Table of Contents
Advertisement
Advertisement
Table of Contents

Related Manuals for Ctl NL6 series


Summary of Contents for Ctl NL6 series
- Page 1 Education Chromebook USER MANUAL E N G L I S H NL6 series May 2014...
-
Page 2: Table Of Contents
CONTENTS BEFORE YOU START ................... 4 Make sure you have everything ...................4 Familiarize yourself with the computer ...............5 OPENING THE DISPLAY PANEL ................5 FRONT OVERVIEW....................6 LEFT SIDE OVERVIEW .....................8 RIGHT SIDE OVERVIEW ..................10 BACK OVERVIEW ....................12 BOTTOM OVERVIEW....................13 GETTING STARTED .................... 14 Power Sources ......................14 CONNECTING THE POWER ADAPTERS ..............14 RECHARGING THE BATTERY ................15... -
Page 3: Taking Care Of Your Computer
TAKING CARE OF YOUR COMPUTER • To prevent possible overheating of the computer’s processor, make sure you don’t block the openings provided for ventilation. • DO NOT press or touch the display panel. • DO NOT place on uneven or unstable work surfaces. • DO NOT use your computer under harsh conditions. • DO NOT place or drop objects on the computer and DO NOT apply heavy pressure on it. • DO NOT subject the computer to magnetic fields. • DO NOT expose to direct sunlight. • DO NOT use or store in extreme temperatures. -
Page 4: Before You Start
BEFORE YOU START Make sure you have everything When you receive your Chromebook, unpack it carefully, and check to make sure you have all the items listed below. For a pre-configured model you should have the following: • Chromebook • AC adapter with power cord • User Manual • Snap-on magnification lens (optional) Once you have checked and confirmed that your Chromebook system is complete, read through the following pages to learn about all of your Chromebook components. Depending on the model you purchased, the actual appearance of your Chromebook NOTE may vary from that shown in this manual. -
Page 5: Familiarize Yourself With The Computer
BEFORE YOU START Familiarize yourself with the computer OPENING THE DISPLAY PANEL To open the display panel, simply lift the lid up. When closing it, be sure not to slam it shut. -
Page 6: Front Overview
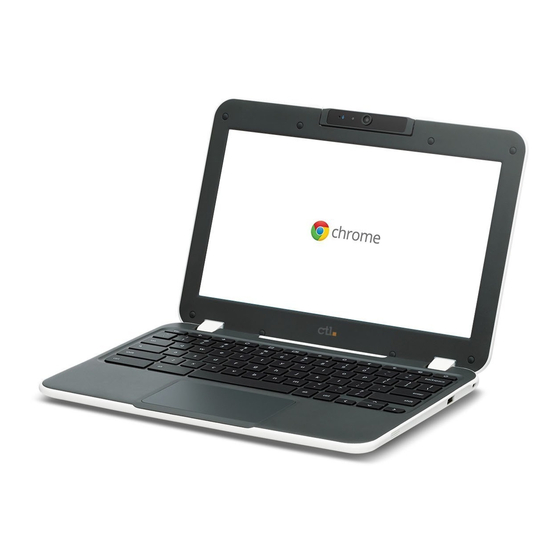
BEFORE YOU START FRONT OVERVIEW The following is an overview of the front of the Chromebook. Camera Microphone Display Panel Suspend/ Power On Button Keyboard Touchpad Pointing Device Camera The 720p HD rotatable camera allows you to snap a photo or create a video chat or video conference from different angles or in different sizes with just a click. (See Optional Snap-on Magnification Lens section for more information.) Microphone The built-in microphone allows for the reception and transmission of voice and/or other audio data to any program capable of accepting such input. Display Panel The display panel is a color LCD panel with back lighting for the display of text and graphics. -
Page 7: Touchpad Pointing Device
BEFORE YOU START Suspend/Power On Button This button turns your Chromebook on and off. (See Power On section for more information.) Touchpad Pointing Device The touchpad pointing device is a mouse-like cursor control with a touch sensitive movement pad. Keyboard The standard Chromebook keyboard is equipped with special shortcut keys which help you access common actions quickly. It is also spill resistant to offer users protection from accidental liquid spills. -
Page 8: Left Side Overview
BEFORE YOU START LEFT SIDE OVERVIEW The following is a brief description of the left side of the Chromebook. Battery Charging Audio Combo Jack USB 3.0 Port Status Indicator (Headphone & Microphone) HDMI Port Speaker Memory Card Reader Power Adapter Port Power Adapter Port The power adapter port allows you to plug in the AC adapter to power your Chromebook and charge the internal battery. Battery Charging Status Indicator The battery charging status indicator shows the system battery status in the following manner: • Amber light - The battery is charging. • Green light - The battery is fully charged. -
Page 9: Memory Card Reader
BEFORE YOU START Memory Card Reader The memory card reader offers a fast and easy way to transfer digital photos, music and data between your Chromebook and flash compatible devices such as digital cameras, portable MP3 players, mobile phones, tablets, and handheld devices. Audio Combo Jack (Headphone & Microphone) The audio combo jack allows you to connect headphones, external speakers, amplifiers or an external mono microphone. -
Page 10: Right Side Overview
BEFORE YOU START RIGHT SIDE OVERVIEW The following is a brief description of the right side of the Chromebook. USB 2.0 Port Kensington Speaker Lock Slot Speaker The speaker provides audio output for video and music playback. USB 2.0 Port The USB 2.0 port allows you to connect Universal Serial Bus devices. It supports v2.0 of the USB standard, which allows data exchange rates as high as 480 Mb/s. -
Page 11: Kensington Lock Slot
BEFORE YOU START Kensington Lock Slot The Kensington lock slot allows you to secure your Chromebook to an immovable object with an optional security cable. -
Page 12: Back Overview
BEFORE YOU START BACK OVERVIEW The following is an overview of the back of the Chromebook. -
Page 13: Bottom Overview
BEFORE YOU START BOTTOM OVERVIEW The following is an overview of the bottom of the Chromebook. Handle Drainage Holes Handle The integrated retrackable handle allows you to carry the Chromebook conveniently. Drainage Holes The drainage holes prevent the accumulation of liquid inside the keyboard by releasing any liquid that has entered the keyboard, such as liquid from condensation or accidental spillage. To prevent the accumulation of liquid inside the keyboard, make sure you do not CAUTION block the drainage holes. -
Page 14: Getting Started
GETTING STARTED Power Sources Your computer has two types of power source: a Lithium-Polymer battery or an AC adapter. CONNECTING THE POWER ADAPTERS The AC adapter provides power for operating your Chromebook and charging the battery. Connecting the AC Adapter 1. Plug the DC output cable into the DC power jack of your Chromebook. 2. Plug the AC adapter into an AC electrical outlet. Switching from AC Adapter Power to Battery Power 1. Be sure that you have at least one charged battery installed. 2. Remove the AC adapter. Your Chromebook will automatically switch to battery power. The Lithium-Polymer battery is not charged upon purchase. Initially, you will NOTE need to connect the AC adapter to use your Chromebook. -
Page 15: Recharging The Battery
GETTING STARTED RECHARGING THE BATTERY The Lithium-Polymer battery is recharged internally using the AC adapter. To recharge the battery, make sure the battery is installed and the computer is connected to the AC. There is no “memory effect” in Lithium-Polymer batteries; therefore you do not need to discharge the battery completely before recharging. The charge times will be significantly longer if your Chromebook is in use while the battery is charging. If you want to charge the battery more quickly, put your computer into Suspend mode, or turn it off while the adapter is charging the battery. Low Battery State When the battery charge is low, a notification message appears. If you do not respond to the low battery message, the battery continues to discharge until it is too low to operate. When this happens, your Chromebook goes into Suspend mode. There is no guarantee your data will be saved once the Chromebook reaches this point. To protect your computer from damage, use only the power adapter that came CAUTION with it because each power adapter has its own power output rating. Once your Chromebook goes into Suspend mode as a result of a dead battery you will be unable to resume operation until you provide a source of power from an adapter. Once you have provided power, you can press the Suspend/Power On button to resume operation. In Suspend mode, your... -
Page 16: Starting Your Chromebook
GETTING STARTED Starting Your Chromebook POWER ON The suspend/power on switch is used to turn on your Chromebook from its off state. For first time use, you must connect your AC adapter to the Chromebook and fully charge the internal Lithium- Polymer battery, once the battery charging status indicator has turned green, you can power on your Chromebook by pressing the suspend/power on button located at the upper-right corner of the keyboard. To power on your Chromebook after first use, just open the lid of the Chromebook. If the display panel is opened and your Chromebook is not powered on, press the suspend/power on button. POWER OFF If you need to take an extended break, press the suspend/power on button to lock the screen or simply close the lid of the Chromebook. To power off your Chromebook, press and hold the suspend/power on button or click the button in the lower-left corner of the screen to completely shut down your Chromebook. When you power on your Chromebook, it will display the main sign-in screen. All Google Accounts that have been added to your Chromebook will be displayed. Click the Google Account you want to sign-in with and enter your password, this will take you to your background wallpaper. If a fault is found, your computer will automatically take you to the recovery screen. -
Page 17: Using Shortcut Keys
GETTING STARTED USING SHORTCUT KEYS Your Chromebook has 11 shortcut keys along the top row of the keyboard that have various functions. Go to the previous page in your browser history Go to the next page in your browser history Reload your current page Enter Immersive mode, which hides the tabs and launcher Enter Overview mode, which shows all windows Decrease screen brightness Increase screen brightness Mute Decrease the volume Increase the volume Search your apps and the web at the same time. On your Chromebook, this key is located on the left side, where you normally find the Caps Lock key on a traditional keyboard. To enable the Caps Lock key, press Alt + key. -
Page 18: Using The Touchpad
GETTING STARTED USING THE TOUCHPAD A touchpad pointing device comes built into your computer. It is used to control the movement of the pointer to select items on your display panel. The touchpad consists of a cursor control, and a clicking area. The cursor control works the same way a mouse does, and moves the cursor around the display. It only requires light pressure from the tip of your finger. The clicking area is on the lower half of the touchpad that functions as mouse button. If tap-to-click is enabled, you can quickly tap the touchpad to perform the click function. To right-click, click the touchpad with two fingers. The actual functionality of the clicking area may vary depending on the application that is being used. Clicking Clicking means pushing and releasing a button. To left-click, move the cursor to the item you wish to select, press the clicking area once, and then immediately release it. To right-click, move the mouse cursor to the item you wish to select, tap on the touchpad with two fingers. You also have the option to perform the clicking operation by tapping lightly on the touchpad once. Double-Clicking Double-clicking means pushing and releasing the clicking area twice in rapid succession. To double-click, move the cursor to the item you wish to select, press the clicking area twice, and then immediately release it. You also have the option to perform the double-click operation by tapping lightly on the touchpad twice. - Page 19 GETTING STARTED Dragging Dragging means pressing and holding the clicking area, while moving the cursor. To drag, move the cursor to the item you wish to move. Press and hold the clicking area while moving the item to its new location and then release it. Dragging can also be done using only the touchpad. First, tap the touchpad once over the item you wish to move with one finger. Next, with a second finger move the object to its new location by moving the second finger across the touchpad, and then release both fingers. Scrolling Scrolling means navigating through a document or web-pages quickly without having to use the on-screen cursor to manipulate the up and down scroll bars. To scroll, simply place two fingers on the touchpad and move them up and down to scroll vertically, left and right to scroll horizontally. This is particularly useful when you are navigating through on-line pages.
-
Page 20: Optional Snap-On Magnification Lens
GETTING STARTED OPTIONAL SNAP-ON MAGNIFICATION LENS Your Chromebook comes with an optional snap-on magnification lens which adds a magnifying effect to the rotatable camera. To attach the magnification lens to the camera follow these steps: 1. Open the display panel to a 90-degree angle. 2. Flip the camera around 180-degrees. 3. Place the magnification lens onto the camera lens and press down until it clicks into place. -
Page 21: Troubleshooting
TROUBLESHOOTING Your computer is sturdy and subject to few problems in the field. However, you may encounter simple setup or operating problems that you can solve on the spot, or problems with peripheral devices, that you can solve by replacing the device. The information in this section helps you isolate and resolve some of these straightforward problems and identify failures that require service. Identifying the Problem If you encounter a problem, go through the following procedure before pursuing complex troubleshooting: 1. Turn off your Chromebook. 2. Make sure the AC adapter is plugged into your Chromebook and to an active AC power source. 3. Make sure that any card installed in the memory card slot is seated properly. You can also remove the card from the slot, thus eliminating it as a possible cause of failure. -
Page 22: Regulatory Notices
REGULATORY NOTICES Manufacturer Information Quanta Computer Inc. No, 188, Wen Hwa 2nd RD., Kuei Shan Hsiang, Taoyuan Hsien,Taiwan, R.O.C. 桃園縣龜山鄉文化村文化二路 188 號 Tel: +886-3-327-2345 Made in China Federal Communications Commission Declaration of Conformity Federal Communication Commission Interference Statement This device complies with Part 15 of the FCC Rules. Operation is subject to the following two conditions: (1) This device may not cause harmful interference, and (2) This device must accept any interference received, including interference that may cause undesired operation. This equipment has been tested and found to comply with the limits for a Class B digital device, pursuant to Part 15 of the FCC Rules. These limits are designed to provide reasonable protection against harmful interference in a residential installation. This equipment generates, uses and can radiate radio frequency energy and, if not installed and used in accordance with the instructions, may cause harmful interference to radio communications. However, there is no guarantee that interference will not occur in a particular installation. If this equipment does cause harmful interference to radio or television reception, which can be determined by turning the equipment off... -
Page 23: Fcc Caution
REGULATORY NOTICES FCC Caution Any changes or modifications not expressly approved by the party responsible for compliance could void the user’s authority to operate this equipment. This transmitter must not be co-located or operating in conjunction with any other antenna or transmitter. Connections to Peripheral Devices Connections to this device must be made with shielded cables with metallic RFI/EMI connector hoods to maintain compliance with FCC Rules and Regulations. Manufacture is not responsible for any radio or television interference caused by using other than specified or recommended cables and connectors or by unauthorized changes or modifications to this equipment. Unauthorized changes or modifications could void the user’s authority to operate the equipment. European Union CE Mark Products with the Conformité Européene (CE) Marking, which indicates compliance with the applicable Directives. -
Page 24: Weee And Recycling Statements
REGULATORY NOTICES WEEE and recycling statements The Waste Electrical and Electronic Equipment (WEEE) Directive This symbol means that the equipment must not be disposed of as unsorted municipal waste, in accordance with the EU directive for waste electrical and electronic equipment (WEEE - 2002/96/ EC). Disposing of WEEE together with normal waste may pose a risk to the environment and to human health, due to certain substances used in that equipment. Instead, it should be disposed of by returning it to the point of sale, or to a municipal recycling collection point. Under the WEEE Directive, each EU Member State is responsible for achieving a high level of collection of WEEE for treatment, recovery and environmentally sound disposal. Li-Polymer Battery Warning This Chromebook contains a Li-polymer battery to power the clock and calendar circuitry. Caution: Danger of explosion if battery is replaced incorrectly. Only qualified service technicians should replace and discard the battery. Replace only with the same or equivalent type recommended by the manufacturer. Discard used batteries according to the manufacturer’s instructions. Travel Notice To reduce the risk of electric shock, fire or damage to the equipment, do not WARNING attempt to power the computer with a voltage converter kit sold for appliances. - Page 25 This Chromebook is intended for use as a child development tool primarily by children, 6 years of age or above. There must be supervision by an adult. It is a must to have a thorough explanation to children on safe and proper handling of the NL6 series model, power supply, battery pack, and power cord. Choking Hazard – Small parts. Not suitable for children under age 3. WARNING • For ITE with power supplies not intended to be handled by children: As with all electrical products, precautions should be observed during handling and use to prevent electric shock. The power supply (adapter) should not be handled by the children. • The NL6 series model should not be placed on the bare skin (lap) of the child for long periods. The laptop should be placed on another surface, like desk tabletop, if intending to use it for more than a few minutes. • The NL6 series model (including power supply and battery pack, as applicable) should not be left in the rain or subjected to exposure to water. If cleaning is necessary do not immerse in water; wipe clean with damp cloth. • The NL6 series model (including power supply and battery pack, as applicable) should not be dropped, crushed (stepped on) or otherwise abused. • The children should be careful with the interconnect cable (wiring) between the power supply (adapter) and NL6 series model, in particular as a potential trip hazard.
-
Page 26: Specifications
SPECIFICATIONS 11.6” HD (1366 × 768) LCD (200-nits), Anti-glare, eTP Platform Intel Bay Trail-M Celeron Processors (4.5W SDP) Video Integrated graphic support Two internal speakers Audio One digital microphone on the camera 3.5 mm Audio combo jack (Headphone & Microphone) Memory 2GB/4GB dual-channel Storage 16GB eMMC One USB 3.0 port One USB 2.0 port One HDMI port I/O Ports One 2-in-1 memory card reader (SD/MMC) One Audio combo jack (Headphone-out & Microphone-in) One DC-in jack for power adapter connection Camera 720p HD resolution rotatable camera Wireless Wi-Fi Dual-Band with integrated Bluetooth module Battery 36 Wh, 3200 mAH, 3-cell Polymer battery Power 19V 40W Adapter Chrome OS Magnification Lens Yes (optional) Handle Dimensions 300.4 × 212 × 22.4 mm ( including the handle) Weight ≤ 1.29 kg ± 5%...
Need help?
Do you have a question about the NL6 series and is the answer not in the manual?
Questions and answers