Table of Contents
Advertisement
Quick Links
Advertisement
Table of Contents

Related Manuals for Lenovo px12-400r


Summary of Contents for Lenovo px12-400r
- Page 1 Network Storage with LifeLine 4.1 User Guide...
- Page 2 © 2014 LenovoEMC, Ltd. All rights reserved. Lenovo and the Lenovo logo are registered trademarks of Lenovo in the United States, other countries, or both. The EMC logo is a registered trademark of EMC Corporation in the United States and/or other countries.
-
Page 3: Table Of Contents
VLAN Settings Adding NICs to Your px12-400r Network Storage Naming Your px12-400r Network Storage Configuring Your px12-400r Network Storage to Use Active Directory Enabling Active Directory Trusted Domains Customizing Access to Features on Your px12-400r Network Storage Enabling the Display of Features... - Page 4 Obtaining System Status for Your px12-400r Network Storage Space Usage Control Panel Device Information Using Your px12-400r Network Storage in Various Time Zones Setting the Display Language for Your px12-400r Network Storage Printing Documents Securing Your px12-400r Network Storage and Contents...
- Page 5 Setting Quotas Deleting an Active Directory User or Group Managing Your px12-400r Network Storage with Local and Active Directory Users Enabling Active Directory after Creating Users in Workgroup Mode Logging in to Your px12-400r Creating Local Users and Groups in Active Directory Mode...
- Page 6 Transferring Content to and from Your px12-400r Network Storage with Copy Jobs Copy Jobs Limitations Getting Content from a USB External Storage Device Safely removing external storage Drive Management Managing Drives Write Caching Global Drive Management Settings Storage Pool Information...
- Page 7 Backing up with Amazon S3 Restoring Files with Amazon S3 Backing up with LenovoEMC Personal Cloud Restoring Files with Personal Cloud Remote Access: Accessing Your px12-400r Network Storage From Anywhere in the World Remote Access Overview Enabling Remote Access Basic Option: Completing the Enable Remote Access Process...
- Page 8 Configuring Router Port Forwarding for Personal Cloud Router Port Forwarding Configuring Your LenovoEMC Personal Cloud Enabling Internet Access to the px12-400r Changing Personal Cloud Settings Inviting People onto Your LenovoEMC Personal Cloud Joining a Trusted Device to LenovoEMC Personal Cloud...
- Page 9 Software Updates Auto-update process: installing a device software update Manual update process: installing a device software update Backing up and Recovering Your px12-400r Network Storage Settings Backing Up Your px12-400r Network Storage Settings Backing up Device Configuration Restoring a Configuration Backup...
- Page 10 Bridging the Primary Router Additional Support How to Get Help Support Legal Open Source Warranty Information Limited Warranty Notice Limited Warranty for Iomega Products Regulatory Information Federal Communication Commission Interference Statement Canadian Verification European Union conformity Important WEEE Information European Union RoHS India RoHS California Perchlorate Information Polyvinyl Chloride (PVC) Cable and Cord Notice...
-
Page 11: Setting Up Your Px12-400R Network Storage
CHAPTER 1 Setting up Your px12-400r Network Storage Setting up Your px12-400r Network Storage... -
Page 12: Setup Overview
Accessing Your Device If It Is Not Discovered By default, the px12-400r will attempt to acquire an IP address from DHCP, If there is not a DHCP server available on the network, the px12-400r will use an IP address in the self-assigned APIPA range (169.254.x.x). -
Page 13: About The Px12-400R Device Components
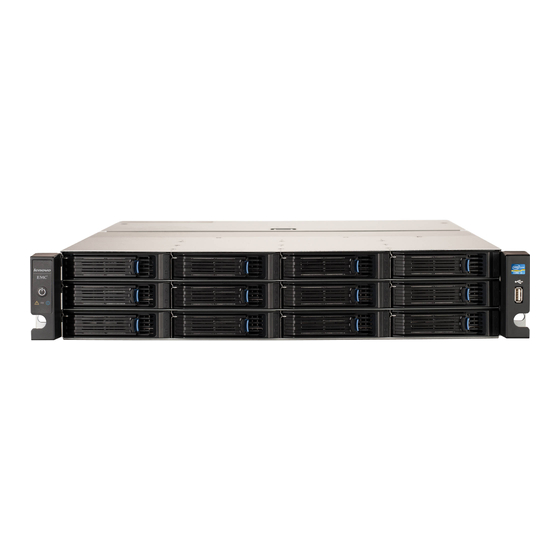
Status Indicators, Buttons and Ports 1. Power button — Press and release to power the px12-400r on or off. When the px12-400r is powered up, pressing the power button for less than 4 seconds will result in a graceful system shutdown. -
Page 14: Drive Bay Detail
Setting up Your px12-400r Network Storage Drive Bay Detail 1. Drive Sled Release Latch — Press the release button and pull the latch to release the drive sled. Refer to the list of qualified hard disks on the LenovoEMC support site at www.iomega.com/nasdisks... -
Page 15: Rear Panel
3. System ID LED — Flashes blue when the Blink Lights feature is enabled in the px12-400r Management Console. This light is used to identify a specific px12-400r in installations with multiple devices. -
Page 16: Connecting The Px12-400R To Your Network
Quick Start Guide Ethernet Cable Rail Kit (models may vary) Package contents may vary. Connecting the px12-400r If you have purchased more than one px12-400r, complete all steps on one device before setting up additional devices. Connecting the px12-400r to Your Network... -
Page 17: Important Rackmount Instructions
Ensure the installation environment does not exceed the maximum ambient temperature specified for the px12-400r. Reduced Air Flow - Installation of the px12-400r in a rack should be such that the amount of air ●... - Page 18 ● loading that could result in a hazardous condition. Circuit Overloading - Consideration should be given to the connection of the px12-400r to the ● supply circuit and the effect that overloading of the circuits might have on over-current protection and supply wiring.
-
Page 19: Safety Information
Openings in the px12-400r are provided for fans and air ventilation and should not be blocked or ● covered. Make sure the px12-400r has ample ventilation (at least 6 inches or 127 mm) in front and behind the unit. Do not walk on the power cord or allow anything to rest on it. -
Page 20: Accessing Your Device If It's Not Discovered
Accessing Your Device If It's Not Discovered If your px12-400r is not discovered when you enter the Setup URL, you can use one of the following options to access it. Device Setup will launch automatically the first time you access your device. - Page 21 2. Select All... under Shared on the left side of the Finder window, 3. Double-click your px12-400r to login to the device management console. After you complete setup for your px12-400r, you can connect to device Shares by selecting Go > Connect to Server and entering either afp://<device IP address> or smb://<device IP address>.
-
Page 22: Setting Up Favorite Features
Favorite Features based on options you selected during setup. Select All Features to see additional features available on your px12-400r. If you want to add any of these to your Favorites, just click and drag the icon from the All Features screen to the Favorite Features tab. -
Page 23: Setting Up Additional Features
File Sharing Setting up File Sharing enables you to add content to your px12-400r and make it available in a wide variety of ways, including content features such as Active Folders and media sharing. For more information, refer to the Sharing Overview. -
Page 24: Device Setup
Device Setup icon under All Features in the px12-400r device management console. You can also manually configure options for any feature on your px12-400r by selecting that feature's icon. Other sections in this manual provide information on settings options for the features available on your px12-400r. -
Page 25: Device Configuration Options
CHAPTER 2 Device Configuration Options Device Configuration Options... -
Page 26: Network Settings
If your px12-400r has multiple network interface cards (NICs), you can bond those NICs. Refer to Bonding NICs. VLAN Each NIC in your px12-400r can be added to up to four Virtual LANs (VLAN). For information on adding a NIC to a VLAN, refer to VLAN Settings. -
Page 27: Manually Configuring Network Settings
IP address in the 169.254.x.x range. Complete the following settings to assign a static IP address for the selected network interface: IP Address — the static IP address for the px12-400r. Use an available IP address in the range ●... -
Page 28: Bonding Nics
Bonding network interface cards (NICs) is a way to provide redundancy for your px12-400r on the network. If one NIC should fail, your px12-400r will remain accessible on the network if that NIC is bonded to others. Depending on the bonding mode selected, it can also increase bandwidth. -
Page 29: Vlan Settings
The smaller networks that VLANs create do not require any additional physical resources, such as additional cabling. Your px12-400r Network Storage can be configured to support VLANs by connecting the corresponding physical NIC to the trunk port of an L2/L3 switch. -
Page 30: Adding Nics To Your Px12-400R Network Storage
To add an accessory network interface card, follow this procedure: Shut down your px12-400r and remove its cover. Locate a vacant expansion slot at the back of the px12-400r and remove the expansion slot cover. Save the expansion slot cover screw. - Page 31 The primary interface for the Failover bonded NIC will be determined as described in the previous ● section. The highest priority NIC in the routing table will control the network speed for the px12-400r. With ● LifeLine 4.1, routing priority will be given to the Failover bonded NIC is the 10GbE port is the primary interface.
-
Page 32: Naming Your Px12-400R Network Storage
Storage Device Name, the Storage Device Descriptive Name, and the Workgroup Name. Change any of these by editing the text fields. Click Apply to save your changes. Device Name: Enter a name for the px12-400r device. Use a name that will help you identify it on ● your network. -
Page 33: Configuring Your Px12-400R Network Storage To Use Active Directory
Configuring Your px12-400r Network Storage to Use Active Directory If you have an existing Active Directory user organization, you can incorporate it into the px12-400r device management interface. Your px12-400r can work in a high availability environment, which means it can work with multiple AD servers should one server fail or go offline. -
Page 34: Enabling Active Directory Trusted Domains
Device Configuration Options Enabling Active Directory Trusted Domains By enabling Active Directory trusted domains on your px12-400r, you enable the importing of users and groups from other trusted domains to your px12-400r device. Those users and groups from other domains will then have access to features on your px12-400r, including accessing folders and documents in Shares. -
Page 35: Customizing Access To Features On Your Px12-400R Network Storage
Enabling the Display of Features Click the Feature Selection icon to open the interface page. All the features of your px12-400r display on the page with a status that indicates whether the feature is enabled or disabled. To enable a feature, expand the desired feature name, and click the switch to On. For example, to enable Amazon S3, expand the Amazon S3 feature, and click the switch to On. -
Page 36: Non-Administrator User Log In
Device Configuration Options Non-Administrator User Log In Non-administrator users can log in to a px12-400r with feature access enabled. When these non-admin users access the device, they first see the Login screen where they enter their login credentials. After logging in, the device management console displays with those features to which the non-admin user has access. -
Page 37: Obtaining Alerts About Your Px12-400R Network Storage
Obtaining Alerts About Your px12-400r Network Storage You can configure your px12-400r to send email alerts when problems are detected. This is done through the Email notification feature, which enables you to set up a destination for emails sent by the px12-400r when problems are detected. -
Page 38: Tracing Events On Your Px12-400R Network Storage
The following icons indicate the severity of each status message: INFORMATION ● Identifies that a change has been made to the state of your px12-400r device, usually by a user, such as attaching a peripheral. WARNING ●... -
Page 39: Obtaining System Status For Your Px12-400R Network Storage
● Shut down the px12-400r. Before shutting down the px12-400r, be sure you have access to the physical device to turn it on. It is recommended that you always use the power button to shut down the device. Device Information The Device Information section displays various hardware, software, and status details. - Page 40 Status The Status Information section displays changes to or issues with your px12-400r. If an issue requires user action to resolve, such as a warning or error message, the px12-400r management console displays a link in the status message. The following types of messages can display:...
-
Page 41: Using Your Px12-400R Network Storage In Various Time Zones
Zones You can set the date and time used on your px12-400r, so that it can appear to be in one time zone, when it actually may be in a different one. This can help your users have the correct date and time if they live and work in a location different from your px12-400r. -
Page 42: Setting The Display Language For Your Px12-400R Network Storage
The Languages page allows you to change the language used in email notification messages. The language used by the px12-400r management interface is based on the preferences configured in your browser. You can change the language used in this program by modifying your browser's preferred language settings. -
Page 43: Printing Documents
To attach a printer, simply plug a supported printer's USB cable to a USB port on the px12-400r. Once attached, the printer will appear in the table. When the cable is unplugged, the printer will be removed from the table. -
Page 44: Securing Your Px12-400R Network Storage And Contents
CHAPTER 3 Securing Your px12-400r Network Storage and Contents Securing Your px12-400r Network Storage and Contents... -
Page 45: How Do I Secure My Px12-400R Network Storage
You control access to content stored on your px12-400r by adding users and groups and assigning access permissions to device Shares. If you want to allow public access to a Share on your px12-400r, you must explicitly provide permissions for Everyone to that Share. See... -
Page 46: Security Settings
Securing Your px12-400r Network Storage and Contents Security Settings Only administrator users can view or change settings on the px12-400r, To change any security settings, you must login to the device management interface as an admin user. 1. Click the Security icon to open the Security settings page. -
Page 47: Users And Groups
CHAPTER 4 Users and Groups Users and Groups... -
Page 48: Users And Groups Overview
Users and Groups Users and Groups Overview The Users & Groups feature displays all users and groups on the px12-400r and enables administrators to add and modify users and groups. Users Non-administrator users can be added to enable controlled access to Share content. Additional administrator users can be added to allow specific users to configure the px12-400r. -
Page 49: Adding Users
Username — enter the username of the user to be created. This is the username for logging ● into the px12-400r. There is a maximum of 32 characters, and spaces are not allowed. The following are not valid usernames: root, daemon, bin, sys, sync, mail, proxy, www-data, backup, operator, sshd, postfix, nobody, unuser, guest, and rsync. -
Page 50: Managing Users
Quota Size — set a quota size by entering a value in gigabytes. To have no quota, leave this ● field blank. You see this option only if you have enabled quotas. Administrator — check this box if you would like to allow this user to manage the px12-400r. ● Click Apply. -
Page 51: Changing User Access Permissions
Setting Quotas You can limit the amount of space allocated to one or more users by applying quotas. If your px12-400r has multiple Storage Pools and you define a quota for users, that quota is applied to all Storage Pools. -
Page 52: Adding Groups
Users and Groups Adding Groups Click the Users & Groups icon to add or manage groups on the px12-400r. Click Add a group. The Information section opens. From the Information section, give the new group a name. To add users to the group, click Add users. -
Page 53: Managing Groups
9. If NFS is enabled, the GID field is visible. The GID value must be the same on both the Linux client and the px12-400r Network Storagefor the client to access files. To modify the GID, type a new GID value. -
Page 54: Deleting Groups
Users and Groups Deleting Groups To delete an existing group: Click the Users & Groups icon. Click the group name to expand the group. In the Information section, click Delete to delete the group. In the Delete Group confirmation pop-up window, click Yes. If you do not wish to delete the group, click Cancel to return to the Groups page. -
Page 55: Using Active Directory Domain
CHAPTER 5 Using Active Directory Domain Using Active Directory Domain... -
Page 56: Active Directory Users And Groups Overview
When the px12-400r is connected to an Active Directory domain, administrator users can import users and groups from an Active Directory (AD) server and grant them access rights to Shares on the px12-400r. You can have both local and AD users on your px12-400r. See... -
Page 57: Managing Active Directory Users And Groups
5. Select the checkbox next to a user or group to import that user or group to your px12-400r Network Storage from the Active Directory domain. Select the checkbox in the title bar to select all the users and groups in the Active Directory domain. -
Page 58: Changing Access Permissions
Using Active Directory Domain Changing Access Permissions Expand Access Permissions to change user or group permissions to a secured Share. When the px12- 400r is in AD mode, AD and local users can have access to a secured Share. See Managing Your Device with Local and Active Directory Users. -
Page 59: Managing Your Px12-400R Network Storage With Local And Active Directory Users
After an AD or local administrator logs in to the px12-400r, that admin user can create additional local users and groups on the px12-400r. The Users & Groups feature lists all local and AD users and groups on the px12-400r. -
Page 60: Creating Share Permissions For Ad Users And Local Users
4. If you are an AD administrator making this change, you will be required to log back into the device as a local user. If there isn't a local administrator account on the px12-400r, device setup will run to enable you to create a new administrator user. -
Page 61: Sharing Files
CHAPTER 6 Sharing Files Sharing Files... -
Page 62: Sharing Overview
Shares that have been made accessible to everyone (public Shares). It can also display secured Shares accessible only to users who log in to the px12-400r device from the Home page. You can access the Home page of your px12-400r device by entering the device name or IP address directly in your browser. -
Page 63: Shares
All Shares on the px12-400r are displayed on the Shares page. The Shares page displays a table that contains folders, connected drives, and any cloud storage to which your px12-400r is connected. The Properties column displays the features that are enabled for each Share. -
Page 64: Adding Shares
Sharing Files Active Folders Follow the link to the Active Folder options for information on configuring each: Email Distribution ● Facebook ● Flickr ● Photo Resize ● YouTube ● Adding Shares 1. Click the Shares icon to open the feature management page. 2. -
Page 65: Managing Shares
If available, you can also enable NFS secured access. The Application Data share is created automatically when you install an application that requires data storage on the px12-400r network storage device. Do not change or delete this share. Changing Share Information 1. - Page 66 Sharing Files group permissions. 5. Click Apply to save your changes. Enabling NFS Secured Access 1. To enable NFS, first click the switch on from the Protocols page. 2. On the Shares page, select a secure Share and expand the NFS section. You cannot apply a rule to an unsecured Share.
-
Page 67: Deleting Shares
If you do not wish to delete the Share, click Cancel to return to the Shares page. Do not delete the Application Data share if it appears on your px12-400r network device. It is required by applications that store data on the px12-400r. -
Page 68: Using Protocols To Share Files
The Apple Filing Protocol (AFP) enables Apple file sharing, which is the preferred method for Mac users to access Shares on the px12-400r. When AFP is enabled, you can use Time Machine to back up a Mac client computer to your px12-400r Network Storage. See Backing up Macs with Time Machine. -
Page 69: Ftp File Sharing
TFTP On the Protocols page, click the switch to turn on TFTP (Trivial File Transfer Protocol) and allow access to your px12-400r Network Storage. When you turn TFTP on, you can send files to your px12-400r using FTP. NFS File Sharing On the Protocols page, click the switch to turn on NFS (Network File System). -
Page 70: Rsync: Synchronizing Files With Another Storage Device Or Other Computers
Host-Based Access Control rules on your client computer, not by user access permissions on your px12-400r. This means that any valid user on the Linux computer who has access to the host (the storage device) can access Shares on the px12-400r, even if not given specific user permission to those Shares on the device. -
Page 71: Monitoring Your Device With An Snmp Management Tool
SNMP agent software on the device reports information to the managers, and an administrator user can perform some configuration of the px12-400r through the manager. Information that comes from the px12-400r is called a trap. Managers and the px12-400r must be running on the same network. -
Page 72: Managing File Sharing With Web Access (Http/Https)
Content Viewer is disabled, you cannot browse any Share content from the px12-400r management interface. If you disable the Web Access protocol, you also disable the display of the home page on your px12-400r. Refer to Sharing Your Content with the World for additional information on displaying the home page for your px12-400r. -
Page 73: Windows File Sharing
Click Apply to save your settings, or click Cancel to discard your changes. Windows File Sharing Windows File Sharing allows you to work in Workgroup mode, using the px12-400r device management console to create users and manage access. To enable Windows File Sharing, click the switch on. -
Page 74: Sharing Content Through The Home Page
In addition, there are applications available on www.lifelineapps.com that can enhance your home page content. You add your custom html content to a Share on your px12-400r and then specify its location on the Home Page Settings page. Sharing Content through the Home Page... - Page 75 Select the Share name and click Apply. Click Apply to save your settings. When you apply a custom home page for your px12-400r, the icon for opening the px12-400r management console is no longer visible. To return to the management console, you must explicitly enter the URL to the management console in your browser: IP address/manage/management.html...
-
Page 76: Automatically Sending Content To Multiple People At Once
To configure a Share as an Email Active Folder, access the Shares feature from the px12-400r device management console, select or create a Share, and expand the Active Folders section to enable and configure email distribution. -
Page 77: Sharing Content Using Social Media: Overview
If you have an account with social media services such as Facebook, Flickr, or YouTube, you can share content on your px12-400r Network Storage with your friends and family using one or more of these social media sites. To share your content using social media sites, create Shares called... -
Page 78: Managing Your Content
You manage content on your px12-400r Network Storage using the Content Viewer. The Content Viewer is a graphical file browser that lets you view and manage content in the Shares on your px12-400r from the device management console or the LenovoEMC Storage Manager. -
Page 79: Transferring Content To And From Your Px12-400R Network Storage With Copy Jobs
Using Copy Jobs, you can create a task that copies your photos on the USB drive to a Share on your px12-400r, and you can set that task to a schedule so the images automatically copy at a specific time. -
Page 80: Getting Content From A Usb External Storage Device
When the external storage has been removed from the External Storage table, it is safe to remove, and you may unplug it from the px12-400r. When the external storage is safely removed, its associated Share is removed as well. -
Page 81: Drive Management
CHAPTER 7 Drive Management Drive Management... -
Page 82: Managing Drives
While write caching does improve performance, there are some risks. The system responds that the data is written to drive when in fact it has only been written to cache. Should the px12-400r lose power, any data not completely written to drive is lost forever. -
Page 83: Storage Pool Information
Drive Status An image on the Drive Management page provides information on the drive status of your px12-400r. The image displays the physical layout of drives and the drive slot numbers. If a drive has a circled letter, it is a member of a Storage Pool. -
Page 84: Adding New Drives To Your Px12-400R Network Storage
If you are replacing a drive that has failed, it will be easiest to do so while the px12-400r is powered up. This will enable you to use the px12-400r management interface to confirm that you are removing the correct drive. - Page 85 The image will vary depending on the specific network storage device and the installed drives. 11. Allow a few minutes for the RAID array and Storage Pool to build. When complete, the Storage Pool status displays on the Drive Management page: Adding New Drives to Your px12-400r Network Storage...
-
Page 86: Storage Pool Management
CHAPTER 8 Storage Pool Management Storage Pool Management... -
Page 87: Understanding How Your Content Is Stored
Storage Pools A Storage Pool is a grouping of drives with a certain storage size and an assigned data protection. A Storage Pool has a minimum of one drive. By default, your px12-400r has one Storage Pool. Storage Pool Data Protection For each Storage Pool, you can select its type of protection. -
Page 88: Adding And Managing Storage Pools
Storage Pools as all drives in a single Storage Pool must be the same capacity. If your px12-400r has one or more SSD drives installed, you can create a Cache Storage Pool, which is a grouping of solid-state drives that helps increase read and write performance to... - Page 89 Storage Pool Management If your px12-400r includes one or more SSD drives that are not already incorporated into a Storage Pool, you will see the option Use for SSD Cache. See Creating a Cache Pool for more information. You cannot create commonly used Shares on an SSD Cache Pool.
-
Page 90: Improving Performance With A Cache Storage Pool
Creating a Cache Storage Pool To create a cache Storage Pool, there must be one or more SSD drives installed in your px12-400r that are not part of an existing Storage Pool. Typically, you create a cache Storage Pool with one solid-state drive. However, if you want to use... -
Page 91: Assigning A Cache Pool To A Volume
The check helps to prevent a single drive failure from becoming a two-drive failure. The check runs for several hours and can affect performance of the px12-400r. If you do not want to run the check on your cache pool, remove the check mark for this option. -
Page 92: Volumes
A snapshot is a backup of a source volume at a certain point in time. The snapshot can be taken while the px12-400r is actively writing to the source volume, which means you do not have to stop your px12-400r from writing to the volume. -
Page 93: Exposing/Unexposing The Snapshot
Storage Pool Management Enter a start time, or click to use the sliders. ● Select the days you want to take a snapshot, or select All Days to take a snapshot every day. ● Enter the number of snapshots to save. ●... -
Page 94: Adding And Managing Volumes
Shares in Volumes All Shares on the px12-400r Network Storage are added to volumes, and the size of the Share is limited by the free space of the volume. When you create a Share, you can add it to a volume at the same time. This is the simplest method for adding a Share to a volume. - Page 95 Storage Pool Management your passphrase, you can reset it using the backed-up master key. Click Back up master key to back up the master key file. To reset the passphrase, click Reset passphrase with master key, then enter a new passphrase and verify it. If you are adding a volume in a cache pool, there is an option to associate the volume with a cache...
-
Page 96: Deleting A Storage Pool
Storage Pool Management Deleting a Storage Pool On the Drive Management page, expand the Information section of the Storage Pool you want to delete. Click Delete. The Delete Storage Pool window displays. Select Check this box if you want to delete the Storage Pools. Click Yes to delete the Storage Pool. -
Page 97: Changing Raid Protection Types
You can change the RAID protection of existing Storage Pools. You can also set the RAID protection type when you add drives to your px12-400r Network Storage and create new Storage Pools. Protection type can be changed only when the Storage Pool is in a normal (healthy) state. If you are unfamiliar with RAID protection, it is recommended that you do not change this setting. -
Page 98: Iscsi: Creating Ip-Based Storage Area Networks (San)
CHAPTER 9 iSCSI: Creating IP-Based Storage Area Networks (SAN) iSCSI: Creating IP-Based Storage Area Networks (SAN) -
Page 99: Iscsi Overview
Creating IP-Based Storage Area Networks (SAN) iSCSI Overview The iSCSI page allows you to create iSCSI drives on your px12-400r Network Storage and allows the LenovoEMC Storage Manager to communicate with those drives over a network. An iSCSI drive provides a single place for all your storage, which you can divide as needed to support all computers in your enterprise business. -
Page 100: Adding Iscsi Drives
Click Apply to save your changes. Connecting to iSCSI Drives You can connect iSCSI drives on your px12-400r to your computer using LenovoEMC Storage Manager or the Microsoft software initiator. If you are using another type of software or hardware initiator, you must use the native tools provided with your initiator to connect your iSCSI drives. -
Page 101: Managing Iscsi Drives
After you add an iSCSI drive, you create a list of CHAP users that have access to an iSCSI drive. These users are independent from the users you create on your px12-400r. On the iSCSI page, expand an iSCSI drive, and expand iSCSI CHAP Users to add user access to an iSCSI drive. -
Page 102: Deleting Iscsi Drives
iSCSI: Creating IP-Based Storage Area Networks (SAN) Deleting iSCSI Drives To delete an iSCSI drive: Click the iSCSI icon to open the feature management page. Click the iSCSI name to expand the iSCSI drive. In the iSCSI Information section, click Delete to delete the iSCSI drive. Click Yes in the confirmation pop-up window. -
Page 103: Backing Up And Restoring Your Content
CHAPTER 10 Backing up and Restoring Your Content Backing up and Restoring Your Content... -
Page 104: Backup And Restore Overview
While RAID technology provides fault tolerance, it is not a true backup. It is strongly recommended to always have another copy of your data that is not stored on the px12-400r. For more information, refer to Understanding How Your Content Is Stored. -
Page 105: Backing Up To And Restoring From Your Px12-400R Network Storage
Using Copy Jobs, you can create a task that copies your photos on the USB drive to a Share on your px12-400r, and you can set that task to a schedule so the images automatically copy at a specific time. -
Page 106: Backing Up Your Px12-400R Network Storage
Using Copy Jobs, you can create a task that copies your photos on the USB drive to a Share on your px12-400r, and you can set that task to a schedule so the images automatically copy at a specific time. -
Page 107: From: Settings
If the destination is Top Level, a new top-level folder is created on the destination device for each source folder. Backing up Your px12-400r Network Storage... -
Page 108: To: Settings
6. By selecting Shares, you choose to copy All Shares, in which all files on the px12-400r are copied. Any files not contained in a folder are not copied. If the destination is a folder, a new folder will be created for each source folder. - Page 109 From and To settings to copy files from the backup location to the original source location, specify what to restore, set overwrite settings, and choose the protocol for the Copy Job. Refer to From: Settings on page 97 for detailed information on Copy Job settings. Backing up Your px12-400r Network Storage...
-
Page 110: Registering With Avamar For Backup And Restore
Avamar is backup and recovery server software that uses deduplication to eliminate redundant copies of data, reducing the required storage space. For example, your px12-400r Network Storage might have 100 email messages with the same 1 MB attachment. If all those emails are backed up, that same attachment is backed up 100 times, requiring 100 MB of storage space. -
Page 111: Backing Up With Amazon S3
Enter a valid access key, secret key, and bucket name from your Amazon S3 account information. You can create a bucket at account setup, or you can enter a new bucket for your px12-400r. Your content lives in this bucket on your Amazon S3 account. -
Page 112: Backing Up With Lenovoemc Personal Cloud
Backing up with LenovoEMC Personal Cloud You can back up content on your px12-400r Network Storage by creating a Copy Job from the LenovoEMC Personal Cloud hosted on the device to another LifeLine-based network storage device that is a member of the same Personal Cloud. -
Page 113: Remote Access: Accessing Your Px12-400R Network Storage From Anywhere In The World
CHAPTER 11 Remote Access: Accessing Your px12-400r Network Storage From Anywhere in the World Remote Access: Accessing Your px12-400r Network Storage From Anywhere in the World... -
Page 114: Remote Access Overview
It allows you to define a top-level domain name (Domain Name), or use one that you already own, such as yourname.com Create a Web Address for your Device — You create a web address to access your px12-400r ●... -
Page 115: Enabling Remote Access
Your px12-400r begins to automatically configure remote access. First, your internet connection is tested. If the connection is successful, a green checkmark displays on the px12-400r image. If there is a problem, an error message displays. After resolving the error, you can click the provided link to retest the connection. - Page 116 Remote Access: Accessing Your px12-400r Network Storage From Anywhere in the World This will ultimately be the address that will be registered and you can use to access your px12-400r remotely. Email Address — Enter a valid email address. The email address will be registered with the ○...
-
Page 117: Accessing Your Px12-400R Network Storage Remotely
Network Storage from any internet-capable computer in the world. When you access your px12-400r remotely, you can access files from any Share to which you are granted access. However, accessing your px12-400r from a remote location will not provide all the same functionality provided by a computer in your local network. -
Page 118: Personal Cloud: Accessing Your Lenovoemc Personal Cloud From Anywhere In The World
CHAPTER 12 Personal Cloud: Accessing Your LenovoEMC Personal Cloud From Anywhere in the World Personal Cloud: Accessing Your LenovoEMC Personal Cloud From Anywhere in the World... -
Page 119: What Is Lenovoemc Personal Cloud
If you allow a user to join their trusted devices to the Cloud, those devices become part of the Cloud and can be accessed by other users on the Cloud. -
Page 120: Is My Content Secure
Personal Cloud. Your px12-400r Network Storage provides an easy way to send email invitations and instructions to the people you select as Personal Cloud users. In this way, your content is never exposed and remains private. -
Page 121: Creating A Lenovoemc Personal Cloud
You control access to content on your Personal Cloud the same way you control access to your px12-400r by users and groups on your network. If you have content on your px12-400r that you do not want to share with members of your Personal Cloud, you should put that content in secured Shares that are not accessible to anyone invited to your Personal Cloud. -
Page 122: Configuring Router Port Forwarding For Personal Cloud
Most routers refer to this as port forwarding, application access, or virtual server. It is recommended that you refer to your router's documentation for setting these values. -
Page 123: Configuring Your Lenovoemc Personal Cloud
Shares. After enabling secure access, any internet users can access your px12-400r home page, and view any unsecured content (that is content in Shares you have explicitly made public by setting access permissions for Everyone). -
Page 124: Inviting People Onto Your Lenovoemc Personal Cloud
Inviting People onto Your LenovoEMC Personal Cloud When you invite people to join your LenovoEMC Personal Cloud, you are actually selecting from existing users on your px12-400r, or adding people as users on your px12-400r. In addition, you are optionally allowing them to join a trusted device to your Personal Cloud. -
Page 125: Joining A Trusted Device To Lenovoemc Personal Cloud
Personal Cloud: Accessing Your LenovoEMC Personal Cloud From Anywhere in the World Joining a Trusted Device to LenovoEMC Personal Cloud You can join your px12-400r as a trusted device on the Personal Cloud hosted on another LenovoEMC network storage device if you have been given permission by the Personal Cloud administrator. -
Page 126: Managing Trusted Devices On A Personal Cloud
Personal Cloud: Accessing Your LenovoEMC Personal Cloud From Anywhere in the World Managing Trusted Devices on a Personal Cloud As administrator of a LenovoEMC Personal Cloud hosted on your px12-400r, you can manage trusted devices on your Personal Cloud. Trusted devices can be disconnected, or you can completely delete a trusted device from the Personal Cloud. -
Page 127: Using Copy Jobs With A Lenovoemc Personal Cloud
Personal Cloud: Accessing Your LenovoEMC Personal Cloud From Anywhere in the World Using Copy Jobs with a LenovoEMC Personal Cloud You can create Copy Jobs that can transfer data from one trusted device to another through the Personal Cloud. When you add a trusted device to your Personal Cloud, a Copy Jobs icon displays next to that device in the trusted device table. -
Page 128: Disabling Or Deleting Your Lenovoemc Personal Cloud
Personal Cloud: Accessing Your LenovoEMC Personal Cloud From Anywhere in the World Disabling or Deleting Your LenovoEMC Personal Cloud When you disable your Personal Cloud, you eliminate access to your Personal Cloud without deleting the account information you created when you set up the Personal Cloud. Later, if you want to re-enable your Personal Cloud, you can do so without re-entering all the account information. -
Page 129: Accessing Content Using Your Lenovoemc Personal Cloud
Shares, or if they can also write (upload) files to Shares. You can also use your Personal Cloud for remote access to content on your px12-400r from anywhere in the world. Enter the name of your Personal Cloud in a web browser, followed by ".mylenovoemc.com". For example, to access a Personal Cloud named "tomscloud1", enter the URL:... -
Page 130: Informing Users What To Do With Lenovoemc Personal Cloud
Informing Users What to Do with LenovoEMC Personal Cloud LenovoEMC Personal Cloud enables invited users to access your px12-400r from the web. They enter the Personal Cloud URL, myCloudName.mylenovoemc.com, in a web browser, using the name of your Personal Cloud in place of "myCloudName", and when prompted, enter a valid username and password for your px12-400r. -
Page 131: Sharing Content Using Social Media
CHAPTER 13 Sharing Content Using Social Media Sharing Content Using Social Media... -
Page 132: Sharing Content Using Social Media: Overview
If you have an account with social media services such as Facebook, Flickr, or YouTube, you can share content on your px12-400r Network Storage with your friends and family using one or more of these social media sites. To share your content using social media sites, create Shares called... -
Page 133: Facebook
Sharing Content Using Social Media Facebook Facebook is a social network to connect with friends and family. You can configure a Share as a Facebook Active Folder so that photos and movies added to that Share are automatically uploaded to your Facebook account. -
Page 134: Flickr
Sharing Content Using Social Media Flickr Flickr is a photo sharing network for sharing photos with friends and family. You can configure a Share as a Flickr Active Folder so that images and albums added to that Share are automatically uploaded to your Flickr account. -
Page 135: Youtube
Sharing Content Using Social Media YouTube YouTube is a social media site to share video content. You can configure a Share as a YouTube Active Folder so that videos added to that Share are automatically uploaded to your YouTube account. Refer to Managing Shares on page 55 for more information on managing Shares and Active Folders. -
Page 136: Share Content Through Lenovoemc Personal Cloud
Sharing Content Using Social Media Share Content through LenovoEMC Personal Cloud You can share your multimedia content with friends and family through a LenovoEMC Personal Cloud. Refer to the LenovoEMC Personal Cloud section for more information. Share Content through LenovoEMC Personal Cloud... -
Page 137: Media Management
CHAPTER 14 Media Management Media Management... -
Page 138: Media Management Overview
Shares that have media sharing enabled. Media content contained in these Shares is then accessible from the px12-400r to any media player on your network, even if the Share is secured. For information on enabling media sharing, refer to Managing Shares on page 55. -
Page 139: Media Services Capabilities And Limitations
One important consideration when using the Media Server feature is that it can share media content on your px12-400r with anyone on the internet. When media sharing is enabled, internet users, including those users on mobile devices running the LenovoEMC Link, can access media content on your px12-400r. -
Page 140: Sharing Media Content Over The Internet
Media Management Sharing Media Content over the Internet There are two methods for sharing media content on your px12-400r with anyone on the internet. You can enable internet access on the Media Server page. Alternatively, you can enable internet access by configuring your LenovoEMC Personal Cloud. -
Page 141: Media Aggregation
Shares on your px12-400r. Because all media files are copied to the px12-400r, they can be played even if the original device they were on is powered off or not connected to the network. -
Page 142: Social Media Sharing
Media Management Social Media Sharing You can share media content, such as movies and pictures, using social media sites like Facebook, Flickr, or YouTube. Refer to the Sharing Content Using Social Media section for more information. Social Media Sharing... -
Page 143: Streaming Music, Movies, And Pictures
You can play back all your media files from your individual home computers by enabling media aggregation on your px12-400r. You can also connect USB mass storage devices (such as your iPod, mp3 player, or USB drive) to your px12-400r and directly stream files through the device, or access media files through a networked media player. -
Page 144: Photos
On the Home Page Settings feature page, check Display slideshows to display picture slideshows from folders on the px12-400r. Click Manage slideshows to configure any slideshows you want to display. The slideshow location can be any folder attached to the px12-400r, including a USB drive or DFS location. Automatically Resizing Your Photos A Photo Resize Active Folder automatically changes the size of photos in that Share to a set size. -
Page 145: Getting Pictures From Your Camera
The Picture Transfer Protocol (PTP) allows pictures to be automatically copied from a USB camera connected directly to the px12-400r. When Picture Transfer is turned on, and your camera is connected to your px12-400r, the pictures are copied to the configured destination folder. -
Page 146: Music
DLNA player running on a computer on the network. Streaming Music The px12-400r has a built-in media server that, when turned on, scans for music in specific folders that have media sharing enabled. Any music contained in these specific folders is then accessible to any user on your network with a media player. -
Page 147: Videos
● Streaming Movies The px12-400r Network Storage has a built-in media server that, when turned on, scans for movies in specific folders that have media sharing enabled. Any movies contained in these specific folders are accessible to any user on your network with a media player. For information on enabling a folder as a... -
Page 148: Adding Applications To Your Px12-400R Network Storage
CHAPTER 15 Adding Applications to Your px12- 400r Network Storage Adding Applications to Your px12-400r Network Storage... -
Page 149: Application Overview
Adding Applications to Your px12-400r Network Storage Application Overview You can install supported applications on your px12-400r using the Application Manager page. For each application installed you may have the option to uninstall, start, and stop the application. Application Overview... -
Page 150: Application Installation
Adding Applications to Your px12-400r Network Storage Application Installation Certain applications on your px12-400r must be installed before you can use them. When you click on an uninstalled application in the px12-400r management console, you open the feature page of the application. -
Page 151: Application Manager
Adding Applications to Your px12-400r Network Storage Application Manager The Application Manager page allows you to add applications to your px12-400r from an installation file located on your computer. For each application installed you may have the option to uninstall, start, and stop the application. -
Page 152: Software Updates
If you want to remove the update without applying changes, click in the Action column. Do not shut down the px12-400r during the update process as this can damage the px12-400r. The px12-400r will be temporarily inaccessible during the software update. Be sure no critical files are being accessed. - Page 153 Adding Applications to Your px12-400r Network Storage The px12-400r will be temporarily inaccessible during the software update. Be sure no critical files are being accessed. Software Updates...
-
Page 154: Backing Up And Recovering Your Px12-400R Network Storage Settings
CHAPTER 16 Backing up and Recovering Your px12-400r Network Storage Settings Backing up and Recovering Your px12-400r Network Storage Settings... -
Page 155: Backing Up Your Px12-400R Network Storage Settings
If you select this option, a confirmation dialog box displays and informs you that restoring the configuration will delete all data and overwrite any existing users or settings on the target px12-400r. Check Check this box to continue to confirm this dialog box or click Cancel to stop the configuration restore process. -
Page 156: Hardware Management
CHAPTER 17 Hardware Management Hardware Management... -
Page 157: Energy Saving
Click Apply to save your changes. Creating a Power Schedule You can create a power schedule for your px12-400r. This allows you to set daily times to automatically power off and/or power on the device. Check the box next to Enable device power schedule. -
Page 158: Factory Reset
Hardware Management Factory Reset Factory Reset returns the px12-400r to its original state. This feature is useful if you give your px12-400r to someone else. Factory Reset provides two options for returning your px12-400r to its original state: Quickly delete all data — permanently deletes all record of existing or deleted data, users, and ●... -
Page 159: Ups Management
Power Supply. If your px12-400r is connected to a UPS battery backup unit, it is listed on this page. The battery status of the backup unit is also indicated, displaying how much of a charge is left in the battery. To monitor the battery status of your UPS unit, connect your px12-400r to it with a USB cable. -
Page 160: Troubleshooting Routers
In this situation, you will most likely have two NAT (Network Address Translation) firewalls. One of the easiest ways to identify this issue is to log in to the router to which the px12-400r is connected. -
Page 161: Configuring Port Forwarding On Double Nat Networks
Primary router bridging may also require special configuration information and settings on the secondary router. If you configured your px12-400r using DHCP, you may not be able to reconnect to it via Remote Access after a reboot. DHCP automatically receives an IP address from the server whenever the px12-400r restarts. - Page 162 192.168.14.51 and 192.168.14.255. Make sure you are assigning the px12-400r an IP address that is not in use by another device. Enter a subnet mask. The subnet mask describes the size of your network. For most networks this is 255.255.255.0 which allows for 256 network devices.
-
Page 163: Additional Support
CHAPTER 18 Additional Support Additional Support... -
Page 164: How To Get Help
Additional Support How to Get Help LenovoEMC is committed to providing excellent customer support. To meet this goal, Lenovo Customer Support offers a variety of support options designed to meet the needs of a wide range of users. For complete information on the support options available for your product, visit the web support site at http://support.lenovoemc.com. -
Page 165: Support
The Support feature opens the LenovoEMC web site where you can get more information about your px12- 400r. The Support page provides access to content for learning more about using and supporting your px12-400r. Refer to the LenovoEMC Support site for more information. -
Page 166: Legal
CHAPTER 19 Legal Legal... -
Page 167: Open Source
Legal Open Source The software included in this product contains copyrighted software that is licensed under open source agreements. Components of this software covered under GPL or other open source licenses are fully documented as to license and redistribution requirements in the ReadMe file available with the source code. -
Page 168: Warranty Information
You can view the LLW in a number of languages from this Web site. If you cannot view the LLW from the Web site, contact your local Lenovo office or reseller to obtain a printed version of the LLW. Warranty Period The warranty period for px12-400r Network Storage products is 3 years for product purchased in all regions. -
Page 169: Regulatory Information
Consult the dealer or an experienced radio/TV technician for help. ● Lenovo is not responsible for any radio or television interference caused by using other than specified or recommended cables and connectors or by unauthorized changes or modifications to this equipment. Unauthorized changes or modifications could void the user’s authority to operate the equipment. -
Page 170: Important Weee Information
European Union RoHS Lenovo products sold in the European Union, on or after 3 January 2013 meet the requirements of Directive 2011/65/EU on the restriction of the use of certain hazardous substances in electrical and electronic equipment (“RoHS recast” or “RoHS 2”). -
Page 171: Recycling And Environmental Information
Lenovo encourages owners of information technology (IT) equipment to responsibly recycle their equipment when it is no longer needed. Lenovo offers a variety of programs and services to assist equipment owners in recycling their IT products. For information on recycling Lenovo and LenovoEMC products, go to: www.lenovo.com/social_responsibility/us/en/product_recycling_program.html... -
Page 172: Copyright And Trademark Information
© 2014 LenovoEMC, Ltd. All rights reserved. Lenovo and the Lenovo logo are registered trademarks of Lenovo in the United States, other countries, or both. The EMC logo is a registered trademark of EMC Corporation in the United States and/or other countries.
Need help?
Do you have a question about the px12-400r and is the answer not in the manual?
Questions and answers