Table of Contents
Advertisement
Advertisement
Table of Contents

Related Manuals for Draytek VigorFly 210


Summary of Contents for Draytek VigorFly 210
- Page 2 VigorFly 210 Wi-Fi Router User’s Guide Version: 1.1 Firmware Version :V1.3.5 Date: July 18, 2014 VigorFly 210 Series User’s Guide...
- Page 3 Web registration is preferred. You can register your Vigor router via Owner http://www.draytek.com. Firmware & Tools Due to the continuous evolution of DrayTek technology, all routers will be regularly Updates upgraded. Please consult the DrayTek web site for more information on newest firmware, tools and documents.
-
Page 4: Regulatory Information
Product: VigorFly 210 Series Router DrayTek Corp. declares that VigorFly 210 is in compliance with the following essential requirements and other relevant provisions of R&TTE Directive 1999/5/EC. The product conforms to the requirements of Electro-Magnetic Compatibility (EMC) Directive 2004/108/EC by complying with the requirements set forth in EN55022/Class B and EN55024/Class B. -
Page 5: Table Of Contents
3.3 NAT ............................63 3.3.1 Port Redirection ......................64 3.3.2 DMZ Host........................67 3.4 Firewall ..........................68 3.4.1 DoS Defense ........................69 3.4.2 MAC/IP/Port Filtering ...................... 70 3.4.3 System Security......................71 3.4.4 Content Filtering ......................71 VigorFly 210 Series User’s Guide... - Page 6 3.11.6 Management....................... 150 3.12 System Maintenance......................151 3.12.1 System Status......................151 3.12.2 TR-069 ........................153 3.12.3 Administration Password .................... 155 3.12.4 User Password ......................155 3.12.5 Configuration Backup ....................157 3.12.6 Syslog/Mail Alert ......................160 VigorFly 210 Series User’s Guide...
- Page 7 4.3 Pinging the Router from Your Computer ................177 4.4 Checking If the ISP Settings are OK or Not ................ 178 4.5 Backing to Factory Default Setting If Necessary ..............178 4.6 Contacting DrayTek......................179 VigorFly 210 Series User’s Guide...
-
Page 9: Introduction
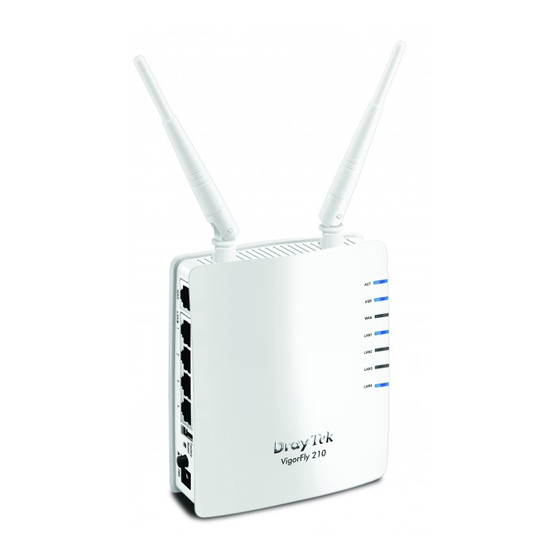
VigorFly 210 is a compact broadband router with 802.11n WLAN network. Its Ethernet WAN port can connect to VDSL/VDSL2/GPON/G.SHDSL /ADSL2+/ADSL/cable modem while you have fixed line. The NAT throughput can easily manage time-critical multimedia streaming. It's easy for family or friends to hook up PCs via embedded 10/100 Ethernet LAN switch to enjoy multimedia applications. -
Page 10: Web Configuration Buttons Explanation
Add new settings for specified item. Edit the settings for the selected item. Delete the selected item with the corresponding settings. Note: For the other buttons shown on the web pages, please refer to the following chapters for detailed explanation. VigorFly 210 Series User’s Guide... -
Page 11: Led Indicators And Connectors
Restore the default settings. Usage: Turn on the router. Press the button and keep for more than 10 seconds. Then the router will restart with the factory default configuration. ON/OFF: Power switch. PWR: Connecter for a power adapter. VigorFly 210 Series User’s Guide... -
Page 12: Hardware Installation
(For the detailed information of LED status, please refer to section 1.1.) Note: To get a better WiMAX signal, please use a USB extension cable to connect USB WiMAX dongle to Vigor router for increasing the distance between Vigor router and the dongle. VigorFly 210 Series User’s Guide... -
Page 13: Printer Installation
You can install a printer onto the router for sharing printing. All the PCs connected this router can print documents via the router. The example provided here is made based on Windows 7. For other Windows system, please visit www.draytek.com. Before using it, please follow the steps below to configure settings for connected computers (or wireless clients). - Page 14 A dialog will appear. Click Add a local printer and click Next. In this dialog, choose Create a new port. In the field of Type of port, use the drop down list to select Standard TCP/IP Port. Then, click Next. VigorFly 210 Series User’s Guide...
- Page 15 In the following dialog, type 192.168.1.1 (router’s LAN IP) in the field of Hostname or IP Address and type 192.168.1.1 as the Port name. Then, click Next. Click Standard and choose Generic Network Card. VigorFly 210 Series User’s Guide...
- Page 16 Now, your system will ask you to choose right name of the printer that you installed onto the router. Such step can make correct driver loaded onto your PC. When you finish the selection, click Next. Type a name for the chosen printer. Click Next. VigorFly 210 Series User’s Guide...
- Page 17 10. Choose Do not share this printer and click Next. 11. Then, in the following dialog, click Finish. VigorFly 210 Series User’s Guide...
- Page 18 12. The new printer has been added and displayed under Printers and Faxes. Click the new printer icon and click Printer server properties. 13. Edit the property of the new printer you have added by clicking Configure Port. VigorFly 210 Series User’s Guide...
- Page 19 14. Select "LPR" on Protocol, type p1 (number 1) as Queue Name. Then click OK. The printer can be used for printing now. Most of the printers with different manufacturers are compatible with vigor router. VigorFly 210 Series User’s Guide...
- Page 20 Note 1: Some printers with the fax/scanning or other additional functions are not supported. If you do not know whether your printer is supported or not, please visit www.DrayTek.com to find out the printer list. Open Support > FAQ/Application Notes; find out the link of Printer Server and click it;...
-
Page 21: Basic Settings
The web page can be logged out according to the chosen condition. The default setting is Auto Logout, which means the web configuration system will logout after 5 minutes without any operation. Change the setting for your necessity. VigorFly 210 Series User’s Guide... -
Page 22: Changing Password
Type new user name in the field of Account and new password in the field of Password. Then click OK to continue. Now, the password has been changed. Next time, use the new username / password to access the web user interface of this router. VigorFly 210 Series User’s Guide... -
Page 23: Quick Start Wizard
The first screen of Quick Start Wizard is welcome page, please click Next. The first screen of Quick Start Wizard is entering login account and password. After typing a new password, please click Next. VigorFly 210 Series User’s Guide... -
Page 24: Setting Up The Time And Date
On the next page as shown below, please select the appropriate connection type according to the information from your ISP. There are several types offered in this page. Each connection type will bring out different web page. VigorFly 210 Series User’s Guide... - Page 25 USB Modem (LTE/WiMAX) installed. For example, you live in Taiwan and have a WiMAX modem inserted onto VigorFly 210. You can choose Taiwan (Global Mobile) to configure necessary settings and then surf the Internet easily.
- Page 26 APN means Access Point Name which is provided and required by some ISPs. Such value is used to dial through USB mode. Please use the Modem Dial String default value. If you have any question, please contact to VigorFly 210 Series User’s Guide...
- Page 27 Type the gateway IP address. Type in the primary IP address for the router. Primary DNS Server Secondary DNS Server Type in secondary IP address for necessity in the future. After finishing the settings here, please click Next. VigorFly 210 Series User’s Guide...
- Page 28 It is not necessary for you to type any IP address manually. Simply choose this type and the system will obtain the IP address automatically from DHCP server. Available parameters are listed below: Item Description Router Name Default setting is VigorFly210. After finishing the settings here, please click Next. VigorFly 210 Series User’s Guide...
- Page 29 Always On. Otherwise, choose Connect on Demand. Always On – Choose it to enable router always keep connection. Connect On Demand - If the connection has been idled over the value, the router will drop the connection. VigorFly 210 Series User’s Guide...
- Page 30 Connect On Demand - If the connection has been idled over the value, the router will drop the connection. Idle Timeout - Set the timeout for breaking down the Internet after passing through the time without any action. VigorFly 210 Series User’s Guide...
-
Page 31: Setting Up The Internet Connection For Wan2
WAN 2 is only used for backup WAN1 interface. You will get different web settings according to the service provider specified. If you want to access Internet by 3G USB modem, choose this mode as the protocol and type the required information in this web page. VigorFly 210 Series User’s Guide... - Page 32 ISP. PPP Username Type the PPP username (optional). PPP Password Type the PPP password (optional). PPP Authentication Select PAP only or PAP or CHAP for PPP. After finishing the settings here, please click Next. VigorFly 210 Series User’s Guide...
- Page 33 USB Modem (LTE/WiMAX) installed. For example, you live in Taiwan and have a WiMAX modem inserted onto VigorFly 210. You can choose Taiwan (Global Mobile) to configure necessary settings and then surf the Internet easily.
-
Page 34: Setting Up The Wireless Connection
SSID It means the identification of the wireless LAN. SSID can be any text numbers or various special characters. The default SSID is "DrayTek". We suggest you to change it. Mode Choose the wireless mode for this router. VigorFly 210 Series User’s Guide... - Page 35 13 ASCII characters or 26 hexadecimal values in 128-bit encryption level. The allowed content is the ASCII characters from 33(!) to 126(~) except '#' and ','. After finishing the settings here, please click Next. VigorFly 210 Series User’s Guide...
- Page 36 Enter the renewal security time (seconds) in the column. Smaller interval leads to greater security but lower performance. Default is 3600 seconds. Set 0 to disable re-key. After finishing the settings here, please click Next. VigorFly 210 Series User’s Guide...
- Page 37 Set to zero to perform another authentication immediately after the first authentication has successfully completed. (The unit is second.) Idle Timeout Set the maximum time that a wireless device may remain idle. (The unit is second.) VigorFly 210 Series User’s Guide...
- Page 38 Set to zero to perform another authentication immediately after the first authentication has successfully completed. (The unit is second.) Idle Timeout Set the maximum time that a wireless device may remain idle. (The unit is second.) VigorFly 210 Series User’s Guide...
- Page 39 IEEE 802.11i specification, the pre-four-way-handshake can reduce handoff delay perceivable by a mobile node. It makes roaming faster and more secure. (Only valid in WPA2) Enable - Enable IEEE 802.1X Pre-Authentication. Disable - Disable IEEE 802.1X Pre-Authentication. VigorFly 210 Series User’s Guide...
- Page 40 Select TKIP, AES or TKIP/AES as the algorithm for WPA. Key Renewal Interval WPA uses shared key for authentication to the network. However, normal network operations use a different encryption key that is randomly generated. This randomly VigorFly 210 Series User’s Guide...
-
Page 41: Saving The Wizard Configuration
After finishing the settings here, please click Next. Now you can see the following screen. It indicates that the setup is complete. Different types of connection modes will have different summary. Click Finish and then restart the router. VigorFly 210 Series User’s Guide... -
Page 42: Online Status
WAN Status - Displays the IP address of the WAN interface. GW IP - Displays the IP address of the default gateway. Mode - Displays the type of WAN connection (e.g., PPPoE). Up Time VigorFly 210 Series User’s Guide... -
Page 43: Saving Configuration
Each time you click OK on the web page for saving the configuration, you can find messages showing the system interaction with you. Ready indicates the system is ready for you to input settings. Settings Saved means your settings are saved once you click Finish or OK button. VigorFly 210 Series User’s Guide... -
Page 44: Registering Vigor Router
User Name / Password. Click Support Area>>Production Registration from the home page. A Login page will be shown on the screen. Please type the account and password that you created previously. And click Login. VigorFly 210 Series User’s Guide... - Page 45 (it appears when you click on the box of Registration Date). After adding the basic information for the router, please click Submit. When the following page appears, your router information has been added to MyVigor database. VigorFly 210 Series User’s Guide...
- Page 46 Click OK. Now, you have finished the product registration. VigorFly 210 Series User’s Guide...
-
Page 47: Advanced Web Configuration
Hence, the NIC has reserved certain addresses that will never be registered publicly. These are known as private IP addresses, and are listed in the following ranges: VigorFly 210 Series User’s Guide... - Page 48 3G USB Modem can be used as backup device. Therefore, when WAN is not available, the router will use 3G USB Modem for supporting automatically. The supported 3G USB Modem will be listed on DrayTek web site. Please visit www.draytek.com for more detailed information.
-
Page 49: Internet Access
To meet the request in bandwidth / rate for data transmission via wireless connection, VigorFly 210 offers 4G USB Modem to satisfy requirements for different countries. Also, it can be used as a backup device by configured with WAN2, and will be invoked instead whenever WAN1 connection is not available due to unexpected error. - Page 50 WAN>>Internet Access will be overwritten. DataType – Choose the type (ASCII or Hex) for the data to be stored. Data – Type the content of the data to be processed by the function of DHCP option. VigorFly 210 Series User’s Guide...
- Page 51 IP Address: Type the IP address. Subnet Mask: Type the subnet mask. Gateway IP Address: Type the gateway IP address. DNS Server IP Address Primary DNS Server - You must specify a DNS server IP VigorFly 210 Series User’s Guide...
- Page 52 MAC Address Clone checked. The router will detect the MAC address automatically. The result will be displayed in the field of MAC Address. After finishing all the settings here, please click OK to activate them. VigorFly 210 Series User’s Guide...
- Page 53 When you choose Connect on Demand, you have to type value here. IPTV WAN VigorFly 210 supports IPTV application (traditional television channel, movie or VoD service) through the second WAN IP under PPPoE connection mode.
- Page 54 MAC Address Clone checked. The router will detect the MAC address automatically. The result will be displayed in the field of MAC Address. After finishing all the settings here, please click OK to activate them. VigorFly 210 Series User’s Guide...
- Page 55 WAN IP Network obtain the IP address automatically. Settings Specify an IP address – Click this radio button to specify some data. IP Address – Type the IP address. Subnet Mask – Type the subnet mask. VigorFly 210 Series User’s Guide...
- Page 56 SIM PIN code - Type PIN code of the SIM card that will be used to access Internet. Modem Initial String1/2 - Such value is used to initialize USB modem. Please use the default value. If you have any VigorFly 210 Series User’s Guide...
- Page 57 After finishing all the settings here, please click OK to activate them. If your router connects to a 4G modem and you want to access Internet via 4G modem, choose 4G as connection type and type the required information in this web page. VigorFly 210 Series User’s Guide...
- Page 58 Ping Detect. Detection Mode – Choose None or Ping Detect for the system to execute for WAN detection. Ping IP – If you choose Ping Detect as detection mode, you VigorFly 210 Series User’s Guide...
- Page 59 APN Name - APN means Access Point Name which is provided and required by some ISPs. Modem Dial String - Such value is used to dial through USB mode. Please use the default value. If you have any question, please contact to your ISP. VigorFly 210 Series User’s Guide...
- Page 60 USB Modem (LTE/WiMAX) installed. For example, you live in Taiwan and have a WiMAX modem inserted onto VigorFly 210. You can choose Taiwan (Global Mobile) to configure necessary settings and then surf the Internet easily. VigorFly 210 Series User’s Guide...
- Page 61 Use the drop down list to choose one of the SMS profiles SMS for WAN backup (created in Application>>SMS) which will take effect when WAN2 is up. After finishing all the settings here, please click OK to activate them. VigorFly 210 Series User’s Guide...
-
Page 62: Multi-Vlan
Display the number of each channel. Enable Check this box to enable that channel. The channels that you enabled here will be shown in the Multi-VLAN channel drop down list on the web page of Internet Access. Though you can VigorFly 210 Series User’s Guide... - Page 63 It is used to set the priority for the audio and/or video data transmission. The adjustable range is from 0 (lowest) to 7 (highest). After finishing all the settings here, please click OK to save the configuration. VigorFly 210 Series User’s Guide...
- Page 64 LAN port for channel 2 to 7. SSID1 to SSID3 Check the box to designate the SSID for channel 2 to 7. When you finish the configuration, please click OK to save and exit this page. VigorFly 210 Series User’s Guide...
-
Page 65: Lan
IP address. As a part of the public subnet, the Vigor router will serve for IP routing to help hosts in the public subnet to communicate with other public hosts or servers outside. Therefore, the router should be set as the gateway for public hosts. VigorFly 210 Series User’s Guide... - Page 66 When you have several subnets in your LAN, sometimes a more effective and quicker way for connection is the Static routes function rather than other method. You may simply set rules to forward data from one specified subnet to another specified subnet without the presence of RIP. VigorFly 210 Series User’s Guide...
-
Page 67: General Setup
DHCP server for your network. Enable Server- Let the router assign IP address to every host in the LAN. Disable Server- Let you manually assign IP address to VigorFly 210 Series User’s Guide... - Page 68 Otherwise, the router forwards the DNS query packet to the external DNS server by establishing a WAN (e.g. DSL/Cable) connection. After finishing all the settings here, please click OK to activate them. VigorFly 210 Series User’s Guide...
-
Page 69: Static Route
Gateway - Type the gateway address for such routing rule. Interface - Choose WAN or LAN as the interface for such route. Comment - Type words as notification for such routing. After finishing all the settings here, please click OK to activate them. VigorFly 210 Series User’s Guide... -
Page 70: Bind Ip To Mac
Select All - Click this link to select all the items in the ARP table. Sort - Reorder the table based on the IP address. Refresh - Refresh the ARP table listed below to obtain the newest ARP table information. VigorFly 210 Series User’s Guide... -
Page 71: Nat
192.168.1.0/24 subnet for the router. As stated before, the NAT facility can map one or more IP addresses and/or service ports into different specified services. In other words, the NAT function can be achieved by using port mapping methods. Below shows the menu items for NAT. VigorFly 210 Series User’s Guide... -
Page 72: Port Redirection
Display the private port of the internal host. Comment Display the brief description for such profile. Status Display if the profile is enabled (v) or not (x). Press any number under Index to access into next page for configuring port redirection. VigorFly 210 Series User’s Guide... - Page 73 IP address and local port assigned below. If User Define is selected, there are four sub-options offered to choose. If Virtual Server is selected, specify a server from the drop down list. VigorFly 210 Series User’s Guide...
- Page 74 Specify the private port number of the service offered by the Local Port internal host. Comment Type a brief description for such profile if required. The Maximum length is 23–character long. After finishing all the settings here, please click OK to save the configuration. VigorFly 210 Series User’s Guide...
-
Page 75: Dmz Host
DMZ Settings Check this box to enable the DMZ Host function. Enter the private IP address of the DMZ host. DMZ IP Address After finishing all the settings here, please click OK to save the configuration. VigorFly 210 Series User’s Guide... -
Page 76: Firewall
Also the Vigor router monitors the traffic. Any abnormal traffic flow violating the pre-defined parameter, such as the number of thresholds, is identified as an attack and the Vigor router will activate its defense mechanism to mitigate in a real-time manner. Below shows the menu items for Firewall. VigorFly 210 Series User’s Guide... -
Page 77: Dos Defense
Check the box to activate the Port Scan detection. Whenever detecting this malicious exploration behavior, the Vigor router will send out a warning. VigorFly 210 Series User’s Guide... -
Page 78: Mac/Ip/Port Filtering
MAC Address - Type the MAC address for the router. MAC/IP/Port Filter Settings Dest IP Address - Type the destination IP address for applying such rule. Source IP Address - Type the source IP address for applying such rule. VigorFly 210 Series User’s Guide... -
Page 79: System Security
With Web filtering service of the Vigor router, you can protect your business from common primary threats, such as productivity, legal liability, network and security threats. For parents, you can protect your children from viewing adult websites or chat rooms. VigorFly 210 Series User’s Guide... - Page 80 Open Firewall>>Content Filtering to access into the following page. Available parameters are listed below: Item Description Web Content Filter At present, there are three content filters offered here for VigorFly 210 Series User’s Guide...
-
Page 81: Csm
As a responsible parent or employer, you should protect those in your trust against the hazards. With Web filtering service of the Vigor router, you can protect your business from common primary threats, such as productivity, legal liability, network and VigorFly 210 Series User’s Guide... - Page 82 Note 2: Commtouch is merged by Cyren, and GlobalView services will be continued to deliver powerful cloud-based information security solutions! Refer to: http://www.prnewswire.com/news-releases/commtouch-is-now-cyren-239025151.html Click CSM>>Web Content Filter to open the following page: Available parameters are listed below: VigorFly 210 Series User’s Guide...
- Page 83 1. Click the Activate link from Web-Filter License to activate WCF service. 2. A Login page will be shown on the screen. Please type the account and password that you created previously. And click Login. VigorFly 210 Series User’s Guide...
- Page 84 It allows you to transfer the Vigor device together with applied license to someone who has already registered another account in myvigor.draytek.com. Be sure to press this button to transfer the product to whom you want to give. Otherwise he/she might not be able to maintain the license hooked up to the Vigor device.
- Page 85 5. When this page appears, click Register. 6. Next, when the registration is completed. You will get the following screen. 7. Return to web configuration of VigorFly 210. 8. Refresh the page of CSM>>Web Content Filter. VigorFly 210 Series User’s Guide...
-
Page 86: Bandwidth Management
(e.g., BitTorrent) always need many sessions for procession and also they will occupy over resources which might result in important accesses impacted. To solve the problem, you can use limit session to limit the session procession for specified Hosts. VigorFly 210 Series User’s Guide... - Page 87 Edit - Allows you to edit the settings for the selected limitation. Delete - Remove the selected settings existing on the limitation list. After finishing all the settings, please click OK to save the configuration. VigorFly 210 Series User’s Guide...
-
Page 88: Bandwidth Limit
If you do not set the limit in this field, the system will use the default speed for the specific limitation you set for each index. RX limit - Define the limitation for the speed of the VigorFly 210 Series User’s Guide... -
Page 89: Quality Of Service
Status – Display if the WAN interface is available for such function or not. Direction – Display which direction that such function will influence. Bandwidth – Display the inbound and outbound bandwidth setting for the WAN interface. Highest/High/Default/Low – Display the bandwidth VigorFly 210 Series User’s Guide... - Page 90 Click Edit to access into the detailed setting page. APP QoS Monitor Check the box of Enable Application QoS Monitor. The system will monitor the application and display current status on this page periodically. VigorFly 210 Series User’s Guide...
- Page 91 Related settings will be explained below. It will be applied to outgoing traffic. Use the drop down list Upload Bandwidth to specify the bandwidth for data transmission. If you choose User defined, you have to type the value manually. VigorFly 210 Series User’s Guide...
- Page 92 (highest, high, default, low) can utilize. That is, if there is no class with higher priority occupies the bandwidth, others with lower priority can use the remained bandwidth. After finishing all the settings, please click OK to save the configuration. VigorFly 210 Series User’s Guide...
- Page 93 Edit link under Rule, you will get the following web page. To configure the detailed settings for the rule, click Add to open the following dialog. Available settings are explained as follows: Item Description Direction Choose Upload or Download that such function will influence. VigorFly 210 Series User’s Guide...
- Page 94 It is available when Application is selected as the protocol. At present, there are eight applications which can be selected for APP QoS management. The usage of APP QoS can be seen by clicking APP QoS VigorFly 210 Series User’s Guide...
- Page 95 After finished settings, click OK to save the settings. The new rule setting profile will be added and displayed on the page. Below shows the QoS rule example for your reference: In the QoS Group Setting page, you will see: VigorFly 210 Series User’s Guide...
-
Page 96: Applications
Enable Dynamic DNS check the box, you will see a check mark appeared on the Active column of the previous web page in step 2). Service Provider Select the service provider for the DDNS account. VigorFly 210 Series User’s Guide... -
Page 97: Spanning Tree
Link Layer Topology Discovery (LLTD) is a proprietary Link Layer protocol for network topology discovery and quality of service diagnostics. This protocol is included in Windows Vista and Windows 7. Check the box to invoke such feature and click OK to save it. VigorFly 210 Series User’s Guide... -
Page 98: Igmp
After setting Enable UPnP setting, an icon of IP Broadband Connection on Router on Windows XP/Network Connections will appear. The connection status and control status will be able to be activated. The NAT Traversal of UPnP enables the multimedia features of your VigorFly 210 Series User’s Guide... - Page 99 Some Microsoft operating systems have found out the UPnP weaknesses and hence you need to ensure that you have applied the latest service packs and patches. Non-privileged users can control some router functions, including removing and adding port mappings. VigorFly 210 Series User’s Guide...
-
Page 100: Schedule
Item Description Enable Check to enable the schedule. Start Date Specify the starting date of the schedule. Start Time Specify the starting time of the schedule. End Time Specify the ending time of the schedule. VigorFly 210 Series User’s Guide... -
Page 101: Sms
Click it to open the phone book for modification. Index Display the index number (from 1 to 10) of the profile. Click the index number link to modify the selected profile. Profile Display the name of the profile. VigorFly 210 Series User’s Guide... - Page 102 Display the phone number created by clicking Add. The phone number displayed here will receive the message when such profile is selected for the access mode of 3G/4G USB Modem (PPP Mode) under WAN>>Internet Access VigorFly 210 Series User’s Guide...
-
Page 103: Apple Ios Keep Alive
Available settings are explained as follows: Item Description Enable Apple iOS Keep Check to enable the function. Alive Index Display the setting link. Click the index link to open the configuration page for setting the IP address. VigorFly 210 Series User’s Guide... -
Page 104: Static Host
Add – Click it to add the new typed host IP with host name and display on the Static Host List. Delete – Remove the selected static host. Click it to save the configuration. Click it to discard the configuration. Cancel VigorFly 210 Series User’s Guide... -
Page 105: Vpn And Remote Access
LAN, you should disable the VPN service of Vigor Router to allow VPN tunnel pass through, as well as the appropriate NAT settings, such as DMZ or open port. This submenu only applies to PPP-related VPN connections, such as PPTP, L2TP, L2TP over IPSec. Available settings are explained as follows: VigorFly 210 Series User’s Guide... - Page 106 Enter a range of IP addresses for the dial-in PPP for Dial-In Users connection. You should choose an IP address from the local private network. For example, if the local private network is 192.168.1.0/255.255.255.0, you could choose 192.168.1.200 as the Start IP Address. VigorFly 210 Series User’s Guide...
-
Page 107: Ipsec General Setup
This usually applies to those are remote dial-in user or node Method (LAN-to-LAN) which uses dynamic IP address and IPSec-related VPN connections such as L2TP over IPSec and IPSec tunnel. Pre-Shared Key- Specify a key for IKE authentication. VigorFly 210 Series User’s Guide... -
Page 108: Remote Dial-In User
RADIUS server through the built-in RADIUS client function. The following figure shows the summary table. Each item is explained as follows: Item Description Index Click the number below Index to access into the setting page of Remote Dial-in User. VigorFly 210 Series User’s Guide... - Page 109 VPN connection employed the L2TP without IPSec policy can be viewed as one pure L2TP connection. Nice to Have - Apply the IPSec policy first, if it is applicable during negotiation. Otherwise, the dial-in VigorFly 210 Series User’s Guide...
-
Page 110: Lan To Lan
ID, connection type (VPN connection - including PPTP, IPSec Tunnel, and L2TP by itself or over IPSec) and corresponding security methods, etc. The router supports 2 VPN tunnels and provides up to 32 profiles simultaneously. The following figure shows the summary table. VigorFly 210 Series User’s Guide... - Page 111 LAN-to-LAN profile includes 4 subgroups. If the fields gray out, it means you may leave it untouched. The following explanations will guide you to fill all the necessary fields. For the web page is too long, we divide the page into several sections for explanation. VigorFly 210 Series User’s Guide...
- Page 112 None: Do not apply the IPSec policy. Accordingly, the VPN connection employed the L2TP without IPSec policy can be viewed as one pure L2TP connection. Nice to Have: Apply the IPSec policy first, if it is VigorFly 210 Series User’s Guide...
- Page 113 IKE phase 1 Algorithm and IKE phase 2 Algorithm -To propose the local available algorithms to the VPN peers, and get its feedback to find a match. Three VigorFly 210 Series User’s Guide...
- Page 114 None - Do not apply the IPSec policy. Accordingly, the VPN connection employed the L2TP without IPSec policy can be viewed as one pure L2TP connection. Nice to Have - Apply the IPSec policy first, if it is VigorFly 210 Series User’s Guide...
- Page 115 Change default route to this VPN tunnel - Check this box to change the default route with this VPN tunnel. Note that this setting is available only for one WAN interface is enabled. It is not available when both WAN interfaces are enabled. VigorFly 210 Series User’s Guide...
-
Page 116: Connection Management
(with Index number and VPN Server IP address). Dial Click this button to execute dial out function. Refresh Seconds Choose the time for refresh the dial information among 10, 20, and 30. Refresh Click this button to refresh the whole connection status. VigorFly 210 Series User’s Guide... -
Page 117: Usb Application
However, in real physical network connection, VigorFly 210 can be connected with other routers to satisfy different requests from users. Executing the firmware upgrade for others connected router might not be easy as done in VigorFly210. - Page 118 6. Choose the model name and specify the path of the firmware located. Click Add. 7. Press the Factory Reset button of VigorFly 210 for 10 or more seconds. Now, the firmware will be upgraded automatically. VigorFly 210 Series User’s Guide...
-
Page 119: Wireless Lan
Complete Security Standard Selection: To ensure the security and privacy of your wireless communication, we provide several prevailing standards on market. VigorFly 210 Series User’s Guide... - Page 120 /or privacy on your wireless network. The Vigor wireless router is very flexible and can support multiple secure connections with both WEP and WPA at the same time. Below shows the menu items for Wireless LAN. VigorFly 210 Series User’s Guide...
-
Page 121: General Setup
Enable Wireless LAN Check the box to enable wireless function. Mode At present, the router can connect to, 11g Only, 11b Only, 11n Only, Mixed (11g+11n), Mixed (11b+11g), Mixed (11b+11g+11n) stations simultaneously. Simply choose Mixed (11b+11g+11n) mode. VigorFly 210 Series User’s Guide... - Page 122 This feature can enhance the performance in data transmission about 40%* more (by checking Tx Burst). It is active only when both sides of Access Point and Station (in wireless client) invoke this function at the same time. VigorFly 210 Series User’s Guide...
- Page 123 Such channel can increase the performance for data transmission. 20 MHZ- the router will use 20Mhz for data transmitting and receiving between the AP and the stations. After finishing all the settings here, please click OK to save the configuration. VigorFly 210 Series User’s Guide...
-
Page 124: Security
Item Description Mode There are several modes provided for you to choose. Disable The encryption mechanism is turned off. Accepts only WEP clients and the encryption key should be entered in WEP Key. VigorFly 210 Series User’s Guide... - Page 125 ASCII characters or 10 hexadecimal values in 64-bit encryption level, or restricted to 13 ASCII characters or 26 hexadecimal values in 128-bit encryption level. The allowed content is the ASCII characters from 33(!) to 126(~) except '#' and ','. VigorFly 210 Series User’s Guide...
- Page 126 The built-in RADIUS client feature enables the router to assist the remote dial-in user or a wireless station and the RADIUS server in performing mutual authentication. It enables centralized remote access authentication for network management. VigorFly 210 Series User’s Guide...
- Page 127 RADIUS server settings. Click the link of RADIUS Server to access into the following page for more settings. Available settings are explained as follows: Item Description IP Address Enter the IP address of RADIUS server. VigorFly 210 Series User’s Guide...
- Page 128 This randomly generated key that is periodically replaced. Enter the renewal security time (seconds) in the column. Smaller interval leads to greater security but lower performance. Default is 3600 seconds. Set 0 to disable re-key. VigorFly 210 Series User’s Guide...
- Page 129 Set the maximum time of service provided before Session Timeout re-authentication. Set to zero to perform another authentication immediately after the first authentication has successfully completed. (The unit is second.) VigorFly 210 Series User’s Guide...
- Page 130 With the pre-authentication procedure defined in IEEE 802.11i specification, the pre-four-way-handshake can reduce handoff delay perceivable by a mobile node. It makes roaming faster and more secure. (Only valid in WPA2) Enable - Enable IEEE 802.1X Pre-Authentication. VigorFly 210 Series User’s Guide...
- Page 131 Session Timeout Set the maximum time of service provided before re-authentication. Set to zero to perform another authentication immediately after the first authentication has successfully completed. (The unit is second.) VigorFly 210 Series User’s Guide...
- Page 132 (seconds) in the column. Smaller interval leads to greater security but lower performance. Default is 3600 seconds. Set 0 to disable re-key.? RADIUS Server Guide you to access into next pop-up window to configure RADIUS server settings. VigorFly 210 Series User’s Guide...
-
Page 133: Access Control
MAC address that has been configured can access the wireless LAN interface. By clicking the Access Control, a new web page will appear, as depicted below, so that you could edit the clients' MAC addresses to control their access rights (deny or allow). VigorFly 210 Series User’s Guide... -
Page 134: Wps
Start PBC button or using PIN Code. On the side of VigorFly 210 series which served as an AP, press WPS button once on the front panel of the router or click Start PBC on web configuration interface. On the side of a... - Page 135 PIN code of the wireless client you wish to connect to the vigor router. Available settings are explained as follows: Item Description Enable WPS Check this box to enable WPS setting. WPS Current Status Display related system information for WPS. If the wireless VigorFly 210 Series User’s Guide...
-
Page 136: Wds
Extend the coverage range of a WLAN. To meet the above requirement, two WDS modes are implemented in Vigor router. One is Bridge, the other is Repeater. Below shows the function of WDS-bridge interface: VigorFly 210 Series User’s Guide... - Page 137 In the following examples, hosts connected to Bridge 1 or 3 can communicate with hosts connected to Bridge 2 through WDS links. However, hosts connected to Bridge 1 CANNOT communicate with hosts connected to Bridge 3 through Bridge 2. VigorFly 210 Series User’s Guide...
- Page 138 Repeater Mode is for the second one. Security There are several types for security, Disabled, WEP, TKIP, AES and Key or Peer Mac Address field valid or not. Choose one of the types for the router. Please disable VigorFly 210 Series User’s Guide...
-
Page 139: Universal Repeater
Please check if this signal is noise for the operating network, then have the signal modulated and amplified again. The output power of this mode is the same as that of WDS and normal AP mode. Available settings are explained as follows: VigorFly 210 Series User’s Guide... - Page 140 Then, check Enable for Auto Connection and click OK to save the changes. VigorFly 210 will keep such information. Next time, it will make network connection for the computer(s) in LAN automatically when the computer is powered on.
- Page 141 Description IP Address – It is available when Static IP is selected. Type the IP address of VigorFly 210. Subnet Mask – It is available when Static IP is selected. Type the subnet mask for the IP address configured above.
- Page 142 Select TKIP or AES as the algorithm for WPA. Pass Phrase Either 8~63 ASCII characters, such as 012345678 (or 64 Hexadecimal digits leading by 0x, such as "0x321253abcde..."). After finishing all the settings here, please click OK to save the configuration. VigorFly 210 Series User’s Guide...
-
Page 143: Ap Discovery
AP’s SSID To specify an AP to be applied with WDS settings, you can specify MAC address or SSID for the AP. Here is the place that you can type the SSID of the AP. VigorFly 210 Series User’s Guide... -
Page 144: Wds Ap Status
Wi-Fi networks. It allows devices to take more time in sleeping state and consume less power to improve the performance by minimizing transmission latency. Such function is designed for mobile and cordless phones that support VoIP mostly. Available settings are explained as follows: VigorFly 210 Series User’s Guide... - Page 145 WMM packets through wireless connection. It can assure that the peer must receive the WMM packets. After finishing all the settings here, please click OK to save the configuration. VigorFly 210 Series User’s Guide...
-
Page 146: Station List
LAN interface. Add - Click this button to add current typed MAC address into Access Control. After finishing all the settings here, please click OK to save the configuration. VigorFly 210 Series User’s Guide... -
Page 147: Ipv6
Link Local address is used for communicating with neighbouring nodes on the same link. It is defined by the address prefix fe80::/10. You don't need to setup Link-Local address manually for it is generated automatically according to your MAC Address. VigorFly 210 Series User’s Guide... - Page 148 After getting the IPv6 prefix and starting router advertisement daemon (RADVD), the PC behind this router can directly connect to the Internet. VigorFly 210 Series User’s Guide...
- Page 149 Keepalive Interval Type the time for the interval between two keepalive messages transferring from the client to the broker. Prefix Length Type the required prefix length for the client network. VigorFly 210 Series User’s Guide...
- Page 150 IPv6 prefix address (such as: 2001:B010:7300:200::/64) offered by the ISP. In addition, PCs under LAN also can have the public IPv6 address for Internet access by means of the generated prefix. No need to type any other information for PPP mode. VigorFly 210 Series User’s Guide...
-
Page 151: Lan General Setup
DHCPv6 Server and RADVD. Each type requires different parameter settings. Available settings are explained as follows: Item Description LAN IPv6 Configuration IPv6 Address - Type static IPv6 address for LAN. RADVD Configuration The router advertisement daemon (radvd) sends Router VigorFly 210 Series User’s Guide... -
Page 152: Firewall Setup
Display the destination IP address of such rule. Source Port Display the source port number of such rule. Destination Port Display the destination port number of such rule Action Display the status (accept or drop) of such rule. VigorFly 210 Series User’s Guide... - Page 153 Type the IPv6 address here if you choose Single as Source IP Type. Source IP Subnet Type the subnet mask here if you choose Subnet as Source IP Type. Destination IP Type Determine the IP type as the destination. VigorFly 210 Series User’s Guide...
-
Page 154: Routing Table
DROP- If the IPv6 packets fit the condition listed in this page, the router will block it. This page displays the routing table for the protocol of IPv6. VigorFly 210 Series User’s Guide... -
Page 155: Tspc Status
When the router detects all the information, the screen will be shown as follows. One set of TSPC prefix and prefix length will be obtained after the connection between TSPC and Tunnel broker built. VigorFly 210 Series User’s Guide... - Page 156 When the router connects to the tunnel broker, the router will use RADVD to transmit the prefix to the PC on LAN. Next, the PC will generate one set of IPv6 public IP (see the figure below). Users can use such IP for connecting to IPv6 network. VigorFly 210 Series User’s Guide...
- Page 157 When your PC obtains the IPv6 address, please connect to http://www.ipv6.org. If your PC access Internet via IPv6 connection, your IPv6 address will be shown on the web page immediately. Refer to the following figure. VigorFly 210 Series User’s Guide...
-
Page 158: Management
Internet checkbox to allow system administrators to login from the Internet. There are several servers provided by the system to allow you managing the router from Internet. Check the box(es) to specify the service. VigorFly 210 Series User’s Guide... -
Page 159: System Maintenance
Each item is explained as follows: Item Description Model Display the model name of the router. Display the firmware version of the router. Firmware Version Build Date/Time Display the date and time of the current firmware build. VigorFly 210 Series User’s Guide... - Page 160 Default Gateway - Display the gateway address of the WAN interface. Primary DNS - Display the specified primary DNS setting. Secondary DNS - Display the specified secondary DNS setting. IPv6 Address - Display the IPv6 address of the WAN1. VigorFly 210 Series User’s Guide...
-
Page 161: 153
URL as the following and type username and password for VigorACS server: http://{IP address of VigorACS}:8080/ACSServer/services/ACSServlet If the connected CPE does not need to be authenticated please set URL as the following: http://{IP address of VigorFly 210 Series User’s Guide... - Page 162 Gateway. Please type a number as the maximum period. A value of “-1” indicates that no maximum period is specified. After finishing all the settings here, please click OK to save the configuration. VigorFly 210 Series User’s Guide...
-
Page 163: Administration Password
Account Type in a new account as the username for accessing into user mode for simple web configuration. Type in new password in this field. Password Confirm Password Type in the new password again. VigorFly 210 Series User’s Guide... - Page 164 4. The following window will be open to ask for username and password. Type the new user password in the filed of Password and click Login. 5. The main screen with User Mode will be shown as follows. VigorFly 210 Series User’s Guide...
-
Page 165: Configuration Backup
Type a key arbitrarily for encrypting the file. Keep the key in mind. You will need it whenever you want to restore such file. Click Backup button to get into the following dialog. Click Save button to open another dialog for saving configuration as a file. VigorFly 210 Series User’s Guide... - Page 166 The above example is using Windows platform for demonstrating examples. The Mac or Linux platform will appear different windows, but the backup function is still available. Note: Backup for Certification must be done independently. The Configuration Backup does not include information of Certificate. VigorFly 210 Series User’s Guide...
- Page 167 Click Restore button and wait for few seconds, the following picture will tell you that the restoration procedure is successful. Note: If the file you want to restore has been encrypted, you will be asked to type the encrypted key before clicking Restore. VigorFly 210 Series User’s Guide...
-
Page 168: Syslog/Mail Alert
Password - Type the password for authentication. Enable E-mail Alert - Check the box of User Login to send alert message to the e-mail box while the router detecting the item(s) you specify here. Click OK to save these settings. VigorFly 210 Series User’s Guide... - Page 169 From the Syslog screen, select the router you want to monitor. Be reminded that in Network Information, select the network adapter used to connect to the router. Otherwise, you won’t succeed in retrieving information from the router. VigorFly 210 Series User’s Guide...
-
Page 170: Time And Date
Check the box to enable the daylight saving. Such feature is Daylight Saving available for certain area. NTP synchronization Select a time interval for updating from the NTP server. After finishing all the settings here, please click OK to save the configuration. VigorFly 210 Series User’s Guide... -
Page 171: Management
Subnet Mask - Represent a subnet mask allowed to login to the router. Management Port Setting Specify user-defined port numbers for the Telnet, HTTP and HTTPS servers. After finishing all the settings here, please click OK to save the configuration. VigorFly 210 Series User’s Guide... -
Page 172: Reboot System
Note that this example is running over Windows OS (Operating System). Download the newest firmware from DrayTek's web site or FTP site. The DrayTek web site is www.draytek.com (or local DrayTek's web site) and FTP site is ftp.draytek.com. -
Page 173: Diagnostics
Display the gateway IP address of the routing. Flags Display the routing status. Interface Display the interface name (eth0, eth1, fp, etc..) that used to transfer packets with addresses matching the prefix. Comment Display the brief explanation for the routing. VigorFly 210 Series User’s Guide... -
Page 174: System Log
Display the IP address assigned by this router for specified MAC Address Display the MAC address for the specified PC that DHCP assigned IP address for it. Expire Time Display the leased time of the specified PC. Refresh Click it to reload the page. VigorFly 210 Series User’s Guide... -
Page 175: Data Flow Monitor
Display the IP address of the monitored device. TX rate (kbps) Display the transmission speed of the monitored device. RX rate (kbps) Display the receiving speed of the monitored device. Sessions Display the session number. VigorFly 210 Series User’s Guide... -
Page 176: Connection Graph
Backup WAN for viewing different connection graph. Click Refresh to renew the graph at any time. This page displays the APP QoS monitoring status. Each item is explained as follows: Item Description Enable Application QoS Check the box to perform the application QoS monitoring. Monitor VigorFly 210 Series User’s Guide... -
Page 177: Traffic Graph
Display how well the application detection works. Click Diagnostics and click Traffic Graph to pen the web page. Choose WAN1/WAN2 Bandwidth, Sessions, daily or weekly for viewing different traffic graph. Click Refresh to renew the graph at any time. VigorFly 210 Series User’s Guide... -
Page 178: Ping Diagnosis
Click this link to remove the result on the window. When you click the menu item under Support Area, you will be guided to visit www.draytek.com and open the corresponding pages directly. Click Support Area>>Application Note, the following web page will be displayed. - Page 179 Click Support Area>>FAQ, the following web page will be displayed. Click Support Area>>Product Registration, the following web page will be displayed. Refer to section 2.6 Registering Vigor Router for detailed information. VigorFly 210 Series User’s Guide...
- Page 180 This page is left blank. VigorFly 210 Series User’s Guide...
-
Page 181: Trouble Shooting
Turn on the router. Make sure the ACT LED blink once per second and the correspondent LAN LED is bright. If not, it means that there is something wrong with the hardware status. Simply back to “1.3 Hardware Installation” to execute the hardware installation again. And then, try again. VigorFly 210 Series User’s Guide... - Page 182 Open All Programs>>Getting Started>>Control Panel. Click Network and Sharing Center. In the following window, click Change adapter settings. Icons of network connection will be shown on the window. Right-click on Local Area Connection and click on Properties. VigorFly 210 Series User’s Guide...
- Page 183 Finally, click OK. Double click on the current used Mac OS on the desktop. Open the Application folder and get into Network. On the Network screen, select Using DHCP from the drop down list of Configure IPv4. VigorFly 210 Series User’s Guide...
- Page 184 VigorFly 210 Series User’s Guide...
-
Page 185: Pinging The Router From Your Computer
Open the Application folder and get into Utilities. Double click Terminal. The Terminal window will appear. Type ping 192.168.1.1 and press [Enter]. If the link is OK, the line of “64 bytes from 192.168.1.1: icmp_seq=0 ttl=255 time=xxxx ms” will appear. VigorFly 210 Series User’s Guide... -
Page 186: Checking If The Isp Settings Are Ok Or Not
Go to System Maintenance and choose Reboot System on the web page. The following screen will appear. Choose Using factory default configuration and click OK. After few seconds, the router will return all the settings to the factory settings. VigorFly 210 Series User’s Guide... -
Page 187: Contacting Draytek
If the router still cannot work correctly after trying many efforts, please contact your dealer for further help right away. For any questions, please feel free to send e-mail to support@draytek.com. VigorFly 210 Series User’s Guide...
Need help?
Do you have a question about the VigorFly 210 and is the answer not in the manual?
Questions and answers