Elmo BOXi T-200 Instruciton Manual
Mobile projector
Hide thumbs
Also See for BOXi T-200:
- Instruction manual (78 pages) ,
- Quick start manual (69 pages) ,
- Quick start manual (68 pages)
Table of Contents
Advertisement
Quick Links
Download this manual
See also:
Instruction Manual
Advertisement
Table of Contents

Related Manuals for Elmo BOXi T-200


Summary of Contents for Elmo BOXi T-200
- Page 1 T-200 Instruction Manual English ■ Read the separate “IMPORTANT SAFEGUARD” carefully before using the projector. ■ Keep this guide in a safe place for future reference. ©2013 Copyright ELMO Co., Ltd. All rights reserved.
-
Page 2: Important Safeguards
IMPORTANT SAFEGUARDS ■ Read Instructions All the safety and operating instructions should be read before the appliance is operated. ■ Retain Instructions The safety and operating instructions should be retained for future reference. ■ Heed Warnings All warnings on the product and in the operating instructions should be adhered to. ■... - Page 3 ■ Power Sources This product should be operated only from the type of power source indicated on the marking label. If you are not sure of the type of power supply to your home consult your appliance dealer or local power company. For products intended to operate from battery power, or other sources, refer to the operating instructions.
- Page 4 ■ Damage Requiring Service Unplug this product from the wall outlet and refer servicing to qualified service personnel under the following conditions: • When the power-supply cord or plug is damaged. • If liquid has been spilled, or objects have fallen into the product. •...
- Page 5 CAUTION RISK OF ELECTRIC SHOCK DO NOT OPEN CAUTION: TO REDUCE THE RISK OF ELECTRIC SHOCK, DO NOT REMOVE COVER (OR BACK). NO USER-SERVICEABLE PARTS INSIDE. REFER SERVICING TO QUALIFIED SERVICE PERSONNEL. The lightning flash with arrowhead symbol, within an equilateral triangle, is intended to alert the user to the presence of uninsulated “dangerous voltage”...
-
Page 6: Before You Use
BEFORE YOU USE ■ To use this product, please be sure to use the supplied power cord and AC adapter. ■ The supplied power cord and AC adapter are designed for exclusive use with this product. Do not use them with other equipment. ■... - Page 7 ■ Luminescent spot and black spot There may be some pixels that do not operate properly due to the use of an image pick-up device made-up of many pixels. Though luminescent or black spots may be found on the screen, it is a phenomenon peculiar to the image pick-up device and is not a malfunction.
-
Page 8: Table Of Contents
CONTENTS IMPORTANT SAFEGUARDS ..................2 BEFORE YOU USE ....................6 CONTENTS ........................ 8 1 GETTING STARTED ..................... 11 CHECKING THE PACKAGE CONTENTS ............. 11 PART NAMES AND FUNCTIONS ................. 12 Projector ......................12 LED BACKLIGHT INDICATION ................ 14 Side panel ......................15 Remote control .................... - Page 9 3 MENU OPERATION ....................39 DISPLAYING THE MENU AND BASIC OPERATION ........... 39 Displaying the main menu ................. 39 Operating the menus ..................39 MAIN MENU ......................41 CORRECTING TH KEYSTONE DISTORTION ............. 43 SELECTING THE DISPLAY MODE ..............44 Setting up User mode ..................
- Page 10 7 WARRANTY AND AFTER SALES SERVICE ............75...
-
Page 11: Getting Started
1 GETTING STARTED CHECKING THE PACKAGE CONTENTS The items below are included with this product. If any item is missing, contact the dealer from whom you purchased this product. Projector AC adapter Power cord IMPORTANT SAFEGUARD Remote control WARRANTY CARD QUICK START GUIDE *Battery included HDMI cable... -
Page 12: Part Names And Functions
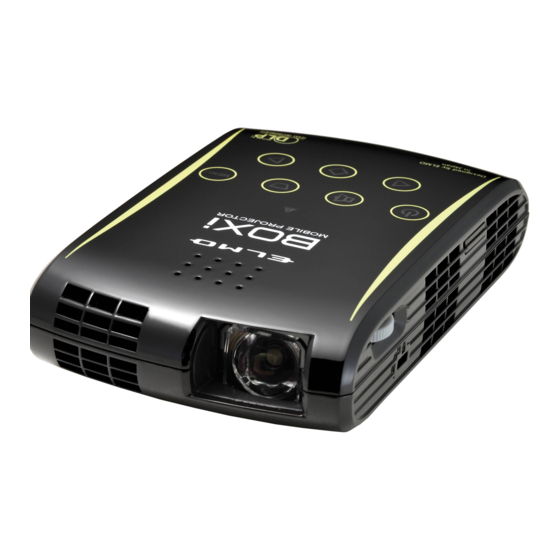
PART NAMES AND FUNCTIONS Projector TOP/FRONT BOTTOM /BACK ⑧ ④ ⑥ ⑪ ⑤ ③ ① ⑩ ② ⑦ ⑨ Related Number Name Function Page Lens ① →P.20 Project an image. →P.29 ② Focus dial To focus the projected image. Speaker ③... - Page 13 Control panel * Touch switch ① ② ③ ④ ⑤ ⑥ ⑦ ⑧ Related Number Mark Name Function Page The red LED flashes when there Warning →P.14,67 ① is something wrong with the indicator projector. To turn the projector on/off. →P.27,28 ②...
-
Page 14: Led Backlight Indication
LED BACKLIGHT INDICATION There is an LED indicator behind each button on the control panel (7pcs in total) and the warning indicator. These LEDs will light up according to the status of the projector. Power indicator: Warning indicator(red) This LED also turns red. LED Backlight(Blue)... -
Page 15: Side Panel
Side panel ① ② ③ ④ Related Number Name Function Page HDMI input terminal. →P.24 ① HDMI To connect an HDMI output device. →P.25 ② AUDIO Head Phone output Terminal. →P.26 ③ To supply 5V power up to 2A. ④ →P.23 DC IN To connect the supplied AC adapter. -
Page 16: Remote Control
Remote control ① ② ⑨ ⑦ ⑩ ⑧ ⑪ ⑤ ③ ④ ⑫ ⑥ ⑬ ⑭ Related Number Mark Name Function Page ① →P.27,28 Power button To turn the projector on/off. To display/hide the menu. To return to the previous menu →P.39 ②... - Page 17 Related Number Mark Name Function Page Contrast To adjust the contrast of the →P.37 ⑩ Button projector. ⑪ →P.38 ECO button To set the ECO mode. To increase the volume of the →P.32 ⑫ Volume+button + built-in speaker. To decrease the volume of the →P.32 ⑬...
- Page 18 CAUTION ■ Improper use of the battery may lead to electrolyte leakage or bursting and may cause fire, injury or corrosion to the remote control. Observe the following precautions for safety use of the product. ・ Do not use any battery other than specified. ・...
-
Page 19: Operating Range For The Remote Control
Operating range for the remote control Aim the IR transmitter of the remote control at the IR receiver on the back of the projector to control the projector. Use the remote control within its operating range as described below. Operating range 42°... -
Page 20: Installing The Projector
INSTALLING THE PROJECTOR Throw distance and screen size Decide on the position to place the projector. The distance between the projector and the screen should be between 48cm (screen size: 25 inch) and 133 cm (screen size: 68 inch). 高 スクリーンサイズ(型) Screen size (inch) さ... -
Page 21: Raising The Projected Image
Raising the projected image Projected image can be raised up when using the built-in tilt stand underneath the projector. Bottom of the projector Tilt stand(5°) Tilt stand(10°) 1. Use the tilt stand Setting up the tilt stand allows you to raise the projected image. The two position tilt stand allows you to set up the projectionangle to either 5°or 10°. -
Page 22: Using A Tripod For A Camera
Using a tripod for a camera The projector is equipped with a tripod receptacle on the bottom of the projector. You can mount the projector on a tripod for a camera. ●Bottom of the projector ●When mounted on a tripod Tripod receptacle N o t e... -
Page 23: Connecting To The Devices
CONNECTING TO THE DEVICES Connecting the power (AC adapter and power cord) Connect the supplied AC adapter and the power cord, and then firmly connect to the DC IN of the projector. Then insert the other plug of the power cord securely into the wall outlet. Terminal Panel AC adapter (Supplied) Power cord... -
Page 24: Connecting To Hdmi Terminal
Connecting to HDMI terminal 1. Connect the projector to a device such as a DVD-player using HDMI cable. Connect the HDMI output terminal of your device such as a DVD-player and computer to the HDMI terminal of the projector using an HDMI cable (Supplied) as shown in the below picture. -
Page 25: Output Audio Through The Audio Terminal
Output audio through the AUDIO terminal 1. Connect headphones or an external speaker to the projector Plug in headphones(sold separately) or an external speaker(sold separately) to the AUDIO output port of the projector. Built-in speaker output will be stopped and audio will be output through headphones or an external speaker. -
Page 26: Supplying The Power From Usb Port
Supplying the power from USB port 1. connect other USB apparatuses to this plane connect other USB apparatuses to this plane The USB port can supply 5V power up to 2A. This USB port is for power supply only and has no communication function. Terminal Panel PC(Other USB apparatuses)... -
Page 27: Basic Operation
2 BASIC OPERATION TURNING THE POWER ON/OFF Powering on 1. Make sure that the power and all necessary cables are connected properly. 2. Touch button on the control panel. (Press button on the remote control.) Remote control Control panel Power indicator will turn green The “Input source standby”... -
Page 28: Powering Off
Powering off Touch button on the control panel. (Press button on the remote control.) Remote control Control panel 2. A message will be displayed. Press the button again. Press the Power button on the control panel of Press Power button again to the projector or on the remote control while the turn off the projector. -
Page 29: Adjusting The Focus
ADJUSTING THE FOCUS Turn the focus ring to adjust the focus. N o t e ■ The focus adjustment can be performed when the throw distance is between 48cm and 133cm. ■ Refer to “Throw distance and screen size” (Page20) for details on the screen size. -
Page 30: Correcting The Keystone Distortion
CORRECTING THE KEYSTONE DISTORTION Correcting the keystone distortion manually with the remote control 1. Press the the button. Remote control The following “Keystone correction” window will be displayed. Keystone correction window 2. Press the “ ” buttons. Press the “>” button. (Press when the projection angle is increased.) Press the “<”... -
Page 31: Selecting The Display Mode (Remote Control)
2. Press the “ ” buttons on the control panel to correct the keystone distortion. Press the “ ” button. (Press when the projection angle is increased.) Press the “ ” button. (Press when the projection angle is decreased.) N o t e ■... -
Page 32: Controlling The Volume (Remote Control)
CONTROLLING THE VOLUME (remote control) Turning up the volume 1. Press the “+” button near the mark on the remote control. The following “Volume control” window will be displayed and the volume will be turned up. Volume control window Turning down the volume 1. -
Page 33: Controlling The Volume With Control Panel
Controlling the volume with control panel 1. Press the “ ”button on the control panel. The following “Volume control” window Control panel will be displayed. Volume control window 2. Press the “ ” buttons on the control panel to controlling the volume. -
Page 34: Turning Off The Sound
TURNING OFF THE SOUND You can temporarily mute the sound from the built-in speaker. Press the button to mute the sound. Press the button again to cancel the mute. When the “+” button near the mark on the remote control is pressed while in mute, the mute will be released and the volume will be increased by 1 level. -
Page 35: Hiding The Image
HIDING THE IMAGE You can temporarily hide the projected image with the “Blank screen” function. 1. Press the MASK button on the remote control. The blank screen will be displayed to hide the projected image. Blank screen Press the MASK button again to return to the input signal screen. N o t e ■... -
Page 36: Adjusting The Brightness (Remote Control)
ADJUSTING THE BRIGHTNESS (remote control) Adjust the brightness on the remote control. 1. Press the button on the remote control. The “Brightness adjustment” window will be displayed. Brightness adjustment window Lighten Darken Press the “ ” buttons of remote control Adjust the brightness with the buttons. -
Page 37: Adjusting The Contrast (Remote Control)
ADJUSTING THE CONTRAST (remote control) Adjust the contrast on the remote control. 1. Press the button on the remote control. The “Contrast adjustment” window will be displayed. Contrast adjustment window Weaken Sharpen Press the “ ” buttons of remote control Adjust the contrast with the “... -
Page 38: Setting The Eco Mode (Remote Control)
SETTING THE ECO MODE (remote control) Setting the ECO mode on the remote control. 1. Press the ECO button on the remote control. The “ECO mode setting” menu will be displayed. ECO mode setting menu Press the “ ” buttons of remote control Select “ON”... -
Page 39: Menu Operation
3 MENU OPERATION Various configurations and adjustments to the projected image can be done from the menu. DISPLAYING THE MENU AND BASIC OPERATION Displaying the main menu Remote control Control panel Press the MENU button. Press the MENU button on the remote control or on the control panel. - Page 40 Button Function Configure the setting of the selected icon. button The “Volume control” screen appears. button The “Keystone correction” screen appears. button Move the selected item left. button Adjust the setting value of the adjustment bar*. Move the selected item right. button Adjust the setting value of the adjustment bar.
-
Page 41: Main Menu
MAIN MENU The following items can be configured from the main menu: Keystone adjustment/ Display mode selection/ Brightness adjustment/ Contrast adjustment/ Volume adjustment/ Language/ Detail settings If you select the item, a sub menu will be displayed. Refer to “Displaying the main menu” (Page39) for details on displaying the main menu. - Page 42 Options/ Icon Name Description Adjustable range Contrast Adjust the contrast of the image. 1 ~ 100 adjustment The adjustment can be made in Default setting:50 →P.50 increments of one unit. Volume Adjust the volume of the image. 1 ~ 10 adjustment The adjustment can be made in Default setting:7...
-
Page 43: Correcting Th Keystone Distortion
CORRECTING TH KEYSTONE DISTORTION Display the “Main” menu. Refer to “Displaying the main menu” (Page39). Press the MENU button on the remote control or on the control panel. The main menu will be displayed. Main menu Select the icon with the buttons on the remote control or on the control panel. -
Page 44: Selecting The Display Mode
SELECTING THE DISPLAY MODE 1. Display the “Main” menu. Refer to “Displaying the main menu” (Page39). Press the MENU button on the remote control or on the control panel. The main menu will be displayed. Main menu Select the icon with the buttons on the remote control or on the control panel. - Page 45 The following display mode can be selected: Icon Mode Description A Mode that can be adjusted to users’ User preferences. "(Page46) Cinema A mode suitable for films. A mode suited for showing still images, Photo such as photos, for exact color reproduction.
-
Page 46: Setting Up User Mode
Setting up User mode User mode allows the color balance to be adjusted by setting color temperature, color gamut and gamma of the image. Icon Name Options/ Adjustable range Description Lower color temperature Lo: 5,000K, Color projects warm color. Higher Mid:6,000K temperature color temperature projects cold... - Page 47 3. Set the Color gamut Color gamut Setting menu Select the icon with the buttons on the remote control or on the control panel. The “Color gamut Setting” menu will be displayed. Select the color gamut with the buttons. Std:sRGB, Wide:Adobe RGB equivalent Press the button to execute the correction.
- Page 48 5. Close the menu User Settings menu After setting up the user set up menu, press the MENU button in the control panel or remote control to go back to the display mode menu. Press the MENU button in the display mode menu to return to the main menu.
-
Page 49: Adjusting The Brightness
ADJUSTING THE BRIGHTNESS 1. Display the “Main” menu. Refer to “Displaying the main menu” (Page39). Press the MENU button on the remote control or on the control panel. The main menu will be displayed. Main menu 2. Select the icon with the buttons on the remote control or on the control panel. -
Page 50: Adjusting The Contrast
ADJUSTING THE CONTRAST 1. Display the “Main” menu. Refer to “Displaying the main menu” (Page39). Press the MENU button on the remote control or on the control panel. The main menu will be displayed. Main menu 2. Select the icon with the buttons on the remote control or on the control panel. -
Page 51: Controlling The Volume
CONTROLLING THE VOLUME Volume setting 1. Display the “Main” menu. Refer to “Displaying the main menu” (Page39). Press the MENU button on the remote control or on the control panel. The main menu will be displayed. 2. Select the icon with the Main menu buttons on the remote control or on the... -
Page 52: Setting The Language
SETTING THE LANGUAGE Set the language to be used for the menus. 1. Display the “Main” menu. Refer to “Displaying the main menu” (Page39). Press the MENU button on the remote control or on the control panel. The main menu will be displayed. Main menu 2. -
Page 53: Detail Settings
DETAIL SETTINGS The following items can be configured: ECO mode/ Aspect ratio setting / Auto power off/ Projection mode/ Installation mode/ CEC mode/Factory settings Various information can be obtained from this screen. Refer to “Checking various information” (Page55). Displaying the detail settings 1. - Page 54 Icon Name Options Description Set the ECO mode. When the projector is in ECO mode setting the ECO mode, the →P.55 LED brightness and fan Default noise will decrease. Auto Default Set the horizontal to Aspect ratio setting vertical ratio of the input 4:3 →P.56 signal.
-
Page 55: Checking Various Information
Checking various information 1. Display the “Detail settings” menu. Detail settings menu The following information can be viewed. Information Description Input Source The current input source will be displayed. Version The firmware version of the projector will be displayed. Setting the ECO mode 1. -
Page 56: Selecting The Aspect Ratio
Selecting the aspect ratio 1. Display the “Detail settings” menu. Detail settings menu 2. Select the icon with the buttons on the remote control or on the control panel. Press the button to execute the selection. The “Aspect ratio setting” menu will be displayed. 3. -
Page 57: Setting The Auto Power Off
Setting the auto power off Detail settings menu 1. Display the “Detail settings” menu. 2. Select the icon with the buttons on the remote control or on the control panel. Press the button to execute the selection. The “Auto power off setting” menu will be displayed. 3. -
Page 58: Selecting The Projection Mode
Selecting the projection mode 1. Display the “Detail settings” menu. Detail settings menu 2. Select the icon with the buttons on the remote control or on the control panel. Press the button to execute the selection. The “Projection mode setting” menu will be displayed. 3. -
Page 59: Selecting The Installation Mode
Selecting the installation mode 1. Display the “Detail settings” menu. Detail settings menu 2. Select the icon with the buttons on the remote control or on the control panel. Press the button to execute the selection. The “Installation mode setting” menu will be displayed. 3. -
Page 60: Setting The Cec Mode
Setting the CEC mode 1. Display the “Detail settings” menu. Detail settings menu 2. Select the icon with the buttons on the remote control or on the control panel. Press the button to execute the selection. The “CEC mode setting” menu will be displayed. 3. -
Page 61: Selecting The Backlight Brightness Mode
Selecting the Backlight Brightness mode 1. Display the “Detail settings” menu. Detail settings menu 2. Select the icon with the buttons on the remote control or on the control panel. Press the button to execute the selection. The “Backlight Brightness mode setting” menu will be displayed 3. -
Page 62: Returning To The Factory Settings
Returning to the factory settings 1. Display the “Detail settings” menu. Detail settings menu 2. Select the icon with the buttons on the remote control or on the control panel. Press the button to execute the selection. The “Factory settings” menu will be displayed. 3. -
Page 63: Maintenance
4 MAINTENANCE This section describes the simple maintenance procedures you should follow to clean the lens, the cabinet and the remote control. CLEANING THE LENS, THE CABINET AND THE REMOTE CONTROL Cleaning the lens 1. Before starting the cleaning, turn off the projector, disconnect the power cord and then allow the cabinet to cool. -
Page 64: Cleaning The Inside Of The Projector
CAUTION ■ Do not use solvents such as alcohol, benzene or thinner as they may mar the finish of the case, causing electric shock. ■ Do not apply volatile materials such as insecticide on the cabinet. Do not leave a rubber, sticky tape or vinyl product in prolonged contact with it. Otherwise, the surface finish will be deteriorated or the coating may be stripped off. -
Page 65: Troubleshooting
5 TROUBLESHOOTING INDICATOR ICONS During use of the projector, the following icons may appear at the bottom right of the screen to warn you or indicate errors. When the icon appears, follow the instructions described in the table below. If the same icon still appears after following the above instructions, contact your dealer. - Page 66 Example of the error indication An error occurred. The projector will be turned off in 5 seconds. Solution Icon Description Turn off the projector immediately and allow the projector to cool down for at least 30 minutes. Make sure of the following and turn The internal temperature has Temperature on the projector:...
-
Page 67: Temperature & Warning Indicator Display
TEMPERATURE & WARNING INDICATOR DISPLAY The warning indicators indicate the status of the internal temperature and the internal fan, by flashing or by lighting. < Upper part of the Control panel> Warning indicator Power indicator Temperature indicator (Red) Solution Turn off the projector immediately and allow the projector to cool down for at least 30 minutes. -
Page 68: Common Problems And Check Items
COMMON PROBLEMS AND CHECK ITEMS The following problems may not be caused by malfunction of the projector. Check the items in the table below before requesting a repair service. If the problem still persists, contact your dealer. Problem Check item Related Page ➡... - Page 69 Problem Check item Related Page ➡ Is the lens correctly adjusted? →P.29 Image is blurred. ➡ Is the projector placed correctly to the →P.20 screen? ➡ Is the lens dirty? →P.63 ➡ Is there condensation on the lens? →P.63 ➡ Is the distance between the projector and the →P.29 screen within the adjustable range of the focus?
-
Page 70: Specifications
6 SPECIFICATIONS SPECIFICATIONS MODEL T-200 Display technology Single-chip DLP Display device Size 0.45 type 1,280×800 (WXGA) Resolution Aspect ratio 16:10 Focus Lens Manual adjustment Focal length f = 9.05mm F number F 2.04 3 LED (R,G,B) Lamp 25 ~ 68 inches ( 0.48 ~ 1.33 m ) Screen size (projection distance) Projection method (can be Front/ Rear/ Desktop/ Ceiling... -
Page 71: Remote Control
Remote control DC 3V (Button battery: CR2032) Power Operating range External dimensions 50 mm x 90 mm x 10 mm Weight 28.5g(including battery) Supplied accessories Remote control ・・・・・・・・・・・・・・・・・ 1pce *with a battery inserted Power cord ・・・・・・・・・・・・・・・・・ 1pce AC adapter ・・・・・・・・・・・・・・・・・... -
Page 72: List Of Compatible Signals
LIST OF COMPATIBLE SIGNALS The following system modes are available with the projector. The projector will detect the input signal and select the appropriate system mode automatically. Computer signal input format (for HDMI) Horizontal Vertical Resolution Signal mode frequency frequency (H x V) (kHz) (Hz) - Page 73 Horizontal Vertical Resolution Signal mode frequency frequency (H x V) (kHz) (Hz) 1360×768(60Hz) 1360 × 47.7 60.0 SXGA+ (60Hz) 1400 × 1050 65.3 60.0 WXGA+(60Hz) 1440 × 55.9 59.9 WXGA+(75Hz) 1440 × 70.6 75.0 WSXGA+(60Hz) 1680 × 1050 65.3 60.0 Video signal input format (for HDMI) Horizontal Vertical...
-
Page 74: Trademarks
TRADEMARKS is a registered trademark of ELMO Co., Ltd. DLP(Digital Light Processing) is a trademark of Texas Instruments. VGA, XGA, and SXGA are trademarks or registered trademarks of International Business Machines Corp. iPhone and iPad are trademarks or registered trademarks of Apple Inc. - Page 75 ■ WARRANTY COVERAGE This warranty shall apply only when the projector is used under the conditions and in the manner intended by ELMO as specified in the instruction manual during the Warranty Period. ■ EXCLUSIONS AND LIMITATIONS This warranty does not cover the following: (1) Failure or damage caused by misuse, improper application, wrong operation other than specified in the instruction manual;...
- Page 76 ■ [OTHER CUSTOMER SERVICE] ■ Customer service You can inquire the following inquiries about the projector to our customer service; (1) About repair service (2) About instruction of use, sale or other issues...
- Page 77 6-14, Meizen-cho, Mizuho-ku Nagoya, 467-8567, Japan OVERSEAS SUBSIDISRY COMPANIES ELMO USA CORP. ELMO Europe SAS Headquarters Headquarters 1478 Old Country Road Immeuble Elysées La Défense, Plainview, NY 11803, U.S.A. 7C, Place du Dôme, Tel. (516) 501-1400 Fax.(516) 501-0429 92056 Paris La Défense, France E-mail: elmo@elmousa.com...
Need help?
Do you have a question about the BOXi T-200 and is the answer not in the manual?
Questions and answers