Table of Contents
Advertisement
Quick Links
Advertisement
Table of Contents

Subscribe to Our Youtube Channel
Related Manuals for Sunfire TGR-3


Summary of Contents for Sunfire TGR-3
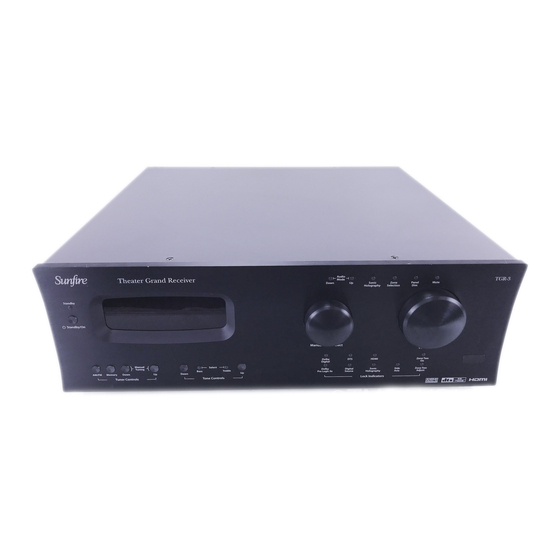
- Page 1 Theater Grand Receiver TGR-3 and TGR-3(E)
-
Page 2: Important Safety Instructions
SAFETY Important Safety In struc tions 1. Read In struc tions 10. Ventilation — The apparatus 12. Power Cord Protection — Pow- should be situated so that its location er-supply cords should be routed so 2. Keep these Instructions or position does not interfere with its that they are not likely to be walked proper ven ti la tion. - Page 3 SAFETY 16. To prevent electric shock, do not 17. Grounding or Po lari za tion — ATTENTION — Le présent appar- use this polarized plug with an ex ten - Pre cau tions should be taken so that eil numérique n'émet pas de bruits sion cord, receptacle or other outlet the grounding or polarization means radioélectriques dépassant las limites...
-
Page 4: Table Of Contents
Chapter 4: On Screen Display....30 of the On Screen Display, and how to adjust and customize your Speaker Calibration ........40 TGR-3. Chapter 5: Using the TGR-3 ......42 Chapter 5 describes the available Bass Management........42 modes, options and operational details of the TGR-3. -
Page 5: Chapter 1: Introduction
Bob Carver, Audio Designer, Physicist Dear Friend, Thank you for pur chas ing a Sunfi re Theater Grand Receiver TGR-3. We hope that you enjoy it and the music it makes as much as we have en joyed creating it for you. -
Page 6: Unpacking And Features
® video packing ma te ri als and the box in case Digital to Analog converters your TGR-3 ever needs to be moved • Dolby Digital EX, Dolby Pro • 32-bit, 20 MHz control micro- or shipped for repair. Logic IIx, DTS ES and DTS... -
Page 7: Overview
The remote can also be used to activate and control all features of the second zone. The TGR-3 (E) is the export model, set for 220-240 VAC operation. Its operation is identical to the TGR-3 described in this manual. -
Page 8: Quick Start Guide
11. Play a source, such as a DVD, 3 front panel display shows an and bring up the volume to suit 7. Turn on the TGR-3, and then turn abbreviated message of where you your taste. Make sure the video on your TV and source equipment. - Page 9 4 ft 0in ZONE 2 R SURR 4 ft 0in SPEAKERS L SURR BACK 5 ft 0in 15. The TGR-3 has many more op- VIDEO R SURR BACK 5 ft 0in SOFTWARE tions which are described in further CONTROL SPEAKERS...
-
Page 10: Front Panel Features
For example, If you press ZONE TWO fi rst, it TGR-3 is set to the desired sur- press this and POWER to turn can turn on Zone 2 (even if the round mode (or the stereo mode). -
Page 11: Tuner Controls
This is on when the HDMI con- MEMORY again to save the nections are in use. Note: When the TGR-3 is turned current frequency as a preset, on, it has a de lib er ate ly slow DOLBY PRO LOGIC IIx... -
Page 12: Rear Panel Features
When these inputs are The supplied FM antenna fi ts monitor, where the video of se lect ed, the TGR-3 will au to mat i- this “F-type” screw-on connector. any selected input and the On cal ly route any video signals going Other antennas can be fi... -
Page 13: Audio Inputs
PHONO input. See the next page for details. remote, the TGR-3 will au to mat i- cal ly select the digital input if there 10. Audio Outputs 21. IEC Linecord Socket... -
Page 14: Installation
Video Connections 12VDC 12VDC Care ZONE2 MAIN ZONE The TGR-3 has four types of video USE EITHER TO TURN connections: composite video, S- If you need to clean the front sur- MAIN ZONE AMPLIFIER ON video, component video and HDMI. -
Page 15: Chapter 2: System Confi Gurations
The following pages show some typical con nec tions that you might make in your in- stal la tion. They show how the inputs and outputs of the TGR-3 are con nected to various audio and video com po nents. - Page 16 The digital output from the DVD player must be con nect ed to the digital inputs of the TGR-3. This is the only way the TGR-3 can receive and decode Dolby Digital or DTS signals. It is best to use a coaxial digital cable to make the connection to the TGR-3, rather than a standard audio cable.
- Page 17 CHAPTER 2 LD connections: external RF Demodulator and S-Video S-video signals from TGR-3 MAIN S-video output to TV Monitor's S-video input digital audio signal RF demodulator signal LD player S-video signal From: LD Player RF signal S-video output From: LD Player...
- Page 18 CHAPTER 2 VCR connections: analog audio and composite video Composite video signal from TGR-3 MAIN composite video output to TV Monitor's composite video input Composite video signal (play) From: VCR video output TGR-3 VCR video input Analog audio signals (play)
- Page 19 Take care to observe all the safety instructions shown on page 3. NOTE: If your CD has a digital out- put, connect it to the TGR-3’s digital CD input. Also connect the analog CD inputs (as shown) if you want...
- Page 20 From: Turntable chassis ground Phono-level audio signals TGR-3 chassis ground connec- From: Turntable L/R audio outputs TGR-3 Phono L/R audio inputs Only connect a Turntable to the PHONO inputs. In most cases, you should also connect the ground wire to reduce any hum through the speak- ers.
- Page 21 The tape player’s output can be connected to the TAPE or DAT inputs. If you have two players, the TGR-3 will au to mat i cal ly select the input which has a signal present. The unused deck must be turned off when the other deck is playing.
- Page 22 If you select tichannel direct (DSP-bypass) input. This provides the highest fi delity the TGR-3's DVD input, you will get signal path for SACD or DVD-Audio, DVD video and DVD digital audio. If If your DVD player has its own sur-...
-
Page 23: Output Connections
S P E A K E R From: Receiver speaker outputs Speaker inputs Speaker-Level Outputs The TGR-3 speaker output posts The TGR-3 can be confi gured so accept bare wire, speaker lugs, the surround back speaker outputs dual-banana and single-banana con- power the surround back, side-axis, nectors. -
Page 24: Zone 2 Connections
TGR-3 Zone, or can play the same source. are run out to your Zone 2 speakers. Zone 2 IR input. The TGR-3 is com- Zone 2 can only play a digital source These are usually located in another... -
Page 25: Chapter 3: Remote Control
VCR and Tape transport changed by holding down the MAIN These should last about six months controls. In TGR-3 mode, if you press button and pressing the joystick pad in normal use, before a low-battery MENU, the On Screen Display will ap- UP or DOWN. - Page 26 CHAPTER 3 Operating the TGR-3 with the Remote 1. Press the remote's MAIN button to make sure the display is on the main display menu. SYSTEM POWER 2. Press the RECVR MAIN device button to set the remote to operate your TGR- TAPE 3.
-
Page 27: Remote Setup
2. Select the device, such as other components in your system, through all the codes in the table SAT, TV or TGR-3, to learn station and to customize it for your conve- for that device. Release UP when com mands from. - Page 28 The pre-pro grammed or too short. from other remote controls. This is com mands for the TGR-3 will not be useful if the pre-pro grammed com- lost, as they can be recalled. 10. The EDIT command can be used...
- Page 29 (which toggle on/off). of your home theater equipment, and to the next character, or press it set the TGR-3 to DVD, set the TV to down to delete a char ac ter. RECAL (Recall) channel 3, and set the DVD to play, 8.
-
Page 30: Chapter 4: On Screen Display
OSD Activation The OSD is activated using the remote's MENU button (with the GUIDE MENU remote set to operate the TGR-3). The joystick pad and surround- ing buttons allow you to navigate MODE MODE through the OSD menus to control and customize many features of the TGR-3. -
Page 31: Osd Menus
CHAPTER 4 OSD Menus Trim (Page 32) Main Menu TRIM MENU Adjust the volume of each speaker "on-the-fl y." The fi rst menu of the TV On +2.5 Screen Display looks like this CENTER SURROUND -2.5 SUR BACK -1.0 MAIN MENU SIDE AXIS TRIM MEMORY TRIMS... - Page 32 The center, rear and sub trims can also be adjusted using Page 2 of the remote's TGR-3 menu (see page 26). TRIM MEMORY If ON, the trims are stored in mem- ory and are recalled during power turn Step through any available on.
-
Page 33: Dolby Setup
CHAPTER 4 Modes Menu DOLBY MAIN MENU DOLBY D DYN RNG TRIMS PRO LOGIC IIx MODE MODES MODES DOLBY SUB TRIM TONE DOLBY SETUP INPUTS DTS SETUP SETTINGS PARTY SETUP PRO LOGIC IIx MODE JZCLUB AMBIENCE MODE MUSIC CENTER WIDTH PANORAMA Modes Menu DIMENSION... - Page 34 78s. video input whenever the 8-Chan- Full Auto nel audio input is selected. Also, Select on, and the TGR-3 will turn this input only works in the Main on and select this input whenever Zone, not Zone 2. this input starts to play. Use off for any input which hinders auto operation.
- Page 35 CHAPTER 4 Tuner Preset Menus MAIN MENU TRIMS MODES TONE INPUTS INPUTS SETTINGS VID1 VID2 INPUTS P2 TUNER Tuner Preset Menu TUNER PRESETS PAGE 1 TUNER PRESETS This allows you to set the AM/FM TAPE band and frequency of up to 40 radio 107.5 NR ON PHONO...
- Page 36 Zone 2 can be enabled PowerUp Source or disabled, and the stereo balance This sets the input source If the TGR-3 is turned off while adjusted with this menu. which the TGR-3 will then the Auto mode is engaged, it...
-
Page 37: Video Menu
This menu allows you to enable or S-video feed, then the video is not not mute when VID2 is chosen. disable the RS-232 port and the rear digitized in the TGR-3. If you are VIDEO DELAY panel IR remote control connections. up-converting from a composite... -
Page 38: Speaker Size Menu
SUR BK 2 SMALL Speaker Size Menu This menu allows you to enter the size of your speakers. The TGR-3's bass management will then auto- matically assign each speaker a frequency range: either full range the cross over point. Try using... - Page 39 This menu allows you to enter the R SUR BACK 5 ft 0in distance from your listening position to the various speakers. The TGR-3 will then automatically adjust and correct the speaker delay times. The sound from each speaker should arrive at the listener at the correct time.
-
Page 40: Speaker Calibration
CHAPTER 4 Speaker Calibration Menu MAIN MENU TRIMS MODES TONE INPUTS SETTINGS SETTINGS MAIN ZONE ZONE 2 SPEAKERS SPEAKERS VIDEO SIZE SOFTWARE SPEAKER CALIBRATION POSITION CONTROL CALIBRATION AMPLIFIER LEFT MAIN L-R CROSSOVER 110 HZ CENTER C-SURR CROSSOVER 90 HZ RIGHT MAIN SUBWFR MODE NORMAL R SIDE AXIS... -
Page 41: Speaker Crossover Menu
If it is set lower than over to 40 Hz. The subwoofer will then fi er channels which can be used to the TGR-3, there would be a hole in receive the lower bass range, (not power the surround back, side-axis,... -
Page 42: Chapter 5: Using The Tgr-3
The TGR-3 has a bass man age - • Up conversion from S-video ter, and surround speakers and ment system that takes advantage inputs to component video subwoofers. -
Page 43: Surround Modes
In MOVIE mode, Dolby Surround JAZZ CLUB can choose from the following modes: soundtracks are decoded by the In this DSP mode, the surrounds TGR-3 into separate channels: left STEREO simulate the ambiance caused and right channels for off-screen DOLBY PRO LOGIC II by rear refl... - Page 44 This mode is available if the Dolby Digital uses a maximum DISCRETE ES sources: the TGR-3 au to mat i cal ly detects a of 5.1 channels and does not TGR-3 DTS-ES discrete decoder Dolby Digital en cod ed source on...
-
Page 45: Tuner Operation
The Tuner is se lect ed either by rotating the manual input selector on the front panel, or by touching the TUNER button in the re mote’s TGR-3 mode. The front panel display shows the frequency of the last station you were lis ten ing to. -
Page 46: Recording
Recording Recording to a Tape Player Input signals from an audio source playing in the TGR-3 can be re cord ed using the left and right audio outputs. The tape player will receive RECORD a straight copy of the analog source signal going... -
Page 47: Zone 2 Operation
This enables the Zone 2 The Zone 2 speakers can be pow- system, but it still has to be turned on. VOLUME ered by the TGR-3's internal amplifi - PREV ers, or by an external power amplifi er. Press the remote's ZONE 2 button. -
Page 48: Sonic Holography
TGR-3. between. We recommend that you ex- ears will hear it and the brain tells you 2. Use the TGR-3 remote to se- periment with its effect, remember that accurately the position of the mu si cian. -
Page 49: Appendix
APPENDIX Appendix Speaker Place ment Side speak ers Side speak ers Pair A are surround speakers, pair B and C are surround back options, and pair D are side-axis speakers, see the next page. The Front Speak ers The Center speak er You should closely follow the If you have a smaller TV, the speak- Most movie dialog will come from the... -
Page 50: Surround Back Speakers
(see page 38). If you want in surround effects during playback of the subwoofer's volume level the TGR-3's Aux outputs to power the Dolby Digital EX, Dolby Pro Logic IIx, before turning on the CD, then side-axis speakers, confi gure the Aux and DTS ES. -
Page 51: The Rs-232 Port
These common cables are avail- fi le. The TGR-3 display will able from most computer stores (or show the status. from Radio Shack as # 26-117). It should be 9-pin male at one end, to fi t into the TGR-3 and normally User's Manual... -
Page 52: Troubleshooting Guide
Poor Tuning of Stations No TV picture nents connected to the TGR-3 are on and fully op er a tion al. • The antenna may be incorrectly • Make sure that the video input of attached. - Page 53 Sunfi re remote. This ex cel lent way of checking that all is located on the top edge of the • Make sure that the TGR-3's Aux speakers are working correctly. remote. Channel outputs have been set...
-
Page 54: Reset Procedure
• Disconnect any component which appear in the display. When it cools, has a grounded power cord. • Turn the TGR-3 back on and it will the TGR-3 will turn back on. go to the default screen. It has now •... -
Page 55: Remote Control Codes
Mondial 147 Sunfi re TGI 329 009, 010, 069, 074 Citation 148, 272 Myryad 244 Denon 206, 207 Sunfi re TGII-IV, TGR-3 001 Magnavox 010, 012, 064, 079, Clarion 026 NAD 006, 005, 067, 178 Funai 120 Taekwang 138 Curtis Mathes 076... - Page 56 APPENDIX more Satellite/DSS receivers: Teac 009, 059, 212 Marantz 197, 164 Yamaha 197, 004 Pulsar 072 Hitachi 139, 140 Technics 007, 010, 076, 088, Matsui 164 York 004 Quartz 002, 014 Home Cable 080, 044, 029 Memorex 007, 072, 004 Yupiteru 043 Quasar 066, 145, 075 109, 122, 193...
-
Page 57: Favorite Settings
APPENDIX Favorite Settings Use this page to record some of your favorite OSD settings and system details. Mode Settings (page 33) Tone Settings (page 32) MODES SELECTION TONE LEVEL dB DOLBY/DTS DYNAMIC RANGE BASS PRO LOGIC II MODE TREBLE PRO LOGIC II CENTER WIDTH PRO LOGIC II PANORAMA Zone Settings (page 36) PRO LOGIC II DIMENSION... -
Page 58: Specifi Cations
(8 ohms, 1 kHz, < 0.5 % THD) Power Requirements Television Broadcast Standard Sensitivity NTSC only US Model TGR-3: (for 200 W output): 355 mV Export: PAL-BGIH only 120 VAC 50-60 Hz: 200 W Protection HDMI switcher max resolution: 1080i... -
Page 59: Limited Warranty
The Sunfi re Corporation Warranty on how long an implied warranty lasts Tech ni cal Ser vic es Department for the TGR-3 is in effect for THREE and/or do not allow the exclusion or P.O. Box 1589 years from the date of original retail... - Page 60 Theater Grand Receiver TGR-3 Manual part number : 913-123-00 Rev A...
Need help?
Do you have a question about the TGR-3 and is the answer not in the manual?
Questions and answers