Table of Contents
Advertisement
Quick Links
Advertisement
Table of Contents

Related Manuals for Microtek LS-3700


Summary of Contents for Microtek LS-3700
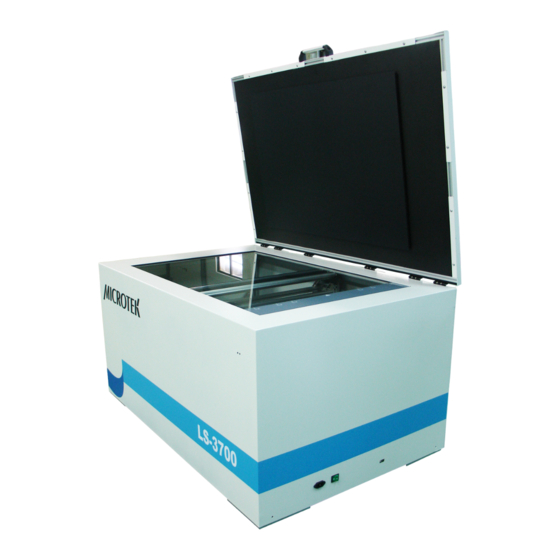
- Page 1 A1 Large-Format Scanner User's Manual www.microtek.com...
-
Page 2: Preface
The contents of this manual have been checked carefully for accuracy, and every effort has been made to ensure that there are no errors. However, Microtek makes no guarantee as to the accuracy of the contents of this document and reserves the right to make changes to the contents without prior warning. -
Page 3: Safety Precautions
• Do not place the scanner on any slippery, slanted, or unstable surface. The product may slide or fall, causing serious injury to people as well as serious damage to the product. LS-3700 User's Manual... - Page 4 When you need a repair service, unplug the scanner from the power outlet and consult qualified service personnel. • When replacement parts are required, use replacement parts that are specified by the manufacturer or have the same characteristics as the original parts. LS-3700 User's Manual...
-
Page 5: Table Of Contents
Table of Contents Preface ....................2 Safety Precautions ................3 Knowing about Your Scanner ............. 7 Features of the LS-3700 ..............7 System Requirements ............... 7 Taking a Closer Look ................ 8 Initiate Setup ..................9 Step 1: Unpacking Package Contents ..........9 Step 2: Installing the Software ............ - Page 6 Open a Window ............... 27 Tools Window ................. 28 Advanced ToolBox Window ............29 The About Menu ................31 User's Manual ................. 31 Cleaning the Glass Surface .............. 32 Maintenance ..................32 Appendix ..................33 Troubleshooting ................33 Specifications ................34 LS-3700 User's Manual...
-
Page 7: Knowing About Your Scanner
• Elevating Knobs — There are four Elevating Knobs at the bottom of LS-3700, which ensure that the scanner can be set on the ground stably and strengthen the safety and convenience of using. -
Page 8: Taking A Closer Look
Turns the scanner on or off. Hi-Speed USB Port Connects the Hi-Speed USB (USB 2.0) cable to the computer. Casters with Locks (4) Used to move or lock the scanner. Ruler Used as a reference to position a scanned document in center. LS-3700 User's Manual... -
Page 9: Initiate Setup
Initiate Setup Step 1: Unpacking Package Contents After unpacking your scanner package, please check for the major components listed below. Scanner Power cord Software CD/DVD Hi-Speed USB cable LS-3700 User's Manual... -
Page 10: Step 2: Installing The Software
Always close any open programs and turn off Anti-virus utilities before installing software. 1. Turn on your computer. 2. Place the Microtek Software CD/DVD into a drive. 3. Follow the on-screen instructions to install the driver and software. Note: If the Microtek Software Installer... -
Page 11: Step 3: Keeping The Scanner In Place
Step 3: Keeping the Scanner in Place There are four casters at the bottom of LS-3700, which are designed for moving the scanner in convenience. In order to avoid the sudden movement of the scanner which may result injury to users, please put LS-3700 on a flat and stabilized ground before using. - Page 12 2. Repeat the step 1 until four black pedestal have been moved up from the ground. Spin the Elevating Knob counterclockwise until the black pedestal is moved up from the ground. LS-3700 User's Manual...
-
Page 13: Step 4: Unlocking The Scanner
Push down with force and turn the locking screw clockwise 90 degrees to the lock position. 4. Shut down ScanWizard LS (USB) software program and turn off your scanner. Hereby, the scanner is ready for transport. LS-3700 User's Manual... -
Page 14: Step 5: Connecting The Scanner
(the green power light) will be turned on as well. To the Hi-Speed USB Cable 1. Connect one end of the Hi-Speed USB cable to your computer. 2. Connect the other end of the Hi-Speed USB cable to the scanner. LS-3700 User's Manual... -
Page 15: Scanning The Materials
3. Lower the upper cover of the scanner gently. Note: When opening or closing the upper cover of the scanner, watch out for the position of upper cover to prevent pressing and hurting for your hands. Ruler LS-3700 User's Manual... -
Page 16: Using Scanwizard Ls (Usb) Software
Using ScanWizard LS (USB) Software ScanWizard LS (USB) is scanning software exclusively designed by Microtek for scanning large-size materials. Its user-friendly interface enables the beginners or the professionals to start the scanning process easily and quickly. Refer to the section “Knowing about ScanWizard LS (USB) Further” in back for more details. - Page 17 7. Click the Scan button to start scanning. The material will be scanned and delivered to the directory where you specify. Note: If you want to cancel the action of the Scan command, press the Esc button on the keyboard. LS-3700 User's Manual...
-
Page 18: Understanding Scanwizard Ls (Usb) Further
From the previous section, you have gotten a general picture about how to use your LS-3700 together with ScanWizard LS (USB) software. At this chapter, you should be able to get to know commands and functions of ScanWizard LS (USB) software further and better;... -
Page 19: Familiarizing With The Main Control Panel Of Scanwizard Ls (Usb)
B. Select Frame button: Used to select and adjust the area to be scanned. C. Magnify button: Clicks to zoom in (magnify) partial area of a scanned image. D. Rotate Counterclockwise button: Clicks to rotate an image in the preview window counterclockwise. LS-3700 User's Manual... - Page 20 H. Minimize button: Clicks to minimize ScanWizard LS (USB). Close button: Clicks to exit ScanWizard LS (USB) software. Preview area: This area in the Preview window shows the Preview image. LS-3700 User's Manual...
-
Page 21: Select Frame Button
The pointed area will be enlarged immediately on the screen. To magnify other area, just move your mouse there and click the left button of the mouse. To cancel using of a magnify, just click the Magnify button again. LS-3700 User's Manual... -
Page 22: Rotate Counterclockwise/Clockwise Buttons
1. Saved folder direction: To select a folder for your scanned and saved images, either use a folder selected by default or click the Arrow button next to the column to explore, search and select folders you want to use for saving scanned images. LS-3700 User's Manual... - Page 23 When all settings are done, click the Save button. The Save As... dialog box will be closed and ScanWizard LS (USB) will start to perform the final file scanning and saving. LS-3700 User's Manual...
-
Page 24: The Files Menu
Save button to save. 3. When done, the Save Scanning Settings dialog box will be closed and you will be directed back to the window of the main control panel. LS-3700 User's Manual... -
Page 25: Load Scanning Settings
Open button to load the selected file. The selected file 3. The settings of the selected file will apply to the preview image in the preview area immediately. The image after being applied The original image with selected file settings LS-3700 User's Manual... -
Page 26: Restore The Default Settings
The Scanner Menu Scanner Info This command provides information about your current scanner. When you choose this command, a dialog box appears showing the scanner name, the scanner serial number, the driver version and the total scanning times. LS-3700 User's Manual... -
Page 27: The Window Menu
) will appear in front of the window which is selected. Also, the selected window will appear on the screen. Preview Window and Tools Window are selected and therefore are marked with check marks Preview image appears in the preview area Tools Window LS-3700 User's Manual... -
Page 28: Tools Window
Scan Type: Select a desired image input type from a drop-down menu. The option is Reflective or Transparent. This option can be selected only when the connected scanner supports. • Close button (x): Click to close the Tools Window. LS-3700 User's Manual... -
Page 29: Advanced Toolbox Window
Contrast: Drag the slider left or right to enhance the contrast of images; thus, you can approve the stereoscopy of images. • Saturation: Drag the slider left or right to increase or decrease the color intensity of images. LS-3700 User's Manual... - Page 30 It is the default setting of the system. Image Settings This sub-menu lets you choose the path for the CMS Profile. The default setting is LS3700.icm. LS-3700 User's Manual...
-
Page 31: The About Menu
When this option is selected, a folder will appear on the screen. In the folder, you can find user's manuals related to supported scanner models and relevant language versions. Please select one which is fit to your demand. LS-3700 User's Manual... -
Page 32: Cleaning The Glass Surface
Cleaning the Glass Surface To ensure optimal performance for the LS-3700, it is important to clean the glass surface of the scanner on a regular basis. First, lift up the upper cover of the scanner. Make sure that it has been lifted up to a proper position for safety. -
Page 33: Appendix
Uninstall and reinstall the ScanWizard LS (USB) software. 4. After clicking “Scan,” a blank screen appears. Make sure your scanner is unlocked (see “Unlocking the Scanner” in the “Initial Setup” section). Uninstall and reinstall the ScanWizard LS (USB) software. LS-3700 User's Manual... -
Page 34: Specifications
Scanner's glass: No warranty Important Please never attempt to open or service the machine by yourself; or, this will void your warranty. Specifications, software bundles, and accessories are subject to change without notice. Not responsible for typographic errors. LS-3700 User's Manual...
Need help?
Do you have a question about the LS-3700 and is the answer not in the manual?
Questions and answers