Table of Contents
Advertisement
Quick Links
Advertisement
Table of Contents

Related Manuals for Pfaff creative 1.5


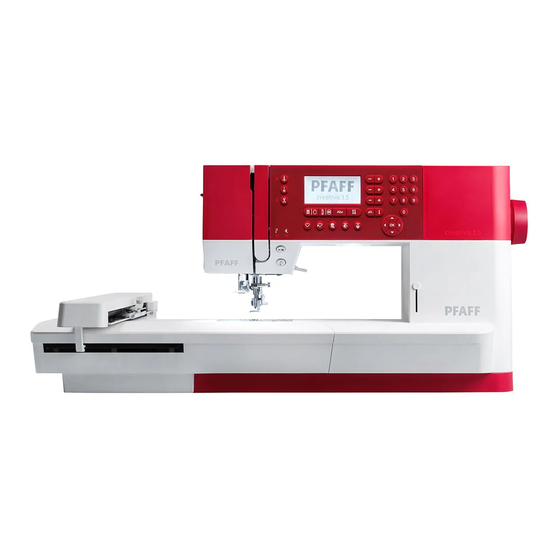
Summary of Contents for Pfaff creative 1.5
- Page 1 Owner’s Manual...
-
Page 2: Important Safety Instructions
This household sewing machine is designed to comply with IEC/EN 60335-2-28 and UL1594. IMPORTANT SAFETY INSTRUCTIONS When using an electrical appliance, basic safety precautions should always be followed, including the following: Read all instructions before using this household sewing machine. Keep the instructions at a suitable place close to the machine. - Page 3 • If the LED lamp is damaged or broken, it must be replaced by the manufacturer or its service agent or a similarly qualified person, in order to avoid a hazard. • If the cord connected with the foot control is damaged, it must be replaced by the manufacturer or its service agent or a similarly qualified person, in order to avoid a hazard.
-
Page 4: Table Of Contents
TABLE OF CONTENTS Introduction ..........6 Presser Foot Lift ..........24 Machine Overview..........6 Changing the Presser Foot......24 Front............. 6 Remove Presser Foot........24 Top Parts ............7 Attach Presser Foot........25 Rear Side ............7 USB Port............25 Accessory Tray ..........7 USB Embroidery Stick........25 Parts of the Embroidery Unit ...... - Page 5 Thread Tension ........... 35 Basting............53 Mirroring ............ 35 Monochrome..........53 Speed Control ..........53 Personal Stitch..........35 Thread Tension ........... 53 Save Personal Stitch ........35 Getting Started Embroidering ......54 Overwrite Personal Stitch......35 Load Personal Stitch ........35 Embroidery Edit..........55 Sewing Techniques ........36 Rotate ............
- Page 6 1 Introduction Machine Overview Front 1. Lid with stitch overview 12. Free arm 2. Presser foot pressure dial 13. Presser foot 3. Threading slots 14. Presser foot bar and presser foot holder 4. Thread cutter 15. Needle screw 5. LED lights 16.
-
Page 7: Accessory Tray
Top Parts 1. Thread guides 2. Bobbin winder thread guide and tension disc 3. Bobbin thread cutter 4. Bobbin winder lever and bobbin spindle 5. Hole for auxiliary spool pin 6. Felt pad 7. Spool cap 8. Spool pin 9. Thread tension discs 10. - Page 8 8. Bobbins (5, one is on the machine) 9. Screwdriver for needle plate 10. Spool cap, small 11. Spool cap, large 12. USB embroidery stick with embroidery designs and PFAFF® creative™ 1.5 embroidery collection booklet 13. Multi-purpose tool 14. Long needle clamp screw for zig-zag free-motion sewing...
-
Page 9: Presser Feet
Included Hoop 1. creative™ MASTER HOOP (240x150 mm) Included Accessories not in Picture • Foot control • Power cord • Needles • Hard cover Presser Feet OA -Standard Presser Foot for IDT™ System (attached on the machine upon delivery) This foot is used mainly for straight stitching and zigzag stitching with a stitch length longer than 1.0 mm. - Page 10 5M - Manual Buttonhole Foot This foot is used for sewing manual buttonholes longer than 25 mm. Use the markings on the foot to position the garment edge. The finger on the back of the foot holds cording for corded buttonhole. 6 –...
-
Page 11: Stitch Overview
Stitch Overview Utility Stitches Stitch № Name Description Straight stitch For seaming and topstitching. Select from 29 different needle positions. Stretch triple straight Reinforced seam. Topstitching. stitch Straight stitch reverse Sew continuous reverse. Zigzag stitch Reinforce seams, clean finish, stretch sewing, lace insertion. Zigzag stitch, right or Reinforce seams, clean finish, stretch sewing. - Page 12 № Name Stitch Description Elastic overcast Seam and overcast stretch fabrics in one step. Overlock Seam and overcast in one step, patch, hem. Closed overlock Seam and overcast in one step, patch, hem. Stretch knit overlock Seam and overcast stretch fabrics in one step. Closed overlock blind Create decorative overlock blindhem for stretch fabrics.
-
Page 13: Quilt Stitches
Quilt Stitches Needle Art Stitches Satin Stitches Decorative Stitches... -
Page 14: Optional Feet Stitches
Optional Feet Stitches Beading stitch, For sewing on pearls, beads etc. Requires optional Beading foot (part number 820605–096) 4–6mm Candlewicking Create the look of hand embroidered French knots. Requires optional Candlewicking Foot for IDT™ system (part number 820613–096). Candlewicking Create the look of hand embroidered French knots. Requires optional Candlewicking Foot for IDT™... -
Page 15: Connect The Power Cord And Foot Control
2. Remove all outer packing material and the plastic bag. Note: Your PFAFF® creative™ 1.5 machine is adjusted to provide the best stitch result at normal room temperature. Extreme hot and cold temperatures can affect the sewn result. -
Page 16: Pack Away After Sewing
Pack Away After Sewing 1. Switch the main switch off. 2. Unplug the cord from the wall socket and then from the machine. 3. Unplug the foot control cord from the machine. Wind the cord around the foot control for easy storage. -
Page 17: Spool Pins
Spool Pins Your machine has two spool pins, a main spool pin and an auxiliary spool pin. The spool pins are designed for all types of thread. The main spool pin is adjustable and can be used both in a horizontal position (the thread reels off the spool) and a vertical position (the thread spool rotates). -
Page 18: Threading The Machine
Threading the Machine Make sure that the presser foot is raised and the needle is in its highest position. 1. Place a felt pad and the thread spool on the spool pin and fit a spool cap of the right size and direction. Note: Hold thread with both hands to prevent it from slacking while threading. -
Page 19: Threading For Twin Needle
Threading for Twin Needle Replace the sewing needle with a twin needle. Make sure that the presser foot is raised and the needle is in its highest position. 1. Thread the first thread as described on previous page. 2. Thread the needle eye by hand from front to back. 3. -
Page 20: Bobbin Winding
Bobbin Winding Winding From Horizontal Position 1. Place the felt pad and thread spool on the spool pin in horizontal position. Slide on a spool cap of the right type and direction. 2. Place the thread under the thread guide (A) from right to left. -
Page 21: Inserting The Bobbin
(E). 4. Replace the bobbin cover. IDT™ System (Integrated Dual Feed) For sewing any fabric precisely, the PFAFF® creative™ 1.5 machine provides the ideal solution: the integrated dual feed, IDT™ system. As on industrial machines, the IDT™... -
Page 22: Universal Needle
Disengaging the IDT™ System Raise the presser foot. Hold the IDT™ system with two fingers at the ribbed ankle. Pull the IDT™ system down, then pull it away from you to release the IDT™ system slowly upward. Needles The sewing machine needle plays an important role in successful sewing. -
Page 23: Wing Needle
Wing Needle The wing needle has wide wings on the side of the needle to poke holes in the fabric when sewing entredeux and other hemstitches on natural fiber fabrics. Note: Wing needle is not included with the machine. Wing needle. Note: Change the needle often. -
Page 24: Presser Foot Pressure
Presser Foot Pressure The presser foot pressure has been pre-set to the standard value ”N”. In most cases, you do not need to adjust the presser foot pressure. For specialty techniques, or when sewing on very light or heavy fabric, adjusting the pressure can improve the result. For very light fabrics, turn the dial to a lower number. -
Page 25: Usb Port
USB Embroidery Stick Delivered with your machine is a USB embroidery stick with embroidery designs and PFAFF® creative™ 1.5 embroidery collection booklet. Use the stick to store designs and embroidery fonts, or to move files between the computer and sewing machine. -
Page 26: How To Update Your Machine
PFAFF® dealer for updates and upgrades for your machine and owner’s manual. Updating Instructions • Go to the PFAFF® web site at www.pfaff.com to find information about available updates. • Follow the update wizard to prepare your USB embroidery stick for the update. -
Page 27: Buttons And Indicators
Buttons and Indicators 1. Needle stop up/down button 9. Sequencing/embroidery edit 17. Load button with indicator mode button 18. Save personal stitch or sequence 2. Tie-off button 10. Alphabet mode, sequencing button button 3. Thread snips button with 19. Delete button indicator 11. -
Page 28: Direct Selection Buttons
Reverse Button with Indicator In embroidery mode, use the + and - buttons to step between different color blocks forward/backward, to For permanent reverse, press the button before starting activate monochrome embroidery, or to adjust the width to sew. The reverse indicator will be lit and the machine of a design. -
Page 29: Speed Control Lever
Wheel Buttons OK Button Use these buttons to move around the graphic display. The wheel center button, OK, is used to confirm your The wheel has up and down arrow buttons, left and selections or clear messages on your screen. right arrow buttons and a center button, OK, to confirm your selections. -
Page 30: Settings Menu
Settings Menu In the settings menu, you can adjust the machine settings, sound settings and screen settings. Open by pressing the settings menu button and select the setting you wish to adjust by pressing the up and down arrow buttons on the wheel. Use the left and right arrow buttons to adjust the values. -
Page 31: Audible Alarm
When turning on the machine with this setting activated and for every stitch selection that is not a straight stitch, a pop-up informs you that the machine is set to straight stitch. Note: Twin needle and stitch width safety cannot be used at the same time. - Page 32 Park Position When you have finished your embroidery, remove the hoop and open the settings menu. Use the wheel to select the park position option and press OK. It is very important to remove the hoop before selecting park position, otherwise it may be damaged.
-
Page 33: Sewing Mode
3 Sewing Mode Sewing mode is the first view on the graphic display after you turn on the machine. Your selected stitch will be shown in real size in the stitch field. Here you will find all the basic information you need to start sewing. This is also the menu where you adjust the settings of your stitch. -
Page 34: Stitch Adjustments
Stitch Adjustments Your machine will automatically select optimal settings for each stitch. You can make adjustments to every stitch as desired. Adjusted settings only affect the selected stitch and will be reset to default when another stitch is selected. Adjusted settings are not automatically saved when the machine is turned off. -
Page 35: Thread Tension
Thread Tension For the best stitch appearance and durability, make sure the needle thread tension is correctly adjusted, i.e. for general sewing, the threads evenly meet between the two fabric layers. Your sewing machine electronically Correct tension sets a thread tension for the selected stitch. Depending on the fabric, batting, thread etc, the tension may need to be adjusted. -
Page 36: Sewing Techniques
Sewing Techniques Three-Step Zigzag Stitch Three-step zigzag stitch is used to overcast raw edges. Make sure the needle pierces the fabric on the left side and overcasts the edge on the right side. The stitch can also be used as an elastic stitch to allow seams to stretch when sewing knit fabrics. - Page 37 Manual Buttonhole To sew a buttonhole longer than 25mm, use presser foot 1. Lower the buttonhole lever and presser foot. Press start/stop button or the foot control to start sewing while pushing the buttonhole lever away from you until the machine starts sewing a straight stitch backwards.
-
Page 38: Sew On A Button
Note: Use the multi-purpose tool to create a thread shank for your button. You can also use a sew-on button foot, available as an optional accessory at your local authorized PFAFF® dealer. Darning Darning a small hole or a tear before it becomes larger can save a garment. -
Page 39: Handlook Quilting
Handlook Quilting A quilt usually consists of three layers, two layers of fabric with a layer of batting sandwiched between. 1. Baste the completed quilt top to the batting and backing. 2. Thread the needle with an invisible (monofilament) thread. Use needle size 90 and lightweight, soft cotton (60 wt or lighter) thread in the bobbin. -
Page 40: Blindhem Stitch
2. Attach the optional Open Toe Free-Motion foot. Disengage the IDT™ system and lower the feed dogs. 3. Begin by pin basting your quilt through all layers with safety pins, starting from the center of your quilt and working out. Place a pin every 6-8 inches (15-20 cm). -
Page 41: Sewing In Zippers
Sewing in Zippers There are different ways to sew in zippers. Follow the directions included with your pattern for best results. For all types of zippers it is important to sew close to the teeth of the zipper. The zipper foot 4 can be snapped to the presser foot bar on the left or right, depending on how you will insert your zipper. -
Page 42: Sequencing
4 Sequencing The sequencing function on your machine makes it possible to combine stitches and letters into sequences. You can add up to 60 stitches and/or letters in a sequence. Save your sequence on your machine; reload and sew any time you like. All stitches in your sewing machine can be used for sequencing except for buttonholes, darning stitch, button sewing and bar tack stitches. -
Page 43: Select Character Set And Font
Select Character Set and Font Press the - or + buttons just to the right of the character set indicator (3) to change character set between upper or lower case, normal or special letters and symbols. Press the - or + buttons just to the right of the font indicator (4) to change fonts. -
Page 44: Load Sequence
Load Sequence Loading your sequence works just like in sewing mode, see page 35. To load your sequence, press the load button. Note: When loading a sequence into sewing mode, the value displayed for the sequence will be the letter M. Sewing a sequence To sew the sequence, return to sewing mode by pressing sewing mode button, the start/stop button or by... -
Page 45: Embroidery Preparations
Embroidery Collection Page through the PFAFF® creative™ 1.5 embroidery collection booklet, found as a PDF-file on the USB embroidery stick, for an overview of the available designs and embroidery fonts. The design number,... -
Page 46: Download Backup Designs
All creative™ 1.5 designs and other files from the USB stick are also available on our website for backup. Go to PFAFF® website at www.pfaff.com, click on Support and select creative™ 1.5 . When downloading the files you will be asked to enter a code. Enter number:... -
Page 47: Attach Embroidery/Free-Motion Foot 6
Attach Embroidery/Free-Motion Foot 6 1. Turn off the power switch to prevent accidents. 2. Turn the hand wheel toward you until the needle is at its highest point. 3. Disengage the IDT™ system and raise the presser foot. 4. Remove the presser foot and holder by removing the presser foot screw (A). -
Page 48: Attach/Remove The Hoop
Attach/Remove the Hoop Slide the hoop onto the embroidery arm from front to back until it clicks into place. To remove the hoop from the embroidery arm, press the grey button on the hoop connection assembly and slide the hoop towards you. -
Page 49: Embroidering
6 Embroidering In embroidery mode you can adjust and stitch out designs. You need to have the embroidery unit connected to your machine to enter embroidery mode. After loading a design there are two views available in embroidery mode - stitch-out and edit. Embroidery Stitch-Out View 1 1. -
Page 50: Embroidery Stitch-Out
Color List All colors in the loaded design are shown in the order they will be embroidered. Each listed color shows order, name and thread type. Use the up and down arrow buttons to view all of the colors in the list. Embroidery Stitch-Out Load a Design This machine has 15 built-in embroidery designs and 86... -
Page 51: Embroidery Text Editor
PFAFF® dealer. Depending on the size of the design, some hoops may not be available for selection and the machine will beep. -
Page 52: Hoop Positions
Note: If you try to start embroidering and the hoop you have selected is not the same as the hoop attached to the embroidery unit, a pop-up will appear to inform you of this. Attach the correct hoop or select another hoop in the list. Hoop Positions Open the settings menu to choose between different hoop positions. -
Page 53: Orbit To Check Position
Orbit to Check Position Orbiting can be used to trace the design area. Press the first row + button to move the hoop so the needle is placed in the upper left corner of where the design will be embroidered. Each time you press the + button the hoop will move to view all corners of the design. -
Page 54: Getting Started Embroidering
Getting Started Embroidering 1. Clear sufficient space to accommodate movement of the embroidery arm and the hoop. 2. Make sure the machine is turned off and slide the embroidery unit onto the free arm of the machine until it plugs firmly into the socket. Turn on the machine. -
Page 55: Embroidery Edit
Embroidery Edit To adjust your design, press the embroidery edit button. When you press the stitch-out button, the machine will switch to embroidery stitch-out. Note: When you press the start/stop button or foot control, machine will automatically change to embroidery stitch out view and start stitching. -
Page 56: Mirroring
Mirroring Use the mirroring buttons to mirror the design end to end or side to side. The icons will appear when these buttons are pressed. Note: The P icon will mirror according to this setting. Common Embroidery Pop-Ups Embroidery Unit Calibration When the embroidery unit is attached, a pop-up asks you to remove the hoop and clear the machine area for calibrating the embroidery arm. - Page 57 Stop Command in Design This pop-up will appear when there is a programmed stop in the design. The machine will stop. Press OK to confirm and continue embroidering.
-
Page 58: Maintenance
7 Maintenance Cleaning the Machine To keep your sewing machine operating well, clean it often. No lubrication (oiling) is needed. Wipe the exterior surface of your machine with a soft cloth to remove any dust or lint built up. Wipe the graphic display with a clean, soft and damp cloth. -
Page 59: Cleaning Under The Bobbin Area
Note: Do not blow air into the bobbin case area. The dust and lint will be blown into your machine. Note: When using the optional accessory PFAFF® Embroidery Cutwork Needles, it is necessary to clean the bobbin area after each embroidered design/project. -
Page 60: Troubleshooting
In this troubleshooting guide you will find solutions to the problems you may have with your machine. For further information please contact your local authorized PFAFF® dealer who will be happy to help you. General Problems Bobbin alarm does not work? Clean lint from bobbin area and use only the bobbins approved for this model. -
Page 61: Bobbin Thread Breaks
Bobbin Thread Breaks Did you insert the bobbin properly? Check the bobbin thread. Is the needle plate hole damaged? Change the needle plate. Is the bobbin area clean? Clean lint from bobbin area and use only the bobbins approved for this model. Is the bobbin wound correctly? Wind a new bobbin. -
Page 62: Technical Specification
Have your sewing machine serviced regularly by your local authorized PFAFF® dealer! If you have followed this trouble shooting information and still have problems, take your sewing machine to your dealer. If there is a specific problem, it is a great help to test sew with your thread on a scrap of your sewing fabric and bring it to your dealer. -
Page 63: Index
Index Accessories..............8 Darning..............38 Accessory Tray ............7 Decorative Stitches............ 13 Adjust Text and Stitches ..........43 Delete a Stitch or Letter in a Sequence ......43 alphabet mode, sequencing........51 Delete Button............28 Alphabet Mode, Sequencing ......... 28, 42 Design Height............ - Page 64 Parts of the Embroidery Unit ........8 Personal Stitch ............35 Presser Feet ..............9 IDT™ system........21–22, 33, 38, 54 Presser Foot Lift............24 Info Button ............... 28 Presser Foot Pressure ..........24 Inserting the Bobbin ..........21 Quilt Stitches ............13 Language ..............
- Page 65 The Embroidery Design has Puckered ......61 The Embroidery Design is Distorted......61 The Machine Does Not Feed or Feeds Irregularly ..61 The Machine Skips Stitches........60 The Machine Will Not Embroider ......61 The Seam Has Uneven Stitches ........61 Thread Cutter ............
-
Page 67: Intellectual Property
User’s Guide. Consult your local Authorized PFAFF® retailer, and be sure to visit our website at www.pfaff.com for the latest updates of the software and the User’s Guide. - Page 68 www.pfaff.com...
Need help?
Do you have a question about the creative 1.5 and is the answer not in the manual?
Questions and answers