Table of Contents
Advertisement
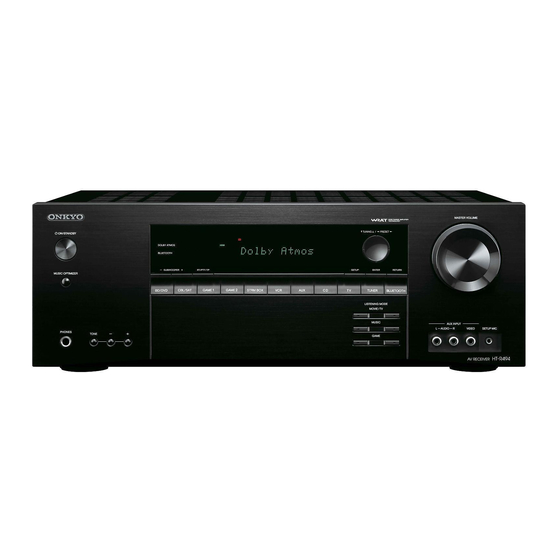
HT-R494
AV RECEIVER
Basic Manual
This manual includes information needed when
starting up and also instructions for frequently
used operations. The Advanced Manual is
published on the web for ecological reasons and
has more detailed information and advanced
settings.
Advanced Manual
found here
En
http://www.onkyo.com/manual/htr494/adv/en.html
Advertisement
Table of Contents

Subscribe to Our Youtube Channel
Related Manuals for Onkyo HT-R494


Summary of Contents for Onkyo HT-R494
- Page 1 HT-R494 AV RECEIVER Basic Manual This manual includes information needed when starting up and also instructions for frequently used operations. The Advanced Manual is published on the web for ecological reasons and has more detailed information and advanced settings. Advanced Manual found here http://www.onkyo.com/manual/htr494/adv/en.html...
-
Page 2: Table Of Contents
● Advanced Speaker Connection 1 ・ Part names and functions of the remote controller ..11 OSD is not displayed when the input selector is "BLUETOOTH". ● Connecting and Operating Onkyo RI Components 2 ・ Display ................12 ● Troubleshooting 2 Bluetooth ... -
Page 3: Front Panel
(European, Australian and Asian models) Front Panel Cursor buttons, l TUNING j button, zON/STANDBY button: Turns the unit on or into PRESET AUX INPUT VIDEO/AUDIO jacks: A video camera or standby mode. button and ENTER button: Move the cursor and such other device is connected. -
Page 4: Rear Panel
Power cord corresponds with the "VCR" input selector. RI REMOTE CONTROL jack: An Onkyo product with RI SUBWOOFER jack : A subwoofer with built-in amplifier If your TV does not support ARC, you need connection F in addition to ¼... -
Page 5: Step 1: Connections
Step 1: Connections Connecting the TV and Players Before Start Connection to TV ● Connect this unit between the TV and Connect the "to TV" jack and the HDMI IN player. jack of the TV with a HDMI cable. This is ●... -
Page 6: Connection With A Player That Has A Hdmi Jack
Step 1: Connections Connection with a player that has a HDMI jack Connecting the AM/FM Antenna Connect to the "BD/DVD", "CBL/SAT", "GAME 1", and "STRM BOX" jacks using a HDMI cable. Connect the equipment to the corresponding jack, for example a Blu-ray Connect the antennas to listen to AM/FM broadcast. -
Page 7: Connecting Speakers
Step 1: Connections Connecting Speakers Speaker layout Center HEIGHT RIGHT HEIGHT LEFT "( Front & Height R Front & Height L FRONT RIGHT FRONT LEFT & " 1/2˝-5/8˝ 3/8˝-1/2˝ (12-15 mm) (10-12 mm) " # Front speakers Center speaker % & Surround speakers Subwoofer ( ) Height speakers Front &... -
Page 8: Instructions On How To Connect Speakers
Step 1: Connections Instructions on how to connect speakers When using commercially available banana plugs: tighten the speaker terminals to the end and then insert the banana plugs. Do not insert the core of speaker cable 2 speaker cables are required to connect each Front directly into the hole for banana plug of speaker terminal. -
Page 9: Step 2: Setting Up
Step 2: Setting Up Operation: Use the remote controller of this unit to 1� Place the speaker setup microphone� operate the menus shown on the TV screen. To display the Before starting the procedure, refer to the figure and Turning the Power On guidance, you need to make HDMI connection between place the supplied speaker setup microphone at the... -
Page 10: Hdmi Setup
After that, follow the guidance displayed on the TV the HDMI Standby Through function is enabled. screen to operate the unit. To proceed to the next RIHD is a name for the linked system function of Onkyo's CEC compliant ¼ products. -
Page 11: Step 3: Playing Back
Step 3: Playing Back z RECEIVER button: Turns the unit on or into standby Part names and functions of the remote mode. controller Basic Operations REMOTE MODE/INPUT SELECTOR buttons: Switch the input to be played. Furthermore, by registering a particular remote control code to a button, you can switch the remote control mode to operate other equipment by pressing that button. -
Page 12: Display
Step 3: Playing Back Display ● Due to the characteristics of Bluetooth wireless technology, the sound produced on this unit may slightly Bluetooth ® be behind the sound played on the Bluetooth-enabled device. ● The on-screen displays are not displayed when the You can wirelessly enjoy music files stored in a smartphone OSD language is set to Chinese. -
Page 13: Quick Setup Menu
Step 3: Playing Back main unit or CH +/− on the remote controller. ● This setting is not possible during MUTING or when using headphones. Quick Setup Menu ● To delete a preset station, after selecting the preset A/V Sync: If the video is behind the audio, you can station you want to delete, press MEMORY on the delay the audio to offset the gap. -
Page 14: Other Useful Functions
Step 3: Playing Back To spread the width of the sound field to the left and player and CD player. This function is effective when an right, set to "On". To concentrate sound in the center, set input with audio only has been selected (CD, TUNER or Other useful functions to "Off". -
Page 15: Troubleshooting
After that, turn the unit on again. If "NG" appears, How to reset: unplug the power cord immediately and contact your Onkyo dealer. 1� While holding down CBL/SAT on the main unit (note that There’s no sound, or it’s very quiet�... -
Page 16: Specifications
Others Specifications Bluetooth Section ● HDMI Input Communication system BD/DVD, CBL/SAT, GAME 1, STRM BOX Bluetooth Specification version 2.1 +EDR (Enhanced Data Rate) Amplifier Section Output Maximum communication range HDMI OUT (to TV) Line of sight approx. 15 m () Rated Output Power (North American) Video Resolution Frequency band... -
Page 17: Table Of Display Resolutions
Others Table of display resolutions Refer to the following table for information about the image formats and resolutions output by this unit in response to input signals. HDMI Output Input 1080p/24 1080p 1080i 720p 480p/576p 480i/576i 1080p/24 1080p ... -
Page 18: License And Trademark Information
Direktiv 1999/5/EC. – Limits for harmonic current emissions – Hér með lýsir Onkyo Corporation því yfir að varan HT-R494 er í samræmi – Limitation of voltage changes, voltage For DTS patents, see http://patents.dts.com. Manufactured under license from við... - Page 19 En-19...
-
Page 20: Supplied Accessories
(Hong Kong) For Product Support Team Only: without prior notice. Unit 1033, 10/F, Star House, No 3, Salisbury Road, 1-800-229-1687 Visit the Onkyo web site for the latest update. Tsim Sha Tsui Kowloon, Hong Kong. http://www.us.onkyo.com/ Tel: 852-2429-3118 Fax: 852-2428-9039 http://www.hk.onkyo.com/...
Need help?
Do you have a question about the HT-R494 and is the answer not in the manual?
Questions and answers