Table of Contents
Advertisement
WARNING:
If the information in these instructions is not
followed exactly, a fire or explosion may result causing property
damage, personal injury or death.
-- Do not store or use gasoline or other flammable vapors and
liquids in the vicinity of this or any other appliance.
-- WHAT TO DO IF YOU SMELL GAS
• Do not try to light any appliance.
• Do not touch any electrical switch; do not use any phone in your
building.
• Immediately call your gas supplier from a near by phone.
Follow the gas supplier's instructions.
• If you cannot reach your gas supplier, call the fire department.
-- Installation and service must be performed by a qualified
installer, service agency, or the gas supplier.
Installation & Operation
Manual
Models: 502 - 2072
WARNING:
This manual supplies information for the
installation, operation, and servicing of the
appliance. It is strongly recommended that this
manual and the Copper-fin
Manual be reviewed completely before proceeding
with an installation. Perform steps in the order
given. Failure to comply could result in severe
personal injury, death, or substantial property
damage.
Save this manual for future reference.
CPX-I-O Rev B
2
Pool Heater Service
Advertisement
Table of Contents

Related Manuals for Lochinvar COPPER-FINN2 2072


Summary of Contents for Lochinvar COPPER-FINN2 2072
- Page 1 WARNING: If the information in these instructions is not followed exactly, a fire or explosion may result causing property damage, personal injury or death. -- Do not store or use gasoline or other flammable vapors and liquids in the vicinity of this or any other appliance. -- WHAT TO DO IF YOU SMELL GAS •...
-
Page 2: Table Of Contents
HAZARD DEFINITIONS ... 2 PLEASE READ BEFORE PROCEEDING ... 3 SAFETY INFORMATION ... 4 THE COPPER-FIN -- HOW IT WORKS ... 5-7 RATINGS ... 8 1. DETERMINE UNIT LOCATION Location of Unit ... 9 Indoor Clearances from Combustible Construction ... 9 Non-Combustible / Combustible Flooring ... -
Page 3: Please Read Before Proceeding
Please read before proceeding Special instructions This is a gas appliance and should be installed NOTICE by a licensed electrician and/or certified gas supplier. Service must be performed by a qualified service installer, service agency or the gas supplier. WARNING If the information in these instructions is not followed exactly, a fire or explosion may result causing property damage, personal injury, or death. -
Page 4: Safety Information
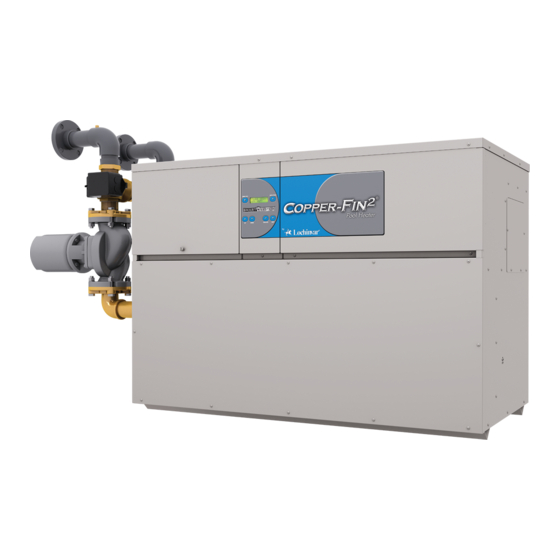
Please read before proceeding Safety information Owner warning – The information contained in this manual is intended for use by qualified professional installers, service technicians, or gas suppliers. Consult and follow all local Building and NOTICE Fire Regulations and other Safety Codes that apply to this installation. - Page 5 The Copper-fin - How it works... Heat exchanger The heat exchanger allows system water to flow through specially designed tubes for maximum heat transfer. headers and copper fined tubing are encased in a jacket that contains the combustion process. Heat exchanger access cover The heat exchanger access cover is a galvanized steel door which allows access for service, maintenance, and removal of the heat exchanger from inside the combustion chamber.
-
Page 6: The Copper-Fin - How It Works
The Copper-fin - How it works... Models 502 - 752 Front View Models 502 - 752 Right Side (inside unit) Models 502 - 752 Rear View Models 502 - 752 Left Side (inside unit) Installation & Operation Manual... - Page 7 The Copper-fin - How it works... Models 992 - 2072 Front View Models 992 - 2072 Right Side (inside unit) (continued) Models 992 - 2072 Rear View Models 992 - 2072 Left Side (inside unit) Installation & Operation Manual...
-
Page 8: Ratings
Ratings Model Number Appliance Water Note: Change “N” to Content Gallons “L” for L.P. gas models. CPN0502 CPN0652 CPN0752 CPN0992 CPN1262 CPN1442 CPN1802 CPN2072 Maximum allowed working pressure is located on the rating plate. NOTICE Notes: 1. Copper-fin pool heaters require special gas venting. Use only the vent materials and methods specified in the Copper-Fin Pool Heater Installation and Operation Manual. -
Page 9: Determine Unit Location
Determine unit location Location of unit This unit meets the safe lighting performance criteria with the gas manifold and control assembly provided, as specified in the ANSI standards for gas-fired units and ANSI Z21.10.3/ CSA 4.3 - latest edition. 1. Maintain all clearances from combustible construction when locating appliance. -
Page 10: Location
Determine unit location Anytime the inlet temperature drops below 45°F, the control turns on the pump contact. If the inlet temperature is below 37°F, and the unit is in the ON Mode, the fi rst stage will fi re. Location Locate indoor pool heaters in a room having a temperature safely above freezing [32°F (0°C)]. - Page 11 Determine unit location Figure 1-5_Outside Combustion Air Through Ducts 4. Outside Combustion Air - Using Direct Venting With this option, you can connect combustion air vent piping directly to the unit. See the information under Direct Venting starting on page 26 for specific information regarding this option.
- Page 12 Determine unit location Exhaust fans Any fan or equipment which exhausts air from the mechanical room may deplete the combustion air supply and/or cause a down draft in the venting system. Spillage of flue products from the venting system into an occupied living space can cause a very hazardous condition that must be immediately corrected.
-
Page 13: Venting
Venting Identify your appliance’s vent system: This manual covers venting requirements for CAT I models and CAT IV vent materials. Be sure to correctly identify the type of vent system your appliance requires before proceeding. CP (N,L) 0502 CP (N,L) 0652 CP (N,L) 0752 CP (N,L) 0992 CP (N,L) 1262... -
Page 14: Vent System Options
Venting Vent system options: This option uses a vertical rooftop flue termination with air supplied from the equipment room - see page 16. CONVENTIONAL NEGATIVE DRAFT VENTING This option uses a vertical conventional vent for flue products with air supplied by a pipe from the sidewall or rooftop - see page 19. -
Page 15: General Venting Information
Venting (continued) General information You must supply adequate combustion and ventilation air to this unit. You must provide minimum clearances for the vent terminal from adjacent buildings, windows that open, and building openings. Follow all requirements set forth in the latest edition of the National Fuel Gas Code, ANSI Z223.1, in Canada, the latest edition of CAN/CGA Standard B149 Installation Code for Gas Burning Appliances and Equipment or applicable local building codes. -
Page 16: Conventional Negative Draft Venting
Venting Conventional negative draft venting Before installing a venting system, follow requirements found in the General Venting section. NOTICE This option uses Type-B double-wall flue outlet piping. The blower brings in combustion air. The buoyancy of the heated flue products cause them to rise up through the flue pipe. The flue outlet terminates at the rooftop. Negative draft The negative draft in a conventional vent installation must be within the range of 0.02 to 0.08 inches w.c. -
Page 17: Vertical Vent Termination Clearances And Location
Venting (continued) 4. Turn on clothes dryers and any other appliances not connected to the common venting system. Turn on any exhaust fans, such as range hoods and bathroom exhausts, so they will operate at maximum speed. Do not operate a summer exhaust fan. 5. - Page 18 Venting Figure 2-1_Vent Termination from Peaked Roof - 10 ft. or Less From Ridge Vent terminations are not shown in FIG.’s 2-1 thru 2-4. Make sure all vertical vents are installed with vent NOTICE terminations recommended by the vent manufacturer. Figure 2-3_Vent Termination from Flat Roof - 10 ft.
-
Page 19: Vertical Directaire Venting
Venting (continued) Vertical DirectAire ™ venting - Before installing a venting system, follow requirements found in the General Venting section. NOTICE The Vertical DirectAire™ vent system is the same as the Conventional Negative Draft vent system, except it pulls combustion air from the outdoors through a separate air inlet pipe. Follow all requirements in the Conventional Negative Draft Venting section on page 16. -
Page 20: Vertical Rooftop Air Inlet
Venting To prevent recirculation of flue products from an adjacent vent cap into the combustion air inlet, follow all applicable clearance requirements in the latest edition of the National Fuel Gas Code and/or CAN/CGA-B149 Installation Code and instructions in the Installation and Operation Manual. - Page 21 Venting (continued) 12" Figure 2-8_Vertical DirectAire™ Installation w/Rooftop Combustion Air Inlet MODEL 1262 1442 1802 2072 *The SVK kits include a DV box adapter and sidewall air inlet cap. The VDK kits include a DV box adapter and a rooftop air inlet cap. Installation &...
-
Page 22: Sidewall Venting
Venting Sidewall venting - see page 14. Before installing a venting system, follow all requirements found in the General Venting NOTICE section. This option uses a powered vent assembly which pulls the flue products out of the stack. This fan generates a negative draft at the unit. - Page 23 Venting (continued) Terminate the venting system at least 3 feet (0.9 m) above any forced air inlet within 10 feet (3.05 m). Terminate the venting system at least 4 feet (1.2 m) below, 4 feet (1.2 m) beside, or 1 foot (30cm) above any door, window, or gravity air inlet into any building.
-
Page 24: Sidewall Venting
Venting Do not combine the flue from this unit with the vent from any other appliance. Do not combine flues from WARNING multiple appliances into a common vent. The flue from this unit must be a dedicated stack. Connect the flue vent directly to the flue outlet opening on the top of the unit. Make the connections from the unit vent to the outside stack as direct as possible with no reduction in diameter. -
Page 25: Horizontal Directaire Venting
Venting (continued) Horizontal DirectAire™ venting (Powered Venting) Before installing a venting system, follow all requirements found in the General Venting section. NOTICE The Horizontal DirectAire™ vent system is the same as the Sidewall Venting system, except it pulls combustion air from the outdoors through a sidewall air inlet. Follow all requirements in Sidewall Venting section on page 22. The Horizontal DirectAire™... -
Page 26: Direct Venting
Venting Direct venting - see page 14. Before installing a venting system, follow all requirements found in the General Venting section. NOTICE This option uses sealed AL29-4C vent materials for the flue outlet piping and separate combustion air inlet piping. This system terminates both the flue and combustion air inlet in the same pressure zone. - Page 27 Venting (continued) Masonry chimney installation Do not use a standard masonry chimney to directly vent the combustion products from this unit. To use a masonry chimney, the chimney must use a sealed, corrosion-resistant liner system. Sealed, corrosion-resistant liner systems (single-wall, double-wall, flexible, or rigid) must be rated for use with a high efficiency, positive pressure vent system. Corrosion-resistant chimney liner systems are typically made from a high grade stainless steel such as AL29-4C.
- Page 28 Venting Length of air inlet pipe The installed length of air inlet pipe from the unit to the outside air inlet cap must not exceed 50 equivalent feet (15.2 m). Subtract 5 feet (1.5 m) of equivalent length for each 90° elbow. Subtract 2.5 feet (0.7 m) of equivalent length for each 45° elbow. Do not exceed the limits for the combustion air inlet piping lengths.
- Page 29 Venting (continued) 2. For PVC, CPVC, ABS, dryer vent, or flex duct air inlet piping, use a silicone sealant to ensure a proper seal at the unit inlet and the air inlet cap. 3. For Dryer vent or flex duct, also use a screw-type clamp to attach the inlet vent material to the unit inlet and the air inlet cap. Properly sealing the air inlet pipe ensures that combustion air will be free of contaminates and supplied in proper volume.
-
Page 30: Outdoor Installation
Venting Outdoor installation Before installing a venting system, follow all requirements found in the General Venting section. NOTICE Units are self-venting and can be used outdoors when installed with the optional outdoor cap. This cap mounts directly to the top of the unit and covers the flue outlet and combustion air inlet openings. -
Page 31: Gas Connections Connecting To Gas Supply
Gas connections Connecting to gas supply Verify that the appliance is supplied with the type of gas specified on the rating plate. This appliance is configured for operation up to 4,500 feet altitude. Consult factory for installations above 4,500 feet elevation. Inlet gas pressure: Measured at the inlet pressure tap on the appliance gas manifold. -
Page 32: Gas Train And Controls
Gas connections 2. Use new, properly threaded black iron pipe free from chips. If you use tubing, make sure the ends are cut square, deburred and clean. Make all tubing bends smooth and without deformation. Avoid flexible gas connections. Internal diameter of flexible lines may not provide unit with proper volume of gas. -
Page 33: Checking Gas Supply Pressure
Gas connections Combination gas valve/regulators equipped with integral vent limiters are not required to have vent or relief lines piped to the outdoors. The termination of the vent limited opening on the combination gas valve/regulator complies with the safety code requirements of CSD-1, CF-190(a) as shipped from the appliance manufacturer without the installation of additional vent lines. -
Page 34: Water Connections
Water connections Install piping from the filter system to the pool heater as shown in the pool heater piping diagrams. See Figures 34 - 38. Minimum pipe diameter to and from the installed pool heater to the filter system piping on models 502 - 752 is 2" and on models 992 - 2072 Btu/hr the minimum is 2-1/2". -
Page 35: Minimum Pump Performance
Water connections 6 - 90° elbows 2 - ball valves 2 - unions ... 1 - cold water tee Not more than 45 feet of straight pipe. For every elbow and tee in excess NOTICE of those shown above, deduct 5 feet from the maximum allowable straight pipe in the pool heater to the system circulating loop. -
Page 36: Piping Diagrams
Water connections Figure 4-3_Heater Within 15 feet of Pool Piping MODEL NO BYPASS PIPE SIZE CP (N,L) 502-752 2" MIN CP (N,L) 992-2072 2-1/2" MIN Figure 4-4_Heater Beyond 15 feet of Pool Piping AUTOMATIC BYPASS VALVE MODEL NO BYPASS PIPE SIZE CP (N,L) 502-752 2"... - Page 37 Water connections Figure 4-5_Cascaded heaters Within 15 feet of Perpendicular Pool Piping COPPER OR CPVC (SEE TABLE) MODEL NO BYPASS PIPE SIZE CP (N,L) 502-752 2" MIN CP (N,L) 992-2072 2-1/2" MIN Figure 4-6_Cascaded Heaters Beyond 15 feet of Pool Piping REQUIRED POOL RETURN...
- Page 38 Water connections Figure 4-7_Multi-stack frame - Cascaded heaters beyond 15 feet of pool piping MODEL NO BYPASS PIPE SIZE CP (N,L) 502-752 2" MIN CP (N,L) 992-2072 2-1/2" MIN PRIMARY LOCATION POOL SUPPLY LIMIT SENSOR POOL MEMBER TABLE 4A PIPE SIZING CHART NUMBER COMMON PIPE SIZE (MIN) OF UNITS...
-
Page 39: Pumped Automatic Bypass
Water connections Pumped Automatic Bypass This is a high efficiency pool heater which requires a special pumped bypass for proper operation. The bypass assembly supplied with the pool heater includes a pump and a 3-way mixing valve. All piping to connect the filter system to the pool heater is made directly to the bypass piping on the pool heater. -
Page 40: Relief Valve
Water connections Relief valve This pool heater is supplied with a relief valve(s) sized in accordance with ASME Boiler and Pressure Vessel Code, Section IV. The relief valve(s) is installed in the vertical position and mounted in the hot water outlet. Place no other valve between the relief valve and the pool heater. -
Page 41: Electrical Connections General Information
Electrical connections General information ELECTRICAL SHOCK HAZARD – For your WARNING safety, turn off electrical power supply before making any electrical connections to avoid possible electric shock hazard. Failure to do so can cause severe personal injury or death. A 120 VAC, 15 Amp, 1 ph, 60 Hz circuit is required for operation of the appliance controls. -
Page 42: Pool Heater Operating Control Module
Electrical connections Pool heater operating control module The operating control for the appliance is the SMART SYSTEM control module. It is located on the inside of the control panel, behind the front access door. Access to adjust the temperature set point and other user adjustable points is made through the Operator Interface located on the front access door. -
Page 43: Runtime Contacts
Electrical connections Low voltage connections 1. Route all low voltage wires through the knockouts on the left side of the heater, as shown in FIG. 5-3. 2. Connect low voltage wiring to the low voltage connection board as shown in FIG. 5-5 on page 44 of this manual and the heater wiring diagram. -
Page 44: Alarm Contacts
Electrical connections Alarm contacts The SMART SYSTEM control closes another set of contacts whenever the heater is locked out or the power is turned off. This can be used to turn on an alarm, or signal a Building Management System that the pool heater is down. Wiring of the cascade When wiring the heaters for Cascade operation, select one heater as the Leader. -
Page 45: Startup Pre-Start Checklist
Startup Pre-start checklist Before attempting to start the pool heater verify that the following items have been checked: 1. Verify proper location and installation of the pool heater. 2. Check gas piping and ensure the gas line is purged of all air. 3. -
Page 46: Check Thermostat Circuit(S)
Startup If freeze protection is not provided for the system, a low ambient temperature alarm is recommended for the equipment room. Damage to the pool heater by freezing is non-warrantable. 1. Pump Operation - MOST IMPORTANT - This pool heater is designed for continuous operation of the filter system pump when the burners are firing. -
Page 47: Operating Instructions
Startup (continued) Figure 6-2_Operating Instructions FOR YOUR SAFETY READ BEFORE OPERATING WARNING: If you do not follow these instructions exactly, a fire or explosion may result causing property damage, personal injury or loss of life. A. This appliance is equipped with an ignition device which automatically lights the burner. - Page 48 Startup Set clock The SMART SYSTEM control has a built-in clock that it uses for its night setback feature and for logging events. This clock must be set when the appliance is installed, and anytime the appliance has been powered off for more than one month. Use the following procedure to set the clock: Press and hold the MENU key (FIG.
-
Page 49: Operating Information General
Operating information General How the appliance operates The Copper-fin uses a copper finned tube heat exchanger to transfer heat from the flue products to the water. An electronic control module monitors various inputs to initiate a call for heat. The blower provides both primary and secondary air to the burner and forces the flue products out of the combustion chamber and into the vent system. - Page 50 Operating information The control monitors the temperature difference between the inlet and the outlet sensor. If this difference exceeds the first limit the control will turn off stages. If the temperature difference exceeds a second limit the control will shut the unit down.
- Page 51 Operating information Cascade When multiple appliances are installed, they can be wired together in a cascade sequence. A maximum of eight appliances can be controlled from a single control. In this application one appliance would be designated as the Leader control and all others would be designated as Member controls.
-
Page 52: Sequence Of Operation
Operating information Sequence of operation OPERATION 1. The high limit may require reset through the display before any action will take place. 2. Upon a call for heat the control turns on the unit pump. The flow switch and low water cutoff (if equipped) must close. 3. -
Page 53: Copper-Fin Control Module
Operating information Copper-fin Use the control panel (FIG. 7-1) to set temperatures, operating conditions, and monitor appliance operation. Figure 7-1_Control Panel - Operator Interface • Hold 5 seconds to enter code Input Mode (Menu Mode) • Press to move up one level in Menu Mode or to exit Menu Mode MENU/EXIT... -
Page 54: Access Modes
Operating information Access modes User The user can adjust the space heating target temperature and the tank target temperature (if a tank sensor is used) by using the UP and DOWN buttons (FIG. 7-1) at any time during normal operation. By entering the USER code (0704), the user can also change temperature units, time and date, and night setback settings. -
Page 55: Status Display Screens
Operating information Status display screens By using the Previous/Next (, ) arrow keys on the SMART SYSTEM display panel, you can navigate through the 11 display screens. Each screen will contain two (2) viewable items. The following is a description of the individual items and what they can display: Screen # Display Shows... - Page 56 Operating information By using the Previous/Next (, ) arrow keys on the SMART SYSTEM display panel, you can navigate through the 11 display screens. Each screen will contain two (2) viewable items. The following is a description of the individual items and what they can display: Screen # Display shows:...
-
Page 57: Owner Maintenance
Maintenance Maintenance and annual startup Table 8A_Service and Maintenance Schedules Service technician (see the following pages for instructions) General: • Address reported problems • Inspect interior; clean and vacuum if necessary; • Check for leaks (water, gas, flue, condensate) • Examine venting system •... -
Page 58: Flue Vent System And Air Piping
Maintenance Follow the service and maintenance procedures given throughout this manual and in component literature WARNING shipped with the appliance. Failure to perform the service and maintenance could result in damage to the appliance or system. Failure to follow the directions in this manual and component literature could result in severe personal injury, death, or substantial property damage. -
Page 59: Check Control Settings
Maintenance (continued) Check relief valve 1. Inspect the relief valve and lift the lever to verify flow. Before operating any relief valve, ensure that it is piped with its discharge in a safe area to avoid severe scald potential. Read Section 4 - Water Connections of the Copper-fin and Operation Manual before proceeding further. -
Page 60: Check Burner Flame
Maintenance Perform start-up and checks Start appliance and perform checks and tests specified in Section 6 - Start-up of the Copper-fin Installation and Operation Manual. Check burner flame Visually check main burner flames at each start-up after long shutdown periods or at least every six months. viewport is located on the burner mounting flange. -
Page 61: Review With Owner
Maintenance (continued) Inspect and clean the heat exchanger While burners are removed, check the heat exchanger surface for sooting. If present, heat exchanger must be cleaned and problem corrected. Proceed as follows. Remove gas manifold(s)/orifice assemblies as described in steps 1 through 5 in Burner Removal and Cleaning, page 60. -
Page 62: Connection Diagram
Connection diagram FIELD WIRING ALARM TO MONITORING DEVICE CONTACTS RUNTIME TO MONITORING DEVICE CONTACTS OPEN OPEN 3-WAY CLOSE CLOSE VALVE COMMON STAGE #1 CONNECT STAGE #2 TERMINAL STAGE #3 (LOUVER STAGE #4 RELAY) FIELD LOUVER PROVING SWITCH SUPPLIED PROVE LINE WIRING LOUVER RELAY COIL... -
Page 63: Connection Diagram
Connection diagram LT HARNESS L HARNESS R/BK R/BK W/BK 12 13 CONTROLLER O/BK IDENTIFICATION PLUG MODEL SPECIFIC CONSULT FACTORY NOTE: NUMBER OF GAS VALVES VARIES BY MODEL R Y R R Y R R/BKY R/BK LOW GAS STAGE #1 STAGE #1 STAGE #2 SWITCH BURNER... -
Page 64: Ladder Diagram
Installation & Operation Manual Ladder diagram WHERE POSSIBLE, SWITCHES ARE SHOWN WITHOUT UTILITIES (GAS, WATER OR ELECTRICITY) CONNECTED TO THE UNIT. AS SUCH, ACTUAL SWITCH STATES MAY VARY FROM THOSE SHOWN ON DIAGRAMS DEPENDING UPON WHETHER UTILITIES ARE CONNECTED OR A FAULT CONDITION IS PRESENT. - Page 65 Installation & Operation Manual Ladder diagram (continued) LBL20083 REV B...
- Page 66 Notes...
- Page 67 Notes...
-
Page 68: Revision Notes
Revision Notes: Revision A (ECO #C08226) initial release. Revision B (ECO #C08423) reflects updates made to images and text as a result of questions/requests from the field. CPX-I-O Rev B 7/11...
Need help?
Do you have a question about the COPPER-FINN2 2072 and is the answer not in the manual?
Questions and answers