
Subscribe to Our Youtube Channel
Related Manuals for Philips PicoPix PPX3614


Summary of Contents for Philips PicoPix PPX3614
- Page 1 Register your product and get support at www.philips.com/welcome PPX3614 User Manual...
-
Page 2: Table Of Contents
Setting up a Wireless Network (WLAN) Using the Wizard ................21 Digital Living Network Alliance (DLNA) ....21 7 Media Playback........22 Video playback ..............22 Photo Playback ..............23 Music Playback ..............24 Office Playback (YOZO Office) ........25 Managing Files ..............25 Philips · PPX3614... -
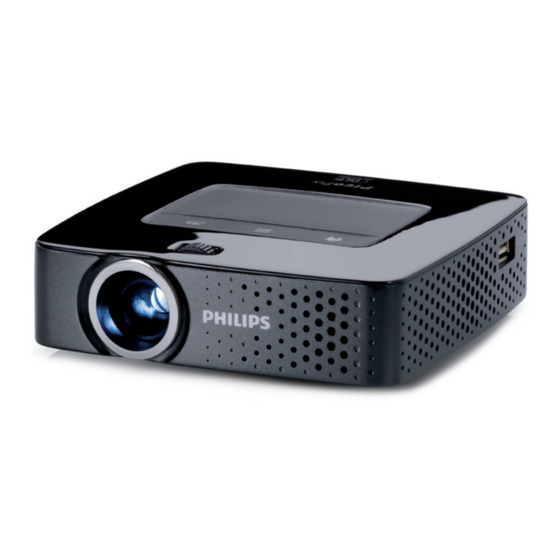
Page 3: Overview
Overview Dear Customer What's in the Box 1 – Remote Control Thank you for purchasing our Pocket Projector. 2 – PicoPix Projector We hope you enjoy your device and its many functions! 3 – Power supply About this User Manual 4 –... -
Page 4: General Safety Information
Do not allow liquids to enter into the device. Switch off the device and disconnect it from the mains supply if liq- uids or foreign substances end up inside the device. Have the unit inspected by a technical service depart- ment. Philips · PPX3614... -
Page 5: Power Supply
Power Supply Wireless Network (WLAN) Use only the enclosed power adapter (see chapter Appen- The functioning of security systems, medical equipment dix / Technical Data). Check whether the mains voltage of or sensitive devices can be disrupted by the transmis- the power supply matches the mains voltage available at sion power of the device. -
Page 6: Overview
9 ý – USB port for connection to a computer (data exchange) ‹ DC IN – Power supply port Bottom of the Device 1 – Pico Station connection socket 2 – Tripod socket 3 – Pico Station port Philips · PPX3614... -
Page 7: Pico Station
1 ý – USB port for a USB storage medium, DVB-T Bottom of the Device stick, mouse or keyboard. 1 – Tripod socket 2 – Lens Pico Station Front View 1 – PicoPix port (not included) 2 – Eject button The Pico Station docking station has its own battery, with which you can extend the replay time of the device. -
Page 8: Touchpad / Gestures
After tapping remove your finger from the touch- pad. The reaction occurs after you have lifted your fin- ger. The click is executed at the point where the cursor is located, even if the cursor is hidden. Philips · PPX3614... - Page 9 Software Keyboard 1 Click in the input field (see also Touchpad / Ges- tures, page 7) using the touchpad or a mouse. 2 The software keyboard appears.. 3 Using the touchpad or a mouse enter the text on the software keyboard. Overview...
-
Page 10: Remote Control
; – Fast-forward DVB-T keys z – Select previous channel y – Call electronic program guide { – Select the next channel Volume keys ¬ – Decrease the volume « – Mute the sound – Increase the volume Philips · PPX3614... -
Page 11: Overview Of The Menu Functions
Overview of the Menu Symbols in the Statusbar Functions 123456 1 After switching on the device the main menu appears. 2 Select the desired menu using the navigation keys À/Á. 3 Confirm with à. 4 By pressing the u key you will return to the main menu. -
Page 12: Initial Operation
The battery of the projector will not be charged while the projector is in use. Notice Operate via Pico Station The battery of the Pocket Projector is empty: Connect the Pico Station to use the Pocket Projector. Philips · PPX3614... -
Page 13: Using The Remote Control
2 Insert the new batteries into the battery compart- Using the Remote Control ment with the positive and negative poles as shown on the back of the remote control. Make sure the Point the remote control at the remote sensor on the polarities(+ and -) are aligned correctly. -
Page 14: Initial Installation
1 Use the navigation keys to select Set- tings. 2 Confirm with à. 3 Select with ¡/¢ Language. 4 Confirm with à. 5 Select the desired language with ¡/¢. 6 Confirm with à. 7 Exit with ¿. Philips · PPX3614... -
Page 15: Connect To The Playback Device
4 Connect to the Playback Device Only use the supplied cable or cables that are available Connecting to an iPhone/ as accessories to connect the projector. iPad/iPod Supplied cables HDMI cable Use the iPhone/iPad/iPod-HDMI cable (not supplied) to USB cable connect the projector to an iPhone/iPad/iPod. -
Page 16: Connecting To A Computer (Vga)
FULL HD 1920 x 1080 60 Hz this jack. Notice Screen Resolution You can obtain the best results with the 800¦×¦600 (60Hz) resolution. 4 Select Menu > Source and switch to VGA. Philips · PPX3614... -
Page 17: Connecting Using Component-Video (Ypbpr/Yuv) Cable
Connecting using Connecting to mobile multimedia devices Some video devices (e.g.: pocket multimedia players, ...) Component-Video (YPbPr/ require specific connection cables. There are either supplied with the device or acquired from the manufac- YUV) Cable turer of the multimedia device. Please note that only the original cables from the device manufacturer may func- Please use this type of connection to obtain the highest tion. -
Page 18: Directly Connecting Projector To Computer Using Wlan (Wifi Streaming)
– especially when using head- phones. This could lead to the risks of hearing damage. Before connecting the headphones, turn down the volume on the device. After connecting the headphones, increase the vol- ume to a comfortable level. Philips · PPX3614... -
Page 19: Memory
5 Memory Inserting a Memory Card Connecting USB Storage Medium 1 Connect the USB storage medium to the USB port 1 Insert a memory card with the contacts facing on the side of the device. upwards into the SD/MMC slot at the back of the device. -
Page 20: Connect To A Computer (Usb)
(if inserted) and the internal memory. 3 Connect the mini-USB port to the Pocket Projector and the USB socket to the computer. 4 A confirmation screen appears when the devices are connected successfully. Philips · PPX3614... -
Page 21: Wireless Network (Wlan)
6 Wireless Network (WLAN) 9 Modify the settings with ¡/¢. In a wireless network (Wireless Local Area Network, WLAN) at least two computers, printers or other addi- 10 Confirm with à. tional devices communicate with each other over radio The ¿ key takes you one step back in the menu. waves (high frequency waves). -
Page 22: Setting Up A Wireless Network (Wlan) Using The Wizard
9 Use ¡/¢ to select the desired wireless network.. tion manual for the device in question. 10 Confirm with à. 11 Activate Push Button Configuration on the WLAN access point. The WLAN access point and device connect automatically and create a WPA protected connection. Philips · PPX3614... -
Page 23: Media Playback
7 Media Playback 7 Use ¡/¢ to select the video file that you wish to Notice play. Navigation Keys All the keys shown are buttons on the remote control. Notice Best Settings for Optimal Use Read the informations on the best settings in the chapter settings (see also Settings, page 34) for optimal use of your device. -
Page 24: Photo Playback
The device saves the modified settings automatically. take a moment before the overview appears. 8 Use À/Á or ¡/¢ to select the image that you want to start the slide show with. 9 Press à to start the slide show. Philips · PPX3614... -
Page 25: Music Playback
1 Switch the device on using the on/off switch on the Notice side. Rotate the Image 2 After the initial screen the main menu appears. Using your thumb contact the touchpad and swipe with the forefinger in a circular manner to rotate an image (see also Touchpad / Gestures, page 7). -
Page 26: Office Playback (Yozo Office)
10 Press ¿ to end the display and return to the over- view. Managing Files Copy Files You can copy files back and forth from the internal 12 Confirm with à. memory to the connected USB storage medium or memory card. Philips · PPX3614... - Page 27 13 Use ¡/¢ to select the destination memory: SD 7 Use ¡/¢ to select the file that you want to delete. card, internal memory or USB storage medium. Notice 14 Confirm with à. No Files Found (0 files) Notice Only those files that are compatible with the Projector will be displayed.
-
Page 28: Digital Tv Playback
DVB-T stick of the device or remove the Definition Television (SDTV). High Definition device from the Pico Station (PPA7301). Television (HDTV) is not supported. If the DVB-T stick is being removed during playback you may have to restart the device. Philips · PPX3614... -
Page 29: First Playback
First Playback Scan Channels 14 Use the navigation keys to select Scan Channels. Notice 15 Confirm with à. Navigation Keys 16 Use the navigation keys to select OK. All the keys shown are buttons on the remote 17 Confirm with à. control. -
Page 30: Television
10 Press u to end playback and return to the main menu. During playback you can adjust the volume using ¬/ on the remote control. Press « or ¬ repeatedly to shut off the volume completely. Philips · PPX3614... -
Page 31: Android
9 Android Your Pocket Projector uses the Android operating sys- Installing Android-Apps tem. CAUTION! Calling Android Trusted Sources! Apps from third party sources may be mali- 1 Switch the device on using the on/off switch on the cious. Only use installation packets from side. - Page 32 Player in order to play Youtube videos. 1 Download the latest version of Adobe Flash Player installation package (flashplayer.apk) for Android. For further information visit www.philips.com/sup- port. 2 Save the package onto a memory card. 3 Insert the memory card into the device (see also Inserting a Memory Card, page 18).
-
Page 33: Adjust Browser Mode
Adjust Browser Mode 10 Use the navigation keys to select Settings. Change the browser mode to display websites contain- ing flash elements. 1 Switch the device on using the on/off switch on the side. 2 After the initial screen the main menu appears. 11 Confirm with à. - Page 34 Reset Browser Mode 1 Proceed as described in the adjust browser mode chapter (see also Adjust Browser Mode, page 32). 2 Use the navigation keys to select iPad. 3 Confirm with à. Philips · PPX3614...
-
Page 35: Settings
10 Settings 1 Switch the device on using the on/off switch on the Projection mode side. Front – Normal projection; the device is located in 2 After the initial screen the main menu appears. front of the projection surface/screen Rear – Rear projection; the device is located behind the projection surface;... - Page 36 Connect for the duration of the firmware update the power adapter. Information – Display free space in the internal mem- ory and information on the device (Capacity: / Free space: / Firmware version: / Device name: / Model:) Philips · PPX3614...
-
Page 37: Service
11 Service Care Instructions for the Battery deep discharge Battery When the battery is in deep discharge or the device is not used for a longer period, proceed as followed: The capacity of the battery diminishes with time. You 1 Connect the device to the power supply (see also can prolong the life of the battery if you observe the fol- Connect Power Supply / Charge Battery, page 11). -
Page 38: Cleaning
After the device has cooled down, you can continue playback. to be damaged or lost. DANGER! Power! Do nut unplug the power adapter during the firmware update. Notice If an error occurs during the firmware update process retry the procedure or contact your dealer. Philips · PPX3614... -
Page 39: Troubleshooting
Troubleshooting 1 Switch the device off using the on/off switch on the side. 2 Wait at least ten seconds. Power Cycling 3 Switch the device on using the on/off switch on the If a problem occurs that cannot be corrected with the side. - Page 40 Pocket Projector via USB; your Android device should be recognized as USB storage medium. Bad image or color quality when connecting with HDMI • Use the supplied HDMI cable (PPA1290). Third- party cables may cause signal distortions. Philips · PPX3614...
-
Page 41: Appendix
12 Appendix Technical Data Accessories Dimensions (L¦×¦H¦×¦W).......105¦×¦32¦×¦105¦mm Following accessories are available for your device: Weight ............... 0,284¦kg Pico Station with battery and speakers Recommended Ambient........5¦–¦35¦ºC ..........PPA7300 / 253529749 Relative Humidity ....15¦–¦85¦% (non-condensing) Pico Station mit battery, speakers and DVB-T adapter File format.... - Page 42 Sagemcom Documents SAS / has decided to integrate environmental performances in PHILIPS products or Sagemcom Documents SAS / the life cycle of this products, from manufacturing to PHILIPS approved products.
- Page 43 Appendix...
- Page 44 PHILIPS and the PHILIPS’ Shield Emblem are registered trademarks of Koninklijke Philips N.V. and are used by Sagemcom Documents SAS under license from Koninklijke Philips N.V. È 201 Sagemcom Documents SAS All rights reserved Sagemcom Documents SAS Documents Business Unit...
Need help?
Do you have a question about the PicoPix PPX3614 and is the answer not in the manual?
Questions and answers