Table of Contents
Advertisement
Advertisement
Table of Contents

Subscribe to Our Youtube Channel
Related Manuals for Robomow RL2000


Summary of Contents for Robomow RL2000
- Page 1 Operating & Safety Manual RL MODELS WWW.ROBOMOW.COM / WWW.ROBOMOW.EU DOC0100D...
- Page 2 ����� � ����� ���� All information by the “RL555 RL855 Only” margin-line are for Robomow RL555 or RL855 only. If your Robomow is NOT RL555 or RL855, please skip down to the end of this margined-line. ����� ��� ����� �����...
-
Page 3: Eu Declaration Of Conformity
42815 Israel The products covered by this Declaration 24 Volt Battery operated Automatic Lawn Mower model RL2000 (with Base Station) 24 Volt Battery operated Automatic Lawn Mower model RL855/555 (with Perimeter Switch) F. Robotics Acquisitions Ltd. declares under sole responsibility that the products identified above conforms with... - Page 4 Welcome to the world of home robotics with the Friendly Robotics Robomow! Thank you for purchasing our product. We know that you will enjoy the extra free time you will have while using Robomow to mow your lawn. When set up and used properly, Robomow will operate safely on your lawn and provide you with a quality of cut matched by a few mowers of any kind.
- Page 5 Keep people in particular children, pets and bystanders away from the area in which Robomow is being used. Severing of toes or fingers - Rotary mower blade Risk of injury from rotating cutting blade. Keep hands and feet away and do not attempt to lift Robomow from this area.
- Page 6 Robomow RL555, RL855, RL2000 Safety Warnings & Precautions Read this Operating and Safety Manual carefully and be familiar with the controls and the proper use of Robomow before operating Robomow Never allow children or people unfamiliar with these instructions to use Robomow.
- Page 7 Product end of use Robomow and its accessories should be collected separately at the end of their life to prevent waste electrical and elec- tronic equipment from ending up in landfill sites, to promote the reuse, treatment and recovery of electrical and electronic equipment in purpose to preserve, protect and improve the quality of the environment, protect human health and utilize natural resources prudently and rationally.
-
Page 8: How It Works
When Robomow leaves the Base Station it automatically starts the signal carried through the Base Station; the signal creates a virtual wall, which is visible only to the Robomow, keeping it inside the lawn preventing it to cross over area where you do not want it to enter. - Page 9 Extension cord (15meters low voltage Perimeter Wire Screws x2 Used for assembling the Base Station Used to create a virtual wall for your Robomow. cable) Extension cord (15meters low Used to create a virtual wall for your Used for assembling the Base Cover to the Base.
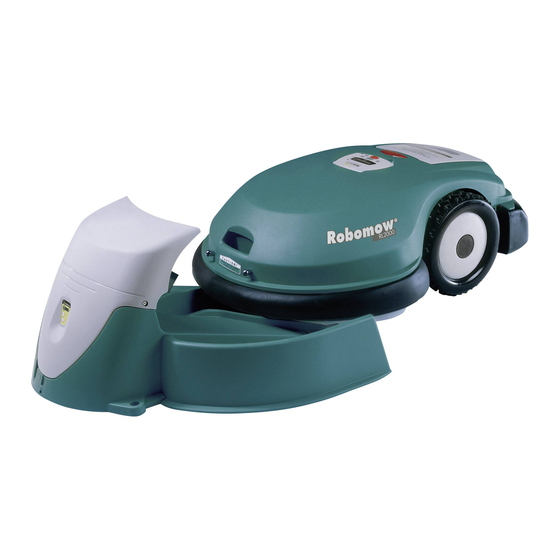
- Page 10 Robomow RL555, RL855, RL2000 Name of the Parts Robomow ® Charging Contact Pins Carrying handle Manual Controller Operating Lamp Power Pack Bumpers with touch sensitive sensors Manual Controller Panel Manual blade engagement button Manual drive speed control – fast/slow Navigator button...
-
Page 11: Table Of Contents
Test the Perimeter Wire Position for Edge Mowing .........3-4 Chapter 4 The mowing process – automatic and manual operation ..... 4-1 For added safety: ....................4-1 Driving Robomow – general instructions ............4-1 Depart ........................4-1 Returning to Base Station .................4-2 Activating the Perimeter Switch (Non base-station zone) ......4-3 Positioning Robomow on the lawn. - Page 12 Robomow RL555, RL855, RL2000 Chapter 5 Setting the Weekly Program (RL2000 only) ..........5-1 Setting the weekly mowing program ..............5-1 Setting the current time ..................5-2 Canceling an active day ..................5-2 Weekly Program Display ..................5-3 Chapter 6 Charging ....................6-1 Charging at the Base Station ................6-1 Charging the Power Pack through an indoor power socket ......6-2...
-
Page 13: Chapter 1 Planning
After completing the one-time set-up of the Perimeter Wire and the Base Station, ����� ����� ������ a weekly program is set. That’s when Robomow does your mowing for the entire ����� season! Robomow leaves the Base Station on the day and time scheduled in the automatic weekly program. -
Page 14: Planning The Perimeter Wire's Layout
Robomow. Soon after setting, the wire will become invisible under the growth of new grass. As soon as Robomow starts operating, it turns on a signal that runs along the Perimeter Wire. This signal keeps Robomow within its working zones and away from preset demarcated areas. - Page 15 Pass wide enough. Robomow can effectively navigate between the two areas while mowing the lawn. We want Robomow to enter the narrow pass in order to move between these zones. But, we do not want it to cross the pass while mowing each one...
-
Page 17: Chapter 2 Base Station And Perimeter Wire Setup
Base Station and Perimeter Wire Setup Chapter 2 Base Station and Perimeter Wire Setup ����� ������ ����� Recommendation, before you start: ���� During setup, you will insert pegs into the ground. To make this task ���� smoother, we recommend you mow your lawn and water it before starting. Hammer Combination Pliers Getting Ready... - Page 18 Robomow RL555, RL855, RL2000 If setting of Base Station is external (outside lawn) ❍ ����� ������ ����� ���� Peg the beginning of the wire to the ground, at a distance of ���� 1m (3.3 feet). Pull out 40 cm (16 inches) of wire and leave it loose at the Base Station location.
-
Page 19: Special Cases Of Perimeter Wire Setup
���� The Perimeter Wire is secured to the ground by the pegs supplied with ❍ Robomow. Insert pegs every few meters and at corners. Area outside perimeter - same basic level and free of obstacles. At this early stage set a minimum number of pegs. Later, after testing the wire setup, you will insert all necessary pegs. - Page 20 Robomow will not recognize these two wires. It will mow over them as if they do not exist. Robomow will recognize the single blocking wire around the Perimeter Island and will not enter this area. If protected obstacles are grouped closely together, demarcate them by a single, continuous, Perimeter Island.
-
Page 21: Fastening Perimeter Wire To The Ground
Robomow can mow areas that have less than a 27% slope 1 meter (3.3 ft) ❍ (roughly 27 cm per 1 meter / 0.9 ft rise per 3 ft). Tip: If Robomow tilts off the ground while climbing a slope, it is 27 cm ❍ What’s in the Boxes (0.9 ft) -
Page 22: Back At Base Station - Completing The Perimeter Wire Setup
������ If additional wire is required in order to complete the setup, connect it ❍ ����� using the water-proof wire connectors supplied with Robomow. (Refer to ���� paragraph 10.7 – Splicing the Perimeter Wire). ���� c IMPORTANT c Use only the wire connectors supplied with Robomow. -
Page 23: Assembling The Base Station
Base Station and Perimeter Wire Setup Assembling the Base Station ����� ������ ����� ���� 2.5.1 Laying and fastening power cord ���� Safety Avoid injury! The power cord should always be securely fastened to the ground! It should never present a tripping hazard. �����... - Page 24 Robomow RL555, RL855, RL2000 Drive Wheel Supports to Base: ❍ ����� ������ Align each Drive Wheel Supports with the Station base. ����� ���� Push the base down until it snaps into place. ���� Flip them and drive the screw into the hole in each Drive Wheel Support.
-
Page 25: Placing Base Station
Base Station and Perimeter Wire Setup ����� ������ Placing Base Station ����� ���� ���� Use RoboRuler to measure and place Base Station on the Perimeter Wire. Area outside perimeter: Same basic level and free of obstacles. 2.6.1 If base station is placed on the lawn – Internal Setup Use RoboRuler to place the Base Station on the Perimeter. -
Page 26: Testing Base Station Setup
NOT connected to a Base Station. Indoor Power Supply A Perimeter Switch should be installed in these areas. A Perimeter Switch is supplied with RL555/RL855 Robomows and is an optional accessory for RL2000. Zone A �������������� ������������� When necessary, Perimeter Switch can be easily moved Wires leading from to other zones. -
Page 27: Perimeter Switch Placing Options
Base Station and Perimeter Wire Setup 2.8.1 Determining Perimeter Switch Location Consider the following in order to install the Perimeter Switch at its optimal �������������� ������������� location: Perimeter Switch is installed outside the perimeter of the non-Base zone. ❍ Select an easily accessed spot. ❍... -
Page 28: Completing And Testing The Setup
Robomow RL555, RL855, RL2000 2.11 Completing and Testing the Setup Once the Perimeter Wire loop is completed and pegged to the ground, you complete the setup by attaching the beginning and Completing Perimeter Wire end of the Perimeter Wire to the Perimeter Switch. - Page 29 Base Station and Perimeter Wire Setup Press the P ‘ON’ button on the Perimeter Switch. ❍ A small flashing green light next to the ‘ON’ button indicates the Flashing light indicates the system is on and functioning correctly. system is on The control panel has other indicators: a disconnected/broken button perimeter Wire and a poor splicing (connections) in the Perimeter...
-
Page 31: Chapter 3 Preparing Robomow
This is a one-time procedure. It needs not be repeated unless the mower is moved several hundred kilometers away. The calibration process is simple. Robomow will ask for it before the first time it is used in the automatic mode. It will lead you through the process. - Page 32 Robomow to their highest position. Reinsert Manual Controller in its holder. ❍ Adjust the controller and its coil until it is at level with top of Robomow. In Base zone - confirm the Base Station is connected to the power. ❍...
-
Page 33: Setting The Cutting Height And Ground Clearance
Slide the tab to its upper position – for low ground clearance. Slide the ❍ tab down – for high level of ground clearance. your Robomow has small wheels (not available in the US) the tab has ❍ an additional lower position. -
Page 34: Testing Base Station And Perimeter Wire Charging Position
(10 feet) in front of Base Station, Reinsert Manual Controller in its holder. ❍ Adjust the controller and its coil until it is at level with top of Robomow. Verify that the section of the Perimeter Wire leading to the Base Station ❍... - Page 35 Preparing Robomow ����� ������ ����� Reinsert Manual Controller. ����������������������������� ❍ ����� ������ Adjust the controller and its coil until it is at level with top of Robomow. ����� ����� ����� ������ For Robomow RL2000, follow the ❍ ����� ���� instructions below to start the test: ����...
-
Page 37: Chapter 4 The Mowing Process - Automatic And Manual Operation
For automatic operation reinsert Manual Controller in its holder. Adjust the controller and its coil until it is at level with top of Robomow. Driving Robomow – general instructions Parts of the mowing process require driving Robomow to various locations in or out of the lawn. -
Page 38: Returning To Base Station
Manual Controller. Once in the station, reinsert Manual Controller ❍ Adjust the controller and its coil until it is at level with top of Robomow Confirm the display changes to a battery charging icon, indicating a ❍... -
Page 39: Activating The Perimeter Switch (Non Base-Station Zone)
If the zone to be mowed is not defined yet, do the setting now . In order for Robomow to operate in a non base-station zone: the Perimeter Switch has to be turned on and the mower should be inside the active perimeter area. -
Page 40: Edge Mowing (Non-Base Station Zone)
If the zone is not set yet, do it now (see section 7.4, Work Time). Reinsert Manual Controller in its holder. ❍ Adjust the controller and its coil until it is at level with top of Robomow. Scroll down (using the DOWN arrow) to select the zone to be ❍... -
Page 41: Completing The Mowing (Non-Base Station Zone)
The display screen will be turned off. Robomow will turn off into a sleep mode �������������� ������������� As an energy saving feature, Robomow always gets into a sleep mode after 20 minutes of inactivity. To wake Robomow up: either press , or remove the ��... -
Page 42: Manual Mowing
���� 4.11 Manual Mowing Step 1 ������ You can activate the blades manually in order for Robomow to trim small areas. For added safety, in order to activate manual mowing you have to press 2 buttons simultaneously. This is a two-step OPC (Operator Presence Control) type system for your safety. -
Page 43: Chapter 5 Setting The Weekly Program (Rl2000 Only)
�������� �� the mowing area. For best cutting results, set the weekly program, �������������� so the Robomow and the sprinklers do NOT run �������� �� at the same time. Remove the Manual Controller from its holder. �����������... -
Page 44: Setting The Current Time
After setting the weekly program is completed, the system asks you ���� ���� automatically to set the current time. c Important c Robomow’s clock works in a 24-hours time scale. For example, 2PM is 14:00, 7AM is 07:00 etc. Serious injury hazard! �����... -
Page 45: Weekly Program Display
���������������������������� ����������������������������� � � � � � � � � � � � � � �������������������� ������������������������ Option 2 – If Robomow is in Base � ��� � ��� � � � � � ���������������������������� Station: ����������������������������� � � � � � � � � � � � � �... - Page 46 ������ Active day ����� Skipped due to low battery voltage Robomow did not depart from Base Station at the scheduled time due to low battery voltage. If “working Time” has been set: Docked before time due to low battery voltage �����...
-
Page 47: Chapter 6 Charging
After completion of all daily cutting sessions it is very important ����� ������������� ������ ����� ����� to bring Robomow to its storage area and plug it into the charger. This ������ ����� should be done as soon as possible, preferably within 6 hours from the ����� �����... -
Page 48: Charging The Power Pack Through An Indoor Power Socket
�������������� ������������� The Power Pack may be re-charged with an indoor power supply connected ��������������������� directly to Robomow’s charging socket. Before taking Robomow for operation, disconnect the charging plug �������� ❍ from the Manual Controller holder. ������������ ������������� �������������... -
Page 49: Power Management And Charging Alerts
Preparing Robomow for off-season storage: Fully charge the Power Pack. ❍ Remove Power Pack from Robomow and store it in a dry location at ❍ room temperature. The Power Pack may be left in a garage or a shed if the temperature there will not drop below -20 ºC (-4ºF). -
Page 51: Chapter 7 Setting Robomow And Using Advanced Features
When you get to the option to be selected, press �� select it or to confirm. Settings Robomow offers several setting options. The Settings menu is the doorway to all those possibilities. Get to the Settings menu. ❍ Press to select “Settings”... - Page 52 Robomow RL555, RL855, RL2000 �������� ����������� �������� �������� �� ������������������������������ ���������������������� �������������������������� ������������� �������� �������������� �������� ������������������������������ �������������������������������� ������������� �������� �� �������� �������� ������������������������������ ����������������������� ��������� �������� ���������� �������� ����������������� �������� ������������������ �������� �������� �������� ����������� �������� ��������������� �������� �����������...
- Page 53 ���� ���� ���������������� ����� ������ ����� For the Base Station zone (only on RL2000), setting the �������� ���� ���� “Work Time” sets the operating time used in Manual Depart from the Base Station. You may also set a specific work time per operation. This is set as part of setting the automatic weekly program (see Chapter 5).
- Page 54 Position Robomow to start edge mowing. ����� Reinsert Manual Controller to its holder. Adjust the controller and its coil until it is at level with top of Robomow. Follow the steps described here to start the “Learn Edge” process. Robomow drives around the Perimeter Wire. Follow it and ��������������������������...
- Page 55 ����� “Child Guard” is a safety feature that prevents young children or other unauthorized people from activating Robomow. When Child Guard is set, Robomow will start operation ONLY after unlocking it. IMPORTANT It Is strongly recommended to turn this feature on.
- Page 56 ����� ���� Use the Fast Edge option to change the speed at which Robomow tracks the Perimeter Wire. (This option is available only for RL2000s base zone). This option is suitable if the perimeter is long and straight. If the Perimeter is curved or wavy, the “Fast Edge”...
- Page 57 If mower changes direction without reaching the wire. If mower crosses the Perimeter Wire outside of the designated area. If ‘Start inside’ message is displayed even when Robomow is inside the designated area and the Perimeter Wire is connected in the right polarity...
- Page 58 10.3). 7.2.13 Rain sensor The Rain sensor feature enables Robomow to detect rain and to skip or stop the operation when rain is detected. There are three options under the Rain sensor menu: Rain sensor on/off –...
-
Page 59: Information
����������������������� Setting Robomow and using Advanced Features �� ����������� Information �������� �� �������������������������������� Press at the Information display to open �� ❍ �������������������������������������� the Information feature and to scroll through the ��������������������������� following sub-menus �������������������������� ���������� ���������������������� ����������������� �������� ��... - Page 60 The Entry Points feature uses 3 default entry points: at the Base Station, at 30% ����� and at 60% of the Perimeter Wires length. Robomow uses these 3 entry points in a cyclic order. You cannot set a specific entry point for a specific day.
- Page 61 If you prefer to have just 2 or 3 entry points -> press at any time in the process. ���� If you prefer not to wait until Robomow completes its drive back to Base Station -> press at any time in the ����...
- Page 62 Robomow RL555, RL855, RL2000 Back to default Use Back to default to go back to factory default Entry Points. Robomow will return to the default entry points of: Base Station, 30% and 60% of the perimeter length. Entry Points - on/off Use this option to start mowing directly from Base Station to the inner area: NO entry points.
-
Page 63: Chapter 8 Troubleshooting
Text error-messages Robomow continuously monitors its operation. It produces text messages to assist you in smoothly running it: text messages in case of an operational fault as well as text messages that prompt the user to perform a certain action. - Page 64 Confirm the mower is not slipping or stuck on its way within the time and distance limitations. to the Docking Station. There is no need to do anything – Robomow will renew Drive Overload The drive motors have been working under a automatically the operation, as the drive motor will cool severe load for too long.
- Page 65 Front Wheel Prob- The Front Wheel has left the ground for more The Robomow is being used on a slope too steep for than 8 – 10 seconds. safe mowing. Exclude this from the mowing area. High grass is preventing the front wheel from fully riding on the ground.
- Page 66 Robomow RL555, RL855, RL2000 Message Displayed Probable Cause/Event Corrective/User Action There is no need to do anything – Robomow will The mowing motors have been working under renew automatically the operation, as the mowing Mowing Overload a severe load for too long of a time.
-
Page 67: Other Problems
Confirm the ‘ON’ light is blinking in the Base Station. Periodically clean the Base Station and the Base Station and/or Robomow have burnt Robomow contacts using only a damp cloth. signs and/or corrosion Contact your service provider if the contacts should be replaced... - Page 68 Robomow RL555, RL855, RL2000 Problem Encountered Probable Cause/Event Corrective/User Action Perimeter Switch / Perimeter Switch Confirm wire is plugged in and wire leads are firmly Wire disconnected from switch attached Walk along perimeter, including islands and ‘Cut wire’ indicator flashing on...
- Page 69 It is required for the charger to remain connected Power Pack has been discharged from to the Robomow when not in use. Failure to do lack of charge maintenance. so can cause permanent Power Pack damage. Contact your service provider.
- Page 70 Set the cutting height to a higher position clippings are left on the lawn) Use Robomow more frequently to maintain your lawn For best cut, operate Robomow when the grass Grass is wet is dry. It is recommended to mow grass early afternoon.
-
Page 71: Chapter 9 Specifications
Equivalent Mowing Power* 5 HP gas walk mulching mower * Side by side comparison Theft Guard Code Write down your 4-digit Theft Guard code. Return here, if you ever forget the code. ____ ____ ____ ____ Robomow Serial Number _______________________ Chapter 9-1... -
Page 73: Chapter 10 Maintenance And Storage
10.2 Maintenance of the Mowing Deck Robomow is a dedicated mulching mower. It may accumulate clippings under the mowing deck, particularly when mowing wet or damp grass. Warning Severe injury hazard! Always remove the Power Pack before lifting the mower. Blades are very sharp. -
Page 74: Maintenance Of The Blades
Machine sharpening is not recommended, as it may create difficulties in balancing. ��������������� �������� �� Robomow automatically displays a reminder for blades replacement after every 200 hours of operation. �������������� ������������������� �������������������� IMPORTANT Remember to restart the “Replace ��������... -
Page 75: Maintenance Of The Outer Housing
Maintenance of the Outer Housing Use only a damp cloth and a dry brush to clean the outer surfaces of Robomow. A cloth may be soaked in a light detergent diluted with water, and then wringed dry for using on Robomow. -
Page 76: Maintenance Of The Base Station Area
Temperature should not be colder than -4 ºF (-20 ºC). A fully charged Power Pack may be stored for up to 3 months before recharging it, if stored in a cool, dry place. Charge the Power Pack before using the Robomow for the first time ❍ next season. - Page 77 Before the new mowing season starts, lightly polish the ����� ������ ����� charge contacts on the Robomow and the Base Station ���� ���� with a small piece of fine sandpaper, 200 grit or higher or with steel wool of ‘00’ or higher grade.
-
Page 79: Chapter 11 Accessories
Accessories Chapter 11 Accessories Blade Set Power Pack Keep a spare blade set on hand. Sharp Convenience of blades are important for increasing capacity safety and good cutting with a second battery. performance. Perimeter Switch Convenience of having Peg Pack (50) a switch for each zone For larger lawns and and not moving one... -
Page 80: Chapter 12 Tips For Maintaining Your Lawn
Keep your mower blades sharp. Sharp blades provide a clean, safe and efficient cut. Dull mower blades will tear and shred the tips of the grass, which can provide an entry point for disease organisms and weaken the grass plant. It is recommended to replace all three Robomow blades once a year. Thatch Clippings and thatch are simply not connected. -
Page 81: Warranty Card
Robomow RL555, RL855, RL2000 RL Series Limited Warranty Friendly Robotics warrants to the original purchaser that the RL series ‘Product’ is free from defects in materials and workmanship when used under normal residential* purposes for a period of 24 months, 12 months for the batteries, beginning from the date of purchase. Product accessories, includ- ing replacement batteries, are warranted for a period of ninety days from the date of purchase. - Page 82 To register your product online, go to www.robomow.com/register/ www.robomow.com / www.robomow.eu...
Need help?
Do you have a question about the RL2000 and is the answer not in the manual?
Questions and answers