
Subscribe to Our Youtube Channel
Related Manuals for Brecknell CP103

Summary of Contents for Brecknell CP103
-
Page 1: User Instructions
CP103 Thermal Mini Printer User Instructions AWT 35-501163 Issue AB... - Page 2 Brecknell is a trademark of the Illinois Tool Works group of companies whose ultimate parent company is Illinois Tool Works Inc (“Illinois Tool Works”). Copyright © 2013 Illinois Tool Works. All rights reserved. No part of this publication may be reproduced by making a facsimile copy, by the making of a copy in three dimensions of a two-dimensional...
-
Page 3: Table Of Contents
Paper Roll Specifications ....................5 Chapter 2 Communication ........................6 RS-232 Serial Interface ...................... 6 CP103 Printer PS/2 Connector ..................6 Serial Cable Definition ....................... 7 Chapter 3 Printer Self Test and Cleaning ....................8 Cleaning the Print Head ..................... 8 Steps for Cleaning Print Head .................. -
Page 4: Chapter 1 General Information And Warnings
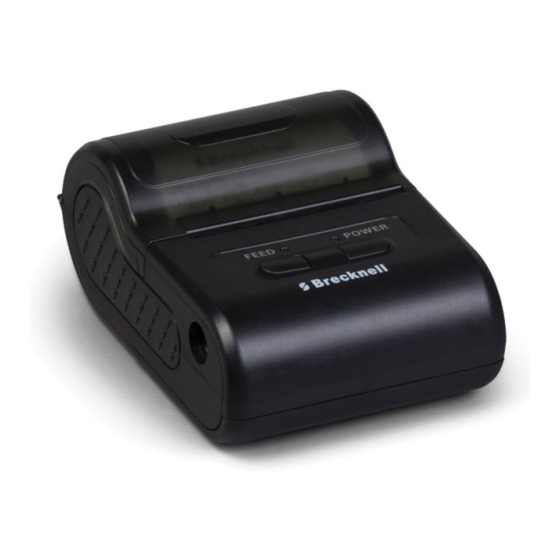
1.2 Description The CP103 Printer is a portable thermal printer which uses a power supply adapter. The communication interface is via RS-232 Serial. The CP103 printer can be used for a variety of instruments or handheld data printing. -
Page 5: Package And Accessories
When ready, plug the other end of the AC adapter into a wall socket. Plug the RS-232 serial cable in the host device. Press the [POWER] button to turn on the printer. CP103 Thermal Printer User Instructions... -
Page 6: Signal Light Status
ESC/POS compatible command set Other Features Paper auto-detection, power detection, thermal protection, with machine charging, automatic sleeping mode Working Conditions Temperature: 0° - 50°, Humidity 20% - 85% Storage Conditions Temperature: -20° - 70°, Humidity 5% - 95% CP103 Thermal Printer User Instructions... -
Page 7: Paper Roll Specifications
1.8 Paper Roll Specifications Item Specification Roll Width: 58mm Roll Diameter: ≤ 43mm Paper Thickness 0.06 - 0.08mm Paper Type Thermal CP103 Thermal Printer User Instructions... -
Page 8: Chapter 2 Communication
Communication The CP103 Mini Thermal Printer uses a RS-232 serial interface connection with the host communication. If a serial port is unavailable on the host device, it is possible to use a serial / USB converter. 2.1 RS-232 Serial Interface RS-232 is developed according to the EIA standard asynchronous transmission serial interface. -
Page 9: Serial Cable Definition
2.3 Serial Cable Definition Wire Colors PS2 Connector Pinout Pin Description DB9 Pinout male female white blue Null black yellow 12 V Input green 12 V Input CP103 Thermal Printer User Instructions... -
Page 10: Chapter 3 Printer Self Test And Cleaning
Wait for the rubbing alcohol to evaporate completely and then place the thermal paper roll back in the printer. Close the paper dispenser cover and print a test page. CP103 Thermal Printer User Instructions... -
Page 11: Chapter 4 Programming
Programming It is possible to make changes to the operation of the CP103 printer such as baud rate, company name and address, time and date. A communication utility program is needed and can be downloaded to a PC. Connect the printer to the computer with the provided serial cable. -
Page 12: Communicate With The Printer
From the Set parameters tab under Select Printer Type, choose “Serial”. 4.1.2 Select COM Port Select the PC communication port the printer is connected to. Under Set Serial Port choose the correct COM port from the drop down choices. CP103 Thermal Printer User Instructions... -
Page 13: Check Printer Baud Rate
4.1.4 Select Baud Rate Select the baud rate within the utility that matches the baud rate of the printer. Under Set Serial Port choose the correct baud rate from the drop down choices and press Open. CP103 Thermal Printer User Instructions... -
Page 14: Make Changes To Printer Configuration
38400 57600 115200 4800 1200 Click on the box to the left of SendNewLine. Click the [SEND] button. The typed in command string will be displayed in the bottom window if the command was sent. CP103 Thermal Printer User Instructions... -
Page 15: Set The Printer Data Bits
Go to the Testing tab. Under the CMD Testing window (the top window) enter the following command string: +UART STOP:n Where n is the number associated with the desired stop bit Stop Bit 1 (default) CP103 Thermal Printer User Instructions... -
Page 16: Set The Printer Parity
Under the CMD Testing window (the top window) enter the following command string: 1f 40 Click on the box to the left of HEX. Click the [SEND] button. The typed in command string will be displayed in the bottom window if the command was sent. CP103 Thermal Printer User Instructions... -
Page 17: Time And Date
Click on the box to the left of SendNewLine. Click the [SEND] button. The typed in command string will be displayed in the bottom window if the command was sent. CP103 Thermal Printer User Instructions... -
Page 18: Company Information
For example input: +COMPANY: Major Technology Click on the box to the left of SendNewLine. Click the [SEND] button. The typed in command string will be displayed in the bottom window if the command was sent. CP103 Thermal Printer User Instructions... -
Page 19: Underline Printing
Click on the box to the left of HEX. Click the [SEND] button. The typed in command string will be displayed in the bottom window if the command was sent. CP103 Thermal Printer User Instructions... -
Page 20: Inverse Font
Click on the box to the left of HEX. Click the [SEND] button. The typed in command string will be displayed in the bottom window if the command was sent. CP103 Thermal Printer User Instructions... -
Page 21: Character Dot Choice
Where n is the number associated with the type of font used for printing. Description Arial (default) bold Click on the box to the left of HEX. Click the [SEND] button. The typed in command string will be displayed in the bottom window if the command was sent. CP103 Thermal Printer User Instructions... -
Page 22: Time And Date Display Mode
/ width (default) Click on the box to the left of HEX. Click the [SEND] button. The typed in command string will be displayed in the bottom window if the command was sent. CP103 Thermal Printer User Instructions... -
Page 23: Upside Down Printing
<ESC> 2 1b 32 MM/DD/YY month/day/year <ESC> 3 1b 33 DD-MM-YY day-month-year/numeric month <ESC> 4 1b 34 DD-MON-YY day-month-year with 3 letter abbreviation of the month <ESC> 5 1b 35 DOW day of week abbreviation CP103 Thermal Printer User Instructions... -
Page 24: Logo Download
300 DPI. The logo must be saved as a .bmp file. Go to the Upgrade tab. Under Download NV LOGO, click on the [Loading Logo file] button. The Open file window will appear. Find the logo file to load and click the [Open] button. CP103 Thermal Printer User Instructions... - Page 25 Click the [SEND] button. The typed in command string will be displayed in the bottom window if the command was sent. The CP103 printer also supports full ESC/POS commands which are not listed in this manual. Refer to the CP103 Thermal Printer User Instructions...
- Page 27 Brecknell USA 1000 Armstrong Dr. Fairmont MN 56031 Tel:507-238-8702 Fax:507-238-8271 Email: sales@brecknellscales.com http://www.brecknellscales.com Brecknell UK Foundry Lane, Smethwick, West Midlands, England B66 2LP Tel:+44 (0) 8452 46 6717 Fax:+44 (0) 8452 46 6718 Email: sales@brecknellscales.co.uk http://www.brecknellscales.com...
Need help?
Do you have a question about the CP103 and is the answer not in the manual?
Questions and answers