
Related Manuals for Pride Jazzy Select series


Summary of Contents for Pride Jazzy Select series
- Page 1 JAZZY SELECT SERIES Jazzy Select Jazzy Select 6 Jazzy Select 6 With Power Seat Including Models: Jazzy Select, Jazzy Select 6, and Jazzy Select 6 With Power Seat 32 Wedgwood Road Bicester, Oxon OX26 4UL •...
- Page 2 S A F E T Y G U I D E L I N E S WARNING! An authorised Pride Dealer or a qualified technician must perform the initial setup of this power chair and must perform all of the procedures in this manual.
-
Page 3: Table Of Contents
SAFETY ..............................5 III. YOUR POWER CHAIR ........................17 IV. ASSEMBLY ............................23 COMFORT ADJUSTMENTS ......................26 VI. BATTERIES AND CHARGING ....................34 VII. CARE AND MAINTENANCE ......................38 VIII. WARRANTY ............................45 APPENDIX I - SPECIFICATIONS ....................46 Jazzy Select Series www.pridemobility.com... -
Page 4: Introduction
Pride to enhance or preserve the safe use of this product. - Page 5 Avoid exposure to rain, snow, ice, salt or standing water whenever possible. Maintain and store in a clean and dry condition. Jazzy Select Series www.pridemobility.com...
- Page 6 Removal of grounding prong can create electrical hazard. If necessary, properly install an approved 3-pronged adapter to an electrical outlet having 2-pronged plug access. Wear safety goggles. Corrosive chemicals contained in battery. Do not remove the anti-tip wheels. www.pridemobility.com Jazzy Select Series...
- Page 7 Connect Red wire to Red Positive (+) Terminal Post Connect Black wire to Black Negative (–) Terminal Post Do not use batteries with different amp-hour (Ah) capacities. Do not mix old and new batteries. Always replace both batteries at the same time. Pinch/Crush point. Jazzy Select Series www.pridemobility.com...
- Page 8 I I . S A F E T Y Battery charger for indoor use only. Disposal and recycling - Contact your authorised Pride Dealer for information on proper disposal and recycling of your Pride product and its packaging. Locked and in drive mode.
-
Page 9: General Guidelines
Pride products. Pre-Ride Safety Check Get to know the feel of your power chair and its capabilities. Pride recommends that you perform a safety check before each use to make sure your power chair operates smoothly and safely. -
Page 10: Your Power Chair
Your power chair is rated for a maximum weight capacity. Please refer to the specifications table for this limit. MANDATORY! Stay within the specified weight capacity of your power chair. Exceeding the weight capacity voids your warranty. Pride will not be held responsible for injuries and/or property damage resulting from failure to observe weight limitations. - Page 11 Doing so could cause instability in your power chair. Pride recommends that the maximum slope of an incline you attempt to safely ascend or descend on your power chair does not exceed 10.5% (6°). See figure 1.
- Page 12 Your power chair is designed to provide optimum stability under normal driving conditions—dry, level surfaces composed of concrete, blacktop or tarmac. However, Pride recognises that there will be times when you will encounter other surface types. For this reason, your power chair is designed to perform admirably on packed soil, grass and gravel.
-
Page 13: Stairs And Escalators
Motor Vehicle Transport Pride recommends that you do not remain seated in your power chair while traveling in a motor vehicle. The power chair should be stowed in the boot of a car or in the back of a truck or van with batteries removed and properly secured. -
Page 14: Removable Parts
Pride recommends that the power chair user determine his/her personal limitations and practice bending and reaching in the presence of a qualified healthcare professional. - Page 15 User Positioning Pride recommends that all users be seated in an upright position with their pelvis positioned as far rearward as possible in the power chair seat. All users need to discuss pelvic positioning with their authorised Pride Dealer, therapist(s) or healthcare professional to determine appropriate pelvic position when seated on the power chair based on the user’s individual medical needs.
- Page 16 WARNING! Pride strongly recommends that you do not smoke cigarettes while seated in your power chair, although the power chair has passed the necessary testing requirements for cigarette smoking.
-
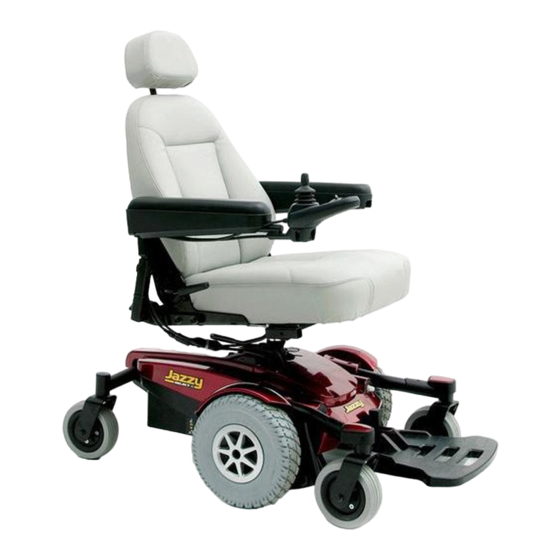
Page 17: Assembly
THE JAZZY SELECT SERIES POWER CHAIR The Jazzy Select Series Power Chair has two main assemblies: the seat assembly and the power base assembly. See figure 5. Typically, the seat assembly includes the armrests, seatback and seat base. The power base assembly includes two motor/brake assemblies, two drive wheels, two batteries and wiring harnesses. - Page 18 I I I . Y O U R P O W E R C H A I R REAR SHROUD SEAT POST FRONT COVER MAIN CIRCUIT BREAKER CONTROLLER HARNESS ANTI-TIP WHEELS Figure 6. The Jazzy Select Power Base REAR SHROUD MAIN CIRCUIT BREAKER CONTROLLER HARNESS Figure 7. The Jazzy Select 6 Power Base www.pridemobility.com Jazzy Select Series...
- Page 19 I I I . Y O U R P O W E R C H A I R POWER SEAT ACTUATOR REAR SHROUD MAIN CIRCUIT BREAKER CONTROLLER HARNESS FRONT COVER Figure 8. The Jazzy Select 6 With Power Seat Power Base Jazzy Select Series www.pridemobility.com...
- Page 20 Power Module: Provides connection between the controller and the motors, batteries and off-board charger port. CONTROLLER CONNECTOR BATTERY CONNECTORS MOTOR CONNECTORS MAIN CIRCUIT BREAKER BATTERY CONNECTORS Figure 9. Jazzy Select Series Electrical Components (Jazzy Select 6 Shown) www.pridemobility.com Jazzy Select Series...
- Page 21 I I I . Y O U R P O W E R C H A I R CONTROLLER CONNECTOR MOTOR CONNECTORS BATTERY CONNECTORS MAIN CIRCUIT BREAKER BATTERY CONNECTORS Figure 10. Jazzy Select 6 With Power Seat Electrical Components Jazzy Select Series www.pridemobility.com...
- Page 22 WARNING! Do not use the freewheel lever handles as tie-down points to secure this product. FREEWHEEL LEVER FREEWHEEL LEVER Figure 11. Drive Mode (Drive Engaged) Figure 12. Freewheel Mode (Drive Disengaged) www.pridemobility.com Jazzy Select Series...
-
Page 23: Initial Assembly
Nylon insert lock nuts should not be reused as it may cause damage to the nylon insert, resulting in a less secure fit. Replacement nylon insert lock nuts are available at local hardware stores or through your authorised Pride Dealer. Seat Installation (Select and Select 6) - Page 24 4. Connect the power seat connector and controller harness to the power base. 5. Lift the armrest straight up, then route the controller harness and secure with wire ties as shown in figure 18. www.pridemobility.com Jazzy Select Series...
- Page 25 Figure 16. Seat Latch Safety (Disengaged) NOTE: Refer to V. “Comfort Adjustments” for more information on controller installation and adjustment. WIRE TIES Figure 18. Select 6 With Power Seat Controller Figure 17. Power Seat Actuator Cable Routing Jazzy Select Series www.pridemobility.com...
-
Page 26: Comfort Adjustments
NOTE: If your power chair is equipped with an optional seating system, please refer to the information pro- vided in separate manuals. WARNING! If your power chair was configured by your authorised Pride Dealer, please consult your healthcare professional before changing the seat position or making any other adjustment. - Page 27 WARNING! Do not allow the motor to run more than a few seconds after the mechanism reaches the top or bottom limit. NOTE: For more information on operating the power elevating seat, contact your authorised Pride Dealer. WARNING! The power elevating seat option is intended for use on a level surface only. Never raise the seat from its lowest position on an inclined surface.
-
Page 28: Armrest Angle Adjustment
1. Lift the armrest straight up so that it is perpendicu- lar to the floor. See figure 21. 2. Loosen the locking nut. 3. Turn the adjustment screw to raise or lower the armrest. 4. Tighten the locking nut to lock the adjustment screw into place. www.pridemobility.com Jazzy Select Series... -
Page 29: Armrest Height Adjustment
9. Tighten the setscrew to secure the controller. 10. Route the controller harness along the seat frame and secure with wire ties. See figure 13 or 18. 11. Plug the controller harness into the power base. See figure 6, 7 or 8. Jazzy Select Series www.pridemobility.com... - Page 30 1. Flip up the foot platform and locate the adjustment FOOT screw. PLATFORM 2. Turn the adjustment screw to raise or lower the BRACKET front of the foot platform. ADJUSTMENT SCREW Figure 24. Select 6 and Select 6 with power seat Foot Platform Adjustment www.pridemobility.com Jazzy Select Series...
- Page 31 1. Remove the two adjustment screws from the side of each leg rest extension. 2. Slide the leg rest up or down to the desired length. 3. Reinstall the two adjustment screws. LEG REST EXTENSION ADJUSTMENT SCREWS Figure 26. Elevating Leg Rests Jazzy Select Series www.pridemobility.com...
- Page 32 When coming to a stop, your power chair tips forward excessively. The anti-tip wheels constantly rub the ground. WARNING! Consult your authorised Pride Dealer before attempting to change the anti-tip wheel height! Changing the anti-tip wheel height affects handling under acceleration! WARNING! The higher you raise the anti-tip wheels, the more you increase your power chair’s...
-
Page 33: Positioning Belt
MANDATORY! Inspect the positioning belt for loose or damaged parts before each use of the power chair. If you discover a problem, contact your authorised Pride Dealer for maintenance and repair. Jazzy Select Series... -
Page 34: Batteries And Charging
PROHIBITED! Do not allow unsupervised children to play near the power chair while the batteries are charging. Pride recommends that you do not charge the batteries while the power chair is occupied. - Page 35 The red light indicates that power to the off-board charger is on. The green light indicates that the batteries are fully charged. If it is not a Pride off- board charger, then follow the instructions supplied by the manufacturer.
- Page 36 We work closely with our battery manufacturer to provide a battery that best suits your power chair’s specific demands. Fresh batteries arrive regularly at Pride and are promptly shipped with a full charge. During shipping, the batteries encounter temperature extremes that may influence initial performance. Heat robs the charge from the battery, and cold slows the power available and extends the time needed to recharge the battery (just as with a car battery).
- Page 37 What about shipping? If you wish to use a freight company to ship your power chair to your final destination, repack your power chair in the original shipping container and ship the batteries in separate boxes. Jazzy Select Series www.pridemobility.com...
-
Page 38: Care And Maintenance
3. Check the joystick operation and the brakes before using your power chair again. 4. If any inconsistencies are found, take your power chair to your authorised Pride Dealer. Power chairs that are frequently exposed to sources of water, such as incontinence, should be inspected often for corrosion and electronic components may need to be replaced frequently. -
Page 39: Daily Checks
Check the rubber boot around the base of the joystick for damage. Visu- ally inspect the boot. Do not handle or try to repair it. See your authorised Pride Dealer if there is a problem. -
Page 40: Cleaning And Disinfection
V I I . C A R E A N D M A I N T E N A N C E Yearly Checks Take your power chair to your authorised Pride Dealer for yearly maintenance, especially if you use your power chair on a daily basis. This helps ensure that your power chair is functioning properly and helps prevent future complications. -
Page 41: Battery Replacement
WARNING! Completely deflate the DRIVE WHEEL WASHER tyre before attempting repair. Figure 30. Jazzy Select Series Drive Wheel Removal Figure 31. Jazzy Select Series Drive Wheel Disassembled Follow these easy steps for a quick and safe repair for both pneumatic and solid tyres: 1. - Page 42 V I I . C A R E A N D M A I N T E N A N C E CORRECT CONNECTION INCORRECT REAR SHROUD CONNECTION REAR COVER YELLOW THUMBSCREWS REAR BATTERY FRONT BATTERY SIDE COVER Figure 32. Battery Installation (Seat Removed for Clarity - Select 6 Shown) www.pridemobility.com Jazzy Select Series...
- Page 43 When to See Your Authorised Pride Dealer for Service The following symptoms could indicate a serious problem with your power chair. If necessary, contact your authorised Pride Dealer. When calling, have the model number, serial number, nature of the problem and the error code if available.
- Page 44 Disconnect both batteries before load testing and follow the directions that come with the load tester. If either one of the batteries fails the load test, replace both of them. If your power chair still does not power up, contact your authorised Pride Dealer. www.pridemobility.com...
-
Page 45: Warranty
Pride Mobility Products Ltd. cannot be deemed responsible. NOTE: Pride Mobility Products Ltd. provides parts only under warranty. Your authorised Pride Dealer is responsible for labour and service. Please contact your authorised Pride Dealer for information about these services and for any applicable charges. -
Page 46: Appendix I - Specifications
A P P E N D I X I - S P E C I F I C A T I O N S JAZZY SELECT SERIES SPECIFICATIONS Class of Use: Suspension: Jazzy Select : Active-Trac Jazzy Select 6 and Jazzy Select 6 With Power Seat: Active-Trac with Mid-Wheel 6... - Page 47 A P P E N D I X I - S P E C I F I C A T I O N S Figure 33. Jazzy Select Dimensions and Ground Clearance Figure 34. Jazzy Select 6 and Jazzy Select 6 With Power Seat Dimensions and Ground Clearance Jazzy Select Series www.pridemobility.com...
- Page 48 N O T E S www.pridemobility.com Jazzy Select Series...
- Page 49 N O T E S Jazzy Select Series www.pridemobility.com...
- Page 50 N O T E S www.pridemobility.com Jazzy Select Series...
- Page 51 Quality Control - Jazzy Select Series Inclusion of all Parts Joystick Serial Number Controller Serial Number Left Motor Serial Number Right Motor Serial Number Fit and Finish Performance Jazzy Select Jazzy Select 6 Jazzy Select 6 With Power Seat Date Inspected...
Need help?
Do you have a question about the Jazzy Select series and is the answer not in the manual?
Questions and answers