Table of Contents
Advertisement
Advertisement
Table of Contents

Related Manuals for Samsung SNH-E6411BN


Summary of Contents for Samsung SNH-E6411BN
-
Page 1: User Manual
SAMSUNG SMARTCAM User Manual SNH-E6411BN 0678... -
Page 2: Operational Description
Samsung Techwin Co., Ltd. and information being sent. Describe all modulation types and all data rates. The name of this product is the registered trademark of Samsung Techwin Co., Ltd. Other trademarks mentioned in this manual are the registered trademark of their Instructions &... -
Page 3: Table Of Contents
• To avoid entangled cable lines, avoid using cable extension for adaptor’s power cord. MoniToRinG • The product’s servicing is allowed only to authorized Samsung Techwin’s service personnel. Registration …………………………………………………… 13 • When using the product for children’s care, be careful to keep the product out of children’s reach. -
Page 4: Getting Started
Features • easy to install - Simply visit the home page (www.samsungsmartcam.com) and download and install the program without a separate installer program. • Remote monitoring - Whenever and wherever if you are in the Internet enabled environment, remote monitoring is ready for you. - PC, laptop or smart phone can be used for monitoring. -
Page 5: What's Included
What’s Included Check for components when opening the product package. Camera Power Adaptor Network Cable Quick Start Guide Warranty Card GPL Lisence Tapping screw Plastic anchor Please save the packaging. You will need the serial number later to register the camera. -
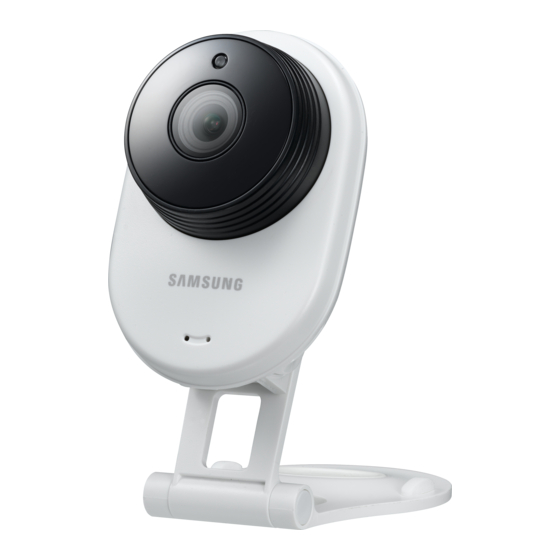
Page 6: Part Names And Functions
Part names and functions Front Rear Speakers Luminance Sensor Generate audio output from your smart phone. Detects light levels where the camera is placed. Night vision mode changes according to detection result. wi-Fi Direct button Built-in iR LeDs for night vision Create a Wi-Fi connection for your camera and smart phone. -
Page 7: Led Status
power Supply network connection Plug-in the camera power adapter to the wall outlet and connect the camera as Connect the provided network cable with the network terminal of the camera. shown. For further details on network configuration, refer to “network Connection and Settings”. -
Page 8: Installation
Installation precautions Install the camera in a place where the Wi-Fi signal can be reached and & without interference. nStallation Keep it away from humidity such as around the humidifier. Keep it away from direct sunlight, strong light or dust; install it in a place with etwork onneCtion clear view. -
Page 9: Wall Mounting With Screws
wall Mounting with Screws Use drill bit of 5mm diameter and drill on the marked positions, drill to have 3 cm depth holes. Clean the holes after drilling. Assembling Be careful not to get injured while drilling. Remove the two rubber packings on both sides of the camera installation board. -
Page 10: Adjusting The Angle
Adjusting the Angle pulling out the network cable Place the camera installation board on flat ground. Rotate the knob on the rear side of the camera in the [LooSen] direction to unfasten it. Adjust the camera’s shooting angle as appropriate. Do not put excessive force. -
Page 11: Network Connection And Settings
Connecting via network cable Network Connection and Settings If you do not have a Wireless Access Point, you must connect the camera using precautions LAN cable directly to your home router. When you apply the power, the power status LED is lit red, and it will change to red blinking when the booting is completed. -
Page 12: Wi-Fi Connection Setting
wi-Fi connection setting If you want to connect a camera to Wi-Fi, first connect the network cable and try to make a connection to the Wi-Fi network. When you apply the power, the power status LED is lit red, and it will change to red blinking when the booting is completed. -
Page 13: Monitoring
Registration Once you register the product with the site, you can monitor the camera video on the PC or laptop computer. web browser requirements Windows onitorinG Windows XP, 7 supported Mac OSX 10.7 Lion or higher is supported - Internet Explorer 9 or higher (The 64-bit is not supported.) - Safari - Firefox... -
Page 14: Plug In Installation
❖ plug in installation Click <install> to begin the installation. You need to install your plug in to automatically search for cameras connected to the network and view the video in your camera. If you login or click <Starting SmartCam> in a PC where the plug in is not installed, the installation message window will pop up. - Page 15 For Mac Enter MAC PC password and click <install Software>. Click <Continue>. Installation has completed. Click <install>.
- Page 16 Enter the requested information, and click <Sign Up>. According to the network connection and setting, click <next> when the camera LED turns into green. • ID : Using alphabetical characters and numbers, make a combination using 8 to 14 letters. Select the serial number of the camera to be added from the camera search list.
- Page 17 Create <Camera name> and <Camera password>. Select your Wireless Network from the list. Click <next>. Enter the password of your Wireless Network and click <next>. The camera password is used to block the unauthorized access to your camera. Create camera password using alphanumeric characters between 1 to 8 without any space.
-
Page 18: Live Video
Unplug the network cable from the camera and the router. Live Video Click <Finish> if the <Finish> button is activated. Select a camera from the camera list at the upper left hand of the screen. The gray icon indicates the camera is inactive so you cannot monitor it right now. Once the camera is successfully registered, you can check the camera in the camera list. - Page 19 Monitoring options Item Description Motion zone setting It detects motion within the range set by a user. Flip You can flip over the video image. A user can directly save videos in their SD card. If there is an ongoing event now or overwrite to SD card is not checked, and there is storage space of 10% remaining, you Manual recording cannot perform manual recording.
- Page 20 Relay mode is added feature where the video from the camera is transmitted to If you want to delete the set area, click on <Delete All>. Samsung server then retransmitted to the user's computer. If you have trouble connection to the camera, visit "http://www.samsungsmartcam.
-
Page 21: Setup
Item Description Setup Serial number You can confirm the serial number. Click the <Modify>, you can change the Camera password. Basic info Camera password Enter the current camera password, and type a new Camera password. Camera Name Click the <Modify>, you can change the camera name. You can check the current version and the latest version of your Firmware Version camera S/W. - Page 22 ❖ Firmware update network If the currently used S/W is not of the latest version, update it. If you are using the latest version, then the firmware will not be activated. <Wired Network> Click <Firmware>. Click the < > icon to update the firmware. When the firmware update is finished, the camera will reboot.
- Page 23 If any of the manual settings is wrong, the network settings will not be applied. Item Description If you have both cable and wireless network connections simultaneously, the cable Wireless On/ You can select to activate or deactivate the wireless network network connection is prioritized.
- Page 24 Time The time will synchronize with the NTP(Network Time Protocol) server automatically. For this, Internet connection is required. You need to set the timezone correctly to obtain the exact time setting. The time displayed without Internet connection may not be accurate. Item Description Time...
- Page 25 <Gmail> notification Alarm & notification The event alarm is sent through Gmail. Select the Google. Camera has ability to send event notifications when motion or audio is detected. Enter your Gmail address and password. Click <Save>. Select <Use> of “Send alarms”. Enter your email address to receive the notification e-mail and click <Add>.
- Page 26 push alarm notification Alarm Schedule The push alarm is provided through the web viewer and mobile app in which the camera is registered. Alarms will only operate for the times selected by the user. • Push alert list shows the list of IDs of users who registered cameras. When an alarm occurs, the web site will send push alerts to each smart phone.
- Page 27 Turn off the camera power or set it to <Off> before removing the micro SD card. If you SD card fail to do this, the data in the micro SD camera may be damaged. Please note that the content of a micro SD card used for other purposes may be deleted when it is mounted in the camera.
-
Page 28: Event Alarm
Event Alarm Playback You can play the video recorded in your SD card. You can check the event alarm that occurred. Item Description Delete by dates Delete all the event alarms on the date. Item Description Delete All Delete all the event alarms for thirty days. Type Set the event type to search for during the search period. -
Page 29: Information
My Account Information If you want to change the member information, click on <Account>. Select the item (password, or email address) and enter your information. - Page 30 Support You can download the Samsung SmartCam mobile app and user guide. 30 · English...
-
Page 31: Appendix
Specifications Specifications Item Description Linux ppendix Resolution 1920x1080, 1280x720, 640x480 Max. Framerate 1080p@20fps Video Compression Format H.264, MJPEG Streaming Capability Multiple Streaming (Up to 5 Profiles) Specifications Angular Field of View (D/V/H) 128°/ 62°/ 111° Low Light Performance 0.3Lux(Color), 0Lux(Black/White) Specifications Product Appearance Day &... - Page 32 Item Description Item Description Audio Detection Support Color White Audio I/O Dimension (WxHxD) 63.0 x 92.1 x 41.6 Audio Compression Format G.711, G726 Weight 117g Audio Communication 2-Way Audio (Built-in Microphone & Speaker), Half Duplex Memory Slot microSD (FAT32), Up to 32GB Event recording, Manual recording, Continuous recording, Remote Recording &...
- Page 33 product Appearance...
-
Page 34: Troubleshooting
Problem Action Troubleshooting The video from the - The video from the camera can be delayed according to a network delay. camera is temporarily Please check if the camera is installed in a place of proper wireless Internet lost. communications. If you encounter a problem with your system, see the table below to solve the problem as quickly and easily as possible. - Page 35 Samsung Techwin cares for the environment at all product manufacturing stages, and is taking measures to provide customers with more environmentally friendly products. The Eco mark represents Samsung Techwin’s devotion to creating environmentally friendly products, and indicates that the product satisfies the EU RoHS Directive.
- Page 36 SALES NETWORK SAMSUNG TECHWIN CO., LTD. Samsung Techwin R&D Center, 6, Pangyo-ro 319beon-gil, Bundang-gu, Songnam-si, Gyeonggi-do 463-400, Korea TEL : +82-70-7147-8740~60 FAX : +82-31-8018-3745 SAMSUNG TECHWIN AMERICA Inc. SAMSUNG TECHWIN EUROPE LTD. 100 Challenger Rd. Suite 700 Ridgefield Park, NJ 07660...
Need help?
Do you have a question about the SNH-E6411BN and is the answer not in the manual?
Questions and answers
Is this manual suitable for model # SNH-E6413BN? I can't find a manual for that model and this unit looks pretty much the same as that one.
The context shows that both SNH-E6411BN and SNH-E6413BN use similar video access URLs (http:///cgi-bin/video.cgi?msubmenu=jpg or mjpg), indicating similar functionality. This suggests they may have similar interfaces and features. Therefore, the manual for SNH-E6411BN is likely compatible with SNH-E6413BN.
This answer is automatically generated