Table of Contents
Advertisement
Advertisement
Table of Contents

Subscribe to Our Youtube Channel
Related Manuals for Casella HB4056-01 dBadge2


Summary of Contents for Casella HB4056-01 dBadge2
- Page 1 User Manual HB4056-01(EN) May 2015 Page 1 of 51...
- Page 2 Darwin and Livingstone. A lot has changed in our 200+ year history but what does remain is our commitment to reliable, trustworthy and credible solutions. For more information or to find out more about Casella and our products, please visit our website at: http://www.casellasolutions.com...
-
Page 3: Introduction
USB download via Docking Station (and combined charger) Updated & simplified Plug-in for Casella Insight data management software The models and other key features of the dBadge2 range are listed below: The addition of Bluetooth® 4.0 wireless connectivity and the supporting Airwave App enables remote control and monitoring of the instrument’s status such as battery usage,... - Page 4 It should be noted that for every measurement run, the dBadge2 records a comprehensive data set which means that you can retrospectively analyse the results within Casella Insight, regardless of what was displayed on the instrument in D1, D2 or D3.
-
Page 5: Safety And Warnings
Safety and Warnings This product is not approved for intrinsically safe operation and must not be used within hazardous areas. The dBadge2 contains no user serviceable parts. DO NOT open the product case, this will invalidate the warranty. Repair and battery replacement must be carried out by authorised service personnel only. -
Page 6: Table Of Contents
Visual Alarm Warnings ........................26 Motion sensing ..........................27 Airwave Application ........................28 Download Utility .......................... 31 Casella Insight Data Management Software ................32 User Interface Diagrams ......................33 Technical Specifications ....................... 35 Glossary of Terms......................... 39 Projected and Normalised Noise Measurements ................ 41 Noise Measurements –... -
Page 7: Typical Steps In A Noise Assessment
Typical Steps in a Noise Assessment May 2015 Page 7 of 51... -
Page 8: Getting To Know Your Instrument And Accessories
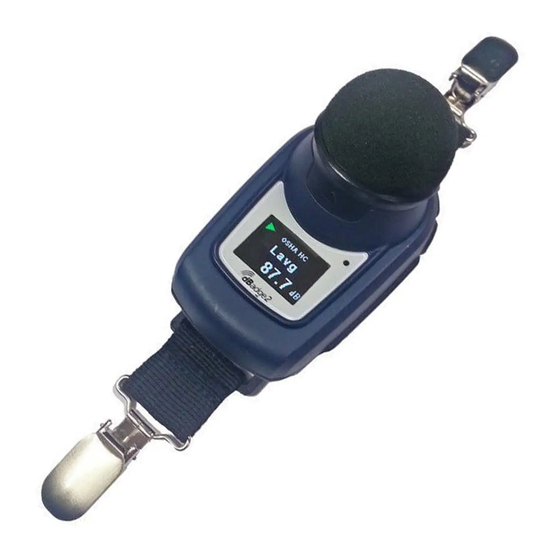
10 dBadge2 instruments and 3 Docking Stations. The Airwave App and download utility are available for download from the Support section of the Casella website as detailed in Sections 10 and 12 of this handbook respectively. May 2015... - Page 9 Mounting the dBadge2 The recommended location for mounting a personal noise exposure meter is normally in a position close to the ear (10-15cm). The dBadge2 should therefore be mounted on the apex of the shoulder to avoid reflections from the head which might otherwise affect the measurements.
- Page 10 and safety pins. This consists of a strap with four hooks which loop over the rim of the hard hat. The Microphone & Windscreen During use, it is essential that the dBadge2 is fitted with the Windscreen (part number 207069B, supplied). The Windscreen protects the microphone from potential erroneous results due to air movement passing over it but also helps to protect from dust ingress, moisture or minor impact damage.
- Page 11 Charging the dBadge2 Power Indicator Battery charging is via an intelligent combined docking station and 3-way charger (part number 207078B) required to download the dBadge2 memory and/or to charge the internal Nickel Metal Hydride (NiMH) batteries. It consists of the docking station itself and a wall mounted power supply (part number PC18) which requires an appropriate plug adaptor for the country of use (a selection is supplied) and connects to either of the 12V connectors on the rear of the docking station.
-
Page 12: Using The Dbadge2
(e.g. V1.04) and a third screen displays the serial number of the dBadge2 with two lines of user-defined text. This may be up to 32 characters and is input via Casella Insight data management software. The screen then defaults to the main... - Page 13 It is best practice (and often mandatory) to field calibrate each dBadge2 both before and after use. The dBadge2 records calibration levels and times which can be viewed later in Casella Insight data management software which will also allow the target calibration level to be set as shown on the calibrator’s own calibration certificate, nominally 114.0dB.
- Page 14 Note: the dBadge2 will not enter the calibration mode if a measurement run is taking place. If a run is in progress, stop the run according to Section 6.5. The windscreen should be removed prior to calibration. Please refer to Section 5.2 Push the CEL-120/2 (or other approved) acoustic calibrator over the microphone as shown.
- Page 15 If necessary, charge the dBadge2 as described in Section 5.3. If the memory is full either clear it as described in Section 7.17 or download the data to Casella Insight data management software. Note: if the battery or memory available is less than one hour, the run will not start.
- Page 16 ‘L’ key will scroll to the previous screen and similarly with the cursor on the 8KHz band, pressing the right ‘R’ key will scroll to the next screen. If results are required to be pre A-weighted, this can be enabled via Casella Insight data management software.
- Page 17 Only battery and memory status will be displayed and the screen will timeout if selected but any key press will return this screen for a further 20 seconds. If during a measurement run, the remaining battery or memory capacity falls below 2 hours, warning screens will be displayed and you may wish to instruct the wearer to report this to you.
- Page 18 From the PAUSED screen:- to continue the run, press the right ‘R’ key as ‘play’ symbol prompted by the to stop the run, press the left ‘L’ key as prompted by the ‘ ‘stop’ symbol and a STOP SURE? confirmation message will appear for 3 seconds then default back to the PAUSED screen if no action is taken to stop the run, press the right ‘R key as...
- Page 19 If octave band mode has been enabled on the Pro Model, additional screens and the cursor operates as per Section 6.3 Switching off the dBadge2 To switch off the dBadge2, press and hold the left ‘L’ key for the duration of the 3 second 3-2- 1 countdown (releasing during the countdown will cease the operation).
-
Page 20: Configuring The Dbadge2
Configuring the dBadge2 The configuration menu is accessed by pressing the right ‘R’ key immediately after the dBadge starts to run through its power up screens (as per Section 6.1). The configuration menu is used to:- Select language Adjust the date and time ... - Page 21 Section 7.6. There is also a fully custom configurable option which is achieved using Casella Insight data management software. Additional dosimeters D2 and D3 may be selected to display any of the other available configurations.
- Page 22 Customers in the US may wish to Select D2 for example to compare OSHA HC in Dosimeter D1 with say OSHA PEL Select D3 if you require a further comparison with say ACGIH Pre-defined Dosimeter Setups for D1, D2 and D3. The following tables detail the parameters available for display.
- Page 23 LZpk Pro. LEX,8Hr LZPk 7.6.2 Customised Dosimeter Configurations Any of the general noise parameters listed below may also be configured in Casella Insight for display in D1, D2 or D3 Threshold (Tnn) Adjustable 70 to 90dB in 1dB steps Criterion...
- Page 24 7.6.3 Dose Data Parameters available for display on dBadge2 LAvg based Dose Parameters (North America): LAvg (Tnn, Qn) TWA 8Hrs (Tnn, Qn) Projected TWA 8Hrs (Tnn, Qn) DOSE % (Tnn, Cnn, Qn) Projected DOSE % (Tnn, Cnn, Qn, Work time) Exceedance time (LAS>...
- Page 25 Press the right ‘R’ key to accept or left ‘L’ key to change 7.11 Alarms Alarm criteria can be set within Casella Insight – see Section 8. Press the right ‘R’ key to accept or left ‘L’ key to change 7.12 Auto Lock Selecting Auto Lock ‘locks’...
-
Page 26: Visual Alarm Warnings
‘L’ key to select fixed or programmable timers. The latter are set using Casella Insight data management software which will start and stop the dBadge2 automatically whilst the fixed timer will halt a run after 8 hours, initiated manually as per Section 6.3. -
Page 27: Motion Sensing
In order to check for ‘wearer compliance’ and decide if the sample is valid or not, dBadge2 has a sensor that reports a Motion Index as the percentage of time that movement has been detected during a measurement run, which is reported by Casella Insight data management software or the Download Utility. -
Page 28: Airwave Application
Airwave Application The Airwave Application allows an instrument’s status and measurement progress to be checked discretely without having to disturb the worker who may be performing a critical task or be inaccessible. It must be installed on a suitable mobile device which supports Bluetooth® 4.0 connectivity and is running Android operating system version 4.3 or higher. - Page 29 Each instrument will update and broadcast its dashboard data approximately every 3 seconds. When the Airwave app is first opened it will automatically scan for any Casella Airwave compatible products within range (typically up to 25m line of sight with no solid obstructions in the path).
- Page 30 Example data is shown for ISO D1 settings (left) and OSHA D1 & D2 (right) From this screen it is also possible to Start, Stop or Pause a measurement run. Touch and hold the appropriate icon in the lower part of the mobile device’s display for 3 seconds during which time a countdown will be displayed.
-
Page 31: Download Utility
The download utility is a simple download solution for those who just want their data in an .XLS format. It is located in the Software & Support section of the dBadge Product Support page of the Casella website and can be installed by clicking on the setup icon and following the self-explanatory installation instructions. -
Page 32: Casella Insight Data Management Software
As an audit trail original and modified data can be specified. The Casella website offers a number of ‘How to‘ videos explaining the various features and operations within the software. -
Page 33: User Interface Diagrams
User Interface Diagrams 13.1 Operation Screens Warning Messages Initialisation S c reens Battery / Memory S tatus S WIT CH ON S/N 0123456 v007.01.00 MEMORY FULL 8Hrs CHARGE ! DOWNLOAD! m y text line 1 PRESS 27 Jan 2015 dBadge2 Fred Blogs 14:34 LEFT... - Page 34 T o Enter Configuration Mod e, Press L a nd R K eys T ogether a t S witc h On ‘R’ Key ‘L ’ Key S et Y ear 2015 04 Nov S et Language English S et Month 2 0 1 5 Adjust Date &...
-
Page 35: Technical Specifications
Technical Specifications 14.1 Sound Exposure Meter/Dosimeter Standards: IEC 61252 Ed. 1.1 b: 2002, ANSI S1.25 – 1991 (R2007) for dosimeters and sound exposure meters. IEC 61260:1995. Electro acoustics, Octave-Band and Fractional-Octave-Band Filters; Class 2 ANSI S1.11-2004 (R2009) Octave-Band and Fractional-Octave-Band Analog and Digital Filters; Class 2 14.2 Electromagnetic and electrostatic compatibility: The dBadge2 conforms to the requirements for EMC emissions and immunity as specified in IEC61000-... - Page 36 Fast, Slow and Impulse Exchange Rate: Q=3 or Q=5dB exchange rates Threshold: 70-90dB in 1dB steps (Set via Casella Insight Data Management Software) Criterion Level: 70-90dB in 1dB steps (Set via Casella insight Data Management Software) Real Time Clock: Accuracy better than 1min per month Under Range Indication: <54 dB...
- Page 37 ALL noise data and for EVERY measurement run. The comprehensive set of data containing all of the below parameters is available to view and analyse within the Casella Insight PC application. The Dosimeter Setups D1, D2 and D3 simply define which parameters are displayed on the instrument itself but all values are automatically stored in the memory of the dBadge2 for download.
- Page 38 Motion Index (0/1 status of motion detection) Octave Analysis (Pro Model Only) Nine Octave bands with centre frequencies from 31.5Hz to 8kHz are provided. Octave filter results may be A or Z weighted. LEQ (nHz) and Lmax (nHz) cumulative Octave data is saved for each run. A Fast or Slow time constant can be selected for the maximum Sound Pressure Level parameter.
-
Page 39: Glossary Of Terms
Glossary of Terms A-Weighting is the standard weighting of the audible frequencies designed to approximate the response of the human ear to noise. Acoustic Calibrator is an instrument that provides a reference noise source with a standard level and frequency. This is used to calibrate and check the performance of sound level meters and noise dosimeters. - Page 40 is the A-weighted sound level measured with Slow Time Weighting. LASmax is the maximum A-weighted sound level measured with Slow Time Weighting LAvg is a parameter used in predominately in OSHA measurements. It is the average sound level over the measurement period (equivalent to Leq).
-
Page 41: Projected And Normalised Noise Measurements
Threshold Value is the threshold below which sound levels are excluded from calculation. OSHA measurements use an 80 dB threshold and call for a hearing conservation program to be implemented when the eight hour TWA exceeds 85 dB (50% dose). is the Time Weighted Average. - Page 42 When the working shift is less than 8 hours the TWA(8h) will be less than 90 dB. E.g. if the working shift is only 5 hours, then the TWA(8h) will be 86.6 dB. In Figure 2 this can be seen where the vertical green line (representing the working shift duration) crosses the blue line (representing the TWA(8h) as the shift duration increases).
- Page 43 From the above, it can be demonstrated that if the working shift is exactly 8 hours and a measurement is carried out for less than this time; the Lavg at the end of the measurement will equal the TWA(8h). The projected values are only appropriate when the measurement duration is less than the full working shift duration.
-
Page 44: Noise Measurements - A Simple Analogy
Noise Measurements – A Simple Analogy In order to try and help explain some of the above concepts, an analogy can be used. Taking a possible requirement of 100% noise dose equates to 90 dB for 8 hours (this is a TWA(8h) of 90 dB), this could be considered as running water from a tap. -
Page 45: Examples Of Possible Measurement Scenarios
Therefore, 35 litres divided by 8 hours equals 4.375 litres per hour. This would be the analogous to the TWA(8h) value. Using the same values the projected dose can also be calculated. 25 litres of water has been collected after 5 hours. If the working shift was 5 hours this would be a dose of 25/80 litres which equals 31.25% dose (this is what the dose at the end of the measurement would be). - Page 46 Scenario 2: Criterion duration (Tc) = 8 hours; measurement duration (Tm) = 5 hours; shift duration (Ts) = 5 hours The noise which the worker is exposed to is measured for 5 hours, which is the entire shift duration. This is the same situation as a worker who has a shift duration of 8 hours, but is only exposed to noise during 5 hours of this shift.
- Page 47 Figure 11 shows the 12 hour measurement It is now possible to calculate the value normalised to 8 hours, i.e. TWA(8h). This is effectively achieved by keeping the measured energy (represented by the blue line) constant, but changing the duration from 12 hours to 8 hours. This will have the effect of the TWA(8h) value being higher than the 12 hour Lavg value.
- Page 48 Figure 14 shows the 10 hour measurement (blue line); but also the same noise level continued for the rest of the 12 hour shift (green line) Projecting the 10 hour measurement for the remainder of the 12 hour shift means that the Lavg for the 12 hours equals the Lavg for the 10 hours = 88.0 dB.
-
Page 49: Fault Finding & Diagnostics
Figure 16 when the standard TWA(8h) is calculated, the value effectively increases as the measurement duration increases Figure 17 when the projected TWA(8h) is calculated, the value effectively equals the Lavg whilst the measurement time is not greater than 8 hours. Once the duration exceeds 8 hours then the TWA(8h) will start increasing. -
Page 50: Declarations
Bluegiga technologies. The Bluetooth® Qualified Design IDs for this module are:- Bluetooth Controller QDID: B021015, Bluetooth Smart Software: QDID B018942 Copies of the modules regional approvals certificates may be obtained from Casella or Bluegiga. This product contains an FCC and Industry Canada certified Bluetooth® Low energy wireless... - Page 51 CE DECLARATION OF CONFORMITY Casella declares that this product is in compliance with the essential requirements and other relevant provisions of applicable EC directives. A copy of the EU Declaration of Conformity for this product may be obtained by clicking on the www.casellasolutions.com...
Need help?
Do you have a question about the HB4056-01 dBadge2 and is the answer not in the manual?
Questions and answers