Table of Contents
Advertisement
Advertisement
Table of Contents

Related Manuals for Vizio SB4051-C0


Summary of Contents for Vizio SB4051-C0
- Page 1 VIZIO QUICK START GUIDE Model: SB4051-C0...
-
Page 2: Important Safety Instructions
IMPORTANT SAFETY INSTRUCTIONS Your Unit is designed and manufactured to operate within defined design limits, and misuse may • The wall socket should be located near your Unit and be easily accessible result in electric shock or fire. To prevent your Unit from being damaged, the following rules should •... -
Page 3: Table Of Contents
TABLE OF CONTENTS Package Contents ................... 4 Controls & Connections ................. 5 First-Time Setup..................8 Using the Remote ................... 15 Connecting with HDMI ................16 LED Indicators ..................18 Programming the Sound Bar ..............21 Using Button Combinations ..............22 Bluetooth Pairing .................. -
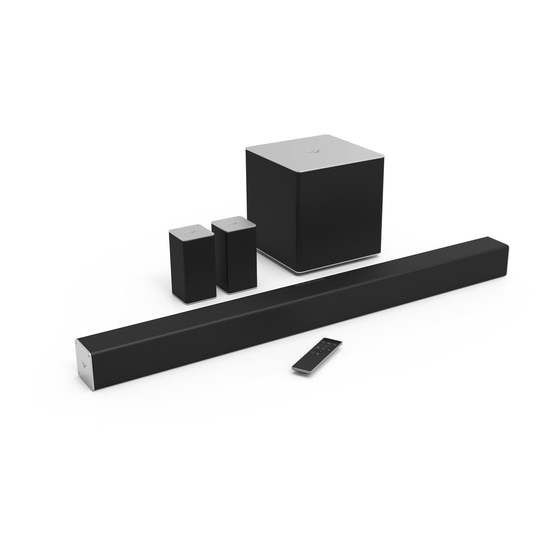
Page 4: Package Contents
PACKAGE CONTENTS High Definition Wireless 2 x Satellite Remote Control Sound Bar Subwoofer Speakers with Batteries Stereo RCA to 2 x Power Coaxial Audio Digital Optical 3.5mm Audio Cable Cables Cable Cable HDMI Cable 2 x Wall 2 x Wall 2 x Wall Mount Brackets Mount Brackets... -
Page 5: Controls & Connections
CONTROLS & CONNECTIONS Back of Sound Bar OPTICAL (4) Power Port AUX (1) Digital Optical HDMI OUT (6) Analog Audio In Audio In HDMI Out (Stereo RCA) (ARC) DIGITAL (3) HDMI IN (5) Coaxial In AUX (2) HDMI IN Analog Audio In USB* (7) (Stereo 3.5mm) USB In... - Page 6 Volume Increase or decrease the loudness of the audio. Bluetooth Input Hold to pair. (See ‘Bluetooth Pairing’ for more information.) Input Press to change the audio source. Power Press to turn soundbar on or off. Top of Sound Bar...
-
Page 7: Back Of Subwoofer
Back of Subwoofer Back of Satellite Speaker Satellite Speaker Port (Connects to Subwoofer) Power Switch Power Port Satellite Speaker Ports (Connects to Satellite Speakers) LED Indicator Pairing Button... -
Page 8: First-Time Setup
FIRST-TIME SETUP Back of Sound Bar 3.5MM TO 3.5MM TO DIGITAL OPTICAL DIGITAL COAXIAL RCA CABLE RCA CABLE CABLE CABLE † †‡ GOOD GOOD BETTER BETTER CHOOSE ONE CABLE GOOD * Not all TVs have the audio outputs shown above. To connect the Sound Bar directly to your other devices (Blu-Ray player, game system, etc.) see your device’s user manual. - Page 9 Do not use HDMI IN for First-Time Setup. See Advanced Setup if you would like to connect HDMI devices (such as Blu-ray™ players, cable HDMI boxes, and game consoles) to your Sound Bar. CABLE BEST Connect the Sound Bar to your TV* using one of HDMI cables send Video (Out) and receive the connection types to the left.
- Page 10 Connect the power cable to the Sound Bar AC IN as shown. Plug the power cable into an electrical outlet.
- Page 11 Connect the satellite speakers to the subwoofer using the included satellite speaker audio cables. Match the color coded speaker cable to the matching speaker port color.
- Page 12 Connect a power cable to the subwoofer. Plug the power cable into a power outlet. Flip the power switch into the ON position.
- Page 13 For the best surround sound experience, position the Sound Bar, subwoofer, and satellite speakers as shown. The Sound Bar should be close to ear level. Sound Bar is centered below the TV. Note: Speaker stands not included.
- Page 14 Remove the battery cover Insert the included batteries by gently sliding it away and gently slide the battery from the remote. cover back into place. Turn your TV on, the Sound Bar will automatically turn on and begin searching for an active input. Input Power The LED indicators on the front of the Sound Bar will...
-
Page 15: Using The Remote
USING THE REMOTE Display Displays Sound Bar Settings Input Press to change input source. (Press INPUT then Previous to select previous input. Press INPUT then Next to select Bluetooth input.) Power Press to turn on or off. Menu Press to access the menu settings. Enter/Play/Pause Press to select an option. -
Page 16: Connecting With Hdmi
Control from the CEC menu. The following steps are for use with a VIZIO TV, steps may differ by TV manufacturer. See your TV’s user manual for more information. CEC Function naming may differ by TV manufacturer. See your TV’s user manual for more information. - Page 17 Back of TV* Connect to HDMI (ARC) port on your TV * HDMI ARC port location may differ by TV manufacturer. See your TV’s user manual for more information.
-
Page 18: Led Indicators
Press the Enter button on the remote. The Sound Bar will be discoverable for 15 minutes. Bluetooth Pairing (When searching for device) You can now search for the Sound Bar (VIZIO SB4051) using your Bluetooth Device. The BT Pair Flash from Bottom to Top sound bar will power down if no device is found. - Page 19 Function LED Behavior Description Surround Balance Two center LEDs Press the Next/Previous button to increase/decrease the surround balance level on each Surr Bal indicate Surround side. The LED indicators will move to the top with balance levels to the right and down Balance is centered.
- Page 20 Press the Next/Previous button to enable/disable VIZIO TV Remotes. When TV Remote On VZtv Rmt enabled (On), you can use a VIZIO TV remote control to turn on the Sound Bar TV Remote Off (using the TV Volume Up button) and control volume.
-
Page 21: Programming The Sound Bar
PROGRAMMING THE SOUND BAR You can program your Sound Bar to accept TV remote IR commands. Press the Menu button on the remote, then use the Up/Down buttons to navigate to Prg Remote. Use the Next/Previous buttons to toggle through Learn Vol -, Learn Vol +, and Learn Mute. Function LED Behavior Description... -
Page 22: Using Button Combinations
Note: This will erase all settings and preferences that you have set. Enable VIZIO VIZIO TV Enable/disable the use of a VIZIO TV remote control to power on and TV Remote Remote adjust the volume of the sound bar. To enable/disable this function,... -
Page 23: Bluetooth Pairing
Once the device is paired, the LED Indicators will stop flashing. You can now search for the Sound Bar (VIZIO SB4051) using your Bluetooth device. For more information, refer to the user documentation that came with the device. -
Page 24: Using Bluetooth Mode
USING BLUETOOTH MODE Maximizing Signal Your Sound Bar supports music streaming from smartphones, tablets, and computers with Bluetooth A Bluetooth signal has a range of up to 30 feet. Keep capability. Device compatibility will vary, see your in mind that Bluetooth is a compressed audio format, device’s documentation for more information. -
Page 25: Re-Linking The Subwoofer With The Sound Bar
RE-LINKING THE SUBWOOFER WITH THE SOUND BAR The subwoofer has already been paired with the sound bar by VIZIO. However, they may need to be re-link if there is no sound coming from the subwoofer. Turn off your TV speakers when programming your sound bar. -
Page 26: Advanced Setup
ADVANCED SETUP Back of Sound Bar 3.5MM TO 3.5MM TO DIGITAL OPTICAL DIGITAL COAXIAL RCA CABLE RCA CABLE CABLE CABLE Game Console Network Media Tablet/MP3 Player/Laptop USB Thumb Player Drive* † Cable not included. * Supports .WAV file format playback only. -
Page 27: Advanced Setup - Hdmi
ADVANCED SETUP - HDMI Connect to HDMI (ARC) port on your TV HDMI cables transmit both audio and video. To view video from these devices, turn the Sound Bar on, then set the Sound HDMI CABLE Bar input to HDMI-ARC 5. Set your TV input to the HDMI port to which the Sound Bar is connected. -
Page 28: Wall-Mounting The Sound Bar
WALL-MOUNTING THE SOUND BAR Wall-Mount Screw Holes Back of Sound Bar Insert the two wall-mount screws into the wall-mount screw holes, and then tighten them with a Phillips screwdriver. Place the included wall mounting template against the wall under your TV. Mark the four bracket holes using a pencil. - Page 29 Be sure your screws are attached to wood studs, drywall anchors (for drywall), or concrete anchors (for brick/concrete walls). Screws for attaching the brack- ets to the wall are not included. Choose the screw type and length appropriate your home’s construction.
-
Page 30: Wall-Mounting The Satellite Speakers
WALL-MOUNTING THE SATELLITE SPEAKERS To wall-mount the satellite speakers: 1. Attach the wall mount screw to the back of the satellite speaker. 2. Attach the wall mount to the back of the satellite speaker. 3. Align and mount the satellite speaker with the wall mount bracket. - Page 31 Do You Have Questions? Find Answers At SUPPORT.VIZIO.COM Find help with: • New Product Setup • Connecting Your Devices • Technical Problems • Product Updates • And More Live Chat Support Available You can also contact our award-winning support team at:...
- Page 32 Customized Support Get assistance quickly with your information on-hand. News & Offers Take advantage of the latest news and special offers from VIZIO. Safety & Satisfaction Stay up to date with important product updates and notifications. REGISTER YOUR VIZIO PRODUCT NOW...
-
Page 33: Help & Troubleshooting
HELP & TROUBLESHOOTING • Press the POWER button on the remote control or on the top of your Sound Bar. There is no power. • Ensure the power cord is securely connected. • Plug a different device into the electrical outlet to verify that the outlet is working correctly. •... -
Page 34: One-Year Limited Warranty
Covers units purchased as new in United States and Puerto Rico Only VIZIO provides a warranty to the original purchaser of a new Product against defects in materials and workmanship for a period of one year of non-commercial usage and ninety (90) days of commercial use. -
Page 35: Legal & Compliance
LEGAL & COMPLIANCE FCC Class B Radio Interference Statement NOTE: This equipment has been tested and found to comply with the limits for a Class B digital device, pursuant to Part 15 of the FCC Rules. These limits are designed to provide reasonable protection against harmful interference in a residential installation. - Page 36 © 2015 VIZIO INC. ALL RIGHTS RESERVED. 150120OC-US-A...
Need help?
Do you have a question about the SB4051-C0 and is the answer not in the manual?
Questions and answers