Table of Contents
Advertisement
Advertisement
Table of Contents

Summary of Contents for Net1 R-90
- Page 1 User Manual Gateway R-90 CDMA 2000 EV-DO Rev B Router...
- Page 2 R-90 Series Important Notice Due to the nature of wireless communications, transmission and reception of data can never be guaranteed. Data may be delayed, corrupted (i.e., have errors) or be totally lost. Although significant delays or losses of data are rare when wireless devices such as the router are used in a normal manner with a well-constructed...
-
Page 3: Table Of Contents
R-90 Series TABLE OF CONTENTS 1 Introduction ......................4 2 Product Overview ....................4 2.1 Placement of your R-90 ................... 5 3 Using your Router ....................6 3.1 Package Contents ................... 6 3.2 Router Interfaces .................... 6 3.3 Power LED ..................... 6 3.4 Signal Strength LED .................. -
Page 4: Introduction
Integrated 802.11 b/g/n Wireless Access Point The R-90 supports Wi-Fi modes b/g and n. Your router as default is set to Wi-Fi mode g. To use mode n you can change this by logging into the web interface (instructions are in section 3.10). Although, please... -
Page 5: Placement Of Your R-90
Place your R-90, the central connection point of your network, as close as possible to windows or in rooms at the outer side of your house. If you also use the Wi-Fi feature of the R-90, it should be placed near the centre of your wireless network devices. -
Page 6: Using Your Router
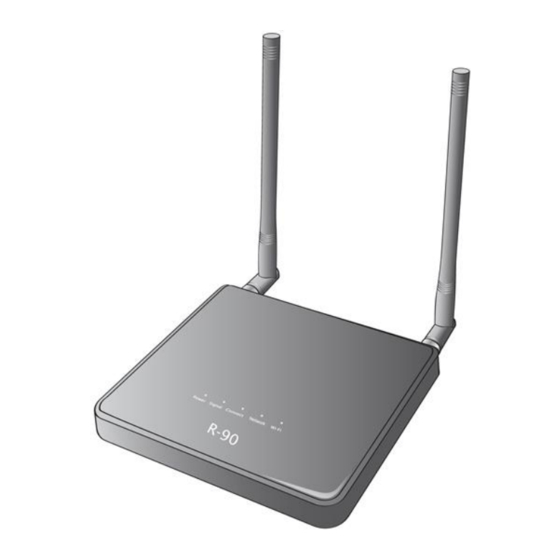
3.2 Router Interfaces The R-90 is designed to be placed on a desktop or wall mounted. All the ports at the back of the router are for better organization and utility. The LED indicators are easily visible on the top of the router to provide you with information about network activity and status 3.3 Power LED... -
Page 7: Signal Strength Led
This LED indicates the status of your Wi-Fi connection. LED Colour Status No Wi-Fi Blue Solid Wi-Fi network within R-90 activated Blue Blinking Data passing through Wi-Fi 3.8 Other Features (6) Network connections to Computers (RJ-45/Ethernet) (7) Phone line (RJ-11) -
Page 8: Rechargeable Battery
R-90 Series 3.9 Rechargeable Battery The R-90 comes with the rechargeable battery already pre-installed. It is natural that over time the battery performance will degrade. If you need to remove and replace your battery please follow the instructions below Before removing or inserting the battery, please ensure that you disconnect the power supply, and move the power switch on the R-90 to the OFF position. -
Page 9: Setting Up Your Hardware
R-90 Series 3.10 Setting up your Hardware 1 Make sure your router is not connected to any power source and that all the LEDs are OFF. 2 How to setup the antennas for maximized performance ① Antennas are located on both sides of the router. -
Page 10: Connecting And Configuring Your Router
3.11.1 Connecting with Wi-Fi When connecting through Wi-Fi please ensure you try to connect to the correct R-90 as each device has a unique SSID. The SSID can be found on the sticker, which is located on the bottom of the router. Please note that the last 4 characters are random. -
Page 11: Web Manager Options
R-90 Series Web Manager Options The Web Manager User Interface is a web-based tool that you can use to setup the router. You can also use it to manage advanced functions of your router. From the User Interface, you can perform these tasks: ... - Page 12 R-90 Series shown above. If another user is already logged into the web interface then you will receive this error message. Please wait until the other person has logged out. 3. After entering the correct user name and password you will be asked if you want to change the user name and password of the web page.
- Page 13 R-90 Series 4. Once you click OK the following screen will appear and you can then enter your new User Name and Password. Once you have done this please press the apply button. Your router will reboot and you will need...
-
Page 14: Basic Wireless Settings
R-90 Series 4.1 Basic Wireless Settings Clicking on the header of the “Basic Wireless Settings” tab will take you to the “Basic Wireless Settings” page. There are options that allow you to make changes to the Wi-Fi wireless network settings 4.1.1... - Page 15 Wi-Fi Mode Your R-90 can support three different types of Wi-Fi network, types b, g and n. As default the R-90 is set to support mixed mode (b/g/n). This setting ensures that nearly all Wi-Fi devices will be able to connect to your R-90 without any issues 4.1.4...
-
Page 16: Router Status
R-90 Series Router Status Clicking on the header of the “router Status” tab will take you to the “router Status” header page. From this page you can find all the relevant information pertaining to your router such as firmware version and IP address. -
Page 17: Network Information
R-90 Series 4.3 Network Information The network information page will provide all the information and detail with regards to the mobile network. The information on this page can be very useful when you are in contact with Customer Services. -
Page 18: System Settings
SSID, WPA password, Port Forwarding etc will be lost. The login will revert back to the default settings. Router Upgrade – Occasionally your operator may release a new router firmware for your R-90, and this new firmware can be applied using this option CDMA Upgrade –... - Page 19 R-90 Series...
-
Page 20: Advanced Wireless Settings
Router Management via Wi-Fi’ checkbox. From this page you can also configure which devices are allowed to connect to your R-90. If at anytime you would like to see which devices are connected to your R-90 then you can simply press the Wi-Fi... -
Page 21: Multi Port Forwarding
R-90 Series 4.6 Multi Port Forwarding Clicking on the “Multi Port Forwarding” sub-heading in the “Advanced” list will take you to the relevant page. Multi Port Forwarding allows you to route a range of ports to the devices that are connected to your router. -
Page 22: Single Port Forwarding
R-90 Series 4.7 Single Port Forwarding This feature helps forward IP packets from a specific port to a specific host in your LAN by changing the port number. -
Page 23: Firewall
R-90 Series 4.8 Firewall This page will allow you to enable / disable your firewall... -
Page 24: Lan Mac Filtering
R-90 Series 4.9 LAN MAC Filtering Your router can be configured to restrict access to the Internet, email or other network services. Restrictions can be set for a single computer, a range of computers or multiple computers. For example, to restrict Internet access for a single computer, enter the IP address of the computer you ”. -
Page 25: Wan Setup
R-90 Series 4.10 WAN Setup Clicking on the “WAN Setup” sub-heading in the “Advanced” list will take you to the “WAN Setup” page. This is where you can enable or disable the router’s DMZ, Internet Ping, and HTTP-related items. 4.10.1 Demilitarized Zone (DMZ) The DMZ feature allows you to specify one computer on your internal network to be placed outside the firewall. -
Page 26: Lan Ip Setup
IP address for each computer on your network. To turn off the DHCP ”. server, de-select “Use router As DHCP Server” and click “Apply If at anytime you would like to see which devices are connected to your R-90, please press the DHCP clients table button... - Page 27 R-90 Series...
-
Page 28: Dynamic Dns
R-90 Series 4.12 Dynamic DNS Dynamic DNS (Domain Name Service) is a method for Dynamic IP users to notify a domain name server to change, in real time (ad-hoc) the active DNS configuration of its configured hostnames, addresses, or other information stored in DNS. -
Page 29: Static Routes
R-90 Series 4.13 Static Routes A static IP address connection type is less common than other connection types. If your ISP uses static IP addressing, you will need your IP address, subnet mask and ISP gateway address. This information is available from your ISP or on the paperwork that your ISP gave you. -
Page 30: Upnp Settings
R-90 Series 4.14 UPnP Settings From this page you can enable / disable UPnP, Universal Plug and Play. -
Page 31: Cdma Settings
R-90 Series 4.15 CDMA Settings Clicking on the header of the “CDMA Settings” tab will take you to its header page. From this page, the router’s basic settings can be modified. These settings include: EV-DO Mode – This setting allows the user to toggle between Rev A and Rev B. Rev A provides better voice quality when using VoIP while Rev B provides higher data speed ... -
Page 32: Voip Account Settings
R-90 Series 4.16 VoIP Account Settings User Name: The default User Name appears in this box. If you do not see a User Name from the box, contact Customer Service and ask for the correct User Name. Password: The default Password appears in this box. If you do not see a Password from the box, contact Customer Service and ask for the correct Password. -
Page 33: Voip Call Functions
5.1 Activating Voice over IP In order to use Voice over IP you must have an account with Net1. If you do not have the service please contact Customer Service. 5.2 Placing Voice Calls 1. -
Page 34: Restricting Caller Line Identification
R-90 Series 5.5 Restricting Caller Line Identification Your phone number will automatically be sent whenever a call is made. To stop your number being sent by the network please enter the following before your call *31*. You will have to enter this number before every... -
Page 35: Troubleshooting
Please ensure that you are connected to your R-90. If you are using Wi-Fi please try to connect via an Ethernet cable to the R-90 to see if that resolves the I am unable to connect to the Internet. The R-90’s issue. -
Page 36: Technical Specification
R-90 Series Technical Specification Size 180 x 160 x 26 mm Weight 500g Battery Type Li-ion (2 cell), 7.4V(Max 8.4V)/1000mA/h Operating Temperature -20o C ~ +60o C Storage Temperature -30o C ~ +70o C Humidity 5 ~ 95% Stand by Time... -
Page 37: Certification
R-90 Series Certification...
Need help?
Do you have a question about the R-90 and is the answer not in the manual?
Questions and answers