
Related Manuals for LightwaveRF JSJSLW452


Summary of Contents for LightwaveRF JSJSLW452
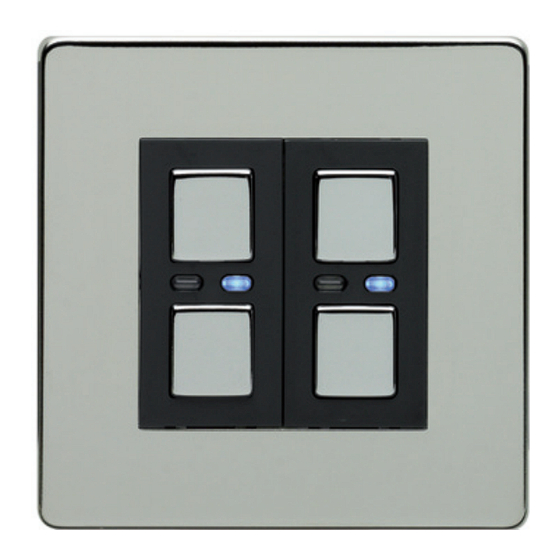
- Page 1 2-Way Dimmer (2 Gang) Model Nos. JSJSLW452 Instruction Manual Connect Series www.megamanuk/lightwaverf.com...
-
Page 3: Get Started
Get Started How do I get started? If the Dimmer has already been installed, refer to the quick setup guide on the following pages to get going. If you are planning to install the Dimmer, please refer to the installation instruc- tions that follow quick setup. - Page 4 Dimmer is o . Blue LED. When ‘O ’ Button. illuminated, Hold to lower light Dimmer is on. level. IMPORTANT: Please retain these instructions for guidance on how to link Remote Handsets and other LightwaveRF Controllers. For additional guidance please visit www.megamanuk.com/lightwaverf...
-
Page 5: Quick Setup
Quick Setup Guide Quick Setup Manual Dimming • Tap either ‘on’ (top) button once to switch the Dimmer on (Blue LED indicator will illuminate). Press and hold the on button to raise the light level. • Tap either ‘o ’ (bottom) button once to switch the Dimmer o (Amber LED indicator will illuminate). -
Page 6: Installation
NOTE: it is important to install this product in accordance with the following instructions. Failure to do so may void your warranty. LightwaveRF is fully legal to install in your own home. However, if in doubt, always consult a qualified electrician. - Page 7 Installation VERY IMPORTANT • A LightwaveRF 2-Way Dimmer (each gang) needs to be used in conjunc- tion with a standard LightwaveRF Dimmer to perform 2-Way Switching. The LightwaveRF 2-Way Dimmer cannot be used in conjunction with a standard lightswitch. This will cause damage to the Dimmer.
- Page 8 Installation IMPORTANT: Turn o the mains electrical supply. Ensure that the wall (back) box has a minimum depth of 35mm. Remove and disconnect the existing light switch (if applicable). It may be useful at this point to mark out or take a photograph of the connections to the existing switch so that the correct wires can easily be transferred to the new Dimmer.
- Page 9 Installation Connect the wiring as per the wiring diagram on the following page. Ensure that the terminals are properly tightened and that no bare wire is visible. Be aware that existing wiring circuits are not always correctly coloured, and that there may be other wired connections present in the back box;...
- Page 10 Installation From Lighting Circuit IMPORTANT: The signal cable input marked ‘S’ must ONLY be connected Live Switched Live to the wire running to the other Dimmer NOT live mains; this will 3 - C o re cause irreparable damage. Cable Earth Live Signal Cable...
- Page 11 The maximum circuit load for each 2-Way Dimmer Gang is equal to the maximum load on the standard LightwaveRF Dimmer it is connected to (i.e. 250W or 210W). • ONLY Dimmable lamps can be used even if the Dimmers are used solely to switch between the on and o states without dimming.
- Page 12 Compatibility & Lamps Compatibility Ensuring the compatibility of your lamps (bulbs) with LightwaveRF Dimmers will ensure that you get the best experience from your lighting setup. LightwaveRF Dimmers are compatible with • Standard mains voltage incandescent, Eco Halogen & low energy incandescent lighting (min 20W, max 250W) •...
-
Page 13: Troubleshooting
2-Way Dimmer to function improperly. Remember, the signal terminal must NOT be connected to 230V mains. If these measures fail, contact technical support via www.lightwaverf.com. - Page 14 Solution: The connected standard LightwaveRF Dimmer may be Locked. This may have been done using a Socket Locker or from the LightwaveRF App. If it is locked on, then the 2-Way Dimmer will not turn o manually. If it is locked o , it will be possible to turn the Dimmer on, but it will automatically turn o again after five minutes.
- Page 15 (standard lightswitch housing) over 35mm deep. Is it legal for me to install the Dimmer? Yes, LightwaveRF is fully legal for you to install in your own home. Is there a maximum number of lamps I can control with the Dimmer? You can control any number of lamps (bulbs) as long as they do not exceed the maximum loading in total.
- Page 16 What if I need a switch to operate on/o only? A LightwaveRF Relay in conjunction with a Wire-free Switch can be used for on/o switching in place of the Dimmer (see www.lightwaverf.com). Can I separate and change individual switches in multigang Dimmers? Multigang Dimmers are not designed to have their switch modules separated and interchanged;...
-
Page 17: Technical Specification
Technical Specification Specification Input rating: 220-240V~ 50Hz. Output rating: 3W~250W max (per gang) Incandescent Load: 20W min 250W max (per gang) Back Box Depth: 35mm min. Earthing Requirement: Not essential (double insulated) Standby Energy Use: Less than 1W (per gang) Wiring: Neutral wire NOT required Warranty: 2 year standard warranty... - Page 18 2 Quadrant Park Mundells Welwyn Garden City Herts AL7 1FS 01707 386035 www.megamanuk.com/lightwaverf...
Need help?
Do you have a question about the JSJSLW452 and is the answer not in the manual?
Questions and answers