Table of Contents
Advertisement
Available languages
Available languages
OWNER'S MANUAL
Operating and Servicing Instructions
Español - página E1
hoover.com/commercial
IMPORTANT: READ CAREFULLY BEFORE ASSEMBLY AND USE.
Questions or concerns? For assistance, please call Customer Service at 1-800-944-9200
Mon-Fri 8am-7pm EST. PLEASE DO NOT RETURN THIS PRODUCT TO THE STORE.
THIS PRODUCT IS INTENDED FOR COMMERCIAL USE ONLY.
©2012 Techtronic Floor Care Technology Limited. All rights reserved. #961151055 ID 106190-R0
Advertisement
Table of Contents

Related Manuals for Hoover CH50400


Summary of Contents for Hoover CH50400
- Page 1 OWNER’S MANUAL Operating and Servicing Instructions Español - página E1 hoover.com/commercial IMPORTANT: READ CAREFULLY BEFORE ASSEMBLY AND USE. Questions or concerns? For assistance, please call Customer Service at 1-800-944-9200 Mon-Fri 8am-7pm EST. PLEASE DO NOT RETURN THIS PRODUCT TO THE STORE.
-
Page 2: Table Of Contents
Troubleshooting Guide ................12 Service ......................13 Warranty......................14 If you need assistance: Visit our website at hoover.com. Follow the authorized dealer locator link to find the Hoover authorized ® dealer nearest you or call 1-800-944-9200 for an automated referral of Hoover authorized dealer ®... -
Page 3: Important Safety Instructions
IMPORTANT SAFETY INSTRUCTIONS SAVE THESE INSTRUCTIONS When using an electrical appliance, basic precautions should always be followed, including the following: READ ALL INSTRUCTIONS BEFORE USING THIS APPLIANCE. WARNING: TO REDUCE THE RISK OF FIRE, ELECTRIC SHOCK OR INJURY: • Fully assemble before operating. •... - Page 4 • Make sure your extension cord is in good condition and is the correct size for your appliance. Table (A) shows the correct size to use depending on cord length and nameplate ampere rating. If in doubt, use the next heavier gauge. The smaller the gauge number, the heavier the cord.
- Page 5 GROUNDING INSTRUCTIONS (CONT’D) DANGER - Improper connection of the equipment- grounding conductor can result in the risk of electric shock. Check with a qualified electrician or service person if you are in doubt as to whether the outlet is properly grounded. Do not modify the plug provided with the appliance - if it will not fit the outlet, have a proper outlet installed by a qualified electrician.
-
Page 6: Features
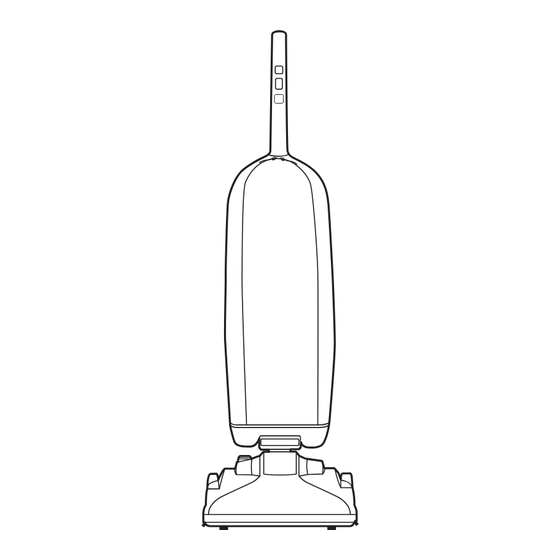
1. FEATURES Handle On-Off Button Hi-Lo Button Check Bag Indicator Upper/Lower Cord Hooks Carrying Handle Bag Door Stair Cleaning Handle Handle Release Pedal 10 Furniture Guard 11 Edge Groomers... -
Page 7: How To Assemble
2. HOW TO ASSEMBLE CARTON CONTENTS Remove all parts from carton and identify each item shown. Make sure all parts are located before disposing of packing. A Handle B Cleaner body C Bagged screw (Attached to upper cord wrap) ATTACH HANDLE TOOL REQUIRED: PHILLIPS OR FLATHEAD SCREWDRIVER 2.2 Push handle into opening at top of cleaner. -
Page 8: Power Cord Assembly
POWER CORD ASSEMBLY 3.3 This cleaner is equipped with a Quick-Change power cord (A). To connect the extension cord to the Quick-Change power cord, plug the socket end of extension cord into the 3-prong end of the Quick-Change cord. When completed, plug extension cord into properly grounded outlet to operate. -
Page 9: How To Operate
4. HOW TO OPERATE Handle Release Automatic Height Adjustment 4.1 Step on handle release pedal to lower nozzle handle. automatically adjusts various carpet heights and hard floor surfaces. Carrying Cleaner 4.3 The cleaner can be moved by using the carrying handle. Stair Cleaning 4.4 With handle in lowered... -
Page 10: General Maintenance
What To Buy To assure cleaning effectiveness, use only Hoover ® Type Q Bags. It is important that you use only genuine HOOVER ® bags to assure your cleaner operates at peak per- formance. To order bags please visit hoover.com. -
Page 11: Replacing Brushroll
What to Buy To assure cleaning effectiveness, use only Hoover ® Brushroll part #301428009. It is important that you use only genuine HOOVER ® parts to assure your cleaner operates at peak per- formance. To order bags please visit hoover.com. -
Page 12: Troubleshooting Guide
In the event that further assistance is required, see your Yellow Pages for an authorized HOOVER ® Dealer or visit our website at www.hoover.com. Costs of any transportation to and from any place of repair are to be paid by the owner. The service parts used in this unit are easily replaced and readily available from an authorized HOOVER Dealer or retailer. -
Page 13: Service
Follow the service center link to find the service outlet nearest you. • For an automated referral of authorized service outlet locations call 1-800-944-9200. Do not send your vacuum to Hoover®, Inc., Company in Glenwillow for service. This will only result in delay. If you need further assistance: To speak with a customer service representative call 1-800-944-9200;... -
Page 14: Warranty
When used and maintained in normal Commercial than an Authorized Hoover Warranty Service use and in accordance with the Owner’s Manual, Dealer. Hoover, Inc. reserves the right to inspect your HOOVER product is warranted against any alleged defective product and make final ®... - Page 15 MANUAL DEL PROPIETARIO Instrucciones de Funcionamiento y Servicio hoover.com/commercial IMPORTANTE: LEA ATENTAMENTE ANTES DE ENSAMBLAR Y USAR. ¿Tiene alguna pregunta o inquietud? Para obtener asistencia, llame al Servicio de atención al cliente al 18009449200, de lunes a viernes, de 8 a.m. a 7 p.m., hora del ESTE, antes de devolver este producto a la tienda.
- Page 16 Concesionario autorizado de servicio de garantía ® de uso comercial normales y según el Manual del de Hoover. Hoover, Inc. se reserva el derecho de propietario, el producto estará garantizado contra inspeccionar cualquier producto que se supone defectos originales en el material y la fabricación es defectuoso y de tomar las decisiones finales durante un año completo desde la fecha de com-...
- Page 17 • Consultando las Páginas amarillas en la sección “Aspiradoras – uso” doméstico. • Visite nuestro sitio web en hoover.com (clientes estadounidenses) o hoover.ca (clientes can . . adienses). Siga el enlace del centro de servicio para encontrar el centro de servicio más cer cano.
- Page 18 Garantía.......................14 Si necesita ayuda: Visite nuestro sitio web en www.hoover.com. Haga clic en el enlace que permite localizar los vend- edores autorizados hoover para encontrar el vendedor más cercano, o marque el 1-800-944-9200 para escuchar un mensaje indicando la dirección de los vendedores autorizados Hoover® (sólo en ee.
- Page 19 SALVAGUARDIAS IMPORTANTES ! ¡ ¡GUARDE ESTAS INSTRUCCIONES! Al usar un aparato eléctrico, observe siempre las precauciones básicas, incluyendo las siguientes: LEA TODAS LAS INSTRUCCIONES ANTES DE USAR ESTE APARATO ADVERTENCIA: PARA REDUCIR EL RIESGO DE INCENDIOS, CHOQUES ELÉCTRICOS O LESIONES: •...
- Page 20 CUALQUIER OTRO MANTENIMIENTO DEBE SER REALIZADO POR UN REPRESENTANTE DE MANTENIMIENTO AUTORIZADO. En caso de necesitar más ayuda, busque a un Concesionario autorizado de HOOVER® en las Páginas amarillas o visite nuestro sitio Web en www.hoover.com. Los costos de transporte desde y hacia el lugar de reparación estarán a cargo del propietario.
- Page 21 Para asegurar una limpieza eficaz, utilice únicamente cepillo de rodillos de Hoover®, núm. de pieza 301428009. Es importante que utilice únicamente piezas de Hoover® genuinas para asegurar que su aspiradora funcione al máximo de su rendimiento. Para hacer sus pedidos de bolsas, visite www.hoover.com. Las bolsas de...
- Page 22 • Desenchufe el aparato antes de conectar el accesorio de mano turboaccionado. • No aspire ningún objeto que se esté quemando o que libere humo, como cigarrillos, fósforos o cenizas calientes. • No use este aparato sin la bolsa para polvo ni los filtros colocados en su lugar. •...
- Page 23 CONJUNTO DE LA ASPIRADORA PELIGRO – La conexión inadecuada del conductor de conexión a tierra del equipo puede ocasionar un riesgo de choque eléctrico. Consulte a un electricista calificado o al personal de mantenimiento si no está seguro de que la toma de corriente está conectada a tierra en forma adecuada.
- Page 24 Qué comprar Para asegurar una limpieza eficaz, utilice únicamente bolsas tipo Q con material de filtración de Hoover ® Es importante que utilice únicamente bolsas de Hoover ® genuinas para asegurar que su aspiradora funcione al máximo de su rendimiento.
- Page 25 4. FUNCIONAMIENTO Ajuste automático Liberación del de la altura mango 4.2 La boquilla se ajus- 4.1 Pise el pedal para automáticamente bajar el mango. a distintas alturas de alfombras y superficies de suelo duro. Transporte de la aspiradora 4.3 Es posible mover la aspiradora utilizando el mango de transporte.
- Page 26 1. FUNCIONES Mango Botón de encender/apagar Botón Hi/Low (potencia alta/baja) Indicador de verificación de la bolsa Ganchos para el cordón superiores/inferiores Mango de transporte Puerta de la bolsa Mango para limpieza de escaleras Pedal para soltar el mango 10 Protector para muebles 11 Limpiadores de bordes...
- Page 27 2. ENSAMBLAJE DE LA ASPIRADORA CONTENIDO DE LA CAJA Retire todas las piezas de la caja e identifique cada artículo que se muestra. Asegúrese de ubi- car todas las piezas antes de eliminar el embalaje. A Mango B Cuerpo de la aspiradora C Tornillo guardado en una bolsa (Conectado al enrollador de cordón superior).
- Page 28 CONJUNTO DEL CABLE DE ALIMENTACIÓN 3.3 Esta aspiradora está equipada con un cable de alimentación de Cambio-Rápido (A). Para conectar el cable de extensión al cable de alimentación de Cambio-Rápido, enchufe el extremo del cable de extensión que tiene el receptáculo dentro del extremo del cable de Cambio-Rápido que tiene 3 patas.
Need help?
Do you have a question about the CH50400 and is the answer not in the manual?
Questions and answers