Table of Contents
Advertisement
Available languages
Available languages
Quick Links
Please review this manual before operating your Hoover® appliance.
This cleaner meets Occupational Safety and Health Act (OSHA-29 CFR 1910 Subpart S) requirements.
© 2008 All rights reserved. #59156722 R0 8/09
Professional
Owner's Manual
Operating and Servicing Instructions
www.hoover.com
C O M M E R C I A L
B A G L E S S U P R I G H T V A C U U M
IMPORTANT:
• Read carefully
DE US O C OME RC IAL
before assembly and use.
A S P I R A D O R A V E R T I C A L
• This product is intended for
S I N B O L S A
commercial use only.
C O M M E R C I A L
• Let us help you put your
vacuum together or
A S P I R A T E U R - B A L A I S A N S S A C
answer any questions, call:
1-800-321-1134
(USA & Canada)
www.hoover.com
Advertisement
Table of Contents

Related Manuals for Hoover CH50015


Summary of Contents for Hoover CH50015
- Page 1 1-800-321-1134 (USA & Canada) www.hoover.com Please review this manual before operating your Hoover® appliance. This cleaner meets Occupational Safety and Health Act (OSHA-29 CFR 1910 Subpart S) requirements. © 2008 All rights reserved. #59156722 R0 8/09...
-
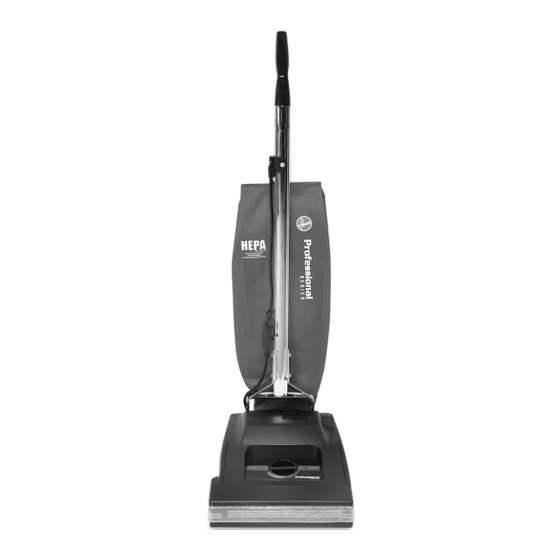
Page 2: Cleaner Description
Operate cleaner only at voltage specified on data plate on bottom of cleaner. If you need assistance: Visit our website at hoover.com. Click on the “Customer Service” link to find the service outlet nearest you OR Call 1-800-944-9200 for an automated referral of authorized service outlet locations (U.S. only) OR Call 1-800-263-6376 to speak with a representative in our Consumer Response Center;... -
Page 3: Important Safety Instructions
• Do not use with damaged cord or plug. If appliance is not working as it should, has been dropped, damaged, left outdoors, or dropped into water, take it to an Authorized Hoover Commercial Warranty Service Distributor. -
Page 4: Grounding Instructions
Grounding Instructions This appliance must be grounded. If it should malfunction or breakdown, grounding provides a path of least resistance for electrical current to reduce the risk of electric shock. This appliance is equipped with a cord having an equipment- grounding conductor (C) and grounding plug (A). -
Page 5: How To Use
1. HOW TO USE Carpet Height Adjustment It is necessary to raise and lower the nozzle for various carpet pile heights. Turn the control to the desired adjustment for carpet pile height according to the chart below. For cleaning glue-down carpet and removing loose dirt from hard surface. For short pile and kitchen type carpet. - Page 6 HEPA Media Throw Away Bag A HOOVER® HEPA media throw away bag is used with this cleaner. Reposition bag closure clip inside top of outer bag and attach spring ring to spring hook. Firmly push bag collar of HEPA media bag onto tube, taking care not to damage bag during installation.
-
Page 7: Power Cord
Power Cord To reduce twisting of the power cord, start at the end of the cord and coil before storing on storage hook. Extension Cord Use at least a 16-Gauge grounded type SJ or SJT type extension cord. The extension cord must employ a 3-prong grounded type plug and a 3-pole receptacle that accepts the machine plug. - Page 8 V-belt are positioned properly. Use only genuine HOOVER belts with your cleaner. Reposition hood and bottom plate. When purchasing a new Flat Belt, ask for HOOVER part Replace hood and bottom plate screws. No. 38528036. When purchasing a new V-Belt, ask for HOOVER part No.
- Page 9 Use only genuine HOOVER agitator roll sleeves with your cleaner. For the Conquest 14, ask for HOOVER part No. 48416013. For the Conquest 18, ask for HOOVER part No. 48416017. If agitator does not rotate, the V-belt is not positioned properly in the groove of the idler pulley.
-
Page 10: Troubleshooting
• calling 1-800-944-9200 for an automated referral of authorized service outlet locations (U.S. only). Do not send your cleaner to Hoover in Glenwillow, Ohio for service, this will only result in delay. If further assistance is needed, contact the Hoover Consumer Response Center, 1-800-263-6376, Mon-Fri pm est In Canada: Carson Building;... - Page 11 1-800-321-1134 (& de los E.E.U.U.; Canadá) www.hoover.com Repase por favor este manual antes de funcionar su aplicación de Hoover ® Esta aspiradora cumple con los requisitos de la Ley de seguridad y salud ocupacional (Occupational Safety and Health Act, OSHA; Título 29 Sección 1910 Inciso S del Código Federal de Reglamentaciones [Code of Federal Regulations, CFR]).
-
Page 12: Descripción De La Aspiradora
Si necesita ayuda: Visite nuestro sitio web en hoover.com. Siga el enlace del centro de servicio para encontrar el centro de servicio más cercano o llame al 1-800-944-9200 para que le indiquen de manera automática la ubicación de los centros autorizados de servicio (únicamente en los EE. -
Page 13: Solución De Problemas
• No deje el aparato sin supervisión cuando esté enchufado. Desenchúfelo de la toma de Para obtener un servicio aprobado de HOOVER y piezas de HOOVER genuinas, encuentre el Centro de ventas y corriente cuando no lo utilice y antes de realizar el mantenimiento. -
Page 14: Instrucciones De Conexión A Tierra
Manguito del rodillo agitador: Qué comprar reajusta automáticamente, y es posible continuar pasando la aspiradora. Utilice únicamente manguitos del rodillo agitador HOOVER genuinas con su aspiradora. Si el protector térmico sigue activándose después de efectuar los pasos anteriores, es posible que su solicite la pieza n°... -
Page 15: Ajuste De La Altura Para Alfombras
Al comprar una nueva correa plana, solicite Vuelva a colocar la cubierta y la placa inferior. la pieza n° 38528036 de HOOVER. Al comprar una Vuelva a colocar la cubierta y los tornillos de la placa nueva correa en V, solicite la pieza n° 38528013 de inferior. -
Page 16: Cordón De Extensión
Bolsa de tela para polvo opcional Cordón de alimentación Es posible usar una bolsa desechable de papel tipo A de HOOVER® con la aspiradora en lugar de una bolsa de tela para polvo. Para reducir la posibilidad de que se tuerza el cordón de alimentación, comience por el extremo del cordón del mango de la aspiradora y enróllelo antes de guardarlo en el gancho para guardar.
Need help?
Do you have a question about the CH50015 and is the answer not in the manual?
Questions and answers