DataCard SD160 User Manual
Hide thumbs
Also See for SD160:
- Service manual (308 pages) ,
- Quick install manual (8 pages) ,
- User manual (156 pages)

Subscribe to Our Youtube Channel
Related Manuals for DataCard SD160


Summary of Contents for DataCard SD160
- Page 1 ® Datacard SD160™/SD260™ Card Printers User’s Guide February 2015 Part No. 527526-001, Rev. A...
-
Page 2: Trademark Acknowledgments
Any use, operation or repair you perform that is not in accordance with the information contained in this documentation is at your own risk. Trademark Acknowledgments Datacard is a registered trademark and service mark of Entrust Datacard Corporation in the United States and other countries. MasterCard is a registered trademark of MasterCard International Incorporated. - Page 3 MicroECC Copyright (c) 2013, Kenneth MacKay All rights reserved. Redistribution and use in source and binary forms, with or without modification, are permitted provided that the following conditions are met: – Redistributions of source code must retain the above copyright notice, this list of and the following disclaimer.
-
Page 5: Compliance Statements
Safety All Datacard® products are built to strict safety specifications in accordance with CSA/UL60950 1 requirements and the Low Voltage Directive 2006/95/EC. Therefore, safety issues pertaining to operation and repair of Datacard® equipment are primarily environmental and human interface. -
Page 6: Regulatory Compliance
Notice for Europe The EU Declaration of Conformity can be found on Datacard.com We hereby certify that this printer complies with EMC Directive 2004/108/EC, R&TTE Directive 1999/5/EC, and the EU RoHS Directive EU Directive 2011/65/EC. This printer conforms to Class A of EN 55022 and to EN 301 489 5. - Page 7 Notice for Europe and Australia This is a Class A product. In a domestic environment this product may cause radio interference, in which case the user may be required to take adequate measures. Notice for China (Simplified Chinese) Notice for Taiwan (Traditional Chinese) Notice for Japan Japanese Voluntary Control Council for Interference (VCCI) class A statement Korea Communications Commission (KCC) statement...
- Page 8 Wash hands after handling. Datacard Group believes that its products are not harmful when used as designed. However, the above warning is made in compliance with the State of California Safe Drinking Water and Toxic Enforcement Act of 1986, which requires warning labels on products that may contain elements that the State of California considers harmful.
-
Page 9: Sd160/Sd260 Card Printers User's Guide
Revision Log SD160/SD260 Card Printers User’s Guide Revision Date Description of Changes February 2015 First release of this document. -
Page 11: Table Of Contents
About the SD160 and SD260 Card Printers ........ - Page 12 Chapter 5: System Maintenance ..........25 Clean the Printer .
- Page 13 111: Card not picked ........... . 56 112: Card hopper empty .
-
Page 15: Chapter 1: Introduction
Chapter 1: Introduction About this Manual This manual provides user information for the SD160 and SD260 Card Printers. The manual includes: An overview of printer components and options, and a description of the system label. How to use the printer, including how to power the printer on and off, how to use the front panel and LCD menus, card processing basics, how to print a test card, and how to load and replace supplies. - Page 16 Introduction...
-
Page 17: Chapter 2: About The Printer
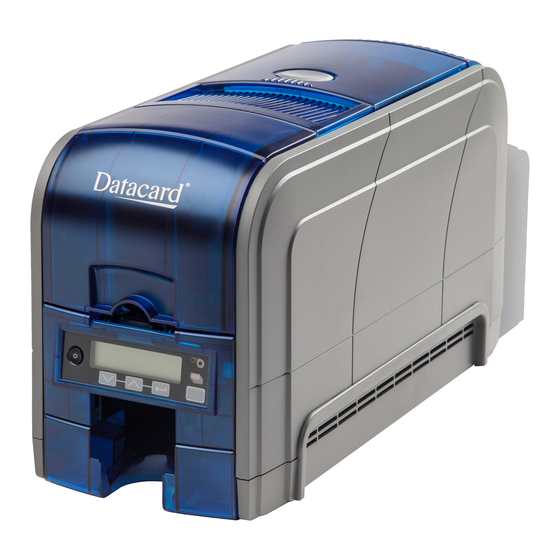
About the SD160 and SD260 Card Printers The card printer applies images, text, and encoded data to plastic cards. It can print full color and monochrome images, depending on the type of print ribbon installed. The SD160 printer also can print on rewritable cards. -
Page 18: Printer Top And Front
Printer Top and Front Cover Latch Button Cover Ridges Ribbon Cartridge Handle Card Input Hopper Front Panel Output Hopper Cover Open the cover to access the printhead and ribbon. Latch Button Push the latch button to release the cover and open the printer. Cover Ridges Press down on the ridges when closing the cover to make sure that it latches properly on both sides. -
Page 19: Printer Left Side
Power receptacle USB connection Network connection (SD260 only) Optional Smart Card Some printer models include an optional smart card Module module. Refer to “System Label” page 8 for information about the options installed on your printer. SD160/SD260 Card Printers User’s Guide... -
Page 20: Inside The Printer
Inside the Printer Printhead Configuration Label Print Ribbon Cartridge Configuration Label The label shows the location and date of manufacture, the printer serial number, and lists the options installed. Printhead The printhead transfers images to cards using the print ribbon. Print Ribbon Cartridge The cartridge holds the print ribbon and cleaning sleeve. -
Page 21: Print Ribbon Cartridge
Print Ribbon Cartridge The cartridge holds the ribbon for printing. Print Ribbon The ribbon applies images to cards. Replaceable Cleaning The cleaning sleeve removes dust and other particles from Sleeve cards to maintain print quality. SD160/SD260 Card Printers User’s Guide... -
Page 22: System Label
System Label The printer configuration label on the side of the cover swingarm shows the components installed. It provides information that is useful when requesting service. The label shows the following information: Printer model and serial number Configuration, which includes options installed in the printer Date and country of assembly MAC address to use when the printer is connected via an Ethernet network... -
Page 23: Chapter 3: Using The System
Optionally, the card moves to the magnetic stripe encoding area or to the smart card park station, depending on the type of card selected and the printer options installed. The finished card exits the printer through the card output hopper. SD160/SD260 Card Printers User’s Guide... -
Page 24: Card Printer System Overview
The printer with supplies and a facility power source. A data connection between the printer and PC, which can be a USB connection or a network connection. (The SD160 card printer connects via USB only.) Tasks and Users Typical roles in a card production system include: The operator, who makes cards, loads supplies, and handles minor problems such as card jams. -
Page 25: Printer Controls
2, including the serial number, network IP address or USB IP address, firmware version, ribbon part number, and region code, if available. If you don’t press a key for 30 seconds, the LCD panel returns to the default Ready message. SD160/SD260 Card Printers User’s Guide... -
Page 26: Lcd Panel Menus
LCD Panel Menus The LCD panel shows the printer’s menu system and displays printer messages or conditions. For a list of messages and recovery information, refer to “Respond to Messages” page Using the System... - Page 27 The printer returns to the Ready status after 2 minutes of no activity. Changes not applied are lost. To leave a selection without changing the value, press the up or down arrow key until Exit displays, and then press the E key. NTER SD160/SD260 Card Printers User’s Guide...
-
Page 28: User Button And Light
User Button and Light The printer’s U button displays with a border of light that indicates the system status. Use the button to: Suspend printer activity—press the U button when the LCD panel displays Ready. Clear a message—press the U button once. -
Page 29: Ribbon Light
No card, or an incorrect card, is detected for the print job. Insert a card to continue printing. A scheduled printer cleaning is due. Insert a cleaning card now, or set aside time to run a cleaning card. SD160/SD260 Card Printers User’s Guide... -
Page 30: Retrieve The Printer's Network Ip Address
Retrieve the Printer’s Network IP Address You need to know the printer IP address to perform some tasks. For example, the XPS Card Printer Driver asks you to enter the network IP address during installation. You also use the IP address when launching Printer Manager, the printer’s web interface, from a browser window. - Page 31 Network menu. NTER Press the down arrow key to scroll to Exit on line 2. Press E . Then, press the U button to return the printer to NTER Ready. The U button glows green. SD160/SD260 Card Printers User’s Guide...
-
Page 32: Print A Test Card
Print a Test Card The printer includes a test card that runs without using a driver or other source of card data. Use it to verify that the printer is working. Begin with the printer Ready. The U button shows steady green. -
Page 33: Load And Replace Supplies
Insert ISO magnetic stripe cards with the stripe (back side) facing down and to the right. Insert smart cards with the smart card chip facing up and toward the back of the hopper. Close the input hopper. SD160/SD260 Card Printers User’s Guide... -
Page 34: Load The Print Ribbon
Load the Print Ribbon Load the print ribbon when you install the printer and when the ribbon runs out. Open the printer cover. Remove the print ribbon cartridge. Load a full roll of print ribbon (the blue spool) onto the blue spindle closest to the cartridge handle. Place the silver take up spool on the silver spindle with the black gear. -
Page 35: Install The Ribbon Cartridge
Make sure that the ribbon cartridge is correctly positioned in the guides. Close the printer cover. Press down on the ridges on the front of the cover to make sure that it latches properly on both sides. SD160/SD260 Card Printers User’s Guide... -
Page 36: Prepare The Printer To Print Rewritable Cards
Prepare the Printer to Print Rewritable Cards Open the printer cover and remove the print ribbon cartridge. Remove the print ribbon from the cartridge and set it aside. Make sure that the cleaning roller with the replaceable cleaning sleeve is installed. Return the print ribbon cartridge to the printer. -
Page 37: Chapter 4: Printing Cards
You also can: Print a test card directly from the printer. Refer to “Print a Test Card” page 18. Print a driver sample card. Refer to “Printing a Driver Sample Card” in your card printer’s Driver Guide. SD160/SD260 Card Printers User’s Guide... -
Page 38: Print Cards
Print Cards Make sure that cards are loaded in the printer or available to insert when prompted. For the steps to follow, refer to “Load Cards” page Print from ID Software From the ID software, use the template or create a design for the card. Select the printer if you use more than one printer. -
Page 39: Chapter 5: System Maintenance
Clean the printer when: There is debris on completed cards. A new roll of print ribbon is installed. You can perform the following cleaning tasks: Clean the Printhead page 26 Run a Printer Cleaning Card page 28 SD160/SD260 Card Printers User’s Guide... -
Page 40: Clean The Printhead
Clean the Printhead Clean the printhead when: The printhead is replaced. There are unprinted lines on the finished card. This usually indicates dirt or contaminants on the printhead. The printhead is touched accidentally. Oils from hands can affect print quality and damage the printhead. - Page 41 Use only the cleaning swab to clean the printhead. Other materials can stick to the printhead and cause damage. Use a cleaning swab one time only. Discard it after you clean the printhead. SD160/SD260 Card Printers User’s Guide...
-
Page 42: Run A Printer Cleaning Card
Run a Printer Cleaning Card Run a cleaning card to clean debris from the inside of the printer and from the hopper rollers. The cleaning card can remove most contaminants from the printer. Run a cleaning card after every 250 cards processed by the printer, or every 6 months. Prepare the printer for cleaning. - Page 43 Replace the ribbon cartridge and close the printer cover. Press down on the ridges on the front of the cover to latch it properly. Press the U button to return the printer to Ready. The printer is available to print cards again. Discard the used cleaning card and cleaning sleeve. SD160/SD260 Card Printers User’s Guide...
- Page 44 & T INTS Use the cleaning card one time only. Change the cleaning sleeve each time you clean the printer or change the print ribbon. If the card light blinks amber and there are cards in the input hopper, it indicates that the printer’s configured cleaning count, set in Printer Manager, has been reached.
-
Page 45: Chapter 6: Troubleshooting
This section also describes troubleshooting for the following: Installation Problems page 34 Card Printer Driver Problems page 36 Card Appearance page 39 Rewritable Card Problems page 45 Magnetic Stripe Problems page 47 Card Jams page 49 Messages and Conditions page 50 SD160/SD260 Card Printers User’s Guide... -
Page 46: Locate A Problem Within The Card Production System
If you need to reinstall the Card Printer Driver to fix a problem, we recommend that you download the latest version of the driver from http://www.datacard.com. Select Support & Drivers > Drivers & Downloads from the menu. Enter your printer model in the Enter Product Name or Number area, and click Go. -
Page 47: Locate A Problem With Basic Printer Functions
If the sample card prints, the printer and driver are working correctly. Continue to step 6. If the sample card does not print, the printer and driver have a communication problem. Determine the cause of the problem and try the sample card again. SD160/SD260 Card Printers User’s Guide... -
Page 48: Installation Problems
Print a card using your card production software. If the card prints, your software is working successfully with the printer. Troubleshoot the card design, if necessary. If the card does not print, check the following: In the application, is the correct printer selected in the Print Setup or Print dialog? If the printer produced a blank card, review the page size or driver settings. -
Page 49: Usb Installation Troubleshooting
Hibernation on a laptop requires several moments to enable USB communication. Unplug the USB printer port and then connect it again. Replace the PC port or the PC. Contact your PC or port vendor if you need assistance. SD160/SD260 Card Printers User’s Guide... -
Page 50: Network Installation Troubleshooting
Network Installation Troubleshooting Problem Solution The network cable is Reconnect the data cable to the network port and the printer. loose. Restart the printer. The Status page of Follow your network troubleshooting procedures to isolate Printer Properties shows and test each component of the computer to printer the printer is not communication link. -
Page 51: The Card Printer Driver Does Not Detect The Network-Connected Printer
Message 500 displays Make sure that both ends of the data cable are connected. after you send a card to Replace a defective USB cable if needed. print. SD160/SD260 Card Printers User’s Guide... -
Page 52: Driver Status Or Windows Print Queue Does Not Provide Expected Data
Driver status or Windows print queue does not provide expected data Problem Solution The Card Printer Driver Check the following: sample card or magnetic Enable bidirectional support must be selected on the stripe test cards do not Printer Properties > Ports tab to allow printing from the print. -
Page 53: Printer Messages Do Not Display On The Pc
40 Printing includes unexpected data page 41 The color printing has flaws page 41 The printing is too light page 43 The printing is too dark page 43 The monochrome printing has flaws page 44 SD160/SD260 Card Printers User’s Guide... -
Page 54: Something Did Not Print
Something did not print Problem Probable Cause Solution Nothing is printed on the The Disable Printing Open the Preferences > Layout > Advanced card. option in the Card Printer tab and change Disable Printing to Off. Driver is set to All, Front, or Back. -
Page 55: Printing Includes Unexpected Data
Use cards that meet the size requirement for correct size for the the printer. Refer to “Cards” in your printer’s printer. Installation and Administrator’s Guide for specifications. If you must use the cards you have, ask your system administrator for help. SD160/SD260 Card Printers User’s Guide... - Page 56 Problem Probable Cause Solution Printing is blurred. The cards have a matte, Use cards that meet the requirements for the not glossy, finish. printer. Refer to “Cards” in your printer’s Installation and Administrator’s Guide for specifications. The rollers are dirty. Run a cleaning card.
-
Page 57: The Printing Is Too Light
A change in the card to “Color Printing” in your printer’s stock you use can alter Installation and Administrator’s Guide, and the appearance of printed “Color Adjustment Tab” in your printer’s cards. Driver Guide. SD160/SD260 Card Printers User’s Guide... -
Page 58: The Monochrome Printing Has Flaws
The monochrome printing has flaws Problem Probable Cause Solution Text has broken (partly The monochrome (K) If the card does not include a bar code, printed) characters. power setting is balanced increase the monochrome intensity. If the to print both fine text card includes fine text and bar codes, change and bar codes. -
Page 59: Rewritable Card Problems
The card design includes Modify the card design to minimize large large printed areas. areas. The card has had the Use a new card. same information or graphics for an extended period of time. SD160/SD260 Card Printers User’s Guide... - Page 60 Problem Probable Cause Solution The print quality on the The card has been Use a new card. card is poor. erased and written too many times The surface of the card is Clean the card with a lint free cloth before dirty.
-
Page 61: Magnetic Stripe Problems
Change the data to be allowed by the magnetic encoded, and resend the print job. Refer to “Magnetic Stripe stripe format selected for Design” in the printer’s Installation and Administrator’s Guide the track. for more information. SD160/SD260 Card Printers User’s Guide... -
Page 62: Use Advanced Troubleshooting Tools
Problem Solution The magnetic stripe data Review the encoding format setting for the tracks in Printer was sent in an encoding Manager. Refer to the Printer Manager “Printer Setting format not supported by Menu” in the Installation and Administrator’s Guide. Make the track. -
Page 63: Card Jams
Retry in the PC message. & T INTS Check the ribbon to make sure that it is not torn. Refer to “109: Print ribbon problem” page 55 to repair or replace the ribbon, if needed. SD160/SD260 Card Printers User’s Guide... -
Page 64: Messages And Conditions
Messages and Conditions When the printer cannot process the card sent, it issues a condition. The LCD panel on the front panel shows these conditions. The XPS Card Printer Driver also displays the condition as a message on the PC. In a shared printer environment, messages can differ slightly from the messages and conditions described in this section. - Page 65 Insert same card side 1 up Amber Flash Warning Insert cleaning card Amber Flash Warning Improper Shutdown Amber Flash Warning Supply region not valid Amber Flash Amber Flash Error Rewrite config mismatch Amber Flash Amber Flash Error SD160/SD260 Card Printers User’s Guide...
-
Page 66: Messages From The Xps Card Printer Driver On The Pc
Messages from the XPS Card Printer Driver on the PC The Card Printer Driver displays the same messages as those on the printer LCD panel. The messages that display on the PC provide additional information about the condition that caused the message and contain recovery instructions. Click the appropriate button to clear the message. -
Page 67: Respond To Messages
Open the printer and remove the ribbon cartridge. Turn the knob to remove the card. Replace the ribbon cartridge and close the printer. Press the U button on the printer. On the PC, click Retry, or click Cancel to cancel the card. SD160/SD260 Card Printers User’s Guide... -
Page 68: 103: Printer Problem
103: Printer problem The printer had an error. The card will be canceled. Press the printer P button to power off the printer. OWER Press the P button again to power on the printer. OWER Click OK on the PC to clear the message. 104: Critical problem The printer had a serious error. -
Page 69: 107: Magstripe Read Data Error
Reposition, repair, or replace the ribbon and advance the repaired area one full turn. Replace the ribbon cartridge and close the printer. Press the U button on the printer to clear the message. On the PC, click Retry, or click Cancel to cancel the card. SD160/SD260 Card Printers User’s Guide... -
Page 70: 110: Print Ribbon Out Or Missing
110: Print ribbon out or missing The printer does not have usable ribbon. To complete the current card: Open the printer and remove the ribbon cartridge. Install a new ribbon and cleaning roller. Replace the cartridge and close the printer. Press the U button on the printer to clear the message. -
Page 71: 113: Close Cover To Continue
Clear a check box in the card production application. Change the font from Mag Trackx XPS Card Printer to a printable font such as Arial, Verdana, or Calibri. Refer to “Magnetic Stripe Fonts” in your printer’s Driver Guide. SD160/SD260 Card Printers User’s Guide... -
Page 72: 117: Reader Not Available
Purchase ribbon from your dealer or authorized reseller. Check the Datacard website for newer firmware that supports new ribbon types. If rewritable card printing is enabled on an SD160 printer, remove the print ribbon from the cartridge and reinstall the cartridge. -
Page 73: 120: User Paused The Printer
Turn the card over end to end so side 2 is facing up. Insert the card in the printer. If the card is not immediately picked, press the printer’s U button or click OK. Click Cancel on the PC if you want to cancel the card. SD160/SD260 Card Printers User’s Guide... -
Page 74: 149: Option Not Installed
149: Option not installed The printer does not support the personalization being requested for the card. The card will be canceled. Change the card data to match the printer’s options and settings, or print to a printer that is configured to support the personalization being requested. Press the User button on the printer, or click OK on the PC to clear the message. -
Page 75: 172: Insert Cleaning Card
The rewritable card settings in the driver and Printer Manager do not match. The card will be canceled. Make sure that the following settings do not conflict: Printing Preferences > Print Mode tab: Print using rewritable cards Printer Manager > Print menu: RewritableCardEnable SD160/SD260 Card Printers User’s Guide... -
Page 76: Driver-Only Messages
Driver-Only Messages The following messages are issued by the Card Printer Driver and display on the PC that sent the card print job. These messages do not display on the printer LCD panel. 500: The printer is not available The computer cannot communicate with the printer. To complete the current card: Make sure that the printer is powered on and in the Ready state. -
Page 77: 505: Usb Communication Issue
The printer must be online to print. To complete the current card press the printer’s U button until the printer returns to the Ready state. Click OK to clear the message, or click Cancel to cancel the card. SD160/SD260 Card Printers User’s Guide... -
Page 78: Driver Sdk Messages
Driver SDK Messages The following messages are issued when you use the Card Printer Driver Software Development Kit (SDK) to define your card printing. The messages are returned by the SDK to the application that sent the print job. These messages do not display on the printer LCD panel or on the PC that sent the job.
Need help?
Do you have a question about the SD160 and is the answer not in the manual?
Questions and answers