Table of Contents
Advertisement
Quick Links
Advertisement
Table of Contents

Related Manuals for PIONEERPOS CYPRUS Core Pentium-Series

Summary of Contents for PIONEERPOS CYPRUS Core Pentium-Series
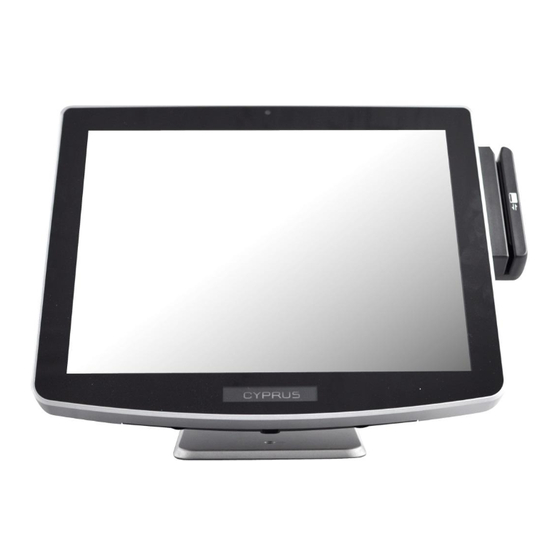
- Page 1 User Manual CYPRUS Core Pentium & Core i-Series For further assistance, contact us: : 909-468-9757 option 2 : www.pioneerpos.com Email : support@pioneerpos.com Drivers : http://www.pioneerposftp.com Manual for CYPRUS (V1.0) (Core Pentium & Core i-Series) Page 1...
- Page 2 WCxxxxxxxxxx Disclaimer Information in this document is subject to change without notice. PioneerPOS shall not be liable for technical or editorial errors in this document. This manual contains proprietary information which is protected by copyright. No parts of this document may be photocopied, reproduced, or translated to another language without prior written consent of Pioneer POS Solutions Inc.
-
Page 3: Table Of Contents
Table of Content Table of Content ..................................3 Introduction ................................... 4 About this guide ..................................4 System specification ................................5 Section A: Getting started ..............................6 Chapter 1: Terminal overview, communication ports, and peripherals ................6 Chapter 2: Setting Up Terminal............................9 Section B: Using Touchscreen Terminal .......................... -
Page 4: Introduction
Introduction PioneerPOS CYPRUS terminal is an AIO touch screen computer system that is perfect fit for space-constrained applications such as restaurant, hospitality, information service, medical, and the likes. PioneerPOS manufactures All-in- One touch screen systems with built-in PC, as well as touch monitor with different sizes. -
Page 5: System Specification
System specification 15” LED-backlit LCD, 1024 x 768 (optimal resolution) Display Touch Screen Option Resistive, PCAP Multitouch Processor Intel 4th Generation (Haswell) Core Pentium / i3 / i5 / i7 Memory up to 8GB (depending on processor type) SATA, 2.5” Hard Drive, Solid-state Disk Storage Operating System Windows 7, Pos Ready 7, Windows 8.1 Industry Pro, Windows 8.1 Industry Pro for... -
Page 6: Section A: Getting Started
Section A: Getting started Chapter 1: Terminal overview, communication ports, and peripherals Identifying controls and ports Manual for CYPRUS (V1.0) (Core Pentium & Core i-Series) Page 6... - Page 7 Communication ports Manual for CYPRUS (V1.0) (Core Pentium & Core i-Series) Page 7...
- Page 8 Optional peripherals Magnetic strip reader Biometric (fingerprint) reader Part number: 4GB-U39 Part number: 49-FP-URU4S-U2 Second display monitor (10-inch) 2D Imager (Barcode scanner) Part number: 1H000002A1 Part number: 4G-B1-DS457DLU1 (Driver’s license parsing) 4G-B1-DS457SRU1 (Short range) Customer Display (2x20 VFD Line display) Wall-mounting Plate Part number: 46B-RCRJ-XXX Part number: 1GB-WALL01...
-
Page 9: Chapter 2: Setting Up Terminal
Chapter 2: Setting Up Terminal Standard base model Manual for CYPRUS (V1.0) (Core Pentium & Core i-Series) Page 9... - Page 10 V-base model Manual for CYPRUS (V1.0) (Core Pentium & Core i-Series) Page 10...
- Page 11 Connecting network The LAN network port is located on the I/O Panel. Cyprus also comes with optional build-in wireless card. Manual for CYPRUS (V1.0) (Core Pentium & Core i-Series) Page 11...
-
Page 12: Section B: Using Touchscreen Terminal
Section B: Using Touchscreen Terminal Chapter 3: Touch screen calibration (if needed) [NOTE] Following instructions are only applicable to RESISTIVE type touch panel. PCAT (projective capacitive) type touch panel will NOT require calibration in either Windows 7 or Windows 8.1 operating environment. Calibration on Windows 7 or POS Ready 7 Cyprus’s Touch Screen can be operated with finger or soft stylus. - Page 13 Calibration on Windows Pro 8.1 or Windows Embedded Industry Pro 8.1 or Windows Embedded Industry Pro Retail 8.1 1. On desktop top, hit the Windows Icon either on keyboard or lower left corner. 2. Type out “Tablet PC Settings” 3. Click on the Icon for Tablet PC Settings 4.
- Page 14 5. Tap the center (DO NOT Press and HOLD) of cross hair as it moves around the screen. Manual for CYPRUS (V1.0) (Core Pentium & Core i-Series) Page 14...
-
Page 15: Chapter 4: Network
Chapter 4: Network Wired network Standard Cyprus comes with on-board Intel Network controller. For regular network usage, you just need to plug in the network cable and it should work. In case you need to check your network setting, you can follow the instruction below: Start ->... - Page 16 Wireless network 4.2.1 For system installed with Intel MiniPCI/MiniPCI-E wireless card Go to Start -> Program -> Intel PROset Wireless. Click on “Intel PROset Wireless” to setup wireless utility. Manual for CYPRUS (V1.0) (Core Pentium & Core i-Series) Page 16...
-
Page 17: Chapter 5: Serial Port (Rs232, Com Ports)
Chapter 5: Serial port (RS232, COM ports) Serial port location and pin assignment Cyprus comes with four RS232 Serial port on I/O Panel. The serial ports are using 8-Pin RJ45 connector. Picture: Serial Port (RS232) Location highlighted in RED rectangular box. Table: Pin Assignment for RS232 Serial Port Serial Port Signal Description... - Page 18 Using RJ45 to DB9 adapter with serial port/COM port If you are using devices with DB9 Connector, you can use RJ45 to DB9 adapter. Please see picture below: Picture: RJ45 Male to DB9 Male adapter (P/N: 30-326F) Table: Pin assignment for RJ45 Male to DB9 Male adapter (P/N: 30-326F) RJ45 Male DB 9 Male Pin 1...
- Page 19 Connector: HEADER 2X4P S/T,2.0mm,DIP Jumper: MINI JUMPER 2P,2.0MM,F,SMT Pin 1 RI2# (default) [Note] Call PioneerPOS tech support at 909-468-9757 or email support@pioneerpos.com for detail info on how to make changes. Manual for CYPRUS (V1.0) (Core Pentium & Core i-Series) Page 19...
-
Page 20: Section C: Using Accessories
Chapter 6: Using Customer Display/Rear Display (optional, part number: 46B-RCRJ-XXX) Unless specified, standard Rear Display/Customer Display shipped from PioneerPOS is set to AEDEX protocol by default. Protocol/emulation supported Pioneer POS rear display/customer display supports a few different protocols. The supported protocols are: ... - Page 21 On the next field, “Please Input Scroll Data (Max 40 Byte for ASCII)”, you may leave the field blank or you can type any sentence you would like for the scroll data. When you are ready, click “Write to EEPROM(Y)” A new pop up window will show up.
-
Page 22: Section D: Solving Problems
[Note] Only authorized technician trained by PioneerPOS should repair this system. Damage due to servicing not authorized by PioneerPOS is not covered by your warranty. Do not try to repair at the component level such as Printed Circuit Board (PCB), LCD Panel Unit, Inverter board, or Power Supply unit because it may cause safety hazard. -
Page 23: Chapter 8: Common Problems
Chapter 8: Common Problems No power Problem description: System could not turn on (no POST screen, System Power Indicator LED is off, no sound from Fan or Hard Drive). Make sure that the power cord coming out from the system is plugged in to the power source (electrical outlet). By pass power strips or power extension or UPS (Uninterrupted Power Supply) to verify that the system turns on. - Page 24 If you could not see POST screen, try to connect an external monitor to the VGA connector on I/O Panel. If you could see display from external monitor, the problem could be caused by defective inverter board or LCD. Please contact PioneerPOS Technical Support. Manual for CYPRUS (V1.0) (Core Pentium & Core i-Series)
- Page 25 For example, if you are using Western Digital hard drive, you may use “Data Lifeguard Tools” available at Western Digital Support Website. Note: PioneerPOS uses Western Digital brand WD Blue series for HDD on Cyprus series product. For problem on SSD, contact PioneerPOS Tech Support for troubleshooting process.
- Page 26 Touch panel: Touch position is not accurate Problem description: Touch position is not accurate. Note: Only applicable to Resistive type panel. For PCAP (capacitive), contact PioneerPOS CustomerONE team. If touch position is not accurate, then try launch Touckit utility to re-calibrate by following the steps below: Go to Start ->...
- Page 27 Problem description: The cursor on Windows is not activated by finger touch. Note: Only applicable to Resistive type panel. For PCAP, contact PioneerPOS tech support. Try to use a keyboard/mouse to test if the system has lockup problem (system stops responding). If you are able to use keyboard/mouse to move the cursor, go to step 2.
- Page 28 8.11 LTP port issue Problem description: LTP port device not responding Check the connection of the device. Make sure that the device is connected to the appropriate port. Check if the particular port is being used by other program (make sure that no two printers are using the same port).
-
Page 29: Chapter 9: Troubleshooting Accessories
Open notepad program and swipe the card in notepad program to test the card. If you still could not read the card, go to step 3. Apply keyboard patch, visit below link to download keyboard patch. http://www.pioneerpos.com/download/kbdpatchxp.zip Link: Remove the MSR from the terminal and reconnect. -
Page 30: Section E: System Board Description
Section E: System Board description Chapter 10: System Board Layout Manual for CYPRUS (V1.0) (Core Pentium & Core i-Series) Page 30... -
Page 31: Chapter 11: System Board Jumper Settings
Damages due to customer modification will VOID factory warranty on motherboard and CYPRUS terminal. PioneerPOS will not be responsible for loss and damages on Cyprus terminal and any other devices due to user modification. Call 909-468-9757 option 2 or email support@pioneerpos.com... - Page 32 COM2_DCD: COM2 DCD Jump setting Connector: HEADER 2X3P G/F 2.0MM BLK S/T Jumper: MINI JUMPER 2P,2.0MM,F,SMT Pin 1 (default) Pin 2 COM2_ RI: COM2 RI Jump setting Connector: HEADER 2X4P S/T,2.0mm,DIP Jumper: MINI JUMPER 2P,2.0MM,F,SMT Pin 1 RI2# (default) COM1_SEL: RS232/RS422/RS485 Jump setting Connector: HEADER 2X3P G/F 2.0MM BLK S/T Jumper: MINI JUMPER 2P,2.0MM,F,SMT RS232...
- Page 33 J10-J13: Panel ID Selection Connector: HEADER 1X2P,S/T,2.0MM DIP Pin 1 Pin 1 Pin 1 Pin 1 Jumper: MINI JUMPER 2P,2.0MM,F,SMT Panel type Open Open Open Open 640x480_18bit_60Hz Open Open Open Close 800x480_18bit_60Hz Open Open Close Open 800x600_18bit_60Hz Open Open Close Close 1024x600_18bit_60Hz Open...
Need help?
Do you have a question about the CYPRUS Core Pentium-Series and is the answer not in the manual?
Questions and answers