Table of Contents
Advertisement
Advertisement
Chapters
Table of Contents

Subscribe to Our Youtube Channel
Related Manuals for Roberts ecologic 15


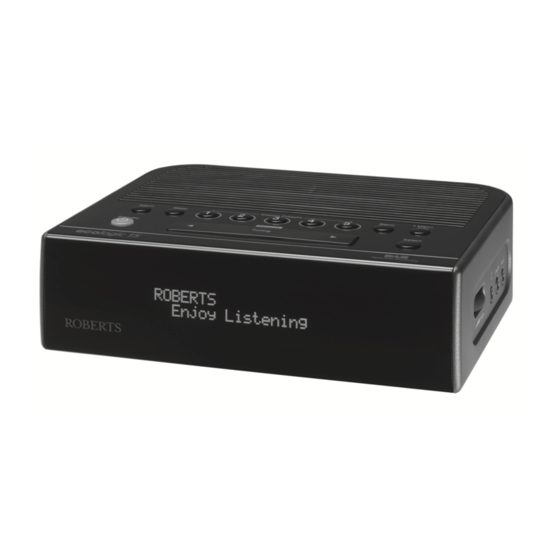
Summary of Contents for Roberts ecologic 15
- Page 1 DAB/DAB+/FM RDS clock radio with OLED display Please read this manual before use...
-
Page 2: Table Of Contents
Contents Controls ................2-3 Snooze function ............23-24 Using the clock radio for the fi rst time .........4 Sleep function ..............25 Operating your clock radio...........5 Setting the clock manually ........... 26-27 Selecting a station - DAB ...........6 Setting the clock format .............28 Secondary services - DAB...........6 To return to auto clock set mode ........29 Display options - DAB............ -
Page 3: Controls
Controls (top view) 1. Band button 5. Tuning Down button 9. Station preset buttons 1-5 2. Tuning Up button 6. Sleep button 10. Loudspeaker 3. OLED display 7. On / Standby button 11. Menu / Info button 4. Snooze button 8. -
Page 4: Controls
Controls (right hand side) 13. Volume control 14. Headphone socket 15. Line Out socket 16. Auxiliary input socket Controls (rear) 17. Wire DAB/FM aerial 18. USB socket (for software upgrade) 19. DC input socket... -
Page 5: Using The Clock Radio For The Fi Rst Time
Using the clock radio for the fi rst time 1. Place your clock radio on a fl at surface. 2. Fully extend the wire aerial located on the rear of your clock radio. Place the wire antenna so that it is straight as possible extending either above or below the radio. -
Page 6: Operating Your Clock Radio
Operating your clock radio DAB Mode 1. Place the wire antenna so that it is as straight as possible extending either above or below the radio. 2. Press and release the On / Standby button to switch on your clock radio. -
Page 7: Selecting A Station - Dab
Selecting a station - DAB DAB Mode 1. Press the On / Standby button to switch on your clock radio. 2. Press and release the Band button until the DAB mode is selected. The display will show the name of the radio station currently selected. Station list 3. -
Page 8: Display Options - Dab
Display options - DAB Your radio has a range of display options when in DAB mode:- 1. Press and release the Menu/Info button to cycle through the various options. BBC Radio 2 All display options except the text display will revert to the clock display Now playing on the r after about 10 seconds. -
Page 9: Finding New Stations - Dab
Display options - DAB cont. BBC Radio 2 g. Signal strength Displays the signal strength for the currently tuned DAB station. The open block in the signal strength graph shows the minimum signal strength needed for good DAB reception. The signal blocks will go up or down showing the changing signal strength as you adjust the wire aerial or the clock radio position. -
Page 10: Manual Tuning - Dab
Manual tuning - DAB Manual tuning allows you to tune your radio to a particular DAB frequency in Band III. Any new stations found will be added to the station list. This function < Manual Tune < can also be used to assist the positioning of the aerial or the clock radio to optimise reception for a specifi... -
Page 11: Dynamic Range Control (Drc) - Dab
Dynamic Range Control (DRC) - DAB The DRC facility can make quieter sounds easier to hear when your radio is used in a noisy environment. < DRC Value < There are three levels of compression: DRC Off No compression applied. (default) DRC Value DRC High Maximum compression applied. -
Page 12: Prune Stations - Dab
Prune stations - DAB Over time, some DAB services may stop broadcasting, or may change location and then not be able to receive a station. In order to remove such < Prune < stations from the DAB station list, the Prune stations function will delete the DAB stations from your station list that can no longer be received. -
Page 13: Operating Your Clock Radio - Fm Auto-Tune
Operating your clock radio - FM auto-tune FM Mode 1. Fully extend the wire aerial located on the rear of your clock radio. Place the wire antenna so that it is as straight as possible extending either above or below the clock radio. 2,10 2. -
Page 14: Manual Tuning - Fm
Manual tuning - FM FM Mode 1. Fully extend the wire aerial located on the rear of your clock radio. Place the wire antenna so that it is as straight as possible extending either above or below the clock radio. 2. -
Page 15: Display Options - Fm
Display options - FM Your radio has a range of display options for FM mode:- BBC R4 The Radio Data System (RDS) is a system in which inaudible digital The best variety of information is transmitted in addition to the normal FM radio programme. RDS offers several useful features. -
Page 16: Stereo / Mono Setting - Fm (Headphones Only)
Stereo / Mono setting - FM (headphones only) Your radio will play stereo FM broadcasts in stereo (via headphones) provided that the received signal is of adequate strength. However, as < FM Audio < a stereo signal becomes weaker the audio signal will become poorer. It may be preferable to force the radio to play the station in mono in order to reduce the level of background hiss. -
Page 17: Scan Sensitivity Setting - Fm
Scan sensitivity setting - FM Your radio includes a local/distant option for the auto-scan function. By setting the radio to the 'local' scan option, weaker signals from more < FM Scan Zone < distant transmitters can be ignored by the radio, making stronger signals easier to fi... -
Page 18: Presetting Stations Dab And Fm
Presetting stations - DAB and FM You may store your preferred DAB and FM radio stations to the preset BBC Radio 2 station memories. There are 10 memory presets in your radio 5 for DAB Now playing on the r and 5 for FM. - Page 19 Recalling a preset station - DAB and FM 1. Press the On / Standby button to switch on the clock radio. BBC Radio 2 Connecting... 2. Select the required waveband by pressing the Band button. 3. Momentarily press and release the required Preset button. Your radio will then tune to the chosen preset station stored in the preset memory.
-
Page 20: Alarms
Alarms Your clock radio has 2 separate alarms which can be set to wake you to DAB, FM radio or buzzer alarm. Each alarm can be set to sound once, daily, on weekdays or at weekends. The alarms can be set whether the clock radio is on or in standby mode. - Page 21 6. Repeatedly press and release the Tuning Up or Down buttons to choose the desired minute for the alarm and then press the Select button. The alarm duration will fl ash on the display. 6-11 6-11 7. Press the Tuning Up or Down buttons to choose the alarm duration. Choose between 15, 30, 45, 60 or 90 minutes.
- Page 22 13. Repeatedly press and release the Tuning Up or Down buttons to choose the day option and then press and release the Select button to confi rm the setting. 13-17 13-17 • If setting alarms to daily, weekdays or weekends proceed to point 18. 14.
- Page 23 To view the alarm settings 1. Press and release the Alarm button. 'Alarm 1 Setup' will show on the Alarm 1 Setup display. 2. Press and release the Alarm button again to select alarm number 2. 'Alarm 2 Setup' will show on the display. 3.
-
Page 24: Controlling Alarms In Standby
Controlling alarms in standby When your clock radio is in standby, the alarms can be controlled Alarm 1 Setup using the Alarm button. This avoids the risk of disturbance to Alarm On someone who is asleep. 1. To change the states of the alarms when in standby, press and Alarm 1 Setup release the Alarm button once for alarm 1 or twice for alarm 2. - Page 25 To set the snooze duration 1. Press the On / Standby button to switch on your clock radio. < System Setting < 2. Press and hold the Menu/Info button until Advanced DAB or FM menu shows on the display and then release the button. System Setting 3.
-
Page 26: Sleep Function
Sleep function Set sleep time Your clock radio can be set to turn off after a preset time has elapsed. The sleep setting can be adjusted between 15 and 120 minutes. Ensure 15 minutes your clock radio is switched on. 1. -
Page 27: Setting The Clock Manually
Setting the clock manually Your clock radio will set its clock automatically using the DAB or FM radio signal. If no signal is available and you need to set the time < System Setting < manually, please follow the procedure shown below. 1. - Page 28 10. Press the Tuning Up or Down buttons to set the desired minute. • If the clock radio has been set to use a 12 hour format, there will be an option here for setting AM or PM for the clock time. Set date 11- 1-2013 11.
-
Page 29: Setting The Clock Format
Setting the clock format The clock display used in standby mode and when the clock radio is in use can be set to 12 or 24 hour format. The selected format is then < System Setting < also used when setting the alarms. 1. -
Page 30: To Return To Auto Clock Set Mode
To return to auto clock set mode 1. Press the On / Standby button to switch on your clock radio. < System Setting < 2. Press and hold the Menu/Info button until the Advanced DAB or FM menu shows on the display and then release the button. System Setting 3. -
Page 31: Language Function
Language function Your clock radio can be confi gured to a different language. < System Setting < 1. Press the On / Standby button to switch on your clock radio. 2. Press and hold the Menu/Info button until the Advanced DAB or FM System Setting menu shows on the display and then release the button. -
Page 32: Software Version
Software version The software display cannot be altered and is just for your reference. < System Setting < 1. Press the On / Standby button to switch on your clock radio. 2. Press and release the Band button until the DAB or FM band is selected. -
Page 33: Brightness Control
Brightness control Your clock radio has two separate brightness settings so that you can adapt the intensity of the display to suit the ambient room lighting when the clock radio is in standby mode and when it is switched on. <... -
Page 34: System Reset
System reset If your radio fails to operate correctly, or some digits on the display are missing or incomplete carry out the following procedure. < System Setting < 1. Press the On / Standby button to switch on your clock radio. Press and release the Band button until the DAB or FM band is selected. -
Page 35: Auxiliary In Socket
Auxiliary input socket A 3.5mm Auxiliary input socket is provided on the right hand side of your clock radio to permit an audio signal to be fed into the unit from an external audio device such as an iPod, MP3 or CD player. 1. -
Page 36: Headphone Socket
Headphone socket A 3.5mm Headphone socket located on the right hand side of your clock radio is provided for use with headphones. Inserting a plug automatically mutes the internal loudspeaker. Please be aware that the sensitivity of headphones can vary widely. We therefore recommend setting the volume to a low level before connecting headphones to the clock radio. -
Page 37: General
General Do not allow this clock radio to be exposed to water, steam or sand. Do not • Your clock radio should not be exposed to dripping or splashing and leave your clock radio where excessive heat could cause damage such as that no objects fi... -
Page 38: Specifi Cations
Specifi cations Circuit features Loudspeaker 75mm Power Requirements Output Power 600mW Mains AC 100 240V 50/60Hz (Adaptor) Headphone socket 3.5mm dia Frequency Coverage Aux in socket 3.5mm dia 174.928 - 239.200MHz Line out socket 3.5mm dia 87.50 - 108 MHz Aerial system Wire aerial Wire aerial... -
Page 39: Guarantee
Company’s service department for attention. In the event that it is not possible to return the instrument to the Roberts' dealer from whom it was purchased, please contact Roberts Radio Technical Services at the address shown overleaf. - Page 40 ROBERTS RADIO TECHNICAL SERVICES 97-99 Worton Road Isleworth Middlesex TW7 6EG Technical Helpline:- 020 8758 0338 (Mon-Fri during offi ce hours) Website: http://www.robertsradio.co.uk © 2013 Roberts Radio Limited Issue 1...
Need help?
Do you have a question about the ecologic 15 and is the answer not in the manual?
Questions and answers