Table of Contents
Advertisement
SAFA MEDIA Co., Ltd
2F, Romanson B/D, 77-1 Garak-dong,
Songpa-gu Seoul Korea
Tel. 82-2-3400-5240
Fax. 82-2-3401-4142
http://www.safa.co.kr
SF69-00602A
INSTRUCTION MANUAL
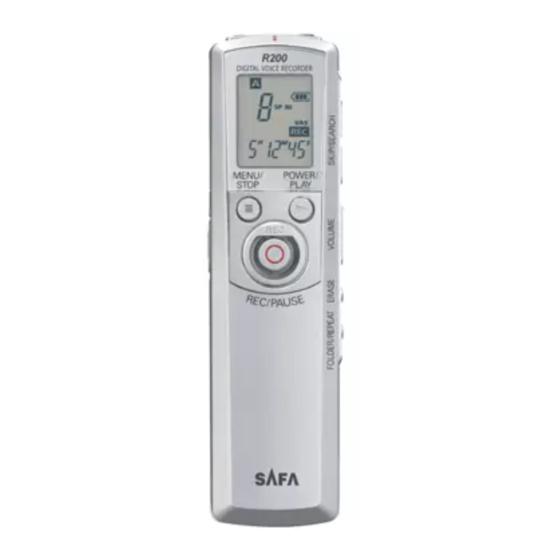
Digital Voice Recorder
R200
Thank you for purchasing this
product. Please read this manual
carefully before using the product.
Familiarizing yourself with the
instructions and functions.
explained In this manual begone
operating the product will ensure
proper use of the product. Please
fill in and keep the warranty
included in this maunal from
your product distributor.
Advertisement
Table of Contents

Related Manuals for Safa Media R200


Summary of Contents for Safa Media R200
- Page 1 Thank you for purchasing this product. Please read this manual carefully before using the product. Familiarizing yourself with the instructions and functions. SAFA MEDIA Co., Ltd explained In this manual begone 2F, Romanson B/D, 77-1 Garak-dong, operating the product will ensure Songpa-gu Seoul Korea proper use of the product.
-
Page 2: Table Of Contents
Contents Accessories ....2 Erasing all files in the Copying data by using Playback ....35 Name of each part selected folder ... 13 Explorer ......32 Formatting the unit's data ........3 Formatting (Erasing all (1) Copying files to your ......... -
Page 3: Name Of Each Part
Name of each part Before use AAA alkaline battery Inserting battery 1. External microphone jack (supplied) 2. Built-in microphone 3. Skip/Search buttons )(SKIP/SEARCH) 4. Power/Play button ( ) (POWER/PLAY) 5. Volume button (+, (VOLUME) When you have inserted the battery, the unit is set to the 6. -
Page 4: Turning The Power On And Off
Before use Turning the power on and off Date and time setting 1. In the stop mode, press and hold down the (MENU/ Press the (POWER/PLAY) button to turn the STOP) button down for at least 2 seconds. power on. . -
Page 5: Using An Earphone
Selecting display Recording Using an earphone Selecting a recording mode Connect the earphone (supplied) to the jack. The 1. In the stop mode, press and hold down the (MENU/ speaker is automatically disconnected. STOP) button for at least 2 seconds. . -
Page 6: Selecting The Folder
Recording Selecting the folder VAS (Voice activated system) recording 1. In the stop mode, press and hold down the (MENU/ Press the FOLDER/REPEAT button repeatedly to select STOP) button for at least 2 seconds. the folder ( "A" , "B" , "C" or "D" ) in the stop mode. The menu setting display appears. -
Page 7: Playback
Playback Repeat playback 1. Press the FOLDER/REPEAT button repeatedly to select the folder ("A", "B", "C" or "D") in the stop mode. A-B repeat: 1. During playback, press the FOLDER/REPEAT button 2. Press the (SKIP/SEARCH) button to at the beginning of the section you want to repeat select the desired file. -
Page 8: Erasing
Erasing Erasing the selected file Formatting (Erasing all memories) 1. Press the FOLDER/REPEAT button repeatedly to If you select the format function from the menu, the memory will be initialized and all files will be erased. select the folder ("A" , "B" , "C" or "D") in the stop mode. Use only when you need it! Save a backup copy of your recorded messages on a 2. -
Page 9: Using Timer
Using timer Before setting the timer, see " Date and time setting" on 5. Press the (POWER/PLAY) button. page 6 first. . The hour display blinks. . " " appears. Alarm timer SP H I When the alarm time arrives, beep alarm will be activated. 1. -
Page 10: How It Works At The Timer On Time
Using timer How it works at the timer on time: 3. Press the (SKIP/SEARCH) button, and press the (POWER/PLAY) button to select the Mode Alarm timer timer on time (hour, minute). SP H I Power off The power turns on automatically and alarm sounds. -
Page 11: Other Menu Settings
Other menu settings Common procedures of menu setting dIVIdE: Dividing a file You can use the file dividing function to get rid of 1. In the stop mode, press and hold down the (MENU/ unneeded parts or extract only those that are needed. STOP) button for at least 2 seconds. -
Page 12: Connecting To Pc
Other menu settings Connecting to PC Recommended PC environment VAS: Voice activated system (See " VAS (Voice activated system) recording' on page 10.) Supported PCs IBM PC/AT compatible Supported OS Windows XP Professional LEd: Selecting recording LED on/off Windows XP Home Edition Windows Millennium Edition(Me) Windows 2000 Professional Windows 98 Second Edition... -
Page 13: Installing The Software
Connecting to PC Installing the Software 3. Click [Next]. For Windows XP/Me/2000 Skip this section, and see "Connect the unit to your PC" on page 26 first. For Windows 98/98SE 1. Turn on your PC and Windows is started. Do not connect the unit to the PC yet. -
Page 14: Connect The Unit To Your Pc
Connecting to PC Connect the unit to your PC How to check whether USB driver has installed correctly or not Connect the unit to the USB terminal of the PC by using the USB connection cable. 1. Connect the unit to the PC (See page 26). 2. -
Page 15: Disconnecting The Unit From Your Pc
Connecting to PC Disconnecting the unit from your PC Selecting the action Windows is to take After connection, the following screen will appear Before disconnecting, make sure no data is being (Windows XP only). transferred. For Windows Me/2000/98/98SE, this operation is not For Windows 98/98SE needed. -
Page 16: Displaying By Explorer
Connecting to PC Displaying by Explorer 4. Confirm that [SAFA IC Recorder USB Device] is in the list, and click [OK]. To start up Explorer To use the same Explorer screen as the ones used in this manual, start up the Windows XP Explorer as follows. . -
Page 17: Copying Data By Using Explorer
Copying data Connecting to PC by using Explorer " Removable Disk" display Start up Explorer (See page 30). An icon for a Removable Disk will appear in My Computer (1) Copying files to your PC in Windows when the unit is connected to your PC. Select the desired ZVR files you wish to copy inside the VOICE_IC folder on the Removable Disk and drag and drop them into a folder of your choice on your PC. -
Page 18: Playing Back The
Playing back the transferred files using the Media Player If your PC has the Microsoft Windows Media Player 2. Click [Next]. installed, you can play back the transferred ZVR files. See the Windows Media Player online help for details on how to do this. -
Page 19: Playback
Playing back the transferred files using the Media Player Playback 3. Click and select [Removable Disk [E:]]. 1. Select [All Programs] > [Windows Media Player] from [Start] menu. " Windows Media Player" starts. 1) Click 2) Select 2. Select [Open] from [File] menu. Select 4. -
Page 20: Formatting The Unit's Data
Playing back the transferred files using the Media Player Formatting the unit' s data 5. Select the playback file > click [Open]. Always format data using the unit itself (See page 14). Using your PC to do the formatting might stop the unit 1) Select from recording normally. -
Page 21: Troubleshooting Guide
Troubleshooting guide Symptom Possible cause Corrective action Symptom Possible cause Corrective action The PC and the Connect them correctly. (See Battery is not Reinsert the battery correctly page 26.) unit are not con- or replace with new inserted properly alkaline battery. (See page 4.) The unit nected correctly. -
Page 22: Cleaning The Cabinet
Troubleshooting guide Cleaning the cabinet Clean the outside of the unit with a clean soft cloth, Symptom Possible cause Corrective action moistened with lukewarm water. Do not use benzene, thinner or alcohol since they will mar the finish of the The file name is Changing file name using your The unit... -
Page 23: Specifications
Specifications Recorded time : Recording time (approx.) Mode HQ (High-quality) SP (Standard) LP (Long) 4h 30 minutes 22h 30 minutes 36 hour 64MB 128MB 9 hour 45 hour 72 hour Frequency response (over all) : 400Hz - 3.5kHz (HQ) 400Hz - 3.5kHz (SP) 400Hz - 2.5kHz (LP) Terminals : (Earphone)
Need help?
Do you have a question about the R200 and is the answer not in the manual?
Questions and answers