Sign In
Upload
Download
Table of Contents
Contents
Add to my manuals
Delete from my manuals
Share
URL of this page:
HTML Link:
Bookmark this page
Add
Manual will be automatically added to "My Manuals"
Print this page
×
Bookmark added
×
Added to my manuals
Manuals
Brands
Heatmor Manuals
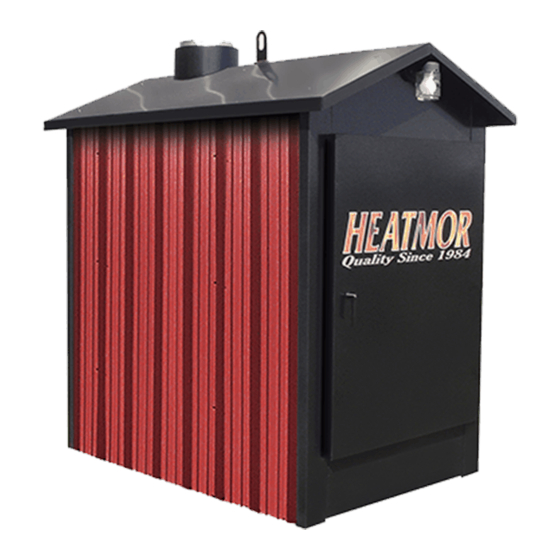
Furnace
100 CSS
Instructions for use manual
Heatmor 100 CSS Instructions For Use Manual
Outdoor furnaces
Hide thumbs
Also See for 100 CSS
:
Manual
(80 pages)
1
2
Table Of Contents
3
4
5
6
7
8
9
10
11
12
13
14
15
16
17
18
19
20
21
22
23
24
25
26
27
28
29
30
31
32
33
34
35
36
37
38
39
40
41
42
43
44
45
46
47
48
49
50
51
52
53
54
55
56
57
58
59
60
61
62
63
64
65
66
67
68
69
70
71
72
73
74
75
76
77
78
79
80
81
82
83
84
85
86
87
88
89
90
91
92
93
94
95
96
97
98
99
100
page
of
100
Go
/
100
Contents
Table of Contents
Troubleshooting
Bookmarks
Table of Contents
Table of Contents
Dear Heatmor™ Owner
Notice to the Reader
Certificate of Compliance
1 Heatmor™ Stainless Steel Furnace Models
2 Furnace Specifications
3 Front Cut Away View of Heatmor™ Outdoor Furnace
Furnace Parts List
4 Rear Cut Away View of Heatmor™ Outdoor Furnace
Furnace Parts List
5 Minimum Clearance Separation Specifications
6 Warnings and Precautions
A Installation
B Electrical
C Other
7 Concrete Pad Specifications
8 Installation of the Heatmor™ Furnace
A Equipment Required
B Placing the HEATMOR™ on the Concrete Pad
C Caulking Around the Firebox Base
D Caulking Around the Outside Perimeter of HEATMOR
E Filling the HEATMOR™ Outdoor Furnace Initially with Water
F Maintaining Water in the Bladder and in the HEATMOR
G Initial Installation of Sand
Types of Sand to Use
Installation
9 Safe Operating Guidelines
A Operation
B Lighting Your HEATMOR™ for the First Time
C Dew Point
D Loading Wood into the HEATMOR
E What Can I Burn
Wood
F How Does a Fire Burn out
G Types of Wood
H Wood as a Fuel
I Stages of Combustion
J Efficiency Measurements and Types of Fires
K Types of Fires
L Handling and Storage of Wood
M Types of Coal
N Coal as a Fuel
O Handling and Storage of Coal
P Loading Coal into the HEATMOR
10 Water
A Qualities of Water to Use
B Water Level Maintenance
C Removal of Water and Replacement of Water
D Water Additives
E Water Treatment Additives and Safety Specifications
F Adding Water Treatment and Freeze Protection Products
11 Bladder Assembly
A Bladder
B Bladder Gate Valve and Bladder Hose
C Water Level Gauge
D Bladder Cover Plate
12 Water Jacket
A Water Jacket
B Supply Line and Return Line Connectors
C Relief Vent Pipe and Weighted Pop off Ball
13 Firebox and Other Components
A Firebox
B Firebox Door
C Firebox Door Hoses and Elbows
D Firebox Door Handle
E Firebox Door Hinge
F Firebox Door Latch
G Firebox Door Holder
H Firebox Door Gasket
I Firebox Door Frame
J Firebox / Base Connector Clamps
K Firebrick
L Standard Grates
M Optional Shaker Grates
N Sand
Types of Sand to Use
Installation
O Flash Curtain / Heat Shield
14 Air Supply
A Combustion Air Blower and Flipper Assembly
Operation of the Combustion Air Blower and Flipper Assembly
Steps to Maintain Your Blower / Flipper Assembly
B Air Box(S)
C Combustion Air Percentage Tube
D Automatic Fan Switch (A.F.S.)
15 Chimney and Top Flue
B Chimney Extension(S)
A Chimney
C Flue
D Top Flue Cover
E Flue Scraper
16 Ashes
A Ash Management and Ash Removal
B Ash Pan
C Ash Auger
D Ash Auger Tube
E Ash Auger Tube Cover Plate
17 Thermometer (Temperature Gauge)
18 Electrical
A Electrical Supply
B Electrical Supply Junction Box
C Double Electrical Outlets at Rear
D Water Temperature Range Control (Aquastat on the Left)
E High Water Temperature Safety Shutoff Controller (Aquastat on the Right)
F Front Light and Fan Power Switch
G in the Event of a Power Failure
19 Exterior Cladding and Insulation
A Outer Door of HEATMOR
B Roof of the HEATMOR
C Sides of the HEATMOR
D Insulation
20 Air Leaks
A Checking for Air Leaks
B Why Do We Not Want any Air Leaks
21 Water Leaks
22 Domestic Coil
23 Season Start up & Shut down Checklists
24 Frequently Asked Questions
Firebox and Other Components
25 Troubleshooting and Solutions
Air Leaks
Heatmor™ Stainless Steel Limited Warranty
Heatmor™ for Life
Notes
Advertisement
Quick Links
1
Furnace Specifications
2
Front Cut Away View of Heatmor™ Outdoor Furnace
Download this manual
TM
Outdoor Furnaces
SAVE THESE INSTRUCTIONS
Table of
Contents
Previous
Page
Next
Page
1
2
3
4
5
Advertisement
Table of Contents
Need help?
Do you have a question about the 100 CSS and is the answer not in the manual?
Ask a question
Questions and answers
Related Manuals for Heatmor 100 CSS
Furnace Heatmor 100 CSS Manual
(80 pages)
Furnace Heatmor 100 CB Instruction Manual
(95 pages)
Furnace Heatmor 100 CB Manual
Stainless steel outdoor furnaces coal burner (41 pages)
Furnace Heatmor 200X Operation And Maintenance Manual
Stainless steel outdoor furnace (96 pages)
Furnace Heatmor 400-4S User Manual
Outdoor furnaces (95 pages)
Furnace Heatmor 600 CSS Manual
Stainless steel outdoor furnace (13 pages)
Furnace Heatmor 200 SSP User Manual
Stainless steel pellet burner outdoor furnace (80 pages)
Furnace Heatmor Response 200 SSRII Operations, Maintenance Manual And Safety Instructions
Stainless steel outdoor furnace (96 pages)
This manual is also suitable for:
200 css
400 dcss
Table of Contents
Save PDF
Print
Rename the bookmark
Delete bookmark?
Delete from my manuals?
Login
Sign In
OR
Sign in with Facebook
Sign in with Google
Upload manual
Upload from disk
Upload from URL


Need help?
Do you have a question about the 100 CSS and is the answer not in the manual?
Questions and answers