Table of Contents
Advertisement
Advertisement
Table of Contents

Related Manuals for Heatmor 200 SSP


Summary of Contents for Heatmor 200 SSP
- Page 1 Outdoor Furnaces save these instructiOns...
- Page 2 Proper personal protective equipment, (PPe), Must Be WOrn at aLL tiMes when servicing and maintaining any of the heatMOr stainless steel Outdoor Furnace product line.
-
Page 3: Table Of Contents
Page # Dear heatMOr™ OWner nOtice tO the reaDer Furnace PhOtO resiDentiaL Furnace sPeciFicatiOns FrOnt cut aWaY vieW OF MODeL 200 ssP Furnace Parts List rear cut aWaY vieW OF MODeL 200 ssP Furnace Parts List MiniMuM cLearance seParatiOn sPeciFicatiOns... - Page 4 Adding Freeze Protection Products BLaDDer asseMBLY Bladder Bladder Gate Valve and Bladder Hose Water JacKet Water Jacket Supply Line and Return Line Connectors Relief Vent Pipe and Weighted Pop off Ball FireBOX anD Other cOMPOnents Firebox Firebox Door Firebox Door Handle Firebox Door Hinge Firebox Door Gasket Firebox Door Frame...
- Page 5 PeLLet suPPLY Internal Hopper of the HEATMOR™ Auger and Auger Motor eXteriOr cLaDDinG anD insuLatiOn Outer Front and Side Doors of the HEATMOR™ Roof of the HEATMOR™ Sides of the HEATMOR™ Insulation air LeaKs Checking For Air Leaks Water LeaKs seasOn start uP &...
-
Page 6: Dear Heatmor™ Owner
Dear HEATMOR Owner, On behalf of myself and the employees of HEATMOR™, I would like to take this opportunity to personally thank you for the purchase of our HEATMOR™ Stainless Steel Outdoor Furnace. You can be assured that your HEATMOR™ was constructed with great emphasis on quality and workmanship. It is our commitment to provide you with the finest outdoor furnace in the industry. -
Page 7: Notice To The Reader
The methods of operation described within this Operations and Maintenance Manual have proven to be effective for HEATMOR™ Inc. for the sole purpose of the operation of a HEATMOR™ Stainless Steel Outdoor Furnace. - Page 8 Phase 2 hanGtaG MODeL 200 ssP...
-
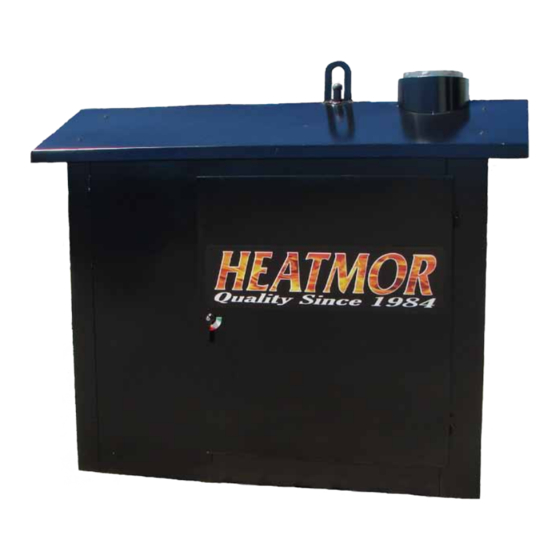
Page 10: Furnace Photo
1 ™ heatMOr stainLess steeL PeLLet Burner OutDOOr Furnace MODeL Model 200 SSP... -
Page 11: Residential Furnace Specifications
Furnace sPeciFicatiOns Specifications Model 200 ssP Overall Width (Inches) Base Width (Inches) (Footprint) 34.5 Overall Length (Inches) Base Length (Inches) (Footprint) 65.5 Total Weight (lbs., without water) 1196 Water Capacity (U.S. gallons) Forced Draft (C.F.M.) Chimney Size (Inches) Internal Hopper Holds 4 bags (40lbs per bag) Insulated Heating Area (Sq. -
Page 12: Front Cut Away View Of Model 200 Ssp
2 FrOnt cut-aWaY vieW OF heatMOr™ 200 ssP OutDOOr Furnace (For parts not shown on the cut-away view, please refer to the appropriate chapter for further details.) -
Page 13: Furnace Parts List
Furnace Parts List - FrOnt cut-aWaY OF 200 ssP Firebox Ashes Ash pan cover Firebox Ash pan (not shown) Firebox door Firebox door handle Bladder assembly Firebox door hinge Firebox door latch Bladder Firebox door gasket Bladder gate valve and hose... -
Page 14: Rear Cut Away View Of Model 200 Ssp
3 siDe cut-aWaY vieW OF heatMOr™ 200 ssP OutDOOr Furnace (For parts not shown on the cut-away view, please refer to the appropriate chapter for further details.) -
Page 15: Furnace Parts List
Furnace Parts List - siDe cut-aWaY OF 200 ssP Firebox Ashes Firebox Ash pan cover Firebox door Ash pan (not shown) Firebox door handle Firebox door hinge Bladder assembly Firebox door latch Firebox door gasket Bladder Firebox door frame Bladder gate valve and hose... -
Page 16: Minimum Clearance Separation Specifications
4 MiniMuM cLearance seParatiOn sPeciFicatiOns The HEATMOR™ furnace, is certified to be installed outside, away from other buildings. Please observe the following “Clearance to Combustibles” guidelines. If you have any further questions, which are not addressed in this Operators Manual, please contact your local dealer for further information. -
Page 17: Warnings And Precautions
7) Before installing the HEATMOR™ furnace, contact and inform your insurance agent. 8) The HEATMOR™ Outdoor Furnace is to be installed on a concrete base only. Any attempt to place the furnace on any other surface may void the warranty. -
Page 18: B Electrical
6) The red wire from the high-limit aquastat on the back of the HEATMOR™ should be wired to the indoor temperature control to override the thermostat. This will dissipate excess heat in the event of a possible malfunction with the HEATMOR™. -
Page 19: Concrete Pad Specifications
The internal hopper opening is 43” above ground or base of furnace. 67.5” If patio stones or a separate cement pad are put around the cement pad for the Heatmor , they should nOt be attached to main base pad of furnace. -
Page 20: Installation Of The Heatmor™ Furnace
OF the heatMOr™ Furnace Principles 1) Need to have an airtight seal the perimeter of the entire HEATMOR™ so rodents are not able to find a home inside the HEATMOR™. 2) Need to lift the HEATMOR™ without damaging it. -
Page 21: D Filling The Heatmor™ Outdoor Furnace Initially With Water
9) Turn off the source of water. The HEATMOR™ is now full of water and the return line is also full of water and air free, BUT the supply line leading from the HEATMOR™ to the building to be heated is still full of air. -
Page 22: E Maintaining Water In The Bladder And In The Heatmor
2) Remove the weighted ball from the relief vent pipe. 3) Connect the water source to the return line leading to the HEATMOR™. Use a garden hose to add the water to the return line. -
Page 23: F Heatmor Recommended Installation Instructions
TANK Existing Boiler Heating: The Heatmor can be hooked up with an existing boiler as shown. A constant flow of hot water is maintained through the use of a circulating pump. The zone valves, existing pump and baseboard radiation transfer the... - Page 24 CRIMP RING FILTER FROM SUPPLY HEATMOR WATER TANK In-Floor Heating: To install an In-Floor Heating system, hot water pipes are placed in the floor at the time your slab is poured. Water circulates through the tubing and heats the concrete which radiates and heats the building. Valves are used to control water flow in each loop, manual control valves are used between manifolds for temperature control, and electric zone valves are used for more even heat.
- Page 25 24 hours/day. The gas or electric element in your water tank will not have to come on. OTHER APPLICATIONS Pools/Hot Tubs: The Heatmor can also be used to heat your swimming pools and hot tubs. A water to water heat exchanger is used for this application.
-
Page 26: Safe Operating Guidelines
Then close hopper door securely. 5) Keep the firebox door, ash pan cover plate, all three flue cover plates, hopper door, airbox cover plate and the outer doors of the HEATMOR™ furnace closed at all times except for servicing and refueling. - Page 27 15) Wear a particle mask when removing ashes. 16) Ash pan may be hot after removing ashes. 17) In case of power failure, do not open any doors on the HEATMOR™. Monitor the water temperature very closely. Refer to “freeze protection” in this manual.
-
Page 28: B Lighting Your Heatmor™ For The First Time
PLEASE READ THROUGH ALL “LIGHTING YOUR HEATMOR™” STEPS BEFORE LIGHTING YOUR FURNACE. 1) Remove the weighted pop off ball from the relief vent pipe, on top of the HEATMOR™ furnace. 2) Close the green valve, supplying the bladder, located at the rear of the furnace. -
Page 29: C Dew Point
Just as moisture collects on the inside of a warm house window on a cold outside day, the same thing is occurring inside the HEATMOR firebox. The warm moisture in the exhaust is condensing on the cold firebox walls of the HEATMOR. In most typical situations, once the water temperature is above approximately 130 degrees Fahrenheit, the sweating will stop because you are above the dew point. -
Page 30: E What Can I Burn
What should I burn? this furnace is designed to burn soft or hard wood pellets OnLY. Wood pellets are generally made from compacted sawdust; they are usually a byproduct of saw milling or other wood transformation activities. They are very dense in formation and generally come in 40 pound bags. They will be either 6mm or 8mm in diameter. -
Page 31: H Efficiency Measurements And Types Of Fires
Because it is best to always keep a tight seal on the hopper door to prevent any possibilities of burn back. Q. Is it a good idea to put the front of my HEATMOR™ into my wood storage building so I can load the HEATMOR™ from inside? a. - Page 32 Buy the wood pellets by the pallet and you can store the pallets not too far from the HEATMOR™. Cover them if you wish. Use the tractor to bring the pallets to the front of the HEATMOR™, as you need them. Refer to the “Clearance to Combustibles”...
-
Page 33: Water
Water Level Maintenance You can verify the water level of your HEATMOR™ by checking the fullness of the bladder. The water level gauge (“add water” weight) inside the front door should be up near the bladder, not down near the hopper. -
Page 34: D Water Additives
4) Pour the entire contents of the water treatment chemical, as supplied, into the HEATMOR™ furnace. 5) Top up your HEATMOR™ furnace with water, fill the bladder, and replace the pop off ball. Refer to “Filling the Bladder Initially” for details or contact your local dealer. -
Page 35: E Water Treatment Additives And Safety Specifications
Water Treatment Additives and Safety Specifications Water Treatment Safety Specifications cautiOn: KeeP Out OF the reach OF chiLDren Product Identification: CLT-545 Product Manufacturer: Rochester Midland Contents: Sodium Nitrate Sodium Molybdate Corrosion Inhibitor Blend Water Danger: Harmful if swallowed Avoid skin and eye contact Avoid breathing mist or vapors Keep container closed and away from children First Aid:... - Page 36 3) Take a funnel and place it into the relief vent pipe. 4) Pour the contents of the freeze protection products, into the HEATMOR™ furnace. Do not pressurize the heatMOr™; do not attempt to thread fittings onto the relief vent pipe and “pump” additives into the HEATMOR™ under pressure.
-
Page 37: Bladder Assembly
Filling the Bladder with Water 1) When the entire system is bled of air and the water jacket of the Heatmor is full of water (water flows out onto the roof through the vent pipe), leave the water from the water source flowing to the HEATMOR™... -
Page 38: B Bladder Gate Valve And Bladder Hose
The bladder hose provides a means for the water to freely flow from the water jacket to the bladder allowing expansion and contraction. When the heatMOr™ Furnace is OPeratinG, the BLaDDer Gate vaLve Must Be OPen. -
Page 39: Water Jacket
Supply Line and Return Line Threaded Connectors Principles The HEATMOR™ furnace is designed to draw the supply (hot) water from the bottom of the water jacket. This may seem irregular (people know hot water rises), but this method mixes the water in the water jacket better and often extends pump life. -
Page 40: Firebox And Other Components
chaPter 12 FireBOX anD Other cOMPOnents Firebox and Firepot Principles of the Firebox and Firepot Wood pellets are burned inside the firebox firepot to generate heat. This heat is absorbed into the water in the water jacket. When the water is up to temperature and the combustion air blowers are off, the firebox must be airtight. -
Page 41: B Firebox Door
Operation of the Firebox Door To visibly inspect the inside of the firebox if needed. 200 SSP Firebox Door Refer to Safe Operating Guidelines for further instructions on how to safely open and close the firebox door or contact your local dealer. -
Page 42: C Firebox Door Handle
3) Loosen and remove the nut on the pivot bolt. Firebox Door Hinge Principle of the Firebox Door Hinge Supports the firebox door. 200 SSP Firebox Door Handle Maintenance / Result Secure and stable, the hinge allows the firebox door to swing free and smooth. Firebox Door Gasket... -
Page 43: F Firebox Door Frame
Keep the door frame cleaned down to the steel at all times. Failure to do so results in a build up of creosote, resulting in a barrier to an airtight seal, air leaks and premature gasket replacement. 200 SSP Firebox Door Frame... -
Page 44: Air Supply
chaPter 13 air suPPLY Maximum draft should not exceed 0.20 inches water column, if exceeded could cause solid fuel fire to burn out of control. the FLiPPer Must OPerate PerFectLY Or PrOBLeMs QuicKLY arise. Combustion Air Blower and Flipper Assembly Principles The combustion air blower and flipper assembly supply air for combustion inside the firebox. -
Page 45: B Air Box(S)
Removal and Replacement 1) Turn off the main power supply to the furnace and remove the front housing panel. 2) Loosen and remove the thumbnuts securing the blower / flipper assembly to the air tube. 3) Disconnect the electrical wire from the blower. 4) Remove the flipper assembly from the blower by removing the four bolts. -
Page 46: Chimney And Flue
In case of chimney fire shut off combustion fan switch and consult your dealer. extensions are available from your local dealer. nOte: If more than one extension is used on the 200 SSP, use all insulated extensions. Insulated extensions are also available from your local dealer. -
Page 47: C Flue
This captures heat that would otherwise be lost out the chimney, assisting in the process of a more efficient burn. The 200 SSP has a tubed flue and all tubes should be maintained. -
Page 48: Ashes
Ash Management and Ash Removal 1) If ash management is deficient, the HEATMOR™ will not perform to its optimum. It is time well spent to ensure proper ash management. In the long run, the operator will be paid back many times over in higher efficiency and better performance. -
Page 49: C Ash Pan Cover Plate
The ash pan cover plate is a rectangular plate that is secured over the ash pan opening, creating an airtight seal. 200 SSP Operation 1) When removing ashes, always turn off combustion air blower and disconnect power. 2) Remove the two thumb nuts. -
Page 50: Electrical
The HEATMOR furnace comes with all internal components pre-wired. Provision is made for easy attachment of the main electrical power supply to the HEATMOR™ controls. Electrical outlets at the rear of the HEATMOR™ accommodate plugging in circulating pumps. Electrical Supply have a licensed electrician make all electrical connections. -
Page 51: C Double Electrical Outlets At Rear
1) The Electronic Controller is reading the temperature of the water at the top left of the water jacket, at the side of the HEATMOR™. The hot supply water is taken from the bottom of the water jacket at the front of the HEATMOR™. -
Page 52: F Watlow Flame Sensor Control
The temperature probe is how the Electronic Controller reads the temperature of the water in the water jacket. Removal and Replacement 1) Turn off the main power supply to the HEATMOR™. 2) Remove the 6 screws from the inside front panel that hold the Electronics. -
Page 53: G Watlow Flame Sensor Control Temperature Probe
The temperature probe is how the Watlow Flame Sensor reads the temperature of the fire. Removal and Replacement 1) Turn off the main power supply to the HEATMOR™. 2) Remove the 6 screws from the inside front panel that hold the Electronics. -
Page 54: I High Water Temperature Safety Shutoff Control
To provide added safety and notification, when a high water temperature is reached, this aquastat will send electrical power to the “red wire”. The red wire leading from the HEATMOR™ back to the power source can be installed so the electrical power will sound an alarm or will override the comfortable heat settings within the heated building. -
Page 55: J Front Light And Fan Power Switch
(left switch) • This light will then illuminate the area in front of the HEATMOR™. • The light must be turned off for electrical power to be running to the combustion air blower. iF the Water teMPerature is hiGh enOuGh tO triGGer... -
Page 56: K Iginition Switch
In the Event of a Power Failure If a power failure occurs during the use of a HEATMOR™, do not open the firebox door to provide draft for the fire to burn. Allow the fire to go out. In case of a prolonged power failure, a generator should be used as a... -
Page 57: Pellet Supply
17 PeLLet suPPLY Internal Hopper of the HEATMOR™ Principle of the Internal Hopper The internal hopper provides a location to store pellets away from the outside elements. The internal hopper holds approx. 4 bags of wood pellets. Operation of the Internal Hopper... -
Page 58: Exterior Cladding And Insulation
18 eXteriOr cLaDDinG anD insuLatiOn Outer Front and Side Doors of the HEATMOR™ Principles of the Outer Front and Side Doors The outer doors of the furnace are exterior doors, which are insulated to retain the heat that radiates from the firebox door and water jacket surface. -
Page 59: C Sides Of The Heatmor
5) Secure the new roof to the frame of the furnace. 6) Re-seal the lift point and relief vent pipe with caulking. Sides of the HEATMOR™ Principle of the Sides and Ends The sides of the furnace are clad with black steel. The steel siding provides a dry covering to protect the insulation of the furnace. -
Page 60: Air Leaks
Checking For Air Leaks If you suspect that your HEATMOR™ has an air leak, we recommend that you check all three flue covers, ash pan door, airbox cover door, fan opening, internal hopper door, external hopper door and firebox door are shut tightly. -
Page 61: Water Leaks
20 Water LeaKs If you suspect that your HEATMOR™ Stainless Steel Outdoor Furnace has developed a water leak, please contact your local dealer for verification and further details. -
Page 62: Season Start Up & Shut Down Checklists
“End of Season Maintenance Checklist,” follow the instructions below: 1. Remove cap from chimney. 2. Build fire in firepot and bring your furnace up to temperature. (Refer to the “Lighting the Heatmor for the first time” section of the Heatmor Operations and Maintenance Manual.) - Page 63 Heatmor™ Operations and Maintenance Manual.) The water in the HEATMOR™ should be chemically analyzed once per year to ensure the proper levels of treatment are being maintained. Contact your local dealer as to where to have your water tested.
-
Page 64: Frequently Asked Questions
Refer to: • Maintaining the correct amount of water in the bladder and in the HEATMOR™. Q. Why is water coming out of the overflow relief vent pipe? a. When the furnace is initially filled and too much water is in the furnace, it releases through the relief vent pipe when the furnace is up to temperature. - Page 65 Q. My furnace is shut down but still continues to increase in water temperature? a. There is an air leak somewhere in the furnace. Check all flippers and seals, ensuring that there is an airtight seal. Refer to: • Checking for air leaks (Located in Air Leaks). Q.
-
Page 66: Troubleshooting And Solutions
♦ Fans On – Air Must Get In. ♦ Fans Off – Air Must Stay Out. ♦ Water Temperature between 165 and 185 degrees Fahrenheit. PROCEDURES ARE REFERENCED TO EARLIER PARTS OF THIS HEATMOR™ “OPERATORS AND MAINTENANCE MANUAL”. PrOBLeM cause... - Page 67 PrOceDure Refer to Electronic Controller Replace Electronic “electrical (Electronic malfunction. Controller. Controller)” Refer to “Filling the heatMOr™ Water Level is Low. Add Water. Outdoor Furnace initially with Water.” Creosote buildup on firebox doorframe Remove creosote from Refer to causing improper door doorframe.
- Page 68 “electrical (contact Local not constant. dealer or licensed Dealer).” electrician. Refer to Re-light fire. Fire is out. “Lighting Your heatMOr™.” Refer to Flue plugged. Clean Flue. “Flue.” Refer to Blower fins are full of Clean Blowers. “steps to Maintain your dust.
- Page 69 Verify HEATMOR™ Too much heat draw on furnace size for Contact your Heatmor Furnace. application. Local Dealer. Refer to “Filling the heatMOr™ Water Level low. Add Water. Outdoor Furnace initially with Water.” Excessive moisture in Refer to Use dryer wood pellets.
-
Page 70: Air Leaks
PrOBLeM cause sOLutiOn PrOceDure Furnace boils or rattles before reaching Use recommended Contact your Improper Antifreeze. maximum Anti-freeze. Local Dealer. operating temperature. Defective in-house Contact your Building too Replace thermostat. thermostat. Local Dealer. warm. Refer to Air leakage around Door. Replace Door Gasket. - Page 71 PrOBLeM cause sOLutiOn PrOceDure Firebox receiving air Check all seals Refer to somewhere when for air leaks. “checking for air Leaks.” fans are off. Run a smoke check. Check type of wood Refer to pellets burning and “What can i burn, Fire is not burning hot.
- Page 72 PrOBLeM cause sOLutiOn PrOceDure Blower continues to operate Refer to and display Water level is low. Add water. “Filling the Furnace initially shows a higher with Water.” than setting temperature. Refer to Defective Electronic Replace Electronic “electrical (electronic Controller. Controller. controller)”...
- Page 73 Pellets are unburnt in Refer to Turn down the auger the ashpan, auger speed “Loading Wood Pellets into speed control control too fast the heatmor ” Wood pellets have a lot Change type of wood Refer to of ash or low heating pellets.
- Page 74 Local Dealer. in building. Heating devices need Maintain heating Contact Your maintenance. devices. Local Dealer. HEATMOR™ not running Contact Your between 145-185 Consult Dealer. Local Dealer. degrees Fahrenheit. a) Check circulating pumps. Replace if necessary . b) Line that is kinked.
- Page 75 PrOBLeM cause sOLutiOn PrOceDure Check electrical Contact your Faulty electrical supply. connections. electrician. Indoor forced air furnace fan is full of dirt or filter Contact your is plugged and therefore Local Dealer. the air flow is reduced going through the coil. Improper installation of Contact your coil in forced air furnace.
- Page 76 PrOBLeM cause sOLutiOn PrOceDure Manifold not balanced Balance the system by properly. One appliance adjusting the flow of Refer to getting more than its water to the different “installation Manual.” share of the total flow of heating appliances. hot water. Outdoor furnace water temperature is not Refer to...
- Page 77 Outdoor Furnaces • • • • • •...
-
Page 78: Heatmor™ Stainless Steel Limited Warranty
PLease reaD the heatMOr stainLess steeL LiMiteD LiFetiMe WarrantY. iF YOu have anY QuestiOns, PLease cOntact YOur LOcaL DeaLer. cOMPLete anD senD the Furnace reGistratiOn tO YOur LOcaL DeaLer, DistriButOr Or heatMOr inc. Within 30 DaYs OF Purchase Date tO vaLiDate the WarrantY.
Need help?
Do you have a question about the 200 SSP and is the answer not in the manual?
Questions and answers