
Related Manuals for Philips 19S1


Summary of Contents for Philips 19S1
- Page 1 Philips LCD Monitor Electronic User’s Manual Downloaded from ManualMonitor.com Manuals...
-
Page 2: Safety And Troubleshooting Information
%Ï the power cable or DC power cord for normal operation. Please use approved power cord provided by Philips all the time. If your power cord is missing, please %Ï contact with your local service center. (Please refer to Customer Care Consumer Information Center) Do not subject the LCD monitor to severe vibration or high impact conditions during operation. - Page 3 IMPORTANT: Always activate a moving screen saver program when you leave your monitor unattended. Always activate a periodic screen refresh application if your LCD monitor will display unchanging static content. Uninterrupted display of still or static images over an extended period may cause “burn in”, also known as “after-imaging”...
-
Page 4: Faqs (Frequently Asked Questions)
Restart your computer and repeat step 2 and 3 to verify that your PC is set at 1280x1024@60Hz (19"). Shut down your computer, disconnect your old monitor and reconnect your Philips LCD monitor. Turn on your monitor and then turn on your PC. - Page 5 Your video card/graphic driver and monitor together determine the available resolutions. You can select the desired resolution under Windows® Control Panel with the "Display properties" What if I get lost when I am making monitor adjustments? Simply press the OK button, then select 'Reset' to recall all of the original factory settings. Will the LCD screen be resistant to scratches? In general it is recommended that the panel surface is not subjected to excessive shocks and is protected from sharp or blunt objects.
-
Page 6: Compatibility With Other Peripherals
Yes. Philips LCD monitors have this optional feature. For standard VESA mount holes on the rear cover allows the user to mount the Philips monitor on most of the VESA standard arms or accessories. We recommend to contact your Philips sales representative for more information. - Page 7 RETURN TO TOP OF THE PAGE Ergonomics, Ecology and Safety Standards Q13: What is Image Sticking, or Image Burn-in, or After Image, or Ghost Image in LCD panels? Uninterrupted display of still or static images over an extended period may cause "burn in", also known as "after-imaging"...
-
Page 8: Troubleshooting
• Safety and Troubleshooting • FAQs This page deals with problems that can be corrected by a user. If the problem still persists after you have tried these solutions, contact Philips • Common Problems customer service representative. • Imaging Problems Common Problems •... - Page 9 Vertical flicker appears Press the Auto button. %Ï Eliminate the vertical bars using the Phase/Clock of Setup in OSD Main %Ï Controls. Horizontal flicker appears Press the Auto button. %Ï Eliminate the vertical bars using the Phase/Clock of Setup in OSD Main %Ï...
- Page 10 For further assistance, refer to the Consumer Information Centers list and contact Philips customer service representative. RETURN TO TOP OF THE PAGE Downloaded from ManualMonitor.com Manuals...
-
Page 11: Regulatory Information
• BSMI Notice (Taiwan Only) Ergonomics • Ergonomie Hinweis (nur Deutschland) • Philips End-of-Life Disposal Good visual ergonomics and image quality in order to improve the working environment for the user and to reduce sight and %Ï • China RoHS strain problems. -
Page 12: Waste Electrical And Electronic Equipment (Weee)
There is currently a system of recycling up and running in the European countries, such as The Netherlands, Belgium, Norway, Sweden and Denmark. In Asia Pacific, Taiwan, the products can be taken back by Environment Protection Administration (EPA) to follow the IT product recycling management process, detail can be found in web site www.epa.gov.tw The monitor contains parts that could cause damage to the nature environment. -
Page 13: Ce Declaration Of Conformity
ROHS is a European Directive aiming to control the use of certain hazardous substances in the production of new electrical and electronic equipment. Philips has completely eliminated four of six RoHS-banned substances form its products by 1998-eight full years before compliance was required and has lowered usage of the remaining substances significantly below the mandated levels. - Page 14 Power Saving Alternative 2 Sleep White (blinking) < 0.8 W (typ.) One step Switch Off < 0.5 W (typ.) ® ® s an NERGY artner, have determined that this product meets the NERGY guidelines for energy efficiency. We recommend you switch off the monitor when it is not in use for a long time. RETURN TO TOP OF THE PAGE Federal Communications Commission (FCC) Notice (U.S.
- Page 15 United States Only This device complies with Part 15 of the FCC Rules. Operation is subject to the following two conditions: (1) this device may not cause harmful interference, and (2) this device must accept any interference received, including interference that may cause undesired operation. RETURN TO TOP OF THE PAGE Commission Federale de la Communication (FCC Declaration) Cet équipement a été...
-
Page 16: North Europe (Nordic Countries) Information
RETURN TO TOP OF THE PAGE Polish Center for Testing and Certification Notice The equipment should draw power from a socket with an attached protection circuit (a three-prong socket). All equipment that works together (computer, monitor, printer, and so on) should have the same power supply source. The phasing conductor of the room's electrical installation should have a reserve short-circuit protection device in the form of a fuse with a nominal value no larger than 16 amperes (A). - Page 17 Placering/Ventilation VARNING: FÖRSÄKRA DIG OM ATT HUVUDBRYTARE OCH UTTAG ÄR LÄTÅTKOMLIGA, NÄR DU STÄLLER DIN UTRUSTNING PÅPLATS. Placering/Ventilation ADVARSEL: SØRG VED PLACERINGEN FOR, AT NETLEDNINGENS STIK OG STIKKONTAKT ER NEMT TILGÆNGELIGE. Paikka/Ilmankierto VAROITUS: SIJOITA LAITE SITEN, ETTÄ VERKKOJOHTO VOIDAAN TARVITTAESSA HELPOSTI IRROTTAA PISTORASIASTA.
-
Page 18: End Of Life Disposal
festgelegten Vorschriften. Auf der Rückwand des Gerätes befindet sich ein Aufkleber, der auf die Unbedenklichkeit der Inbetriebnahme hinweist, da die Vorschriften über die Bauart von Störstrahlern nach Anlage III ¤ 5 Abs. 4 der Röntgenverordnung erfüllt sind. Damit Ihr Monitor immer den in der Zulassung geforderten Werten entspricht, ist darauf zu achten, daß Reparaturen nur durch Fachpersonal durchgeführt werden. - Page 19 Downloaded from ManualMonitor.com Manuals...
- Page 20 Toxic substances like Lead has been eliminated and compliance with European community’s stringent RoHs directive mandating restrictions on hazardous substances in electrical and electronic equipment have been adhered to in order to make Philips monitors safe to use throughout its life cycle. RETURN TO TOP OF THE PAGE...
-
Page 21: About This Manual
• Notational Descriptions About This Guide This electronic user's guide is intended for anyone who uses the Philips LCD Monitor. It describes the LCD monitor's features, setup, operation and other important information. Its contents are identical to the information in our printed version. - Page 22 NOTE: This icon indicates important information and tips that help you make better use of your computer system. CAUTION: This icon indicates information that tells you how to avoid either potential damage to hardware or loss of data. WARNING: This icon indicates the potential for bodily harm and tells you how to avoid the problem.
-
Page 23: Product Information
Product Information • Smartimage • SmartContrast Your LCD monitor • SmartSaturate Congratulations on your purchase and welcome to Philips. To fully benefit from the support that Philips offers, register your product at. www. • SmartSharpness philips.com/welcome • Technical Specifications • Resolution & Preset Modes •... - Page 24 Press to launch the SmartImage on screen display; Keep press to toggle between Office Work, Image Viewing, Entertainment, Economy, and Off; The SmartImage on screen display will remain on screen for 5 seconds or you can also press”OK” to make confirmation. When SmartImage is enabled, the sRGB scheme is disabled automatically.
- Page 25 Enhances text and dampens brightness to increase readability and reduce eye strain. This mode significantly enhances Office Work: readability and productivity when you’re working with spreadsheets, PDF files, scanned articles or other general office applications. This profile combines color saturation, dynamic contrast and sharpness enhancement to display photos and other Image Viewing: images with outstanding clarity in vibrant colors –...
- Page 26 function can obviously enhance contrast in dynamic for more entertainment fun when viewing videos or playing games. RETURN TO TOP OF THE PAGE SmartSaturate What is it? Smart technology that controls color saturation - the degree to which one on screen color is diluted by neighboring colors - to deliver rich and vibrant images for more entertainment fun when you are viewing videos.
- Page 27 Picture/Display • LCD panel type TFT-LCD • Panel size 19" • Aspect ratio • Pixel Pitch 0.294 x 0.294 mm • Brightness 250 cd/m² •SmartContrast 25000:1 •Contrast ratio(typ.) 800:1 • Response time (typical) 5 ms • Optimum Resolution 1280 x 1024 @ 60Hz •...
- Page 28 Normal Operation 18 W 18 W 18 W Sleep 0.8 W 0.8 W 0.8 W 0.5 W 0.5 W 0.5 W AC Input Voltage at 100VAC AC Input Voltage at 115VAC AC Input Voltage at 230VAC Heat Dissipation* +/-5VAC, 50Hz +/ -3Hz +/-5VAC, 60Hz +/ -3Hz +/-5VAC, 50Hz +/ -3Hz Normal Operation...
-
Page 29: Resolution & Preset Modes
* This data is subject to change without notice. RETURN TO TOP OF THE PAGE Resolution & Preset Modes A. Maximum Resolution For 19S1 1280 x 1024 at 75 Hz (analog input) 1280 x 1024 at 75 Hz (digital input) B. Recommended Resolution... - Page 30 If you have VESA DPM compliance display card or software installed in your PC, the monitor can automatically reduce its power consumption when not in use. If an input from a keyboard, mouse or other input device is detected, the monitor will 'wake up' automatically. The following table shows the power consumption and signaling of this automatic power saving feature: Power Management Definition VESA Mode...
- Page 31 Tilt Swivel (19S1CB/19S1CS models) Downloaded from ManualMonitor.com Manuals...
- Page 32 Height adjustment(19S1CB/19S1CS models) RETURN TO TOP OF THE PAGE Downloaded from ManualMonitor.com Manuals...
- Page 33 Downloaded from ManualMonitor.com Manuals...
-
Page 34: Philips' Flat Panel Monitors Pixel Defect Policy
However, pixel or sub pixel defects on the TFT LCD panels used in flat panel monitors are sometimes unavoidable. No manufacturer can guarantee that all panels will be free from pixel defects, but Philips guarantees that any monitor with an unacceptable number of defects will be repaired or replaced under • Pin Assignment warranty. - Page 35 Two or three adjacent dark sub pixels Proximity of Pixel Defects Because pixel and sub pixels defects of the same type that are near to one another may be more noticeable, Philips also specifies tolerances for the proximity of pixel defects.
- Page 36 In order to qualify for repair or replacement due to pixel defects during the warranty period, a TFT LCD panel in a Philips flat panel monitor must have pixel or sub pixel defects exceeding the tolerances listed in the following tables.
- Page 37 RETURN TO TOP OF THE PAGE Downloaded from ManualMonitor.com Manuals...
-
Page 38: Philips Smartcontrol
SmartControl II (Selective Models) • Product Information • Philips Pixel Defect Policy • Philips SmartControl ll Philips SmartControl II • System support and requirement SmartControl II is monitor-based software with an easy-to-use on-screen graphic interface that guides you through fine-tuning resolution, color calibration and other display settings including brightness, contrast, clock &... - Page 39 Follow the instruction and complete the installation. You can lauch after installation complete. %Ï If you want to launch later, you can either click the shortcut on desktop or toolbar. %Ï Start to use: 1. First launch -Wizard The first time after installation of SmartControl II, it will automatically go to Wizard for first time launch. %Ï...
- Page 40 Adjust Menu allow you to adjust Brightness, Contrast, Focus, Position and Resolution. You can follow the instruction and do the adjustment. %Ï Cancel prompts user if you want to cancel installation. %Ï Tab Heading Sub Menu Display in Analog Display in Digital Adjust Brightness Adjust...
- Page 41 Color menu: Downloaded from ManualMonitor.com Manuals...
- Page 42 Color Menu allow you to adjust RGB, Black Level, White Point, Color Calibration, and SmartImage (Please refer to SmartImage section). You can follow the instruction and do the adjustment. %Ï Refer to below table for sub-menu item base on your input. %Ï...
- Page 43 "Show Me" starts color calibration tutorial. Start - starts the 6-step color calibration sequence. Quick View loads the before/after images. To return to Color home pane, click the Cancel button. Enable color calibration - by default is on. If unchecked, does not allow for color calibration to happen, dimes out start and quick view buttons. Must have patent info in calibration screen.
- Page 44 Previous button is disabled until the second color screen. Next goes to the succeeding target (6-targets). Final next goes File>Presets pane. Cancel closes the UI and returns to the plug in page. SmartImage - Allows user to change setting for better display setting based on content. When Entertainment is set, SmartContrast and SmartResponse are enabled.
- Page 45 Displays Assent Management information on Managment, Description, Serial Number, Current Timing, Domain Name, and Asset Management Status. To return to Plug-in home pane select the plug-in tab. Plug-Ins - Theft Deterrence Pane will only be active when selecting Theft Deterrence Mode from the drop-down Plug Ins menu.
- Page 46 User can enter PIN between 4 and 9 digits numbers only. After entering PIN, Accept button takes user to the pop-up dialog box on the following page. Minimum minutes set to 5. Slider set to 5 by default. Does not require the display be attached to a different host to go into theft mode. Once a PIN is entered and accepted, the following dialog box appears: Click on No button takes user to the following screen.
- Page 47 Click on Yes button takes user to secure web site landing page. After creating PIN, the Theft Deterrence pane will indicate Theft Deterrence Enabled and provide PIN Options button: Theft Deterrence Enabled is displayed. Disable Theft Mode opens pane screen on next page. PIN Options button only available after user creates PIN, button opens secure PIN web site.
- Page 48 Options>Preferences - Will only be active when selecting Preferences from the drop-down Options menu. On a non- supported display capable of DDC/CI, only the Help and Options tabs are available. Displays current preference settings. A checked box enables the feature. The check box is a toggle. Enable Context Menu on desktop is checked (On) by default.
- Page 49 Display the Source instruction pane and current input source setting. On single input displays, this pane will not be visible. Options>Audio - Will only be active when selecting Volume from the drop-down Options menu. On a non-supported display capable of DDC/CI, only the Help and Options tabs are available. Option>Auto Pivot Downloaded from ManualMonitor.com Manuals...
- Page 50 Help>User Manual - Will only be active when selecting User Manual from the drop-down Help menu. On a non-supported display capable of DDC/CI, only the Help and Options tabs are available. Help>Version - Will only be active when selecting Version from the drop- down Help menu. On a non-supported display capable of DDC/CI, only the Help and Options tabs are available.
- Page 51 Context Sensitive menu The Context Sensitive menu is Enabled by default. If Enable Context Menu has been checked in the Options>Preferences pane, then the menu will be visible. The Context Menu has four entries: SmartControll II - When selected the About Screen is displayed. Select Preset - Provides a hierarchical menu of saved presets for immediate use.
- Page 52 The task tray has five entries: Help - Access to User Manual file: opnes User Manual file using the default browser window. Technical Support - displays the tech support page. Check for Update - takes the user to PDI Landing and checks the user's version against the most current available. About - Displays detailed reference information: product version, release information, and product name.
- Page 53 Install the driver. Remove SmartControl, and re-install it once more. If it is still not working, we are sorry that the graphic adaptor is not supported. Please pay attention to Philips’ web site for any updated SmartControl driver available.
- Page 54 Downloaded from ManualMonitor.com Manuals...
-
Page 55: Installing Your Lcd Monitor
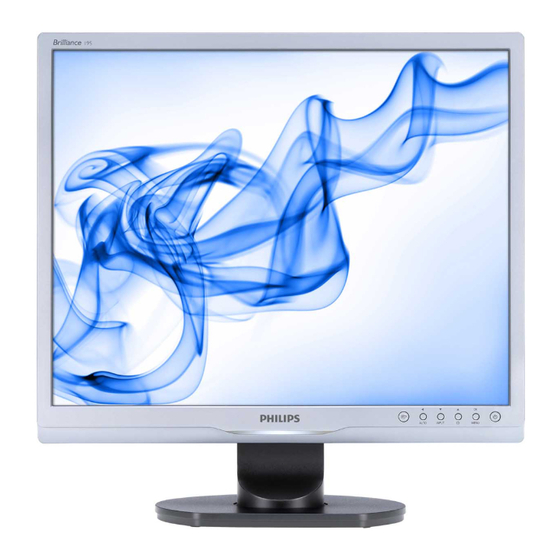
Installing Your LCD Monitor • Front View Produt Description • Connecting to Your PC Front View Product Description • The Base • Getting Started • Optimizing Performance To switch monitor's power On and Off 2 MENU/ To access OSD menu To adjust the OSD menu To adjust brightness of the display .To change the signal input source. -
Page 56: Rear View
RETURN TO TOP OF THE PAGE Rear View Kensington anti-thief lock VGA input DVI-D input (available for selective models) AC power input RETURN TO TOP OF THE PAGE Optimizing Performance For best performance, ensure that your display settings are set at 1280x1024, 60Hz. %Ï... - Page 57 Note: You can check the current display settings by pressing the 'OK' button once. The current display mode is shown in OSD main controls called RESOLUTION. RETURN TO TOP OF THE PAGE Downloaded from ManualMonitor.com Manuals...
-
Page 58: Connecting To Your Pc
Power cord EDFU pack VGA cable RETURN TO TOP OF THE PAGE Connecting to Your PC Connect the power cord to the back of the monitor firmly. (Philips has pre-connected VGA cable for the first installation. Downloaded from ManualMonitor.com Manuals... - Page 59 * available for selective models * available for selective models Connect to PC Turn off your computer and unplug its power cable. Connect the monitor signal cable to the video connector on the back of your computer. Plug the power cord of your computer and your monitor into a nearby outlet. Turn on your computer and monitor.
- Page 60 The Base • Front View Product Description Attach the Base • Accessory Pack • Setting up and connecting your Firmly grasp the monitor with both hands. Attach the monitor stand to the monitor column until the tabs "click" into place before monitor releasing the height adjustable column.
- Page 61 Downloaded from ManualMonitor.com Manuals...
-
Page 62: Remove The Base Stand
RETURN TO TOP OF THE PAGE Remove the base stand Before you start disassembling the monitor base, please follow the instructions below to avoid damage or injury. Extend the monitor stand to its maximum height. Downloaded from ManualMonitor.com Manuals... - Page 63 Place the monitor face down on a smooth surface, taking care to avoid scratching or damaging the screen. Then lift the monitor stand. Press the release button on the rear of the stand to remove the base from the stand. Downloaded from ManualMonitor.com Manuals...
-
Page 64: Remove The Base
Remove the base Condition: for VESA standard mounting applications %Ï Remove the 4 screw covers. Remove the 4 Screws and then remove the base from the LCD monitor. Downloaded from ManualMonitor.com Manuals... - Page 65 Downloaded from ManualMonitor.com Manuals...
- Page 66 This monitor accepts a 100mmx100mm VESA-Compliant mounting interface. Note: RETURN TO TOP OF THE PAGE Downloaded from ManualMonitor.com Manuals...
-
Page 67: Getting Started
The built-in VESA DDC2B feature in Philips Monitors supports Plug & Play requirements for Windows® 2000/XP/ Vista. This information file ( .inf) should be installed in order that your Philips monitor can be enabled from the 'Monitor' dialog box in Windows® 2000/XP/Vista and the Plug & Play application can be activated. The installation procedure based on Windows®... -
Page 68: For Windows Vista
Select the 'Don't Search. I will choose the driver to install' radio button. Then click on the 'Next' button. 1 0 . Click on the 'Have disk...' button, then click on the 'Browse...' button and then select the appropriate drive F: (CD-ROM Drive). -
Page 69: Description Of The On Screen Display
What is the On-Screen Display? On-Screen Display (OSD) is a feature in all Philips LCD monitors. It allows an end user to adjust screen performance or select functions of the monitors directly through an on-screen instruction window. A user friendly on screen display... - Page 70 The OSD Tree Below is an overall view of the structure of the On-Screen Display. You can use this as a reference when you want to work your way around the different adjustments later on. Downloaded from ManualMonitor.com Manuals...
- Page 71 Resolution notification This monitor is designed for optimal performance at its native resolution, 1280X1024@60Hz. When the monitor is powered on at a different resolution, an alert is displayed on screen: Use 1280x1024@60Hz for best results. Display of the native resolution alert can be switched off from Setup in the OSD (On Screen Display) menu. RETURN TO TOP OF THE PAGE Downloaded from ManualMonitor.com Manuals...
-
Page 72: Customer Care And Warranty
Customer Care & Warranty PLEASE SELECT YOUR COUNTRY/AREA TO REVIEW DETAILS OF YOUR WARRANTY COVERAGE WESTERN EUROPE: Austria Belgium Denmark France Germany Greece Finland Ireland Italy Luxembourg the Netherlands Norway Portugal Sweden Switzerland Spain United Kingdom Poland EASTERN EUROPE: Czech Republic Hungary Russia Slovakia Slovenia Turkey LATIN AMERICA: Argentina Brasil... -
Page 73: Your Philips F1Rst Choice Warranty
Philips helpdesk directly to benefit from your Philips F1rst Choice Warranty. This three-year service warranty entitles you to a swap model on-site if your monitor turns out to be faulty or defective. Philips aims at a swap within 48 hours of your call being received. - Page 74 In order to avoid unnecessary inconvenience, we advise you to read the operating instructions carefully or go to the www. philips.com/support website for additional support before contacting the Philips helpdesk. To solve your problem quickly, please prepare the following details before contacting the Philips helpdesk: Philips type number %Ï Philips serial number %Ï...
-
Page 75: F1Rst Choice Contact Information
F1rst Choice Contact Information Country Code Telephone number Tariff Austria 0810 000206 ¬ 0.07 Belgium 078 250851 ¬ 0.06 Denmark 3525 8761 Local call tariff Finland +358 09 2290 1908 Local call tariff France 082161 1658 ¬ 0.09 Germany 01803 386 853 ¬... -
Page 76: Your Guarantee In Central And Eastern Europe
What is excluded? The Philips guarantee applies provided the product is handled properly for its intended use, in accordance with its operating instructions and upon presentation of the original invoice or cash receipt, indicating the date of purchase, dealer's name and model and production number of the product. - Page 77 In order to avoid unnecessary inconvenience, we advise you to read the operating instructions carefully before contacting our dealers or Information Centers In case your Philips product is not working correctly or is defective, please contact your Philips dealer or directly the Philips Service and Consumer Information Centers Website: http://www.philips.com/support...
-
Page 78: Consumer Information Centers
Consumer Information Centers Argentina Australia Brasil Canada New Zealand Belarus Bulgaria Croatia Czech Republic Estonia United Arab Emirates Hong Kong Hungary India Indonesia Israel Latvia Lithuania Malaysia Middle East + North Africa New Zealand Pakistan Romania Russia Serbia & Montenegro Singapore Slovakia Slovenia South Africa South Korea Taiwan Philippines •... - Page 79 CZECH REPUBLIC General Consumer Information Center 800 142100 Xpectrum Lu.ná 591/4 CZ - 160 00 Praha 6 Tel: 800 100 697 or 220 121 435 Email:info@xpectrum.cz www.xpectrum.cz CROATIA Renoprom d.o.o. Ljubljanska 4, Sv. Nedjelja,10431 Croatia Tel: +385 1 333 0974 ESTONIA FUJITSU SERVICES OU Akadeemia tee 21G...
- Page 80 LATVIA ServiceNet LV Jelgavas iela 36 LV - 1055 Riga, Tel: +371 7460399 Email: serviss@servicenet.lv LITHUANIA ServiceNet LT Gaiziunu G. 3 LT - 3009 KAUNAS Tel: +370 7400088 Email: servisas@servicenet.lt www.servicenet.lt ROMANIA Blue Ridge Int'l Computers SRL 115, Mihai Eminescu St., Sector 2 RO - 020074 Bucharest Tel: +40 21 2101969 SERBIA &...
- Page 81 123290 Moscow Russia Tel. +7(495)797 3434 Profservice: 14A -3, 2Karacharovskaya str, 109202, Moscow , Russia Tel. +7(095)170-5401 TURKEY Türk Philips Ticaret A.S. Yukari Dudullu Org.San.Bolgesi 2.Cadde No:22 34776-Umraniye/Istanbul Tel: (0800)-261 33 02 UKRAINE Comel Shevchenko street 32 UA - 49030 Dnepropetrovsk Tel: +380 562320045 www.csp-comel.com...
- Page 82 ARGENTINA Azopardo 1480. (C1107ADZ) Cdad. de Buenos Aires Tel: 0800 3330 856 Email: CIC.monitores@Philips.com BRASIL Alameda Raja Gabaglia, 188 - 10°Andar - V. Olímpia - S. Paulo/SP - CEP 04551-090 - Brasil Tel: 0800-7254101 Email: lourdes.rezende@aoc.com.br Pacific AUSTRALIA Company: AGOS NETWORK PTY LTD...
- Page 83 Fax: 021-7510982 E-mail: gepta@cbn.net.id Service hours: Mon.~Fri. 8:30am~4:30pm; Sat. 8:30am~2:00pm Additional service points: 1. Philips Building Jl. Buncit Raya Kav 99. Jakarta Selatan. Phone: 021-7940040, ext 1722/1724, 98249295, 70980942 2. Jl. Tanah Abang 1 no 12S. Jakarta Pusat. Phone: 021-3455150, 34835453 3.
- Page 84 Fax: (9221) 2721167 E-mail: care@philips.com Website: www.philips.com.p Singapore Company: Philips Electronics Singapore Pte Ltd (Philips Consumer Care Center) Address: 620A Lorong 1 Toa Payoh, TP4 Building Level 1, Singapore 319762 Tel: (65) 6882 3999 Fax: (65) 62508037 E-mail: consumer.care.sg@philips.com Service hours: Mon.~Fri. 9:00am~6:00pm; Sat. 9:00am~1:00pm Taiwan Company: FETEC.CO...
- Page 85 Thailand Company: Axis Computer System Co., Ltd. Address: 1421 Soi Lardprao 94, Srivara Town In Town Soi 3 Road, Wangthonglang, Bangkok 10310 Thailand Tel: (662) 934-5498 Fax: (662) 934-5499 E-mail: axis5@axiscomputer.co.th Service Hours: Mon.~Fri. 08:30am~05:30pm Vietnam Company: Digiworld Corp Address: 211-213 Vo Van Tan St, Ward 5, Dist.3 , Ho Chi Minh city, Vietnam Tel: 848-38266065 Fax: 848-38267307 E-mail: Digicare@dgw.com.vn...
- Page 86 088-856-8540/856-8541 Sun # 0922-8210080 Iloilo Office: C. Lim Comp., Gomez St., Iloilo City # 033 338-4159/ 033 508-3741 Sun # 0922-8808850 Africa SOUTH AFRICA Company name: Sylvara Technologies Pty Ltd Address: Ho Address Palm Springs Centre Christoffel Road Van Riebeeck Park Kempton Park, South Africa Tel: +27878084456 Fax: +2711 391 1060 E-mail: customercare@philipssupport.co.za...
-
Page 87: Your International Guarantee
In case your Philips product is not working correctly or is defective, please contact your Philips dealer. In the event you require service whilst in another country a dealer address can be given to you by the Philips Consumer Help Desk in that country, the telephone and fax number of which can be found in the relevant part of this booklet. -
Page 88: Who Is Covered
Should you encounter any difficulties while installing or using this product, please contact Philips directly to benefit from your Philips F1rst Choice Warranty. This three-year service warranty entitles you to a swap model on-site within 48 hours of your call being received within the first year of purchase. -
Page 89: Where Can I Get More Information
%Ï Where IS SERVICE AVAILABLE? Warranty service is available in all countries where the product is officially distributed by Philips Consumer Electronics. In countries where Philips Consumer Electronics does not distribute the product, the local Philips service organization will attempt to provide service (although there may be a delay if the appropriate spare parts and technical manual(s) are not readily available). - Page 90 Please contact Philips at: (800) 479-6696 Three years free parts and three years free labor will be provided at Philips Canada depot or any one of its authorized service centers. (In Canada, this warranty is given in lieu of all other warranties. No other warranties are expressed or implied, including any implied warranties of merchantability or fitness for a particular purpose.
- Page 91 Just a phone call away Philips’ customer help desks are located worldwide. Within the U.S. you can contact Philips customer care Monday- Friday from 8:00 AM-9:00 PM Eastern Time (ET) and on Saturdays from 10:00 AM-5:00 PM ET hrs by using one of the contact phone numbers.
-
Page 92: Download And Print
Download instructions: To download the file: 1. Click-and-hold your mouse over the icon below. (Windows® 95/98/2000/Me/XP/Vista users right-click) 19S1.pdf Download 2. From the menu that appears, choose 'Save Link As...', 'Save Target As...' or 'Download Link to Disk'. 3. Choose where you would like to save the file; click 'Save' (if prompted to save as either 'text' or 'source', choose 'source'). -
Page 93: Printing Instructions
Printing instructions: To print the manual: With the manual file open, follow your printer's instructions and print the pages you need. RETURN TO TOP OF THE PAGE Downloaded from ManualMonitor.com Manuals...
Need help?
Do you have a question about the 19S1 and is the answer not in the manual?
Questions and answers