Ariens Sno-Thro 920001- ST624E Owner's/Operator's Manual
Ariens snow blower owner/operator manual
Hide thumbs
Also See for Sno-Thro 920001- ST624E:
- Owner's/operator's manual (30 pages) ,
- Owner's/operator's manual (17 pages) ,
- Owner's/operator's manual (32 pages)

Related Manuals for Ariens Sno-Thro 920001- ST624E


Summary of Contents for Ariens Sno-Thro 920001- ST624E
- Page 1 Sno-Thro ® Owner/Operator Manual Model 920001 - ST624E ENGLISH FRANÇAIS 01990600 6/07 Printed in USA...
-
Page 2: Table Of Contents
• Record Unit Model and Serial numbers here. • Record Engine Model and Serial number here. PRODUCT REGISTRATION The Ariens dealer must register the product at the time of purchase. Registering the product will help the company process warranty claims or contact you with the latest service information. -
Page 3: Safety Alerts
Ariens Dealer for assistance. Make sure all assembly has been properly completed. NOTE: To locate your nearest Ariens Dealer, go to www.ariens.com on the Internet. WARNING: To avoid injury to hands and feet,... -
Page 4: Safety Decals And Locations
SAFETY DECALS AND LOCATIONS ALWAYS replace missing or damaged Safety Decals. Refer to figures below for Safety Decal locations. Figure 2 1. WARNING! Read Owner/Operator Manual. OL1801 Keep people away from unit while operating. Keep children out of work area and under watchful care of a responsible adult. - Page 5 Check for weak spots on docks, ramps or floors. Avoid uneven work areas and rough terrain. Stay alert for hidden hazards. DO NOT operate near drop-offs, ditches, or embankments. Unit can suddenly turn over if a wheel is over the edge of a cliff or ditch, or if an edge caves in. Falling snow, fog, etc.
- Page 6 DO NOT operate on steep slopes. DO NOT clear snow across the face of slopes. Keep all movement on slopes slow and gradual. DO NOT make sudden changes in speed or direction. Use a slow speed to avoid stops or shifts on slopes. Avoid starting or stopping on a slope.
-
Page 7: Package Contents
WARNING: AVOID INJURY. Read and understand the entire Safety section before proceeding. WARNING: Dropping or tipping over boxed unit could result in personal injury or damage to unit. PACKAGE CONTENTS 1. Sno-Thro Unit 4. Literature Pack with Extra Shear Bolts 2. - Page 8 2. Connect the chute crank to the pinion gear on chute with spring clip pin. 1. Chute Crank 2. Support Bracket 3. Pinion Gear 4. Spring Clip Pin Figure 6 Check Function of Dual Handle Interlock Without the engine running, press down (engage) both clutch levers.
-
Page 9: Snow Blower Overview
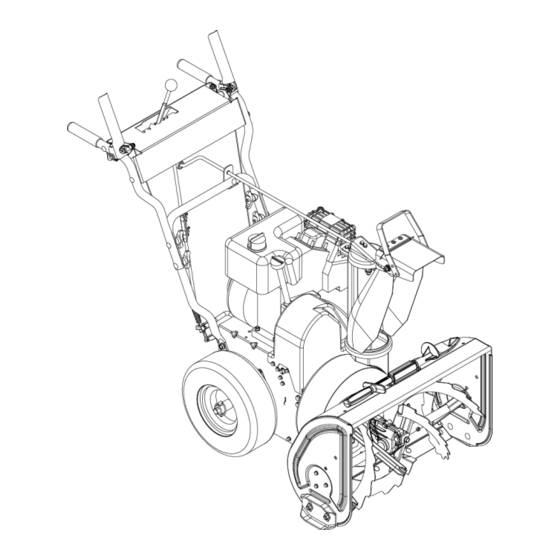
CONTROLS AND FEATURES Figure 7 1. Attachment Clutch Lever 2. Speed Selector 3. Traction Drive Clutch Lever 4. Chute Crank 5. Muffler Guard 6. Discharge Chute Deflector 7. Discharge Chute 8. Impeller 9. Auger 10. Scraper Blade 11. Auger Gearcase 12. -
Page 10: Operation
WARNING: AVOID INJURY. Read and understand the entire Safety section before proceeding. WARNING: To avoid injury to hands and feet, always disengage clutches, shut off engine, and wait for all movement to stop before unclogging or working on snow thrower. Keep hands and feet away from auger and impeller. - Page 11 Throttle The throttle controls the engine speed. To increase or decrease the engine speed, adjust to: 1. Fast (normal or warm starts) 2. Part-Throttle 3. Slow (cold weather starts) 4. Stop (engine is off) Electric Starter The electric starter will start a properly choked and cranked engine when the starter button is pushed.
-
Page 12: Filling Fuel Tank
Scraper Blade The scraper blade allows the back of the housing to keep better contact with the surface being cleared. It also prevents damage to the housing from normal wear. IMPORTANT: DO NOT allow Scraper Blade to wear too far or Auger/Impeller housing will become damaged. -
Page 13: Starting And Shut Off
TO STOP IN AN EMERGENCY Immediately release both control levers to stop unit in an emergency. Stop engine, remove key and wait for all rotating parts to stop before leaving operator’s position. STARTING AND SHUT OFF WARNING: FAILURE TO FOLLOW INSTRUCTIONS could result in personal injury and/or damage to unit. -
Page 14: Maintenance
1. Set Throttle to Slow or Part-Throttle position. 2. Press down on handlebars enough to raise front of unit slightly off surface. Ariens Dealers will provide any service or adjustments which may be required to keep your unit operating at peak efficiency. Should engine service be required, contact an Ariens dealer or an authorized engine manufacturer's service center. -
Page 15: Check/Change Engine Oil
IMPORTANT: DO NOT allow grease or oil to get on friction disc, friction plate or belts. NOTE: Apply Ariens Hi-Temp Grease or equivalent to the lubrication fittings. See SERVICE PARTS on page 23. Sno-Thro should be lubricated (Figure 13) at beginning of season or every 25 operating hours. -
Page 16: Figure
1. Runner 2. Runner Hardware Figure 14 SHEAR BOLTS IMPORTANT: Use only Ariens shear bolts for replacement. Use of any other type of shear bolt may result in severe damage to unit. Occasionally a foreign object may enter the auger/impeller housing and jam the auger, breaking shear bolts (Figure 15) which secure the auger to the shaft. -
Page 17: Attachment Drive Belt Replacement
1. Spring 2. Nut Figure 17 SPEED SELECTOR ADJUSTMENT To adjust (Figure 18): 1. Disconnect adjustment pivot pin from speed selector arm. Save hardware for reinstallation. 2. Place the speed selector on dash panel in the fastest forward speed position. 3. -
Page 18: Traction Drive Belt Replacement
7. Remove hex bolts securing housing to frame (two on each side). Tip housing and frame apart on pivot pin. 8. Remove attachment drive belt from lower pulley (hold brake away from belt). 1. Pinion and Gear 3. Spring Pin 2. -
Page 19: Attachment Clutch/Brake Adjustment
NOTE: To gain belt clearance, remove swing gate spacer (Figure 22) so drive plate can be slid over until finger is out of frame and drive plate can swing past stop hole in frame. See Figure 23. 1. Swing Gate Spacer 2. - Page 20 With the attachment clutch disengaged, check the attachment idler arm position here. The attachment idler arm should lightly touch the frame. Figure 25 4. Tighten jam nut on cable adjustment barrel. Check Attachment Idler Arm Roller Clearance 1. Place the unit into the service position. Remove the bottom cover.
-
Page 21: Traction Drive Clutch Adjustment
1. Engine Sheave 5. Attachment Belt Idler 2. Traction Drive Belt 6. Belt Finger 3. Traction Belt Idler 7. Traction Belt Idler Nut 4. Attachment Idler Nut Figure 28 Check Attachment Brake (Figure 29) 1. With the clutch lever disengaged, brake pad must contact attachment belt. -
Page 22: Friction Disc Replacement
Traction Clutch Lever Figure 31 To adjust traction clutch (Figure 32): 1. With the traction drive clutch lever disengaged, loosen the jam nut on the cable adjuster. Turn adjustment barrel up the cable to decrease the distance between clutch lever and handlebar. Turn the adjustment barrel down the cable to increase the distance between clutch lever and handlebar. -
Page 23: Short Term
07200327 Impeller Belt 07200101 Traction Belt 53200500 Shear Bolts 00170800 Friction Disc ACCESSORIES See your authorized Ariens dealer to add the additional accessories available to your Sno-Thro. Part No. Description 73203100 Slicer Bar 72200600 120 Volt Starter Kit 72406500 Front Weight Kit... -
Page 24: Troubleshooting
PROBLEM PROBABLE CAUSE 1. Fuel tank is empty. Engine will not crank/start. 2. Fuel shut-off valve closed. 3. Build up of dirt and residue around governor/carburetor. 4. Key Switch not in run position. 5. Electric starter not functioning. 1. Out of fuel. Engine stops. -
Page 25: Specifications
SPECIFICATIONS Model Number Description Engine - Power Max - HP (kW) Maximum RPM Displacement - in. (cc) Electric Start Fuel Tank Capacity - qt (Liters) Snow Clearing Width - in. (cm) Chute Rotation Angle Impeller Diameter - in. (cm) Speed - RPM-Max (min Auger Diameter - in. - Page 26 Ariens Company 655 West Ryan Street Brillion, WI 54110-1072 920-756-2141 Fax 920-756-2407 www.ariens.com...
Need help?
Do you have a question about the Sno-Thro 920001- ST624E and is the answer not in the manual?
Questions and answers
how do I remove the wheel on a model 920001-ST624E snow thrower
To remove the wheel on an Ariens model 920001-ST624E snow thrower:
1. Locate the axle lock pin (Figure 9 in the manual).
2. Pull out the axle lock pin to unlock the wheel.
3. Slide the wheel off the axle.
Note: Lock the axle pin again after reinstalling the wheel.
This answer is automatically generated