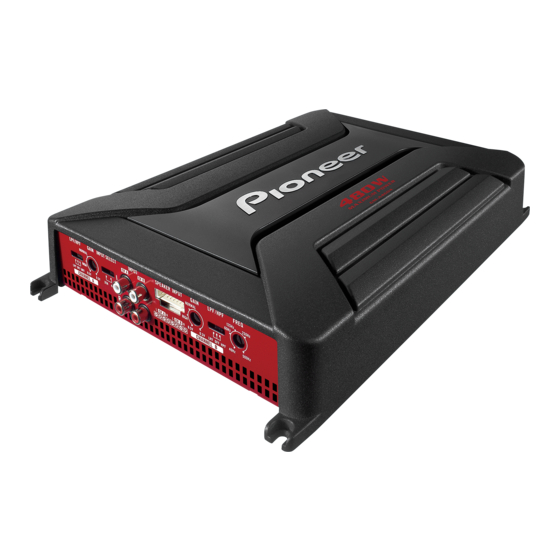
Pioneer GM-A6604 Owner's Manual
Bridgeable four-channel power amplifier
Hide thumbs
Also See for GM-A6604:
- User manual (109 pages) ,
- Owner's manual (57 pages) ,
- Owner's manual (19 pages)
Table of Contents
Advertisement
Quick Links
Advertisement
Table of Contents

Related Manuals for Pioneer GM-A6604


Summary of Contents for Pioneer GM-A6604
- Page 1 BRIDGEABLE FOUR-CHANNEL POWER AMPLIFIER GM-A6604 GM-A4604 Owner’s Manual...
-
Page 2: Before You Start
Section Before you start ! We offer the latest information about Thank you for purchasing this PIONEER PIONEER CORPORATION on our product website. To ensure proper use, please read through this manual before using this product. It is espe- If you experience problems cially important that you read and observe WARNINGs and CAUTIONs in this manual. - Page 3 Section Before you start ! Always install the amplifier on a flat surface. — If the speaker output terminal and speaker Do not install the amplifier on a surface that wire are short-circuited. — If a DC voltage is applied to the speaker is not flat or on a surface with a protrusion.
-
Page 4: Setting The Unit
2 GAIN (gain) control Front side Adjusting gain controls CHANNEL A (chan- nel A) and CHANNEL B (channel B) helps align the car stereo output to the Pioneer amplifier. Default setting is the NORMAL position. If output remains low, even when the car... -
Page 5: Setting Gain Properly
! Despite correct volume and gain settings, output power will change only slightly. the unit sound still cuts out periodically. In such cases, please contact the nearest authorized Pioneer Service Station. Gain control of this unit Preout level: 2 V (Standard: 500 mV) -
Page 6: Connecting The Units
Fuse 25 A × 2 (GM-A6604) / 30 A × 1 (GM- A4604) c Fuse (30 A) × 2... -
Page 7: About Bridged Mode
Speaker channel Power na, antenna cable and tuner. Nominal input: Four-channel output Min. 60 W (GM-A6604) Min. 40 W (GM-A4604) About bridged mode Nominal input: Two-channel output Min. 180 W (GM-A6604) Min. -
Page 8: Connecting The Speakers
Section Connecting the units Connecting the speakers Three-channel output The speaker output mode can be four-channel, three-channel (stereo and mono) or two-chan- nel (stereo or mono). Connect the speaker leads based on the mode and the figures shown below. Four-channel output 1 Right 2 Left 3 Speaker out A... -
Page 9: Connections When Using The Rca Input Jack
Section Connecting the units 4 From car stereo (RCA output) Two-channel output (Mono) If only one input plug is used, e.g. when the car stereo has only one output (RCA output), connect the plug to RCA input jack A rather than B. -
Page 10: Connecting The Power Terminal
Section Connecting the units WARNING If the battery wire is not securely fixed to the term- inal using the terminal screws, there is a risk of overheating, malfunction and injury, including minor burns. Route battery wire from engine com- partment to the vehicle interior. ! When drilling a cable pass-hole into the ve- hicle body and routing a battery wire thor- 1 Car Stereo... -
Page 11: Connecting The Speaker Output Terminals
Section Connecting the units Connecting the speaker output terminals Use wire cutters or a utility knife to strip the end of the speaker wires to ex- pose about 10 mm of wire and then twist the wire. Twist 1 Lug (sold separately) 2 Battery wire 3 Ground wire Connect the wires to the terminal. -
Page 12: Before Installing The Amplifier
2 Drill a 2.5 mm diameter hole ! Place all cables away from hot places, such 3 Floor mat or chassis as near the heater outlet. 4 Hole-to-hole distance: 338 mm (GM-A6604) / 308 mm (GM-A4604) 5 Hole-to-hole distance: 196 mm... -
Page 13: Additional Information
RCA ........6.5 V / 22 kW working out total current drawn by multiple Speaker ......26 V / 16 kW power amplifiers. GM-A4604 Power source ......14.4 V DC (10.8 V to 15.1 V allowable) Grounding system ....Negative type CAR STEREOS PIONEER AUDIO SYSTEMS...
Need help?
Do you have a question about the GM-A6604 and is the answer not in the manual?
Questions and answers