
Related Manuals for Garmin dezl 560


Summary of Contents for Garmin dezl 560
- Page 1 dēzl ® owner’s manual For Sales Information Please Contact RoadTrucker Inc (www.RoadTrucker.com) 8312 Sidbury Rd. Wilmington, NC 28411 (800) 507-0482 / (910) 686-4281...
- Page 2 Garmin. Garmin hereby grants permission to download a single copy of this manual onto a hard drive or other electronic storage medium to be viewed and to print one copy of...
-
Page 3: Table Of Contents
Table of Contents Table of Contents Using Exit Services....Finding Trucking Points of Getting Started ....Interest ........Setting a Home Location ..Mounting the Device ....About Points of Interest ... About myDashboard ....Finding Your Last Parking Entering a Truck or RV Profile ... Spot ........ - Page 4 Table of Contents Viewing Trip Information ..About Offers and Viewing the Turn List ....Advertisements ..... Viewing the Next Turn ..... Using Trucking Features.. Viewing the Junction View ..About IFTA Logging ....Selecting a Route Calculation About Hours of Service.... Mode ........
- Page 5 Warning Icons ......File Types ........ Power Cables ......About Memory Cards....Caring for Your Device..... Transferring Files To Your About Garmin Lock ....Computer ......Erasing User Data ....Deleting Files ......Battery Information ....Changing the Fuse in the Customizing the Device ...
- Page 6 Table of Contents Contacting Garmin Product Support ......... Specifications ......Troubleshooting ....... Index ........dēzl 560 Owner’s Manual For Sales Information Please Contact RoadTrucker Inc (www.RoadTrucker.com) 8312 Sidbury Rd.; Wilmington, NC 28411 - (800) 507-0482 / (910) 686-4281...
-
Page 7: Getting Started
Getting Started Getting Started 4. Enter a truck or RV profile (page 5. Acquire satellites (page WARNING See the Important Safety and Product Mounting the Device Information guide in the product box for product warnings and other WARNING important information. - Page 8 Getting Started Installing the Portable 3. Slide the locking lever on the ➎ Friction Mount base to the unlocked position. If you are using a portable friction mount, you should follow these instructions. 1. Plug the vehicle power cable ➊ into the mini-USB connector ➋...
- Page 9 Getting Started Installing the Base 7. Tilt the device back until it ➏ snaps. NOTICE The adhesive pad is permanent and is very difficult to remove after it is ➏ installed. If you move the adhesive pad, use rubbing alcohol to help remove the adhesive residue.
- Page 10 Getting Started 4. Remove one side of the Attaching the Device to the Base Before you use your device on protective liner from the adhesive battery power, you should charge it. ➊ 1. Plug the vehicle power cable ➋ ➊ LOCK LOCK into the mini-USB connector...
- Page 11 Getting Started 4. Slide the disk on the bottom If you are using a traffic receiver of the arm into the base until it in Europe, you must connect the clicks. external antenna to receive traffic information. 5. Slide the locking lever to the locked position.
-
Page 12: About Mydashboard
60 days after the first time you /dashboard. acquire satellites while driving with 4. Follow the on-screen instructions. your device. For more information, go to www.garmin.com/numaps. Registering the Device 1. From myDashboard, click Register Now. 2. Follow the on-screen instructions. -
Page 13: Entering A Truck Or Rv Profile
For more information about GPS, go driving. Always defer to all posted to www.garmin.com/aboutGPS. road signs and road conditions when making driving decisions. dēzl 560 Owner’s Manual For Sales Information Please Contact RoadTrucker Inc (www.RoadTrucker.com) -
Page 14: Device Overview
Getting Started Adjusting the Screen 1. Turn on your device. Brightness 2. If necessary, go outdoors to an open area, away from tall 1. Press and quickly release the buildings and trees. Power key. Acquiring satellites can take a 2. Touch and drag the scroll bar. few minutes. -
Page 15: Adjusting The Volume
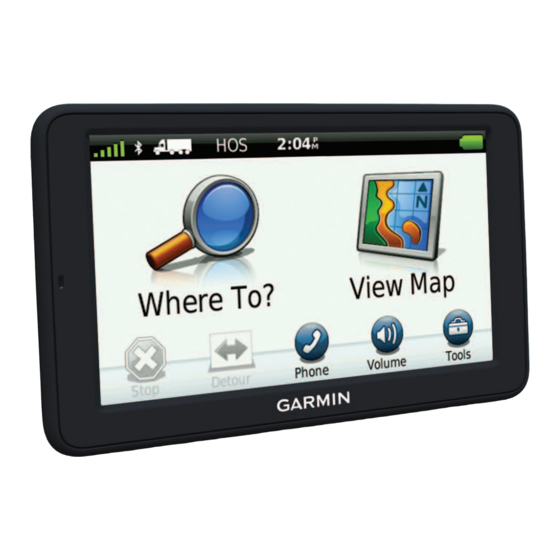
➎ • Touch to make a call when ➏ Using the Main Menu connected to a compatible mobile ➊ phone. Go to www.garmin.com ➌ ➋ /bluetooth for information. • Touch to adjust the volume. ➐ • Touch to open the menu of ➑... -
Page 16: Using The On-Screen Buttons
Getting Started Using the On-screen • Touch to add a space. Buttons • Touch within the field to move the cursor. • Touch to return to the previous screen. • Touch to delete a character. • Touch to see more •... -
Page 17: Transportation Modes
Getting Started Transportation Modes Using a Backup Camera If a composite video backup camera Automobile mode has been installed in your vehicle, Truck mode you can view the output of the camera on your device. RV mode Connect the camera to the video- Pedestrian mode in jack on the cradle. -
Page 18: Searching For A Location
Searching for a Location Searching for a 5. Enter the street name, and touch Done. Location 6. If necessary, select the street. 7. If necessary, select the address. Finding an Address NOTE: Depending on the version of Using the Location Map the built-in map data on your device, The location map opens after you the button names and the order of... -
Page 19: Finding A Location Using The Map
Using the Map Data for the breakdown directory is updated periodically. To purchase 1. From the main menu, touch updates, go to http://buy.garmin.com. Where To? > Browse Map. 1. From the main menu, touch 2. Select a location. Where To?. -
Page 20: Using Exit Services
Searching for a Location • Touch NTTS. Finding Trucking Points of Interest 2. Select a category. The detailed maps loaded in your 3. If necessary, select a subcategory. device contain trucking points of 4. Select a destination. interest, such as truck stops, rest areas, and weigh stations. -
Page 21: About Points Of Interest
Searching for a Location About Points of Interest Going Home Before you can navigate to home, The detailed maps loaded in your you must set a home location. device contain points of interest, such as restaurants, hotels, and auto From the main menu, touch services. -
Page 22: Using Photo Navigation
1. Connect your device to your information balloon. computer (page 2. Touch > Report Error > Yes. 2. Go to http://connect.garmin.com The location is removed from future /photos. searches. 3. Follow the instructions to select and load pictures to your device. Reporting an Incorrect Point 4. -
Page 23: Finding Your Last Parking Spot
Searching for a Location Finding Your Last 3. Under myDashboard Preferences, click Change Preferences > Yes. Parking Spot myDashboard collects the data from From the main menu, touch your device. Where To? > Parking > Last Spot. Rating a Point of Interest When available, you can view and Viewing a List of change the star rating for a point of... -
Page 24: Finding Favorites
Searching for a Location them and create routes to them. Editing Favorites Your home location is also stored in 1. From the main menu, touch favorites. Where To? > Favorites. 2. Select a category. Saving Your Current Location 3. Select a favorite. to Favorites 1. -
Page 25: Entering Coordinates
Searching for a Location 7. Edit the information. Changing the Map Coordinate Format 8. Touch Done. 1. From the Home Screen, touch Deleting Favorites Where To? > Coordinates > 1. From the main menu, touch Format. Where To? > Favorites. 2. -
Page 26: Planning A Trip
Planning a Trip Planning a Trip Scheduling a Trip The trip planner allows you to set a You can use Trip Planner to create departure time and trip duration. and save a trip with multiple destinations. 1. From the main menu, touch Where To? >... -
Page 27: Navigating A Saved Trip
Planning a Trip Navigating a Saved Trip Setting a Simulated Location 1. From the main menu, touch Where To? > Trip Planner. 1. From the main menu, touch Tools > Settings > System > GPS 2. Select a saved trip. Simulator >... -
Page 28: Navigation
Truck mode based on truck and to use safe driving judgment configuration data and applicable at all times. Garmin will not be laws for the state or province. responsible for any traffic fines or citations that you may receive for... -
Page 29: Using The Navigation Map
Navigation Using the Navigation • Touch to view information for ➎ the location. • Touch and drag to view a ➏ ➊ ➋ different area of the map. ➌ • Touch to return to the main ➐ menu. ➎ ➏ ➍... -
Page 30: Viewing Trip Information
Navigation Viewing Trip Information Resetting Trip Information 1. From the map, touch Speed > The trip information page displays 2. Select an option: your present speed and provides statistics about your trip. • When not navigating a route, touch Reset All to reset TIP: If you make frequent stops, every data field, except the leave the device turned on so it can... -
Page 31: Viewing The Turn List
Navigation Viewing the Turn List Viewing the Next Turn When you are navigating a route, Before you can view the next turn, you can view all of the turns for your you must be navigating a route. entire route and the distance between The next turn shows the turn on the turns. -
Page 32: Viewing The Junction View
Navigation Viewing the Junction Selecting a Route View Calculation Mode Before you can view the junction Before you can select a route view, you must be navigating a route. calculation mode, you must set the device to prompt you (page 64). -
Page 33: Taking A Detour
Navigation 4. Touch Go!. • To avoid the next 2 miles, select Next 2 Miles on 5. Touch Add to Active Route. Route. 6. Touch and drag the locations to • To avoid the next 5 miles, order them, and touch Done. select Next 5 Miles on Route. -
Page 34: About Mytrends
Navigation About myTrends 6. When myTrends information ™ appears in the navigation After you save your frequently- bar, touch it to view route visited destinations as favorites, information. myTrends senses when you drive to them. After recording your driving Using the Pedestrian patterns, myTrends displays the route Navigation Map and the estimated time of arrival in... - Page 35 (page 63). a bus or subway, and walking. cityXplorer maps are not included with the device. See http://my.garmin.com to purchase cityXplorer maps. The yellow icons indicate the navigation method used in each section of the route. For example, when you see , board a bus at that point in the route.
-
Page 36: Traffic
You do not need to activate the subscription included with your FM NOTICE traffic receiver. The subscription Garmin is not responsible for the activates automatically after your accuracy or timeliness of the traffic device acquires satellite signals information. Traffic information is while receiving traffic signals from not available in all areas. -
Page 37: Receiving Traffic Information
Traffic Receiving Traffic About the Traffic Icon Information When you are receiving traffic information, a traffic icon appears When the receiver is within a traffic on the map. The traffic icon changes coverage area, your device will begin color to indicate the severity of displaying traffic information. -
Page 38: Traffic On Your Route
Traffic Traffic on Your Route Manually Avoiding Traffic on Your Route CAUTION 1. From the map, touch If you choose to recalculate your 2. Touch Traffic On Route. route when you are navigating in 3. If necessary, touch the arrows to Truck mode, the recalculated route view other traffic delays on your might include roads that have not... -
Page 39: Searching For Traffic Delays
4. Write down the FM traffic receiver unit ID. 1. From the map page, touch 5. Go to www.garmin.com/fmtraffic 2. Touch Traffic Search to view a to purchase a subscription and get list of roads with traffic delays. a 25-character code. -
Page 40: About Offers And Advertisements
Viewing an Offer List ad-based traffic information. From the main menu, touch Tools > Offers. See our privacy statement at .garmin.com/products/privacy Disabling Traffic and Offers important privacy information. Before you can disable offers, you must disable traffic. NOTE: This feature is not available in all areas. -
Page 41: Using Trucking Features
Using Trucking Features Using Trucking Entering Fuel Data 1. From the main menu, touch Tools Features > IFTA Logging > At the Pump. 2. Enter the fuel price per gallon. About IFTA Logging 3. Touch the Fuel Used field. You can use IFTA Logging to 4. - Page 42 Using Trucking Features 7. Touch Next. 5. Select an option: 8. Select the vendor from whom • Touch a field to edit the you purchased the fuel. information. 9. Select the purchaser of the fuel. • Touch > Yes to delete the log.
- Page 43 Using Trucking Features 1. From the main menu, touch Tools 1. From the main menu, touch > IFTA Logging > Jurisdiction Tools > IFTA Logging > Trip Summary. Reports. 2. If necessary, select a truck. 2. If necessary, select a truck. 3.
-
Page 44: About Hours Of Service
1. Connect the device to your should comply with all applicable computer (page federal and state paper logbook 2. Open the “Garmin” drive or requirements. volume, and open the Reports folder. You can use Hours of Service to record your working hours, which 3. -
Page 45: Recording Your Duty Status
Using Trucking Features Recording Your Duty Status Using Driving Logs 1. From the main menu, touch Tools Before you can use Hours of Service, > Hours of Service. you must be in Truck mode (page 11), and you must create a 2. -
Page 46: About Drivers
Using Trucking Features About Drivers Managing Driver Information 1. From the main menu, touch Tools Multiple drivers can use the same > Hours of Service. device to track hours of service. 2. Select a driver > Driver Info. Before you can use Hours of Service, 3. - Page 47 Using Trucking Features 1. From the main menu, touch Tools Managing Shipments Before you can use Hours of Service, > Hours of Service. you must be in Truck mode 2. Select a driver > Manage (page 11), and you must create a Shipments >...
-
Page 48: Exporting Driving Logs
5. If necessary, select the location to card, and open the Garmin export the log. folder. The device exports the log to a CSV 3. Open the HOSExports folder. -
Page 49: Using The Tools
Using the Tools Using the Tools Using Help From the main menu, touch Tools > Help to view information about Viewing Current using the device. Location Information Searching Help Topics Use the Where Am I? page to view From the main menu, touch Tools information about your current >... -
Page 50: Using Ecoroute
Using the Tools NOTE: ecoRoute is available only 3. Enter how much fuel your for Automobile mode. vehicle has used since the last fill Using ecoRoute 4. Enter the distance you have 1. From the main menu, select traveled since the last fill up. Tools >... - Page 51 Using the Tools Braking—displays your score for Viewing Your ecoChallenge Scores smooth and gradual braking. You From the main menu, select Tools > lose points for hard braking. ecoRoute > ecoChallenge. Removing the ecoChallenge About the ecoChallenge Score Score From the Map The leaf color on the ecoChallenge From the map, select >...
-
Page 52: About The Mileage Report
Using the Tools Adjusting the Vehicle Profile A mileage report is created for every route that you drive. If you stop 1. From the main menu, touch Tools > ecoRoute > Vehicle Profile. a route on your device, a mileage report is created for the distance you 2. -
Page 53: Using The Picture Viewer
Using the Tools Resetting ecoRoute Data • Touch to view a slide 1. From the main menu, touch Tools show of the pictures. > ecoRoute. • Touch the screen to stop the 2. Select a category. slide show. > Reset. 3. -
Page 54: Using The World Clock
Using the Tools Using the World Clock Capturing Screenshots 1. From the main menu, touch Tools 1. From the main menu, touch > World Clock. Tools > Settings > Display > Screenshot > Enabled. 2. Touch a city name. 2. Touch to take a screenshot. - Page 55 Using the Tools 6. Select a unit of measure. 5. Select a currency box. 7. Touch Done. 6. Select the currency you want to update. 8. If necessary, repeat steps 5–7. 7. If necessary, repeat steps 3–6 to 9. Enter a value. select a currency to convert to.
-
Page 56: Hands-Free Phone Calls
Refer to your phone your mobile phone with Bluetooth instructions. technology is compatible with the device, go to www.garmin 1. From the dēzl main menu, touch .com/bluetooth. Tools > Settings > Bluetooth > Bluetooth > Enabled > Save. - Page 57 Hands-Free Phone Calls 4. Select the dēzl from the list of 5. Select your phone from the list. devices. 6. Touch OK. 5. If necessary, enter the device A prompt to pair the phone Bluetooth PIN (1234) into your with your device appears on the phone.
-
Page 58: Receiving A Call
Hands-Free Phone Calls • When you turn on the device, it • Touch to delete a phone tries to connect to the last phone from the device memory. to which it was connected. • Touch None to drop your • You might have to set your current connection. -
Page 59: Dialing A Point Of Interest
Hands-Free Phone Calls • Touch Handset to turn off the Dialing a Point of device but remain on the call, Interest or if you need privacy. 1. From the main menu, touch TIP: To switch back, touch Phone > Points of Interest. Hands-free. -
Page 60: Placing Calls Using Voice Dial
Hands-Free Phone Calls Placing Calls Using 1. From the main menu, touch Phone > Call Home. Voice Dial 2. Touch Enter Phone Number. Before you can place calls using 3. Enter the phone number. voice dial, you may need to train your phone to recognize your voice 4. -
Page 61: Data Management
You can purchase memory cards from You can store files, such as JPEG an electronics supplier, or you can image files, on your device. The purchase pre-loaded Garmin mapping device has a memory card slot for software (www.garmin.com additional data storage. -
Page 62: Transferring Files To Your Computer
Data Management Transferring Files To Installing a Memory Card 1. Insert a memory card into the slot Your Computer on the device. ➊ 1. Connect the device to your computer (page Your device and memory card appear as removable drives in My Computer in Windows and as mounted volumes on Mac computers. -
Page 63: Deleting Files
Data Management Deleting Files 5. Open the “Garmin” or memory card drive or volume. NOTICE 6. Select Edit > Paste. If you do not know the purpose of The file appears in the list of files a file, do not delete it. Your device... -
Page 64: Customizing The Device
Customizing the Device Customizing the • Garmin Lock—locks the device (page 71). Device • About—displays the software version number, the unit ID System Settings number, and information on From the main menu, touch Tools > several other software features. Settings > System. -
Page 65: Choosing A Main Menu
Customizing the Device TIP: A customized main 4. If necessary, select . menu can fit up to two 5. Select an icon. enlarged icons. 6. Select Save. • Select to shrink a large Editing the Main Menu Icons icon. You can change the size and location •... -
Page 66: Adding Truck Or Rv Profiles
Customizing the Device Adding Truck or RV Activating Truck or RV Profiles Profiles The device calculates routes based on the width, length, height, weight, WARNING and other settings for the active Entering your vehicle profile does profile. not guarantee that your vehicle’s characteristics will be accounted for You must activate a profile before in all route suggestions. -
Page 67: Automobile, Truck, And Rv Navigation Settings
Customizing the Device • Map Theme—changes the color Editing Truck or RV Profiles of the map data. Before you can delete a profile, you must activate a different profile • Map Data Layout—changes (page 60). the amount of data visible on the map. - Page 68 Proximity points include custom Truck, or RV. POIs and safety camera databases. 3. Touch Map View. Go to www.garmin.com 4. Select an option: /extras for more information. • Touch Track Up to display 1. From the main menu, touch Tools the map in two dimensions >...
-
Page 69: Pedestrian Navigation Settings
Customizing the Device Pedestrian Navigation 1. From the main menu, touch Tools > Settings > Navigation > Settings Pedestrian > Public Transit. From the main menu, touch Tools > 2. Select the transit type to avoid on Settings > Navigation > Pedestrian. your routes. -
Page 70: Avoiding Road Features
Customizing the Device 4. Select an option, if available: Avoiding Road Features 1. From the main menu, touch Tools • Touch Faster Time to > Settings > Navigation. calculate routes that are faster to drive but can be longer in 2. -
Page 71: About Traffictrends
Customizing the Device 3. Touch nüRoute > Custom About trafficTrends ™ Avoidances. When the trafficTrends feature is enabled, your device uses historic 4. Select Add Avoid Area or Add traffic information to calculate more- Avoid Road. efficient routes. Different routes may 5. -
Page 72: Display Settings
Customizing the Device Display Settings Language Settings From the main menu, touch Tools > From the main menu, touch Tools > Settings > Display. Settings > Language. • Color Mode—sets a light • Voice Language—sets the background (Day), a dark language for voice prompts. -
Page 73: Viewing Map Information
You can purchase additional Bluetooth Settings subscriptions or a renewal if your From the main menu, touch Tools > subscription expires. Go to Settings > Bluetooth. www.garmin.com/fmtraffic. • Add Phone—see page Viewing Traffic Subscriptions • Bluetooth—enables the From the main menu, touch Bluetooth component. -
Page 74: Appendix
Appendix Appendix Restriction Warnings Height Warning Icons Weight WARNING Entering your vehicle profile Axle Weight characteristics does not guarantee that your vehicle's characteristics Length will be accounted for in all route suggestions or that you will receive Width the warning icons in all cases. Limitations may exist in the map No Trucks Allowed data such that your device cannot... -
Page 75: Power Cables
Appendix Other Warnings No Left Turn Weigh Station No Right Turn Road Not Verified for Trucks No U Turn Power Cables Road Condition Warnings You can use these options to power Risk of Grounding your device. • Vehicle power cable Lateral Wind •... -
Page 76: Caring For Your Device
Appendix Caring for Your Device Cleaning the Outer Casing NOTICE NOTICE Avoid chemical cleaners and solvents Avoid dropping your device and that can damage plastic components. operating it in high-shock and high- vibration environments. 1. Clean the outer casing of the device (not the touchscreen) Do not expose the device to water. -
Page 77: About Garmin Lock
NOTE: If you forget your PIN and • Register your device at your security location, you must http://my.garmin.com. send your device to Garmin to get • Use the Garmin Lock feature ™ it unlocked. You must also send a (page 71). -
Page 78: Erasing User Data
Changing Your Garmin Lock All original settings are restored. Any items that you have saved are erased. 1. From the Garmin Lock menu, touch Change PIN. Battery Information 2. Enter a new 4-digit PIN twice. battery icon in the status... -
Page 79: Changing The Fuse In The Vehicle Power Cable
Appendix Changing the Fuse in 1. Use a coin to push down the silver tip , and turn the coin the Vehicle Power Cable ➊ counter-clockwise one-quarter turn. NOTICE When replacing the fuse, do not lose 2. Remove the end piece , the ➋... -
Page 80: Removing The Device, Cradle, And Mount
Appendix Removing the Device, Removing the Mounting Arm from the Mounting Base Cradle, and Mount 1. Slide the locking lever on the ➊ Removing the Device from mounting base to the unlocked ➋ the Cradle position. 1. Press up on the tab on the top of 2. -
Page 81: About Nümaps Lifetime
For more information on nüMaps 1. Go to your device product page Lifetime and complete terms and on the Garmin Web site (www conditions, go to www.garmin.com .garmin.com). /numaps, and click Maps. -
Page 82: Safety Cameras
You can create or download custom CAUTION POI lists and install them on your Garmin is not responsible for the device using POI Loader software. accuracy of, or the consequences of 1. Go to www.garmin.com/extras. using, a custom point of interest or a 2. -
Page 83: Purchasing Accessories
• In the USA, go to www.garmin .com/support, or contact Garmin USA by phone at (913) 397.8200 or (800) 800.1020. • In the UK, contact Garmin (Europe) Ltd. by phone at 0808 2380000. dēzl 560 Owner’s Manual For Sales Information Please Contact RoadTrucker Inc (www.RoadTrucker.com) -
Page 84: Troubleshooting
Appendix Troubleshooting Problem Solution My device is not • Verify that the GPS simulator is turned off. • From the main menu, touch Tools > Settings > acquiring satellite signals. System > GPS Simulator > Off. • Take your device out of parking garages and away from tall buildings and trees. - Page 85 Enabled. • Your phone must be turned on and be less than 33 feet (about 10 meters) away from your device. • Go to www.garmin.com/bluetooth for more help. dēzl 560 Owner’s Manual For Sales Information Please Contact RoadTrucker Inc (www.RoadTrucker.com)
-
Page 86: Index
Index Index life 72, 78 safety 76–77 Bluetooth technology caring for your device 50–54 70–71 Numbers pairing with a phone changing the fuse 2-D, 3-D map view 50–52 charging your device settings cityXplorer maps 29, 63 breakdown directory cleaning your device 6, 70 accessories brightness, adjusting... - Page 87 Index display settings jurisdiction summaries drivers, truck 36–37 dash mount 3–5 driving directions trip reports deleting driving logs extras favorites exporting files viewing exported recently found favorites 17–19 duty status locations deleting user data editing 18–19 destinations, multiple ecoRoute finding 20–21 calibrating fuel saving locations to...
- Page 88 Index fuse, changing drivers junction view driving logs 39, 42 jurisdiction summary duty status 36–37 Garmin Lock 71–72 regulations Garmin Product Support shipments 40–41 keyboard geocaching IFTA (International Fuel language settings satellite signals 7–8 Tax Agreement) latitude and longitude settings IFTA logging 35–38...
- Page 89 Index interest 14–19 updating myDashboard 6–7 using photos 16–17 MapSource 55, 75 myMaps settings using the map mass storage mode 55–57, myTrends locations, saving to favorites measurements, converting navigation locking the device 48–49 maps logs memory cards 55–56 off road driving 38, 39 memory card slot...
- Page 90 RV 7, 60–61 mileage vehicle (ecoRoute) trip 37–38 Bluetooth protecting your device resetting Garmin Lock 70–71 device POI loader public transit home location POI loader software avoidances trip information points of interest city maps restoring settings...
- Page 91 30–34 security truck or RV 60–61 route recalculation Garmin Lock 71–72 shipments 40–41 dēzl 560 Owner’s Manual For Sales Information Please Contact RoadTrucker Inc (www.RoadTrucker.com) 8312 Sidbury Rd.; Wilmington, NC 28411 - (800) 507-0482 / (910) 686-4281...
- Page 92 Index settings turn, next subscriptions 30, 67 wallpaper trafficTrends warning icons, truck and unit converter 48–49 traffic information, 68–69 unit ID accuracy and warnings, product USB connector availability windshield mounting cradle 2, 4 transportation modes world clock, world map device trip information traffic receiver resetting...
- Page 93 For the latest free software updates (excluding map data) throughout the life of your Garmin products, visit the Garmin Web site at www.garmin.com. © 2012 Garmin Ltd. or its subsidiaries Garmin International, Inc. 1200 East 151 Street, Olathe, Kansas 66062, USA For Sales Information Please Contact Garmin (Europe) Ltd.
Need help?
Do you have a question about the dezl 560 and is the answer not in the manual?
Questions and answers