Table of Contents
Advertisement
Quick Links
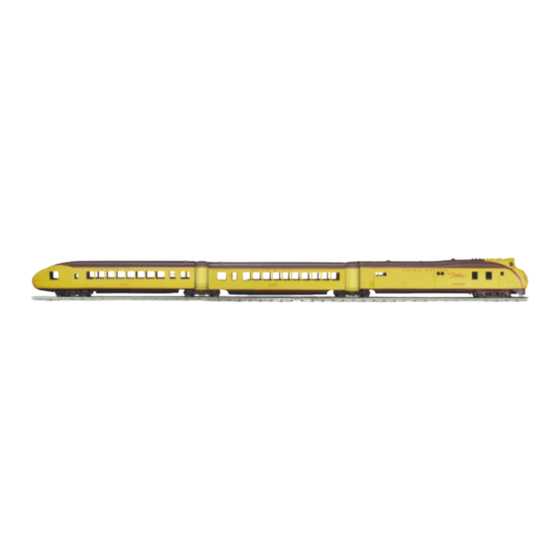
RAILKING M10000
DIESEL ENGINE
OPERATING INSTRUCTIONS
This RailKing M10000 set boasts a detailed ABS body and operates on O-31 track. This
RailKing Diesel Engine contains M.T.H.'s Loco-Sound™ sound and train control
system. The locomotive is easy to operate with any compatible standard AC transformer
(see the compatibility chart on page 15), and is completely compatible with most other
3-rail locomotives, rolling stock, and accessories.
Please read all the accompanying instructions carefully before setting up and operating
your locomotive.
Advertisement
Table of Contents

Subscribe to Our Youtube Channel
Related Manuals for Rail King M10000


Summary of Contents for Rail King M10000
-
Page 1: Operating Instructions
DIESEL ENGINE OPERATING INSTRUCTIONS This RailKing M10000 set boasts a detailed ABS body and operates on O-31 track. This RailKing Diesel Engine contains M.T.H.’s Loco-Sound™ sound and train control system. The locomotive is easy to operate with any compatible standard AC transformer (see the compatibility chart on page 15), and is completely compatible with most other 3-rail locomotives, rolling stock, and accessories. -
Page 2: Table Of Contents
Volume Control Maintenance Lubrication and Greasing Instructions Cleaning the Wheels, Tires and Track Locomotive Traction Tire Replacement Locomotive Light Bulb Replacement Car Light Bulb Replacement Troubleshooting Compatibility Transformer Compatibility Chart Safety Precautions Service and Warranty Information RailKing M10000 Diesel Engine... -
Page 3: Initial Lubrication
Slide the Tongue on Top of the Other Car’s Plate Connect the Wiring Harness Together Figure 1. Connecting the Cars Together At this point, you are ready to put your engine on the track and begin running RailKing M10000 Diesel Engine... -
Page 4: Basic Operation
To prevent accidental high-speed start-ups, this engine is programmed to restart in neutral each time the track voltage is turned off for 10 seconds or more. RailKing M10000 Diesel Engine... -
Page 5: Speed Control
1 whistle, 3 bells code to return the engine to its normal state. Feature to Be Activated: Button Code: 1 Whistle, 2 Bells Speed Control On/Off 1 Whistle, 3 Bells Lock into a Direction/Unlock RailKing M10000 Diesel Engine... -
Page 6: Proto-Cast And Proto-Dispatch
If you experience popping and interference, try cleaning the track with denatured alcohol as described in the “Cleaning the Wheels, Tires and Track” section of this booklet. Note: M.T.H. does not recommend using Proto-Cast and Proto-Dispatch at the same time. RailKing M10000 Diesel Engine... -
Page 7: Volume Control
(see Fig. 2). Loco-Sound Volume Adjustment Knob Figure 2. Location of the Loco-Sound Volume Adjustment Knob RailKing M10000 Diesel Engine... -
Page 8: Maintenance
(in the truck block) with grease (See Figure 4a). 4. Reassemble the truck and motor, being careful not to pinch any wires between the truck block and motor mount. RailKing M10000 Diesel Engine... - Page 9 Add grease to the points marked with “G” in Figure Body Mount Screws Body Mount Screws Grease Idler Gear (G) Motor Mount Screw Figure 4. Body Mount Screws and Greasing Points. Worm Gear (G) Figure 4a. Grease the Worm Gear RailKing M10000 Diesel Engine...
-
Page 10: Cleaning The Wheels, Tires And Track
Once the truck sides have been removed: 1. Make sure the old tire has been completely removed from the groove in the drive wheel, using a razor blade or small flathead screwdriver to pry away any remains. RailKing M10000 Diesel Engine... -
Page 11: Locomotive Light Bulb Replacement
Once the body has been removed, remove the lights as shown in Fig. 6a and replace it. You can obtain replacement bulbs directly from the M.T.H. Parts Department. Locomotive Headlamp Figure 6a. Location of the headlamp in the Engine. RailKing M10000 Diesel Engine... -
Page 12: Car Light Bulb Replacement
Remove the body by removing the 4 screws on the bottom of the car. Replace the lights by pulling the bulb from the roof bracket and replace with a new one (see figure 6b). Pull Light from Socket and Replace Figure 6b. Replacing the Car’s Interior Lights RailKing M10000 Diesel Engine... - Page 13 Follow the procedure in the with the engine sounds running. “Lock into a Direction” section. Engine speed must be below 10 scale The engine won’t lock into forward, mph (approx. 10 volts or less in neutral, or reverse. conventional mode). RailKing M10000 Diesel Engine...
-
Page 14: Compatibility
This engine will operate on any traditional O-31 or larger O Gauge track ® ™ system, including M.T.H.’s RealTrax or ScaleTrax or traditional tubular track. It is also compatible with most standard AC transformers. (See page 15 for a complete list of compatible transformers and wiring instructions.) RailKing M10000 Diesel Engine... -
Page 15: Transformer Compatibility Chart
Standard Lionel SW Unknown 130-Watt Standard Lionel TW 8-18v 175-Watt Standard Lionel ZW A,B,C or D 8-20v 275-Watt Standard Lionel Post-War A,B,C or D Common 0-20v 135/190 Watt Electronic Celebration Series ZW * Conventional Mode Only RailKing M10000 Diesel Engine... -
Page 16: Safety Precautions
In the event such conditions exist, the transformer should not be used until properly repaired. As with all electrical appliances, this product should not be left in operation when unattended. RailKing M10000 Diesel Engine... - Page 17 ___________________________________________________ ___________________________________________________ ___________________________________________________ ___________________________________________________ ___________________________________________________ ___________________________________________________ ___________________________________________________ ___________________________________________________ ___________________________________________________ ___________________________________________________ ___________________________________________________ ___________________________________________________ ___________________________________________________ ___________________________________________________ ___________________________________________________ ___________________________________________________ ___________________________________________________ ___________________________________________________ ___________________________________________________ ___________________________________________________ ___________________________________________________ ___________________________________________________ ___________________________________________________ ___________________________________________________ ___________________________________________________ ___________________________________________________ ___________________________________________________ ___________________________________________________ ___________________________________________________ ___________________________________________________ ___________________________________________________ ___________________________________________________ ___________________________________________________ ___________________________________________________ ___________________________________________________ ___________________________________________________ RailKing M10000 Diesel Engine...
- Page 18 ___________________________________________________ ___________________________________________________ ___________________________________________________ ___________________________________________________ ___________________________________________________ ___________________________________________________ ___________________________________________________ ___________________________________________________ ___________________________________________________ ___________________________________________________ ___________________________________________________ ___________________________________________________ ___________________________________________________ ___________________________________________________ ___________________________________________________ _______________________________ ____________________ ___________________________________________________ ___________________________________________________ ___________________________________________________ ___________________________________________________ ___________________________________________________ ___________________________________________________ ___________________________________________________ ___________________________________________________ ___________________________________________________ ___________________________________________________ ___________________________________________________ ___________________________________________________ ___________________________________________________ ___________________________________________________ ___________________________________________________ ___________________________________________________ ___________________________________________________ ___________________________________________________ ___________________________________________________ RailKing M10000 Diesel Engine...
- Page 19 ___________________________________________________ ___________________________________________________ ___________________________________________________ ___________________________________________________ ___________________________________________________ ___________________________________________________ ___________________________________________________ ___________________________________________________ ___________________________________________________ ___________________________________________________ ___________________________________________________ ___________________________________________________ ___________________________________________________ ___________________________________________________ ___________________________________________________ ___________________________________________________ ___________________________________________________ ___________________________________________________ ___________________________________________________ ___________________________________________________ ___________________________________________________ ___________________________________________________ ___________________________________________________ ___________________________________________________ ___________________________________________________ ___________________________________________________ ___________________________________________________ ___________________________________________________ ___________________________________________________ ___________________________________________________ ___________________________________________________ ___________________________________________________ ___________________________________________________ ___________________________________________________ ___________________________________________________ ___________________________________________________ RailKing M10000 Diesel Engine...
-
Page 20: Service And Warranty Information
Service & Warranty Information How to Get Service Under the Terms of the Limited One-Year Warranty For warranty repair, do not return your product to the place of purchase. Instead, follow the instructions below to obtain warranty service as our dealer network is not prepared to service the product under the terms of this warranty.
Need help?
Do you have a question about the M10000 and is the answer not in the manual?
Questions and answers