Rail King 2-6-0 Operating Instructions Manual
Santa fe steel rail freight hauler
steam engine train set
Hide thumbs
Also See for 2-6-0:
- Operating instructions manual (40 pages) ,
- Operating instructions manual (47 pages) ,
- Operating instructions manual (36 pages)
Table of Contents
Advertisement
Quick Links
R
K
AIL
ING
®
B y M T H E lectr ic T r ains
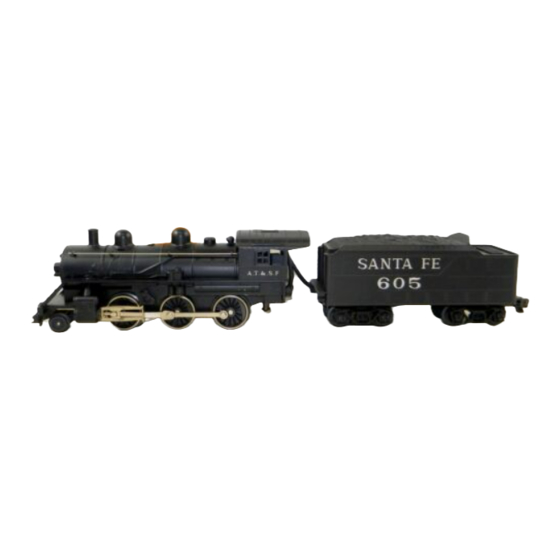
SANTA FE STEEL RAIL FREIGHT HAULER
2-6-0 STEAM ENGINE TRAIN SET
OPERATING INSTRUCTIONS
Making the Most of Your Investment
Thank you for purchasing this RailKing Ready-to-Run Steam Engine Train
Set. We at MTH Electric Trains take pride in manufacturing quality
products like your set, and we hope that you will enjoy it for a long
time. To ensure the maximum durability and pleasure from locomotive,
rolling stock, track and transformer, please read all the way through the
Quick Start Basic Operating Instructions you will find on pages 4.
Remember that a little attention to routine maintenance yields a
maximum of trouble-free performance.
Advertisement
Table of Contents

Subscribe to Our Youtube Channel
Related Manuals for Rail King 2-6-0


Summary of Contents for Rail King 2-6-0
-
Page 1: Operating Instructions
® B y M T H E lectr ic T r ains SANTA FE STEEL RAIL FREIGHT HAULER 2-6-0 STEAM ENGINE TRAIN SET OPERATING INSTRUCTIONS Making the Most of Your Investment Thank you for purchasing this RailKing Ready-to-Run Steam Engine Train Set. -
Page 2: Table Of Contents
Passenger Car Lamp Replacement Locomotive Traction Tire Replacement RITETRAX® TRACK LAYOUT PLANS TRANSFORMER COMPATIBILITY CHART EXPLODED PARTS VIEW DIAGRAM SAFTEY & WARNING PRECAUTIONS SERVICE AND WARRANTY INFORMATION HOW TO GET SERVICE LIMITED ONE YEAR WARRANTY RailKing 2-6-0 Train Set Operating Manual... - Page 3 All RailKing products are compatible with most other 3-rail locomotives, rolling stock, and accessories. Equipment Options Your ready-to-run set features a 2-6-0 steam locomotive equipped with an operating headlight, mechanical whistle, ProtoSmoke® operating smoke unit and a solid state electronic reverse unit. All are simple and fun to operate.
- Page 4 RiteTrax® components. We’ve included just a few later in this manual for your reference. Each layout specifies the space required and the components needed to Figure 2: RiteTrax® sections in proper connected position. RailKing 2-6-0 Train Set Operating Manual...
- Page 5 RiteTrax® track section and the transformer, simply plug in the color-coded wire harness that was included in your set. Figure 6: Top view of RiteTrax® section with lighted lockon in fully seated position. RailKing 2-6-0 Train Set Operating Manual...
-
Page 6: Preparing The Locomotive & Cars For Operation
Grease Gears points indicated by in the diagram in figures 8. You may also want to use either Figure 8: Lubrication points of RailKing 2-6-0 locomotive. a locomotive repair cradle Lubricate Pickup Rollers or an old towel folded over to provide a protective bed for the locomotive shell while you’re working on it. - Page 7 10--15 drops of smoke fluid should be added or the smoke unit ProtoSmoke® ON/OFF Switch switch should be turned off. Figure 10: Locating the ProtoSmoke® ON/OFF Switch RailKing 2-6-0 Train Set Operating Manual...
-
Page 8: Electronic Reverse Unit
The whistle will blow as long as the button is depressed. Now, if you’ve lubricated the locomotive friction points as indicated earlier, you’re almost ready to start running your train set. RailKing 2-6-0 Train Set Operating Manual... -
Page 9: Transformer Operation
Only locomotives equipped with full digital sound systems (which feature engine sounds, horns, bells, air-release sound effects, squeaking brakes and many other locomotive related sound effects) can utilize the bell button. RailKing 2-6-0 Train Set Operating Manual... -
Page 10: Special Reverse Unit Options
(See Figure 13) to the OFF position. This locks the engine into the desired direction. Sliding the switch back to the ON position resets the reverse unit into its normal reverse unit cycling phases. RailKing 2-6-0 Train Set Operating Manual... -
Page 11: Train Set Maintenance
And Side Rod Linkage Grease Gears Figure 14: Removing the 2-6-0 locomotive shell from the chassis. sparingly only to the points indicated by Figure 14. Wipe away any excess, especially if oil spills onto the finish of the locomotive. To... -
Page 12: Grease
To remove the 2-6-0 locomotive cab from its chassis, follow the body removal instructions on the previous pages. Once the body has been removed, rotate the headlight bulb counter-clockwise as seen in Figure to remove the burned out bulb. - Page 13 Figure 18: Locating and removing the interior bulbs. Figure 17: Removing the caboose body from its chassis.. RailKing 2-6-0 Train Set Operating Manual...
-
Page 14: Traction Tire Replacement Instructions
You may find it useful to use two small flatblade screwdrivers to assist you in stretching the tire over the wheel. Be careful to avoid twisting the tire when stretching it over the wheel. If a twist occurs, the tire will RailKing 2-6-0 Train Set Operating Manual... - Page 15 After removing the chassis and inspection cover screws lift the inspection plate away and inspect the wick. If the wick is darkly discolored and Figure 21: Opening the smoke unit for hard, it should be replaced. wick replacement. RailKing 2-6-0 Train Set Operating Manual...
- Page 16 96“ x 60” (2.4m x 1.5m) (22) 10“ Straight (40-1001) (21) O-31 Curved (40-1002) O-31 Right Hand Switch (40-1004) O-31 Left Hand Switch (40-1005) 90 Degree Crossing (40-1006) 5.0“ Straight (40-1016) 4.25“ Straight (40-1017) 3.5“ Straight (40-1018) RailKing 2-6-0 Train Set Operating Manual...
- Page 17 96“ x 48” (2.4m x 1.2m) 10“ Straight (40-1001) (12) O-31 Curved (40-1002) O-31 Right Hand Switch (40-1004) O-31 Left Hand Switch (40-1005) 5.5“ Straight (40-1012) 5.0“ Straight (40-1016) 3.5“ Straight (40-1018) O-31 Half-Curved (40-1022) RailKing 2-6-0 Train Set Operating Manual...
- Page 18 Track List: Item # 96“ x 48” (2.4m x 1.2m) (22) 10“ Straight (40-1001) (10) O-31 Curved (40-1002) O-31 Right Hand Switch (40-1004) O-31 Left Hand Switch (40-1005) 5.5“ Straight (40-1012) 3.5“ Straight (40-1018) RailKing 2-6-0 Train Set Operating Manual...
-
Page 19: Transformer Compatibility And Wiring Chart
TRANSFORMER COMPATIBILITY AND WIRING CHART The 2-6-0 locomotive reverse unit is designed to work with any standard AC transformer. The chart below lists the many Lionel® compatible transformers, such as the Lionel KW or ZW models. In addition, the chart details how the terminals on these compatible transformers should be attached to your layout. -
Page 20: Exploded Parts View Diagram
44.) Insulator (pick up)(top) BD-0000026 45.) Nut IC-0000005 46.) Screw IA-0000007 (M2 x 4.0)panhead) 47.) Wick (smoke unit) AA-0000001 48.) Screw IA-0000003 (4-40 x 6.0mm)(roundhead) 49.) Washer ID-0000029 (4.8 x 9.0 x 2mm)(clear plastic) RailKing 2-6-0 Train Set Operating Manual... - Page 21 RailKing 2-6-0 Train Set Operating Manual...
- Page 22 RailKing 2-6-0 Train Set Operating Manual...
- Page 23 (electrical wall outlet), check your layout for any short circuits, reset the circuit breaker, plug the power cord into the power source (electrical wall outlet), and resume operation. Unplug the Z-500 Hobby Transformer Power Unit from power source (electrical wall outlet) when not in use. RailKing 2-6-0 Train Set Operating Manual...
-
Page 24: Service And Warranty Information
SERVICE AND WARRANTY INFORMATION HOW TO GET SERVICE UNDER THE TERMS OF THE LIMITED ONE YEAR WARRANTY For warranty repair, do not return your product to the place of purchase. Instead, follow the instructions below to obtain warranty service as our dealer network is not prepared to service the product under the terms of this warranty.
Need help?
Do you have a question about the 2-6-0 and is the answer not in the manual?
Questions and answers