Table of Contents
Advertisement
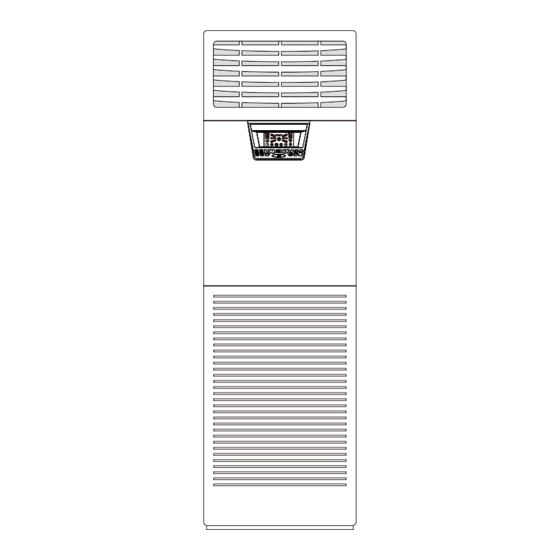
SPLIT AIR CONDITIONER
FLOOR STANDING TYPE
OWNER'S MANUAL
AUF-48H58R520
Thank you for choosing an Air Conditioner. Please read this OWNER'S MANUAL
carefully prior to using, keep it for further reference.
Do not attempt to install, service or move the Air Conditioner by yourself.
Incorrect behaviour may cause fire, electric shock and the unit falling may result
in injury or water leakage. Contact our designated air conditioner service centre
and specialists. The manufacturer shall not assume responsibility for accidents
or injury caused by incorrect behaviour.
AUX
AUX
-
-
+
+
HEATER
HEATER
TIMER
TIMER
MODE
TIMER
TIMER
SLEEP
SLEEP
FAN
FAN
ELECTRON
ELECTRON
LOUVER
LOUVER
MODE
MODE
TEMP
TEMP
SPEED
SPEED
LOCK
LOCK
ON/OFF
ON/OFF
Advertisement
Table of Contents

Related Manuals for Galanz AUF-48H58R520


Summary of Contents for Galanz AUF-48H58R520
- Page 1 LOCK LOCK ON/OFF ON/OFF AUF-48H58R520 Thank you for choosing an Air Conditioner. Please read this OWNER'S MANUAL carefully prior to using, keep it for further reference. Do not attempt to install, service or move the Air Conditioner by yourself. Incorrect behaviour may cause fire, electric shock and the unit falling may result in injury or water leakage.
-
Page 2: Table Of Contents
CONTENTS Contents Features of the air conditioners Safety awareness Name of the components Operation of air conditioner Guide to proper usage Maintenance Pre-repair check Performance parameter Installation instructions Intelligent self diagnosis... -
Page 3: Features Of The Air Conditioners
FEATURES OF THE AIR CONDITIONERS The super-thin cabinet, ivory tint color and cambered surface design all make the products look elegant and splendid. The large diameter centrifugal fan and foam wind tunnel designs greatly reduce the noise of the products. This makes the products possess a leading position in the air conditioning industry and gives the customers a more comfortable and quiet environment. -
Page 4: Safety Awareness
SAFETY AWARENESS Read and understand thoroughly this safety awareness before use. The items Indicated here are very important safety precautions, which must be followed. The capacity of the power lines must be enough; Do not damage the power cord. You may damage it the power lines must have circuit breakers and fuses. - Page 5 SAFETY AWARENESS Read and understand thoroughly this safety awareness before use. The items Indicated here are very important safety precautions, which must be followed. It is important that your air-conditioner is firmly grounded. Do not put a finger, a rod or other objects into the air outlet/inlet grille.
-
Page 6: Name Of The Components
NAME OF THE COMPONENTS INDOOR UNIT Up and down air vanes (up and down air flow with manual adjustment) Air flow port Left and right air vanes (left and right air flow with automatic adjustment) MODE MODE TIMER TIMER TIMER TIMER SLEEP SLEEP... -
Page 7: Remote Controller
NAME OF THE COMPONENTS REMOTE CONTROLLER OPERATION DISPLAY Signal ejecting window UP&DOWN SWING button It sends signals to the indoor unit. It displays the current Only apply to unit contains this function. settings. LEFT&RIGHT SWING button DISPLAY button Press this button , the swing Press it once to stop the indoor louvers will swing horizontally , unit displaying and press again... - Page 8 NAME OF THE COMPONENTS Open the back cover and set two Short RESET piece with forceps. dry batteries. (Short two RESET pieces after changing the batteries. ) NOTICE If the remote controller is out of running, please short two RESET pieces and it will resume to normal working. The maximum distance for communication between the remote controller and the indoor unit is 6 metres.
-
Page 9: Operation Of Air Conditioner
OPERATION OF AIR CONDITIONER Operation procedure-Control under the Remote controller Run/Stop Press I/O button, start operation, and stop when repressed. Temperature adjustment 。 Press TEMPERATURE ADJUSTMENT button, the set temperature decreases 1 C by pressing 。 “ ” “ ” button once, and increase 1 C by pressing button once. - Page 10 OPERATION OF AIR CONDITIONER Controller ELEC-HEAT/ELECTRON LOCK button OPERATION MODE button Press the button for 10 Press the button, the seconds can lock the operation mode change present condition the in the order of: cooling dry other buttons being heat (heat pump type) or LO M I ineffective during the time.
- Page 11 OPERATION OF AIR CONDITIONER Operation procedure-Control under the controller in indoor unit L E F T / R I G H T A D J U S T S w i n g Press the swing button ,swing light lighted , swing sign flashing , the left /right deflector starts swinging.
- Page 12 OPERATION OF AIR CONDITIONER Operation procedure-Control under the controller in indoor unit C O O L I N G O P E R AT I O N Press “ON/OFF”button. Press“MODE”button, setting “cool”mode. ELEC- TIMER MODE HEAT Press “ ”“ ”buttons,setting temp. SLEEP TIMER ELECTRON...
- Page 13 OPERATION OF AIR CONDITIONER Operation procedure-Control under the controller in indoor unit H E AT I N G O P E R AT I O N ( o n l y a p p l y t o h e a t p u m p t y p e ) Press “ON/OFF”button.
- Page 14 OPERATION OF AIR CONDITIONER Operation procedure-Control under the controller in indoor unit S L E E P M O D E Press “ON/OFF”button. Press“MODE”button, setting “heat”mode. Press “ ”“ ”buttons,setting temp. ELEC- MODE TIMER HEAT SLEEP TIMER ELECTRON TEMP SWING SPEED LOCK ON/OFF...
- Page 15 OPERATION OF AIR CONDITIONER Operation procedure-Control under the controller in indoor unit FUNCTIONS OF THE TIMER Timer off On running condition, the machine will stop when the time of setting reaches. Timer on On off condition, the machine will start running when the time of setting reaches. NOTICE: The time range of restarting the machine after stopping it must be more 3 minutes, for the delay Restart control of the system.
-
Page 16: Guide To Proper Usage
GUIDE TO PROPER USAGE Be more careful and you will enjoy more comfortable cooling&heating effect and save more energy. Set the room temperature to your suitable point When cooling, keep away from sunshine During cooling, draw the curtains especially During cooling, a difference of 5℃ between the for the windows facing the sun to reduce the indoor and outdoor temperature will suit you better. - Page 17 GUIDE TO PROPER USAGE IF YOU WILL NOT BE USING THE AIR CONDITIONER FOR A LONG IDLE PERIOD Set the fan of the indoor unit going for 3 Switch off the air conditioner . to 4 hours to dry out the inside thoroughly. (For cool only type, just set FAN mode;...
-
Page 18: Maintenance
MAINTENANCE Note: Be sure to disconnect the power supply before cleaning and maintenance. Cleaning of the filter net If the machine has been operating for a long time, the filter shall be cleaned termly. It is better to clean the filter net biweekly. First remove the inlet grid, and then remove the air filter net. -
Page 19: Pre-Repair Check
PRE-REPAIR CHECK Please check the following items before calling a repair person. And if you still need help, please contact with our designated service centre. Is it a power failure? The air conditioner does not Does the power fall off ? operate at all. -
Page 20: Performance Parameter
PERFORMANCE PARAMETER AUF-48H58R520 Model Indoor Outdoor Function Heat pump type Power 220-240 V 50Hz 380V 50Hz Rated capacity(W) 14000/15400 Standard input power(W) 4900(cool)/5100(heat) Rated input current(A) 8.5(cool)/9.7(heat) Air flow volume(m /h) 1900 Dehumidifying capacity(L/h) Protection class Water -proof IPX4 Climate type... -
Page 21: Installation Instructions
INSTALLATION INSTRUCTIONS SELECTION OF INSTALLATION LOCATION Indoor unit Outdoor unit Mount on the wall solid enough to bear the Keep the air inlet and outlet at a far distance weight of the unit and not cause any shake. from the blockage. A place avoiding direct sunshine and A place with good ventilation, less dust and easy for condensate drain and easy for... -
Page 22: Installation Of The Outdoor Unit
INSTALLATION INSTRUCTIONS The use of stator According to the position of soutache on the wall, select the proper way as the following: The machine can be directly fixed on the wall that must be solid enough. While installing the air exhaust pipe at top of the unit, please don't overlay the bolt hole for installing the air outlet pipe. - Page 23 INSTALLATION INSTRUCTIONS Multi-unit mounting 1 Install side by side(If this method is used, the top side must be open. Meanwhile, please remove the bolts at the pipe side ) Above 100mm Above 100mm Less than 100 sets Above 1000mm 2 Install in tandem Above 200mm Above 200mm Above 200mm Above 200mm...
- Page 24 INSTALLATION INSTRUCTIONS INSTALLATION OF REFRIGERANT PIPELINE AND DRAIN PIPE (INDOOR UNIT) 1To remove the bottom panel, you should remove the fixing screws first and then pull the panel out. 2 Remove the fixing screw from the pipe shield and take the shield off.(figure 1) Please break the evaporator craft tube with pincers before connecting.
-
Page 25: Outdoor Unit
INSTALLATION INSTRUCTIONS INSTALLATION OF CONNECTING PIPE AND DRAIN HOSE (OUTDOOR UNIT) Connect connecting pipe 1.Wipe the airproof oil on the closing valve and the trump extended pipe; 2.Screw down the nut of connecting pipe with the wrench.(the torque as the indoor unit) Discharge the air of the units: liquid connecting pipe (lt can use vacuum pump, too.) -
Page 26: Wiring Diagram
INSTALLATION INSTRUCTIONS CONNECTION OF POWER SUPPLY WIRES AND SIGNAL WIRES Indoor unit terminal board 1 Remove the self-tapping screws (3 pcs) fixing the electric box cover electric box cover and take out the electric box. 2 Loosen the fixing screw of the power terminal board Insulation bush for and signal terminal board, then firmly fix the power... -
Page 27: Intelligent Self Diagnosis
INTELLIGENT SELF DIAGNOSIS INTELLIGENT SELF DIAGNOSIS When electrify for the first time, the air conditioner will check the function automatically.if has some thing wrong, the system will d isplay the room temperature and the set temperature substitute to show the trouble of the air conditioner Trouble code explanation... - Page 28 KL-D2(47)-520-R-E...
Need help?
Do you have a question about the AUF-48H58R520 and is the answer not in the manual?
Questions and answers