
Related Manuals for Dustbane Hurricane Scooter Ride-On


Summary of Contents for Dustbane Hurricane Scooter Ride-On
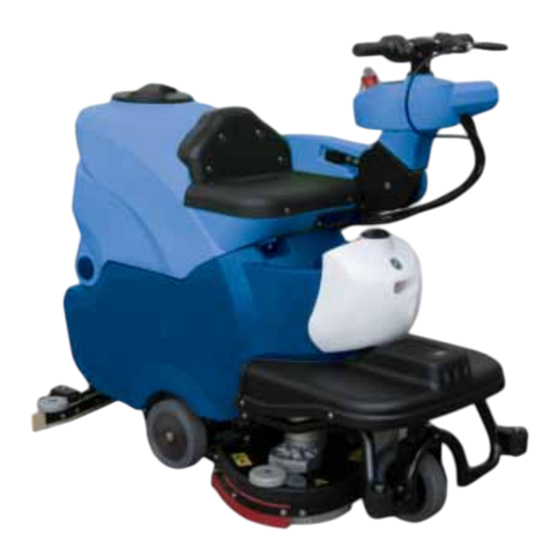
- Page 1 Operations Manual Hurricane Scooter Ride-On Automatic Scrubber Code: 19353-C-AGM Serial #:_________________________ Date of Purchase:_________________________ More info : www.dustbane.ca 07-2011...
-
Page 3: Table Of Contents
1. Index 2. General Information 2.1. Scope of the manual 2.2. Identifying the machine 2.3. Documentation provided with the machine 3. Technical Information 3.1. General description 3.2. Legend 3.3. Danger zones 4. Safety Information 4.1. Safety regulations 5. Handling And Installation 5.1. -
Page 4: General Information
2. General Information Read this manual carefully before carrying out any work on the machine. 2.1. Scope of the manual This manual has been written by the Manufacturer and is an integral part of the machine. It defines the purpose for which the machine has been designed and constructed and contains all the information required by operators. -
Page 5: Legend
A suction system incorporated in the machine dries the floor after washing by means of the low pressure generated in the recovery tank by the suction motor. The squeegee connected to the recovery tank collects the dirty water. The machine moves forward by means of a special electromechanical drive device. 3.2. -
Page 6: Safety Information
4. Safety Information 4.1. Safety regulations Read the “User manual” carefully before start-up and use, or before performing maintenance or any other work on the machine. Rigorously respect all instructions in the Manual (in particular those relating to danger and important information) and on the safety plates fitted to the machine. -
Page 7: Handling And Installation
• Make sure the power sockets used for the battery charger are connected to a suitable ground system and protected by differential thermal solenoid switches. • Make sure the electrical characteristics of the machine (voltage, frequency, absorbed power) given on the rating plate are the same as those of the mains electricity supply. -
Page 8: Checks On Delivery
The squeegees are packed in cardboard boxes without pallet. A fork lift truck must always be used to lift the packaged body of the machine. Handle with care to avoid knocking or overturning the machine. 5.2. Checks on delivery When the carrier delivers the machine, make sure the packaging and machine are both whole and undamaged. If the machine is damaged, make sure the carrier is aware of the damage and before accepting the goods, reserve the right (in writing) to request compensation for the damage. -
Page 9: Batteries
7. clean the outside of the machine in respect of safety regulations; 8. once the machine is clear of the packaging, the batteries can be installed (see relevant paragraph). The packaging may be kept as it can be reused to protect the machine if it is moved to another site or to a repair workshop. -
Page 10: Lifting And Transporting The Machine
5.5. Lifting and transporting the machine All phases must be performed in an adequately lit room and adopting the safety measures most appropriate to the situation. The operator must always use personal protection devices. Important To load the machine onto a means of transport, proceed as follows: 1. - Page 11 • Main Switch - emergency button with key (ref. 1): enables and disables electrical power to all machine functions. Acts as a safety device. To start up the machine, turn the key clockwise. To stop the machine press the button. • Brush button with light (ref.
-
Page 12: Mounting And Adjusting The Squeegee
6.2. Mounting and adjusting the squeegee The squeegee (ref. 6) is responsible for the first phase of drying. To mount the squeegee on the machine, proceed as follows: 1. make sure the squeegee mount (ref. 2) is raised; 2. insert the suction hose sleeve (ref. 4) fully into the squeegee; 3. -
Page 13: Moving The Machine When Not In Operation
6.3. Moving the machine when not in operation To move the machine, proceed as follows: • raise the squeegee by pressing the suction button (LED off ); • raise the head by pressing the brush button (LED off ); • use the selector to set the direction of movement; • operate the accelerator;... -
Page 14: Working
Before starting work, proceed as follows: • check the battery charge (recharge if necessary); • make sure the recovery tank is empty. If necessary, empty it; • via the opening at the front, fill the solution tank with a suitable concentration of clean water and low-foam solution. -
Page 15: Some Useful Tips To Get The Most From Your Automatic Scrubber
4. Pressing the solution flow regulation button once enables solution flow, holding it down determines the quantity of flow (indicated by LED). 5. Operate the accelerator to move forwards or backwards. Empty the recovery tank each time you fill the solution tank. Periodically check that the solution is reaching the brushes/rollers and refill when it runs out. - Page 16 6.8. Draining the dirty water Use suitable personal protection devices. Drain the water with the machine disconnected from the power supply. Danger The recovery tank drain hose is at the back left side of the machine. To empty the drum: 1.
-
Page 17: Draining The Solution Tank
When washing the recovery tank, never remove the suction filter (ref. 2) from its housing and never direct the jet of water against the filter itself. Important You are then ready to wash and dry again. 6.9. Draining the solution tank. Use suitable personal protection devices. -
Page 18: Periods Of Inactivity
7. Periods Of Inactivity If the machine is not used for some time, remove the squeegee, brushes/microfibre disks and drive disks, wash them and put them away in a dry place (preferably in a bag or wrapped in plastic film) away from dust. Park the machine with the parking brake on. -
Page 19: Maintenance Instructions
1. Connect the battery charger connector to the battery wiring connector (ref. 1). In the case of gel batteries, use a charger specific for gel batteries only. Important 2. Charge the batteries as described in the battery charger manual. 3. At the end of charging, disconnect the connectors. 9. -
Page 20: Basket Filter: Cleaning
1. Unscrew and remove the tank cap (ref. 1) from the recovery tank; 2. make sure the recovery tank is empty; 3. clean the float switch at the back of the recovery tank, taking care not to direct the water jet directly against the float switch;... -
Page 21: Fuses: Replacement
1. remove the squeegee from its mount by completely 2. unscrewing the two knobs 3. remove the suction hose sleeve from the squeegee; 4. release the catch (ref. 3 or 6); 5. remove the two blade retainers (ref. 2 or 7) by first pushing them towards the body of the squeegee (ref. -
Page 22: Routine Maintenance
Never use a fuse with a higher amperage than specified. Important If a fuse continues to blow, the fault in the wiring, boards (if present) or motors must be identified and repaired. Have the machine checked by qualified personnel. 9.5. Routine maintenance 9.5.1. - Page 23 The machine does not The brush or disks are worn. Replace clean evenly No solution is The solution tank is empty. Fill it. delivered The hose delivering the solution to the brush is Unblock and open the circuit. blocked. The solenoid valve is faulty. Replace the solenoid valve.
- Page 24 The battery The battery supplied filled with acid by the If recharging with a normal battery charger is not discharges too Manufacturer has been stored for too long before effective, you must use a double recharging cycle: fast during use, being recharged and used for the first time.
-
Page 25: Alarms On The Display
Alarms on the Display 1. NAN “drive lever” already pressed when the machine is turned on or after an Emergency 2. SIC Emergency button pressed 3. POT Speed potentiometer fault 4. MOS Board (mosfet) short circuit 5. HOT Motor thermal cutout tripped 6.
Need help?
Do you have a question about the Hurricane Scooter Ride-On and is the answer not in the manual?
Questions and answers