Sign In
Upload
Download
Table of Contents
Contents
Add to my manuals
Delete from my manuals
Share
URL of this page:
HTML Link:
Bookmark this page
Add
Manual will be automatically added to "My Manuals"
Print this page
×
Bookmark added
×
Added to my manuals
Manuals
Brands
Dustbane Manuals
Scrubber
Hurricane Mini
Operation manual
Dustbane Hurricane Mini Operation Manual
Hide thumbs
Also See for Hurricane Mini
:
Operation manual
(37 pages)
,
Quick manual
(2 pages)
1
2
Table Of Contents
3
4
5
6
7
8
9
10
11
12
13
14
15
16
17
18
19
20
21
page
of
21
Go
/
21
Contents
Table of Contents
Troubleshooting
Bookmarks
Table of Contents
1 Index
Table of Contents
2 General Information
Scope of the Manual
Documentation Provided with the Machine
3 Technical Information
General Description
Legend
Danger Zones
4 Safety Information
Safety Regulations
5 Handling and Installation
Lifting and Transporting the Packaged Machine
Checks on Delivery
Unpacking
Batteries: Removal
Battery Charger (Battery Models)
Lifting and Transporting the Machine
6 Practical Guide for the Operator
Controls - Description
Mounting and Adjusting the Squeegee
Moving the Machine When Not in Operation
Mounting and Changing the Brush/Drive Disks
Detergents - Instructions
Preparing the Machine for Work
Working
Some Useful Tips to Get the most from Your Automatic Scrubber
Prewashing with Brushes or Pads
Drying
Draining the Dirty Water
Draining the Clean Water
7 Periods of Inactivity
8 Battery Maintenance and Charging
Charging Procedure
9 Maintenance Instructions
Maintenance - General Rules
Routine Maintenance
Float Switch: Cleaning
Squeegee Blades: Replacing
Fuses: Replacement
Routine Maintenance
Daily Operations
Weekly Operations
Six Monthly Operations
10 Troubleshooting
Advertisement
Quick Links
1
Troubleshooting
Download this manual
Operations Manual
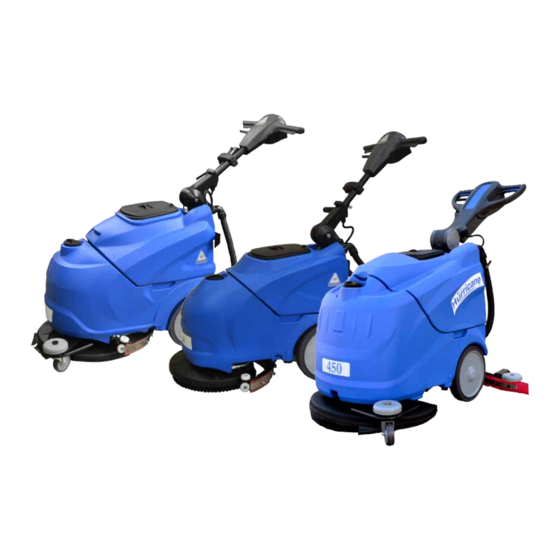
Hurricane Mini / Maxi / 450XTT
Automatic Scrubber
Code: 19352-C-AGM / 19355-C-AGM / 19362-C-AGM
Serial #:_________________________
Date of Purchase:_________________________
More info : www.dustbane.ca
09-2013
Table of
Contents
Previous
Page
Next
Page
1
2
3
4
5
Advertisement
Table of Contents
Need help?
Do you have a question about the Hurricane Mini and is the answer not in the manual?
Ask a question
Questions and answers
Related Manuals for Dustbane Hurricane Mini
Scrubber Dustbane Hurricane 450 XTT Operation Manual
Hurricane series autoscrubbers (37 pages)
Vacuum Cleaner Dustbane Hurricane Mini Quick Manual
(2 pages)
Scrubber Dustbane Hurricane 450 XTT Manual Rapide
(2 pages)
Scrubber Dustbane Hurricane 450 XTT Quick Manual
(2 pages)
Scrubber Dustbane Hurricane Scooter Ride-On Operation Manual
(25 pages)
Scrubber Dustbane Hurricane Maxi Operation Manual
(21 pages)
Scrubber Dustbane Hurricane Rally 21 Operation Manual
Auto-scrubber (25 pages)
Scrubber Dustbane Integra-D Parts & Operation Manual
Floor preparation machine (28 pages)
Scrubber Dustbane Hurricane 400 XTT Quick Manual
(2 pages)
Scrubber Dustbane Labrador Series Operation Manual
21”/ 24”/ 28” auto-scrubber (49 pages)
Scrubber Dustbane Micro-5 Operation Manual
Micro scrubber dryer (41 pages)
Scrubber Dustbane Micro-5 Operation Manual
Micro scrubber dryer (41 pages)
Scrubber Dustbane Hurricane 400 Operation Manual
Auto-scrubber (45 pages)
Scrubber Dustbane Hurricane 900 XTT Quick Manual
(2 pages)
Scrubber Dustbane Hurricane 700 XTT Operation Manual
Auto-scrubber (57 pages)
Scrubber Dustbane Hurricane 700 Operation Manual
Autoscrubbers (64 pages)
This manual is also suitable for:
Hurricane maxi
Hurricane 450xtt
19352-c-agm
19355-c-agm
19362-c-agm
Table of Contents
Print
Rename the bookmark
Delete bookmark?
Delete from my manuals?
Login
Sign In
OR
Sign in with Facebook
Sign in with Google
Upload manual
Upload from disk
Upload from URL


Need help?
Do you have a question about the Hurricane Mini and is the answer not in the manual?
Questions and answers