Broan ALLURE QS3 SERIES Instructions For Use Manual
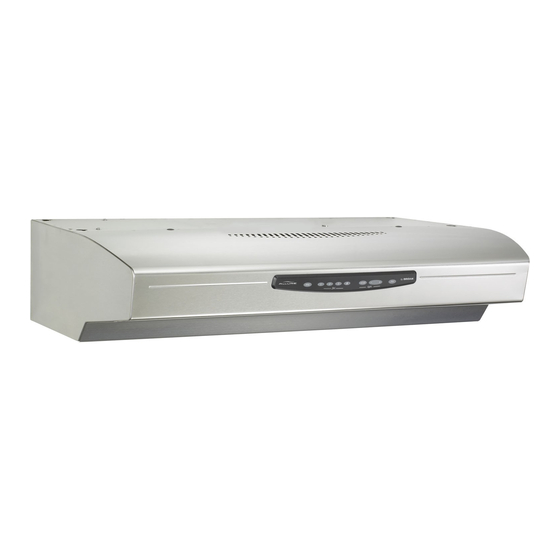
Range hood
Hide thumbs
Also See for ALLURE QS3 SERIES:
- Instructions manual (17 pages) ,
- Instruction manual (16 pages) ,
- User manual (12 pages)
Advertisement
Available languages
Available languages
Table of Contents
ALLURE
®
QS3 SERIES RANGE HOOD
READ AND SAVE THESE INSTRUCTIONS
WARNING
TO REDUCE THE RISK OF FIRE, ELECTRIC SHOCK, OR INJURY
TO PERSONS, OBSERVE THE FOLLOWING:
1. Use this unit only in the manner intended by the manufacturer. If
you have questions, contact the manufacturer at the address or
telephone number listed in the warranty.
2. Before servicing or cleaning unit, switch power off at service panel
and lock the service disconnecting means to prevent power from
being switched on accidentally. When the service disconnecting
means cannot be locked, securely fasten a prominent warning
device, such as a tag, to the service panel.
3. Installation work and electrical wiring must be done by a qualified
person(s) in accordance with all applicable codes and standards,
including fire-rated construction codes and standards.
4. Sufficient air is needed for proper combustion and exhausting of
gases through the flue (chimney) of fuel burning equipment to
prevent backdrafting. Follow the heating equipment manufacturer's
guideline and safety standards such as those published by the
National Fire Protection Association (NFPA), and the American
Society of Heating, Refrigeration and Air Conditioning Engineers
(ASHRAE), and the local code authorities.
5. When cutting or drilling into wall or ceiling, do not damage electrical
wiring and other hidden utilities.
6. To reduce the risk of fire or electric shock, do not use this range
hood with an additional speed control device.
7. Ducted fans must always be vented to the outdoors.
8. To reduce the risk of fire, use only metal ductwork.
9. Use with approved cord-connection kit only.
10. This unit must be grounded.
TO REDUCE THE RISK OF A RANGE TOP GREASE FIRE:
1. Never leave surface units unattended at high settings. Boilovers
cause smoking and greasy spillovers that may ignite. Heat oils
slowly on low or medium settings.
2. Always turn hood ON when cooking at high heat or when cooking
flaming foods.
3. Clean ventilating fans frequently. Grease should not be allowed to
accumulate on fan or filter.
4. Use proper pan size. Always use cookware appropriate for the size
of the surface element.
TO REDUCE THE RISK OF INJURY TO PERSONS IN THE EVENT
OF A RANGE TOP GREASE FIRE, OBSERVE THE FOLLOWING:*
1. SMOTHER FLAMES with a close-fitting lid, cookie sheet, or metal
tray, then turn off the burner. BE CAREFUL TO PREVENT BURNS.
If the flames do not go out immediately, EVACUATE AND CALL
THE FIRE DEPARTMENT.
2. NEVER PICK UP A FLAMING PAN — You may be burned.
3. DO NOT USE WATER, including wet dishcloths or towels - violent
steam explosion will result.
4. Use an extinguisher ONLY if:
A. You know you have a Class ABC extinguisher and you already
know how to operate it.
B. The fire is small and contained in the area where it started.
C. The fire department is being called.
D. You can fight the fire with your back to an exit.
* Based on "Kitchen Fire Safety Tips" published by NFPA.
!
FOR DOMESTIC COOKING ONLY
!
CAUTION
1. For indoor use only.
2. For general ventilating use only. Do not use to exhaust hazard-
ous or explosive materials and vapors.
3. To avoid motor bearing damage and noisy and/or unbalanced
impellers, keep drywall spray, construction dust, etc. off power
unit.
4. For best capture of cooking impurities, your range hood should
be mounted so that the top of the hood is 24-30" above the
cooking surface.
5. Please read specification label on product for further information
and requirements.
Installer: Leave this manual with
the homeowner.
Homeowner: Operating and
Cleaning information on page 6.
NOTE
If hood is to be installed Non-Ducted:
Purchase a set of (2) non-ducted filters from your
local distributor or retailer and attach them to the
aluminum mesh filters.
TABLE OF CONTENTS
This manual is divided into sections as follows:
"PREPARE HOOD LOCATION"
Run ductwork from roof or wall cap, and electrical wiring from
service panel - to installation location
"PREPARE THE HOOD"
Get your hood ready for installation
"CONNECT WIRING"
Make electrical wiring connections to hood
"INSTALL HOOD"
Secure hood to cabinet and ductwork - install bulbs and filters
"OPERATION"
How to use the hood controls
"CLEANING"
Keep your hood in top working condition
"SERVICE PARTS"
Part numbers and exploded view of hood components
"WARRANTY"
One-year limited warranty and how to contact us
Register your product online at: www.broan.ca/register
ALLURE
QS3 SERIES
®
RANGE H OOD
Page 1
Patent No.:
US D450, 829 S
!
Advertisement
Table of Contents

Related Manuals for Broan ALLURE QS3 SERIES


Summary of Contents for Broan ALLURE QS3 SERIES
- Page 1 One-year limited warranty and how to contact us C. The fire department is being called. D. You can fight the fire with your back to an exit. Register your product online at: www.broan.ca/register * Based on “Kitchen Fire Safety Tips” published by NFPA.
-
Page 2: Prepare The Hood
ALLURE QS3 SERIES ® RANGE H OOD Page 2 PREPARE HOOD LOCATION PREPARE THE HOOD ROOF CAP 3¼" X 10" FILTERS (For vertical discharge) SOFFIT HOUSE WIRING CABINET (Top or Back of hood) WALL CAP HOOD HOOD Remove tape holding in place. Pull down on filter tabs or finger holes and lift filters out. - Page 3 ALLURE QS3 SERIES ® RANGE H OOD Page 3 PREPARE THE HOOD AIR CHUTE Remove Air Chute - held in place with one (1) screw. NOTE: Be care- ful not to discon- nect any wires. ELECTRICAL BAFFLE CABLE CLAMP Remove either top or back wiring knockout and install ap- Remove Baffle TABS SLOTS...
- Page 4 ALLURE QS3 SERIES ® RANGE H OOD Page 4 PREPARE THE HOOD PREPARE THE HOOD TIES SCREW BLOWER RETAINING WHEEL RING SMALL DIAMETER RING SECTIONS MOTOR STOP SLOTS EDGE Non-Ducted Installations Only: Require a Performance Ring to be attached to the blower wheel. To install ring: 1.
-
Page 5: Connect Wiring
ALLURE QS3 SERIES ® RANGE H OOD Page 5 CONNECT WIRING WARNING: To reduce the risk of electric shock, make sure power is switched off at the service panel. Lock or tag service panel to prevent power from being switched on accidentally. HOUSE WIRING (120 VAC) -
Page 6: Non-Ducted Filters
ALLURE QS3 SERIES ® RANGE H OOD Page 6 NON-DUCTED FILTERS 4. Install new fuse. 5. Re-assemble air chute, light wire harness, bottom panel, and filters. If hood is to be installed Non-Ducted: 6. Turn on power and check hood/control operation. Purchase a set of (2) Non-Ducted Filters from your local distributor or retailer and attach them to the aluminum mesh filters. -
Page 7: Service Parts
ALLURE QS3 SERIES ® RANGE H OOD Page 7 SERVICE PARTS KEY NO. PART NO. DESCRIPTION R740013 Damper/Duct Connector (includes hardware) R602017 Screw, #8-18 x ¼ Hex* (2 in package) R334126 Motor Capacitor (includes wire nuts & hardware) R501031 Isolation Transformer R627505 Nameplate, White R627506 Nameplate, Almond R627507 Nameplate, Black... - Page 8 INCLUDING, BUT NOT LIMITED TO, IMPLIED WARRANTIES OF MERCHANTABILITY OR FITNESS FOR A PARTICULAR PURPOSE. During this one-year period, Broan-NuTone will, at its option, repair or replace, without charge, any product or part which is found to be defective under normal use and service.
- Page 9 C. Vous avez appelé votre poste local de lutte contre les incendies. notre service à la clientèle. D. Vous pouvez combattre le feu tout en ayant accès à une sortie. * Basé sur “Kitchen Fire Safety Tips” édité par NFPA. Enregistrez votre produit en ligne à : www.fr.broan.ca/register...
- Page 10 HOTTE DE CUISINIÈRE DE LA SÉRIE ALLURE QS3 SERIES ® RANGE H OOD ALLURE ® Page 10 PRÉPAREZ L’EMPLACEMENT PRÉPAREZ LA HOTTE CAPUCHON DE TOIT CONDUIT DE 8, 3 CM X 25,4 CM FILTRES (Pour évacuation verticale) SOFFITE FIL DU PANNEAU D'ALIMENTATION ÉLECTRIQUE (Branché...
- Page 11 HOTTE DE CUISINIÈRE DE LA SÉRIE ALLURE QS3 SERIES ® RANGE H OOD ALLURE ® Page 11 PRÉPAREZ LA HOTTE PRÉPAREZ LA HOTTE CHUTE D’ A IR Enlevez le chute d’air - main- tenue par une (1) vis. REMARQUE : Prendre garde de ne débranch- er aucun fil.
- Page 12 HOTTE DE CUISINIÈRE DE LA SÉRIE ALLURE QS3 SERIES ® RANGE H OOD ALLURE ® Page 12 PRÉPAREZ LA HOTTE PRÉPAREZ LA HOTTE ATTACHES ROUE DU VENTILA- PATTE ANNEAU TEUR EXTRÉMITÉ DE COMPRESSION FAIBLE DIAMÈTRE ANNEAU SECTIONS FENTES DU MO- BORD TEUR LIMITE...
- Page 13 HOTTE DE CUISINIÈRE DE LA SÉRIE ALLURE QS3 SERIES ® RANGE H OOD ALLURE ® Page 13 BRANCHEZ LES FILS INSTALLEZ LA HOTTE D’ALIMENTATION ÉLEC- TRIQUE AVERTISSEMENT: Afin de prévenir les risques d’électrocution, assurez-vous que le courant ait été interrompu au panneau d’alimentation principal. Ver- rouillez ce dernier ou apposez un indicateur voyant pour éviter que quelqu’un ne remette accidentellement le courant en marche.
- Page 14 HOTTE DE CUISINIÈRE DE LA SÉRIE ALLURE QS3 SERIES ® RANGE H OOD ALLURE ® Page 14 FILTRES SANS CONDUIT 1. Couper le courant au panneau électrique. 2. Enlever les filtres, le panneau inférieur, le connecteur de la lumière et le volet d’évacuation.
- Page 15 HOTTE DE CUISINIÈRE DE LA SÉRIE ALLURE QS3 SERIES ® RANGE H OOD ALLURE ® Page 15 PIÈCES DE REMPLACEMENT NO. DU NO. DE SCHEMA PIECE DESCRIPTION R740013 Raccord du conduit avec le registre (avec vis d’assemblage) R602017 Vis # 8-18 x ¼ six pans* (2) R334126 Condensateur pour moteur (avec serre-fils et vis d’assemblage) R501031...
- Page 16 GARANTIE LIMITÉE D’UN AN DE BROAN-NUTONE Broan-NuTone garantit à l’acheteur consommateur original de ses produits qu’ils sont exempts de vice de matériaux ou de fabrication pour une période d’un an à compter de la date d’achat original. IL N’Y A PAS D’ A UTRES GARANTIES, EXPRIMÉES OU IMPLICITES, INCLUANT MAIS NON LIMITÉES AUX GARANTIES IMPLICITES DE QUALITÉ...
Need help?
Do you have a question about the ALLURE QS3 SERIES and is the answer not in the manual?
Questions and answers