
Related Manuals for Falcon FALHDCP90SC


Summary of Contents for Falcon FALHDCP90SC
- Page 1 FALHDCP90SC/-AUS FALHDCP110SC/-AUS FALHDCP90BC/-AUS FALHDCP110BC/-AUS Instructions Manual...
-
Page 2: Table Of Contents
INDEX RECOMMENDATIONS AND SUGGESTIONS ........................3 CHARACTERISTICS................................4 INSTALLATION ..................................5 USE......................................8 MAINTENANCE..................................9... -
Page 3: Recommendations And Suggestions
RECOMMENDATIONS AND SUGGESTIONS The Instructions for Use apply to several versions of this appliance. Ac- cordingly, you may find descriptions of individual features that do not ap- ply to your specific appliance. INSTALLATION • The manufacturer will not be held liable for any damages resulting from incorrect or improper installation. -
Page 4: Characteristics
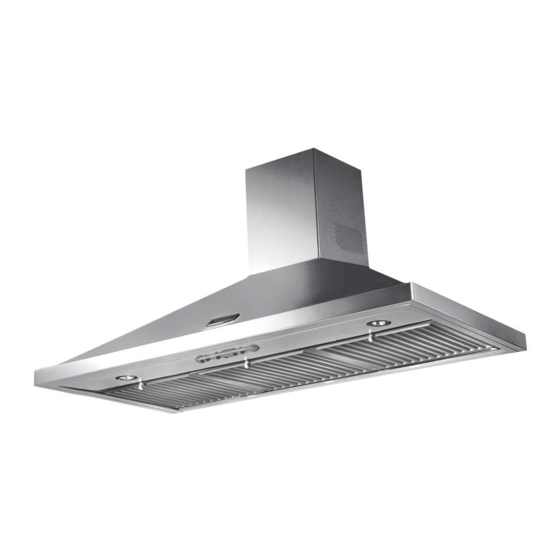
CHARACTERISTICS Dimensions 898 - 1098 - 1198 Components 7.2.1 Ref. Q.ty Product Components Hood Body, complete with: Controls, Light, Blower, Filters 7.2.1 Telescopic Chimney comprising: Upper Section Lower Section Right Air Outlet Grill Left Air Outlet Grill Reducer Flange ø 150-120 mm Adapting ring ø... -
Page 5: Installation
INSTALLATION Wall drilling and bracket fixing 7.2.1 109,5 109,5 Wall marking: • Draw a vertical line on the supporting wall up to the ceiling, or as high as practical, at the centre of the area in which the hood will be installed. •... - Page 6 Mounting the hood body 12.d • Screw the two screws 12d supplied onto the brackets 7.1. • Hook the hood body onto the bracket 7.1, centring it around the vertical line. • Use the adjusting screws 12d underneath the hood to level the hood body.
- Page 7 ELECTRICAL CONNECTION • Connect the hood to the mains through a two-pole switch hav- ing a contact gap of at least 3 mm. • Remove the grease filters (see paragraph Maintenance) being sure that the connector of the feeding cable is correctly inserted in the socket placed on the side of the fan.
-
Page 8: Use
Light Switches the lighting system on and off Motor Switches the extractor motor on and off Speed Sets the operating speed of the extractor: 1. Low speed, used for a continuous and silent air change in the presence of light cooking vapour. 2. -
Page 9: Maintenance
MAINTENANCE Grease filters CLEANING METAL GREASE FILTERS The filters are washable at least every 2 months of operation, or more frequently for particularly heavy usage. • Remove the filters one at a time, supporting them with one hand and turning the safety knobs (pull and turn). •... - Page 12 For more detailed information about recycling of this product, please contact your local city office, your household waste disposal service or the shop where you purchased the product. AGA RANGEMASTER GROUP PLC Falcon is a business name of AGA RANGEMASTER GROUP PLC 436004414_ver2...
Need help?
Do you have a question about the FALHDCP90SC and is the answer not in the manual?
Questions and answers