
Related Manuals for FMI LEF36


Summary of Contents for FMI LEF36
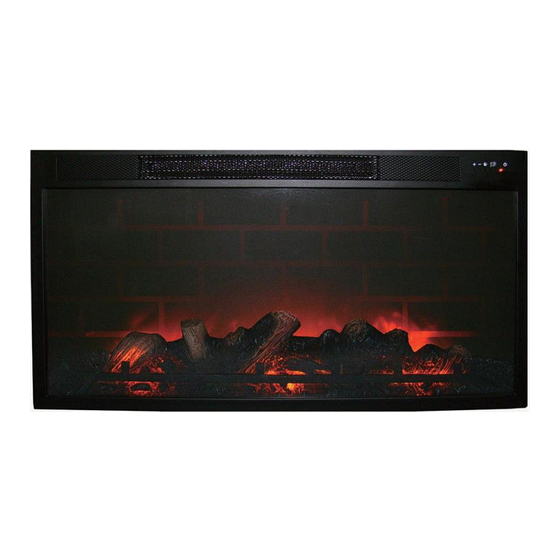
- Page 1 F3610G 36 IN. ELECTIC FIREPLACE FMI MODEL # LEF36 FMI PRODUCTS, LLC Mounting Base Feet and Wall Mounting Bracket Included FMI Products, LLC...
-
Page 2: Table Of Contents
TABLE OF CONTENTS Safety Information ..........................Operating Instructions ........................Installation Instructions ........................Maintenance ............................ Troubleshooting ..........................Illustrated parts breakdown ......................... Warranty .......................... -
Page 3: Safety Information
SAFETY INFORMATION ! Please read and understand this entire manual before attempting to assemble, operate or install the product. ! WARNING: Any use of this appliance other than that recommended by the manufacturer in this owners manual may cause fire, burns, electric shock and/or other serious injuries or death. When using electrical appliances, basic precautions should always be followed to reduce the risk of fire, electric shock and injury to persons including the following: 1. -
Page 4: Operating Instructions
OPERATING INSTRUCTIONS Read all instructions and warning prior to operating the appliance. Ensure that all controls are in the position before plugging the appliance in to a properly grounded electrical outlet. The main control panel is located behind the cover at the top right corner on the front (see Figure 1). Control Panel Figure 1 This heater is for use on 120 Volts. - Page 5 OPERATING INSTRUCTIONS Using the Control Panel: (Locate in Figure 1) (ON/OFF) POWER INDICATOR Figure 3 Main Switch (Figure 3.A): Push button down to “ON” position to start. Ensure that the control panel is in the “ON” position, then you can push any button to start the related function.
- Page 6 OPERATING INSTRUCTIONS This heater includes a remote control. See below for directions to use the remote control: Heat On/Off mode: Press to Flame On/Off mode: Press to Activate the heat. Activate the flame. Heat High: Press to start high heat . Display screen will show Select a desire temperature set “1500W”.
-
Page 7: Installation Instructions
INSTALLATION INSTRUCTIONS CAUTION * Adult assembly required. * Assemble on soft and clean surface to prevent damage or scratch. * Recommended number of people needed for assembly: 2 * Philips screw driver needed but not included. * This item can be wall mounted or free-standing when assembled. * Step 1: The screws are attached at the bottom of the product. - Page 8 INSTALLATION INSTRUCTIONS Wall assembly Two methods of wall mounting are possible. Either attach the wall mounting bracket by securing to the wall studs through the 1/4 inch holes provided or follow the instructions below to use wall anchors. *Assemble on soft and clean surface to prevent damage or scratches. 1: Take the one-piece wall bracket, select the area where you want the fireplace to be mounted.
-
Page 9: Maintenance
MAINTENANCE maintenance in order to allow all components to cool properly. Replacing Light Bulbs: 1. Ensure that all controls are off, the appliance is unplugged and bulbs are cool to the touch. 2. Wear latex gloves to ensure that grease/oil from your hands does not transfer to the bulbs. 3. -
Page 10: Troubleshooting
TROUBLESHOOTING ! WARNING: Turn off the appliance, unplug and let cool for at least 10 minutes before attempting to service. Only a qualified professional should attempt to service or repair the appliance. Corrective Action Problem Possible Cause 1. Push “FLAME ON/OFF” button Flame is dim or not Flame not turned ON. -
Page 11: Illustrated Parts Breakdown
ILLUSTRATED PARTS BREAKDOWN MODEL LEF36 PART NO. PARTS NAME 126266-01 BACK PANEL 126267-01 GLASS HOLDER 126268-01 SIMULATED FIRE LOG 126269-01 GLASS 126270-01 PLASTIC PLATE 126271-01 FAN AND HEATER 126272-01 LAMP COVER 126273-01 WALL MOUNTING BRACKET 126274-01 MOTOR 126275-01 CONNECTION OF MOTOR... -
Page 12: Warranty
This is FMI PRODUCTS, LLC's exclusive warranty, and to the full extent allowed by law; this express warranty excludes any and all other warranties, express or implied, written or verbal and limits the duration of any and all implied war- ranties, including warranties of merchantability and fitness for a particular purpose to one (1) years on new products and 30 days on factory reconditioned products from the date of first purchase.
Need help?
Do you have a question about the LEF36 and is the answer not in the manual?
Questions and answers