Advertisement
Table of Contents
- 1 Avertissements
- 2 Installation Et Montage
- 3 Et Résolution de Problèmes
- 4 Table of Contents
- 5 Warnings
- 6 Spécifications
- 7 Specifications
- 8 Installation and Assembly
- 9 Practical Tips
- 10 Using the Appliance
- 11 Wash Programme Phases and Power Cuts
- 12 Maintenance and Cleaning
- 13 Safety and Troubleshooting
- 14 Environmental Warnings
- Download this manual
Advertisement
Table of Contents

Related Manuals for Brandt WFK1018A


Summary of Contents for Brandt WFK1018A
- Page 1 GUIDE D’INSTALLATION INSTRUCTIONS FOR USE MANUAL DE INSTALAÇÃO & UTILIZAÇÃO DA MÁQUINA DE LAVAR ROUPA Lave-Linge Washing machine Máquina de lavar roupa...
-
Page 3: Table Of Contents
lave-linge sommaire AVERTISSEMENTS SPÉCIFICATIONS INSTALLATION ET MONTAGE UTILISATION DE L’APPAREIL ET CONSEILS PRATIQUES MAINTENANCE ET ENTRETIEN DE L’APPAREIL SÉCURITÉ ET RÉSOLUTION DE PROBLÈMES AVERTISSEMENTS SUR L’ENVIRONNEMENT washing machine contents WARNINGS SPECIFICATIONS INSTALLATION AND ASSEMBLY USING THE APPLIANCE. PRACTICAL TIPS MAINTENANCE AND CLEANING SAFETY AND TROUBLESHOOTING... - Page 4 Dear Costumer, You have just acquired a BRANDT washing machine and we would like to thank you. We have invested all our dedication and know-how in this appliance so that it would best meet your needs. With innovation and performance, we designed it to be always easy to use.
-
Page 5: Warnings
thanks for placing your trust in us Our new range of washing machines has been designed to make life more convenient for you: WITH YOUR CONVENIENCE ALWAYS IN MIND Washing in less time. • The wash programmes do not last as Large hatch. -
Page 6: Spécifications
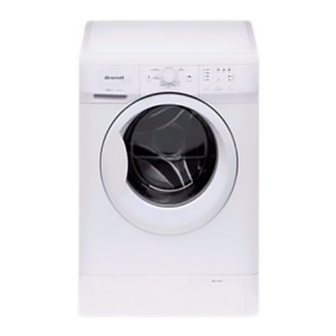
washing machine specifications Power cord Work top Control Detergent panel dispenser Drain hose Hatch Stainless steel drum Filter Kickplate Levelling feet ACCESSORIES LOCATED INSIDE THE DRUM Spanner Rear plugs Drain pipe bender Water inlet hose... -
Page 7: Installation And Assembly
washing machine installation and assembly UNPACKING AND UNBLOCKING THE WASHING MACHINE UNPACKING a Remove the base, corner protectors and top cover. UNBLOCKING a There are 3 blocking screws on the back of the washing machine. b Use the spanner supplied to loosen and completely remove the 3 screws together with the metal washer and the black rubber and plastic tubes that make up... - Page 8 CONNECTION TO THE MAINS WATER SUPPLY AND DRAINAGE installation and assembly CONNECTION TO THE MAINS WATER SUPPLY The water supply hose is inside the drum: a Connect the bent end of the hose to the threaded inlet of the electrovalve located at the rear of the washing machine.
- Page 9 LEVELLING THE WASHING MACHINE AND CONNECTING IT TO THE MAINS ELECTRICITY SUPPLY installation and assembly LEVELLING a First of all, we recommend that you fix and level the rear feet. When they are properly fixed, secure the metal locknut tightly to the top part.
- Page 10 PRE-CLEANING PRE-CLEANING When your washing machine has been correctly installed, we recommend that you pre-clean the machine. This is to check that the installation, the connections and the drainage are all correct, and to thoroughly clean the inside of the washing machine before any wash programmes are run (see the operating instructions on the following pages).
-
Page 11: Practical Tips
washing machine using the appliance and practical tips PREPARING GARMENTS FOR WASHING PREPARATION Before placing the clothes in the drum, make sure all the pockets are empty. Any small objects may block the drain pump. SORTING THE CLOTHES a Sort the clothes according to fabric Importante and how they are made. - Page 12 USING DETERGENT AND ADDITIVES using the appliance and practical tips DETERGENT AND ADDITIVES WASH FABRIC SOFTENER PREWASH a Your washing machine’s detergent dispenser has three compartments. b If you are going to use liquid detergent you must close the wash compartment flap.
- Page 13 WASH PROGRAMME SELECTION using the appliance and practical tips display additive drawer programme start/ spin-dry delayed option dial pause and tub wash selection button full stop button button button additive drawer programme start/ spin-dry delayed option dial pause button wash selection button button...
- Page 14 using the appliance and practical tips When you select a programme, the following information will appear on the display: 1 Wash programme phases: - display models Prewash Wash Rinse Spin-dry - non-display models Wash Rinse 2 Spin speed 3 Programme nº (for a few seconds) and then programme duration (display models only).
- Page 15 Option buttons possible Recommended Programme Textile type temperature Cotton Cotton 90ºC Cotton Cotton 60ºC + prewash Cotton 3 (*) Cotton 60ºC Cotton Cotton 40ºC Cotton Cotton 30ºC Duvet Duvet Synthetic Rapid’ 15 min Cold YES NO Spin-dry Wool Wool YES NO Wool Hand wash Cold...
- Page 16 Max. load Total Approx. Additive Programme of clothes consumption duration compartments description KWh/litres (minutes) (kg) Normal wash, rinses, 2,20/64 fabric softener added automatically if used and long final spin Prewash, normal wash, rinses, 1,50/64 fabric softener added automatically if used and long final spin 1,36/59 Normal wash, rinses, 0,60/59...
-
Page 17: Spin Speed Selection
SPIN SPEED SELECTION using the appliance and practical tips SPIN DRYING The wash options must always be selected after choosing the wash programme. Any programme change during selection cancels the previously selected options. Spin speed selection The programme selected is associated with certain spin revolutions, as shown on the display. -
Page 18: Additional Functions
TIME DELAY SECTION AND ADDITIONAL FUNCTIONS using the appliance TIME DELAY Time delay selection button On display models, a delay of up to 24 hours can be selected. The delay must be selected after choosing the wash programme. To select the delay time, press the clock button. On display models, the delay will be increased by an hour each time the button is pressed. - Page 19 STARTING UP AND LOCK FUNCTION SELECTION using the appliance STARTING UP Start/pause button a To start up the washing machine you have to press the start / pause button. The display will constantly show the minutes left until the wash is over (on display models).
-
Page 20: Wash Programme Phases And Power Cuts
WASH PROGRAMME PHASES AND POWER CUTS using the appliance PROGRAMME PHASES On display models, when the programme is running you can see which phase it is at on the display, as well as how long there is to the end of the programme. -
Page 21: Maintenance And Cleaning
washing machine maintenance and cleaning MAINTENANCE After each wash, leave the door open for a while to allow the air to circulate freely inside the machine. From time to time, depending on the hardness of your water, it is recommendable to run a full wash cycle using a decalcifying product. - Page 22 CLEANING THE ACCESSIBLE FILTER AND THE OUTSIDE maintenance and cleaning CLEANING THE FILTER Clean the accessible filter if the drain pump is blocked by any foreign objects. a Open the kickplate cover with the aid of a coin and by pulling gently on it. b Place a container under the drain pipe to collect any water that comes out of Remove the drain pipe, place it on the...
-
Page 23: Safety And Troubleshooting
washing machine safety and troubleshooting If you detect any problems with Indicator Problems your washing machine, you will probably be able to rectify them No water coming in yourself by consulting the following instructions. Does not drain or spin-dry If this is not the case, unplug the Does not spin-dry appliance and contact the TECHNICAL ASSISTANCE... - Page 24 safety and troubleshooting Why doesn’t the washing When there is no water coming in F01 will appear on the display. machine take in water? Indicator F01, no water coming in, this may be due to a cut in the water supply, a tap turned off or a blocked water inlet filter.
- Page 25 safety and troubleshooting Why is there still some water This may be because the dispenser needs cleaning. This simple operation is described in Maintaining and cleaning in the dispenser? the appliance. 1. Cleaning the detergent dispenser. Why can’t I open the hatch Washing machines today are provided with safety systems immediately after the wash for users.
-
Page 26: Environmental Warnings
washing machine environmental warnings eco-note INFORMATION FOR THE CORRECT DISPOSAL OF WASTE ELECTRICAL AND ELECTRONIC APPLIANCES When your appliance is of no further use, it should To highlight the obligation of collaborating with not be disposed of together with general domestic selective waste collection, the product is marked waste.
Need help?
Do you have a question about the WFK1018A and is the answer not in the manual?
Questions and answers