Hytera PD70X Owner's Manual
Digital portable radio
Hide thumbs
Also See for PD70X:
- Service manual (513 pages) ,
- User manual (24 pages) ,
- Owner's manual (22 pages)
Table of Contents
Advertisement
Quick Links
Advertisement
Table of Contents

Related Manuals for Hytera PD70X


Summary of Contents for Hytera PD70X
- Page 3 Safety Information Booklet carefully before use. The manual is applicable to the following model: PD70X Digital Portable Radio (X may indicate 2, 5, 6 or 8) PD70XG Digital Portable Radio (X may indicate 2, 5, 6 or 8)
-
Page 4: Copyright Information
Hytera is the trademark or registered trademark of Hytera channel only. Communications Co., Ltd. (“Hytera”) in PRC and/or other countries or areas. Hytera retains the ownership of its trademarks and : indicates functions that are available on analog product names. All other trademarks and/or product names that channel only. -
Page 5: Fcc Regulations
U.S, and the manufacturer shall post a RF label on the product If you have any suggestions or would like to learn more details, to inform users of operational instructions, so as to enhance their please visit our website at: http://www.hytera.com. occupational health against exposure to RF energy. RF Radiation Information... - Page 6 in the above standards and guidelines, users should transmit no more than 50% of the time and always adhere to the following procedures: (1) Your radio radiates measurable RF energy only while it is transmitting (during talking), not when it is receiving (listening) or in standby mode.
-
Page 7: Table Of Contents
Contents Checking Items in the Package ------------------------------- 2 Adjust Squelch Level --------------------------------------------11 Product Overview ------------------------------------------------- 3 One Touch Call ---------------------------------------------------------11 Product Controls -------------------------------------------------------3 Telemetry -----------------------------------------------------------12 Programmable Keys --------------------------------------------------4 Roam ---------------------------------------------------------------12 Before Use---------------------------------------------------------- 5 Emergency --------------------------------------------------------------12 Charging the Battery --------------------------------------------------5 Man Down (optional) --------------------------------------------------15 Assembling the Accessories ----------------------------------------6 Scrambler /Encrypt... -
Page 8: Checking Items In The Package
Checking Items in the Package Please unpack carefully and check that all items listed below are received. If any item is missing or damaged, please contact your dealer. Radio Unit Battery Charger Antenna Belt Clip Power Adapter Strap Documentation Kit Note: The antenna may vary with different frequency bands. -
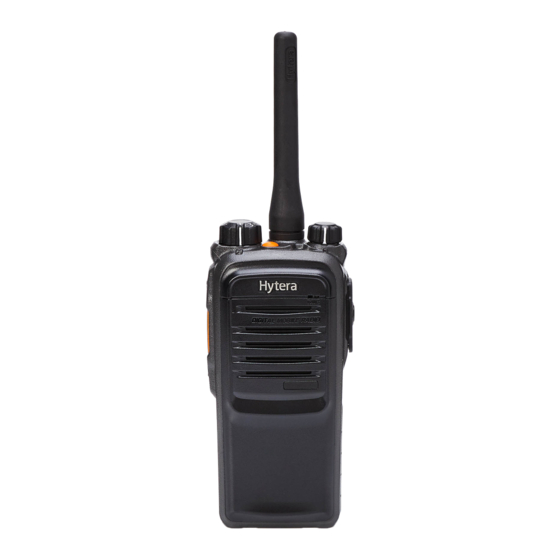
Page 9: Product Overview
Product Overview Product Controls Part Name Part Name Part Name Part Name SK1 (Side Key 1) PTT Key SK2 (Side Key 2) TK (Top Key) Channel Selector Knob Speaker LED Indicator Radio On-Off/Volume Control Knob Microphone Accessory Jack Battery Latch Antenna Belt Clip Battery... -
Page 10: Programmable Keys
Product Overview Programmable Keys To activate Emergency in the case that the radio is positioned 14 Man Down For enhanced convenience, you may request your dealer to aslant for a preset time period program the keys SK1, SK2, and TK as shortcuts to the functions due to an unexpected situation listed below: To encrypt your voice so as... -
Page 11: Before Use
Before Use Charging the Battery Note: To achieve optimal battery performance, please charge the battery for 5 hours before Use only the charger and battery specified by Hytera. Charger initial use. LED can indicate the charging process. Charge Diagram Charge Indicator... -
Page 12: Assembling The Accessories
Before Use Assembling the Accessories To remove the battery, turn off the radio first. Then slide the battery latch upwards to unlock the battery. Attaching the Antenna Attaching the Belt Clip Turn the antenna clockwise to fasten it. Remove the screws. Align the screw holes on the belt clip with those on the radio’s body, and then tighten the screws. - Page 13 Before Use To remove accessories, loosen the screw. Caution: W h e n y o u a r e u s i n g a n e x t e r n a l accessory, waterproof performance of the radio may get affected.
-
Page 14: Status Indication
Status Indication Basic Operations Turning the Radio On/Off LED Indicator Rotate the Radio On-Off/Volume Control knob clockwise/counter- The top LED indicator will help you easily identify the current radio status. clockwise until a click is heard to turn the radio on/off. LED Indicator Radio Status Adjusting the Volume... -
Page 15: Call
Call To ensure optimal volume of the receiving radio, hold the radio All Call approximately 2.5 to 5 centimeters away from your mouth. Transmitting an All Call Private Call In standby mode, hold down the PTT key to transmit an All Call to the All Call contact preset for the current channel. -
Page 16: Functions And Operations
Functions and Operations Adjust Power Level If you don’t want to hear activities on the channel, press the programmed Nuisance Temporary Delete key to remove the With this feature, you may switch power levels quickly. Generally, channel from the scan list temporarily. we recommend you to adopt low power for battery saving. -
Page 17: Squelch Off
Functions and Operations Hold down the programmed Monitor Momentary key to tone and background sound are heard; from Open to Normal, a enable the feature (a high-pitched tone sounds). To disable high-pitched tone is heard and the background sound disappears; from Normal to Tight, a high-pitched tone is heard). -
Page 18: Telemetry
Functions and Operations Radio Disable Operation: You can disable the radio of a Private Call contact remotely Press the programmed Roam key to enable or disable the feature. and disallow it to be used normally. Emergency Telemetry In case of an emergency, you can use the feature to ask for help from your companion or control center. -
Page 19: Emergency Mode
Functions and Operations Emergency ID Type I n t h i s m o d e , p r e s s t h e p r o g r a m m e d Emergency key to go to the Revert Channel, Your radio supports two Emergency ID types. - Page 20 Functions and Operations When the alarm tone disappears (None) or after the information. At this time, the LED glows red. Emergency ID is sent (HDC1200), you can speak into the Two methods are available for you to exit the Emergency mode: microphone to make an emergency call.
-
Page 21: Man Down (Optional)
Functions and Operations key to make the emergency call again (the LED glows red). Scrambler /Encrypt After the emergency call is transmitted, please release the PTT key to receive. The Scrambler/Encrypt feature can encrypt your audio signals to To exit the Emergency mode, long press the programmed prevent eavesdropping. -
Page 22: Battery Power Indicator
Functions and Operations can terminate such alerts by rotating a knob or pressing a key. channel. If you hold down the PTT key while the channel is in When the response period expires, your radio will trigger the use, your radio will keep beeping, alerting you to transmission current emergency system automatically. -
Page 23: Radio Registration Service
Functions and Operations the audio signals during transmission, providing improved audio for the receiving radio. Radio Registration Service If enabled via the programming software, your radio will automatically register in the system within a certain period after power-on. Then it can acquire online information of other radios via accessing specific servers within the valid registration period. -
Page 24: Troubleshooting
Troubleshooting Phenomena Analysis Solution The battery may be improperly installed. Remove the battery and attach it again. The battery may run out. Recharge or replace the battery. The radio can not be powered on. Clean the battery contacts. If the problem can not be The battery may suffer from poor contact caused by dirtied solved, contact your dealer or authorized service center for or damaged battery contacts. -
Page 25: Care And Cleaning
Care and Cleaning To guarantee optimal performance as well as a long service life of the product, please follow the tips below. Product Care Do not pierce or scrape the product. Keep the product far away from substances that can corrode the circuit. -
Page 26: Optional Accessories
Leather Carrying Case (swivel) LCY003 Programming Cable (USB Battery Analyzer MCA05 Ion/Ni-MH batteries) MCA06 Port) PC38 Caution: Use the accessories specified by Hytera only. If not, Hytera shall not be liable for any losses or damages arising out of use of unauthorized accessories.
Need help?
Do you have a question about the PD70X and is the answer not in the manual?
Questions and answers