
Subscribe to Our Youtube Channel
Related Manuals for Smach EFE 2500


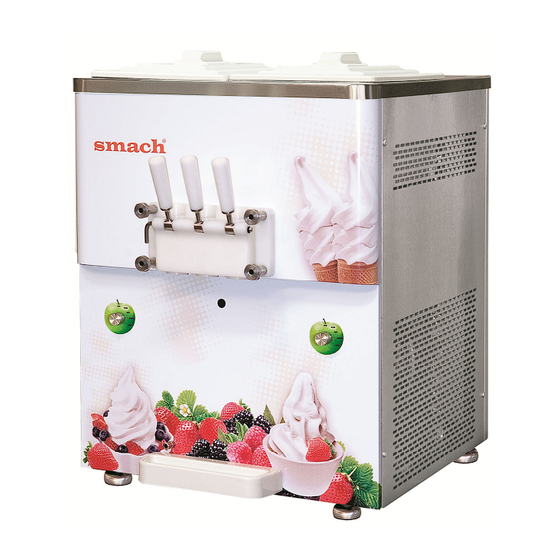
Summary of Contents for Smach EFE 2500
- Page 1 SOFT-SERVE AND FROZEN YOGHURT FREEZER USER GUIDE (OPERATING MANUAL) MODEL: EFE 2500 27.02.2012 Manual Number: V...
-
Page 2: Table Of Contents
1.TABLE OF CONTENTS 1. Table of Contents Page 2 2. Contact Details & Help Desk Page 3 3. Congratulations And Thank You Page 4 4. Electrical Connection Notice Page 5 5. Warnings and Precautions Page 5 6. Proper use and Safety Notices Page6 7. -
Page 3: Contact Details & Help Desk
Tel: +90 236 233 39 29 Fax: +90 236 236 12 59 E-Mail: info@smach.com.tr When calling Smach have the following information ready: 1. Freezer Serial Number: Found on body panel Write down the serial number in this box 2. This Model Number: MODEL EFE 2500 3. -
Page 4: Congratulations And Thank You
In no event shall Smach and/or its employees be held liable, whether in contract or tort, to any party for any direct, indirect, punitive, or consequential damages, including, but not limited to lost... -
Page 5: Electrical Connection Notice
5. Technical maintenance must be done by authorized technicians. 6. Only use food-grade lubricant when changing or replacing the O-rings on the pistons. NOTICE: Smach Gıda Makine A.Ş will not take any responsibility if the users do not follow all the instructions as described in this User Guide. - Page 6 SAFETY NOTICES Smach is concerned about the safety of the person/s using the machine. Therefore please take note and abide by amongst others, the following WARNINGS: The weight of the Machine is no less than 140 kg. Moving it must only be done by persons who are trained and qualified to move a weight of at least 140 kg in the shape and size of the machine.
-
Page 7: Operating Procedure
5. Repairs must be done by the persons who are authorized by Smach, if not, any product failure warrantee will become invalid and void. -
Page 8: Control Dial
9. CONTROL DIAL The CONTROL DIAL has the following selections: STOP In the STOP position the Freezer is still switched ON and the Hopper refrigeration is working. NB! To switch the freezer OFF it must be done at the electrical wall socket dial. WASH In the WASH position the Soft-serve in the barrel will be agitated, however no refrigeration will occur. -
Page 9: Step-By-Step Preparation Procedure
10.STEP-BY-STEP PREPARATION PROCEDURE PREPARATION – 1 Before plugging the power cord of the freezer into the wall power socket, or pulling out the power cord plug - turn the CONTROL DIAL to the STOP position. Attention: NEVER ASSEMBLE OR DISASSEMBLE ANYTHING UNLESS YOU HAVE: 1. - Page 10 STEP- 2: DISPENSING HEAD ASSEMBLY 1. Dispensing Head Disassembled: Dispensing Head Pistons Lifter Rod Piston Lifters O-Rings 89,69 x 5,33 2.Dispensing Head O-Ring Assembly: Again, place a small amount of lubricant onto your index- and middle finger and hold the large DISPENSING HEAD SEAL O-RING between the lubricated fingers and your thumb.
- Page 11 3. Dispensing Head Piston Assembly: Insert the lubricated piston into the dispense head. This motion should be quite free and without too much force. If the piston does not move freely, a little more Lubricant is required. In that case, remove the piston, add a little more lubricant as prescribed above and re- insert.
- Page 12 6.Dispensing Head Assembled: STEP- 3: ASSEMBLE THE BEATERS: Lubricate the two faces of the Beaters Drive Shaft Seal and slip over the drive shaft. BEATER SEAL BEATER...
- Page 13 STEP-4 : ASSEMBLE THE BEATERS TO THE MACHINE: 1. Empty Barrel Make sure the Barrel is free of any obstruction before you insert the Beater. The beater must slide in easily with a final firm push and some turning to align the shaft with the gearbox socket.
- Page 14 STEP- 5: FITTING THE ASSEMBLED DISPENSING HEAD SCREW ON THE 4 DISPENSE HEAD SCREWS PLACE THE DISPENSE HEAD OVER THE 4 TIGHTLY AND LIFT THE DISPENSE HANDLE TO FITTING BOLTS: THE UP POSITION NB! Make sure the dispense handle NB! When tightening the Dispense is in the UP position so Soft-Serve Head Screws, do so in a cross order liquid does not run out.
- Page 15 STEP-6: AERATION TUBE ASSEMBLY 1. Aeration Tube Disassembled: Air Tube_Outer Air Tube_Inner Air Tube_Outer O-Rings Air Tube_Inner O-Rings 2.O-Ring Assembly: grease the O-rings 3. Inner-Outer Aeration Tube Assembly: Slip two parts to each other.
- Page 16 Step-by-step process to assemble the AERATION Tube: The AERATION TUBE has two parts ― OUTER and INNER The OUTER has a large hole TOP and BOTTOM (These are constant) The INNER tube has 3 different size holes TOP and BOTTOM The INNER is turned inside the OUTER to select SMALL, MEDIUM or LARGE TOP LARGE INNER TOP MEDIUM INNER...
- Page 17 STEP- 7 NB! At this stage the CONTROL DIAL is still in the STOP position).FILL THE HOPPER with mix and wait until the bubbling in the HOPPER has stopped. Then push the assembled aeration tube into the feeder hole in the floor of the HOPPER. THE HOPPER CAN TAKE 7 Litres OF MIX ―...
-
Page 18: Step-By-Step Cleaning Procedure
For optimal machine-performance, the condenser must be cleaned from dust and dirt regularly by an authorized technician. Notice: During cleaning and maintenance, follow all instructions given in this User Guide, otherwise, Smach Gıda Makine A.Ş will not take any responsibility of unwanted results. -
Page 19: Bacteria Growth
13. BACTERIA GROWTH TABLE: This is to demonstrate how important the correct hopper temperature is: E. coli multiplication under varying temperature conditions Number of organisms at 5ºC Number of organisms at 20ºC Number of organisms at 37ºC Time generation time = 3 hours generation time = 1 hours generation time = 20 min 0 time... -
Page 20: Troubleshooting Guide
14. POSSIBLE FAILURES AND SOLUTIONS Attention: DO NOT ALLOW ANY TECHNICAL MAINTENANCE OR REPAIRS BEFORE DISCONNECTING THE FREEZER FROM THE POWER SUPPLY. If the solutions listed below in the Trouble Shooting guide do not resolve your operational problems, call an authorized service agent for further assistance. TROUBLESHOOTING GUIDE Problem Cause...
Need help?
Do you have a question about the EFE 2500 and is the answer not in the manual?
Questions and answers