Panasonic AJ-PX270 Operating Instructions Manual
Excerpted version
memory card camera-recorder
Hide thumbs
Also See for AJ-PX270:
- Operating instructions manual (217 pages) ,
- Specifications (12 pages) ,
- Settings manual (8 pages)
Table of Contents
Advertisement
This manual is an excerpted version of the full Operating Instructions.
ENGLISH
For more information, please visit the Panasonic website (http://pro-av.panasonic.net/en/manual/index.
Excerpted Version
html), and refer to the Operating Instruction (PDF).
Pour de plus amples informations, visiter le site Web de Panasonic (http://pro-av.panasonic.net/en/
FRANÇAIS
manual/index.html) et consulter le mode d'emploi (PDF).
Before operating this product, please read the instructions carefully and save this manual for future use.
FJ0214HM0 -YI
Printed in Japan
Operating Instructions
Excerpted Version
Memory Card Camera-Recorder
AJ-PX270
Model No.
ENGLISH
VQT5J83
Advertisement
Table of Contents

Related Manuals for Panasonic AJ-PX270


Summary of Contents for Panasonic AJ-PX270
-
Page 1: Operating Instructions
For more information, please visit the Panasonic website (http://pro-av.panasonic.net/en/manual/index. Excerpted Version html), and refer to the Operating Instruction (PDF). Pour de plus amples informations, visiter le site Web de Panasonic (http://pro-av.panasonic.net/en/ FRANÇAIS manual/index.html) et consulter le mode d’emploi (PDF). Before operating this product, please read the instructions carefully and save this manual for future use. -
Page 2: Read This First
Read this first! Read this first! indicates safety information. CAUTION: CAUTION The mains plug of the power supply cord RISK OF ELECTRIC SHOCK shall remain readily operable. DO NOT OPEN The AC receptacle (mains socket outlet) shall be installed near the equipment and CAUTION: TO REDUCE THE RISK OF ELECTRIC SHOCK, shall be easily accessible. - Page 3 Voltages other than 120 V are not intended for U.S.A. and Canada. Operation at a voltage other than 120 V AC may require the use of a different AC plug. Please contact either a local or foreign Panasonic authorized service center for assistance in selecting an alternate AC plug.
-
Page 4: Declaration Of Conformity
Declaration of Conformity Model Number: AJ-PX270 Trade Name: Panasonic Responsible Party: Panasonic Corporation of North America Two Riverfront Plaza, Newark, NJ 07102 Support contact: 1-800-524-1448 This device complies with Part 15 of the FCC Rules. Operation is subject to the following two conditions: (1) This device may not cause harmful interference, and (2) this device must accept any interference received, including interference that may cause undesired operation. -
Page 5: Important Safety Instructions
Read this first! IMPORTANT SAFETY INSTRUCTIONS 1) Read these instructions. 2) Keep these instructions. 3) Heed all warnings. 4) Follow all instructions. 5) Do not use this apparatus near water. 6) Clean only with dry cloth. 7) Do not block any ventilation openings. Install in accordance with the manufacturer’s instructions. 8) Do not install near any heat sources such as radiators, heat registers, stoves, or other apparatus (including amplifiers) that produce heat. - Page 6 Read this first! Brazil Only Brasil Apenas rManuseio de baterias usadas BRASIL Após o uso, as pilhas e /ou baterias poderão ser entregues ao estabelecimento comercial ou rede de assistência técnica autorizada. Cobrir os terminais positivo (+) e negativo (-) com uma fita isolante adesiva, antes de depositar numa caixa destinada para o recolhimento.
- Page 7 Please be advised that we are not liable for any accident or failure occurring as a result of use of a counterfeit battery pack. To ensure that safe products are used we would recommend that a genuine Panasonic battery pack is used.
- Page 8 f SDXC logo is a trademark of SD-3C, LLC. f HDMI, HDMI logo, and High-Definition Multimedia Interface are trademarks or registered trademarks of HDMI Licensing LLC in the United States and/or other countries. f MMC (Multi Media Card) is a registered trademark of Infineon Technologies AG. f Microsoft and Windows are registered trademarks or trademarks of Microsoft Corporation in the United...
-
Page 9: Table Of Contents
Contents Contents Read this first! Before using the camera Description of Parts Left side Right side Front side, rear side Top side Power supply Charging the battery Attaching and removing the battery Attaching and adjusting accessories Attaching the eye cup Setting menu structure Menu types and how to open them Main menu structure... -
Page 10: Before Using The Camera
Before using the camera Before using the camera r When using this product during rain or snow or when at the beach, be careful that water does not get inside the camera recorder. Water causes damage to the camera recorder and memory card. (Repair may be impossible) r Keep the camera recorder away from devices (TVs, TV games, etc.) that produce magnetism. -
Page 11: Lcd Monitor And Viewfinder
Before using the camera r After using the camera recorder, either remove the battery or disconnect the AC cable from the power outlet. r Battery characteristics The battery is a rechargeable lithium-ion battery. It produces electrical energy via an internal chemical reaction. - Page 12 For details on these descriptions (originally provided in English) and how to obtain the source code, visit the following website. http://pro-av.panasonic.net/ We do not accept inquiries about the details of the source code obtained by the customer. r Precautions when installing USB drivers...
- Page 13 Before using the camera http://pro-av.panasonic.net/ f Install the required driver into your computer from the website. f For installation procedure of the driver, refer to the installation manual on the website.
-
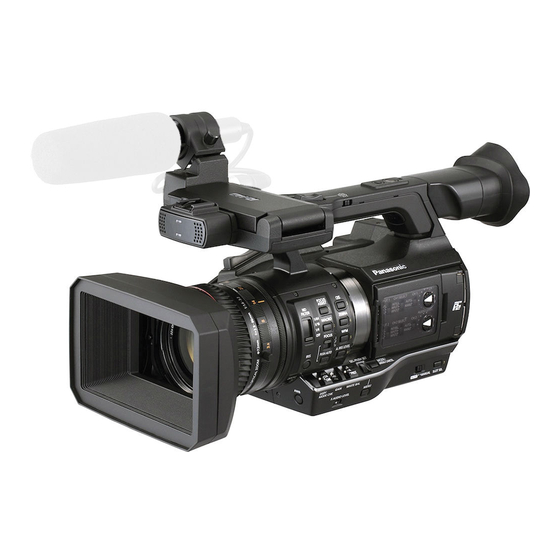
Page 14: Description Of Parts
Description of Parts Description of Parts Left side 26 27 13 14 1 Focus ring Focus manually when the <FOCUS> switch is set to <M>. 2 Zoom ring Adjust the zoom manually when the <ZOOM> switch is set to <MANUAL>. 3 Lens cover switching lever Open/close the lens cover. - Page 15 Description of Parts 7 <GAIN> switch Switch the brightness of the screen according to the lighting conditions under which you are shooting. 8 <F.AUDIO LEVEL> dial In the following conditions, the recording levels for the audio channels 1 to 4 can be adjusted. f When the <CH1>/<CH2>...
- Page 16 Description of Parts 19 <AUDIO LEVEL CH1>/<AUDIO LEVEL CH2> dial Adjust the recording level of audio channel 1/2. 20 Internal speaker Output audio during playback. When connecting the headphones to the headphones terminal, audio from the speaker turns off automatically. 21 HANDLE ZOOM switch Select the operation of the zoom lever (handle side).
-
Page 17: Right Side
(The camera will not work properly if only the miniSD/microSD adaptor is installed. Make sure that the card has been inserted into the adaptor before use.) - Use of Panasonic SD memory cards and miniSD/microSD cards is recommended. Be sure to format cards on the camera before use. - Page 18 Description of Parts - SDXC memory cards are a standard that was established in 2009 by the SD Association for large- capacity memory cards that exceed 32 GB. 5 Recording button (grip side) Press this button to start recording. Press it again to stop recording. Used for direct shooting in thumbnail mode.
-
Page 19: Front Side, Rear Side
Description of Parts Front side, rear side 1 Built-in microphone This is the built-in stereo microphone. 2 Light sensor Detects indoor and outdoor light. 3 Front tally lamp Lights during shooting. This lamp will blink when the battery level becomes low. 4 Recording button (front side) Press this button to start recording. - Page 20 Description of Parts 11 Battery release button Remove the battery. 12 microP2 memory card 1 access LED Indicate the access status of recording and playback of the card inserted in the microP2 memory card slot 1. 13 microP2 memory card slot 1 14 microP2 memory card 2 access LED Indicate the access status of recording and playback of the card inserted in the microP2 memory card slot 2.
-
Page 21: Top Side
Description of Parts Top side 14 15 16 1 Light shoe Attach the video light. 2 Recording button (handle side) Press this button to start recording. Press it again to stop recording. This includes hold mechanism. 3 Zoom lever (grip side) Adjust the zoom of an image. - Page 22 Description of Parts 8 Zoom lever (handle side) Adjust the zoom of an image. <T>: Zoom in the image. <W>: Zoom out the image. 9 Focal plane index < > Indicate the focal plane of the MOS sensor. It provides a reference for measuring the accurate focal distance from the subject. 10 Handle mounting holes Mount the handle.
- Page 23 Description of Parts 20 <MENU> button Press this button to display [USER MENU]. Press this button for 3 seconds or more to display the main menu. Press it while the thumbnail is displayed to display the operation screen of the thumbnail menu, and clips can be deleted.
-
Page 24: Power Supply
Power supply Power supply A battery or AC adaptor can be used as the power supply. Charging the battery The battery is not charged at the time of purchase. Fully charge the battery in the battery charger before using the battery. It is recommended that you have one extra battery. -
Page 25: Attaching And Removing The Battery
Power supply - With the LCD monitor open - When the main menu → [OUTPUT SEL] → [SDI OUT] is set to [OFF] - When the main menu → [OUTPUT SEL] → [VIDEO OUT] is set to [OFF] - With the cable not inserted into the <HDMI OUT> terminal t The battery and camera recorder will become warm during use or while charging. - Page 26 Power supply Removing Lock release button Power switch Battery release button Turn the power switch to <OFF> while holding down the lock release button. Make sure that the LCD monitor has gone off. Lift up and remove the battery while holding down the battery release button. Support the battery with your hand so that it does not fall down.
-
Page 27: Attaching And Adjusting Accessories
Attaching and adjusting accessories Attaching and adjusting accessories Attaching the eye cup Groove Attach the eye cup by aligning the groove on the attaching part of the eye cup with the inner ridge of the eye cup. -
Page 28: Setting Menu Structure
Setting menu structure Setting menu structure Menu types and how to open them Menu type How to open [USER MENU] In the main menu → [USER MENU Displayed by pressing the <MENU> button. SEL], you can select the desired items and pages and register to [USER MENU]. - Page 29 Setting menu structure [DISPLAY SETUP] Configures the settings for the details to be displayed in the viewfinder or LCD monitor. This menu item cannot be set when the thumbnail screen is displayed. [CARD FUNCTIONS] Configures the settings for reading/writing of scene files and user files to SD memory cards.
-
Page 30: Updating The Camera Firmware
For details about downloading and using P2_Status_Logger, refer to the pages displayed after logging in to PASS. Other benefits are offered to registered users. For details, refer to the website (http://panasonic.biz/sav/ pass_e) of PASS (P2 Asset Support System). 2 Check the version using the camera and apply the update Check the version of the camera in the main menu →... -
Page 31: Specifications
Specifications Specifications Dimensions 329 mm (12-15/16 inches) 176 mm (6-15/16 inches) 426 mm (16-25/32 inches) Specifications General Power DC 7.2 V (when the battery is used) DC 12 V (when the AC adaptor is used) Power consumption 19.5 W (when the LCD monitor is used) indicates safety information. - Page 32 Specifications Shortest shooting distance (M.O.D) 1.1 m from the lens Gain setting <L>/<M>/<H> selector switch −3 dB – 18 dB (in 1 dB steps) (Negative value of gain is only in [HIGH SENS.] mode.) (When assigning [S.GAIN] to the USER button: Switching between 24 dB, 30 dB, and 36 dB) Color temperature setting [ATW], [ATW LOCK], [Ach], [Bch], preset 3200 K/preset 5600 K/VAR...
- Page 33 Specifications VFR recording frame rate f 1080/59.94p: 1, 2, 4, 6, 9, 12, 15, 18, 20, 21, 22, 24, 25, 26, 27, 28, 30, 32, 34, 36, 40, 44, 48, 54, and 60 (frames per second) f 1080/50p: 1, 2, 4, 6, 9, 12, 15, 18, 20, 21, 22, 23, 24, 25, 26, 27, 28, 30, 32, 34, 37, 42, 45, 48, and 50 (frames per second) Sensitivity f [HIGH SENS.] mode...
-
Page 34: Digital Audio
Specifications Digital video Sampling frequency f AVC-Intra 100/AVC-Intra 50/AVC-LongG 50/AVC-LongG 25/AVC-LongG 12/DVCPRO HD Y: 74.1758 MHz, P : 37.0879 MHz (59.94 Hz) Y: 74.2500 MHz, P : 37.1250 MHz (50 Hz) f DVCPRO50 Y: 13.5 MHz, P : 6.75 MHz f DVCPRO Y: 13.5 MHz, P : 3.375 MHz... -
Page 35: Audio Input
HQ 2CH MOV: Approx. 78 min f LOW 2CH MOV: Approx. 135 min These are reference values for continuous recording using the Panasonic products. The recording time may differ depending on the scene or the number of clips. Video input/output <SDI OUT>... - Page 36 Specifications <TC IN/OUT> terminal BNC×1 Used as the input and output terminals, <IN/OUT> switch selection f Input: 1.0 V - 4.0 V [p-p], 10 kΩ f Output: 2.0 V±0.5 V [p-p], low impedance <LAN> terminal 100BASE-TX/10BASE-T <USB2.0 DEVICE> terminal Type miniB connector, 4-pin (device) <USB3.0 HOST>...
-
Page 37: Battery Charger
Specifications AC adaptor Power source AC 110 V - 240 V, 50 Hz/60 Hz 42 W Power output DC 12 V, 2.5 A indicates safety information. Ambient operating temperature 0°C - 40°C (32°F - 104°F) Ambient operating humidity 10% - 80% (no condensation) Weight Approx. - Page 38 Information on Disposal in other Countries outside the European Union These symbols are only valid in the European Union. If you wish to discard these items, please contact your local authorities or dealer and ask for the correct method of disposal. Web Site: http://panasonic.net © Panasonic Corporation 2014...
Need help?
Do you have a question about the AJ-PX270 and is the answer not in the manual?
Questions and answers