Advertisement
Instructions for use, installation,
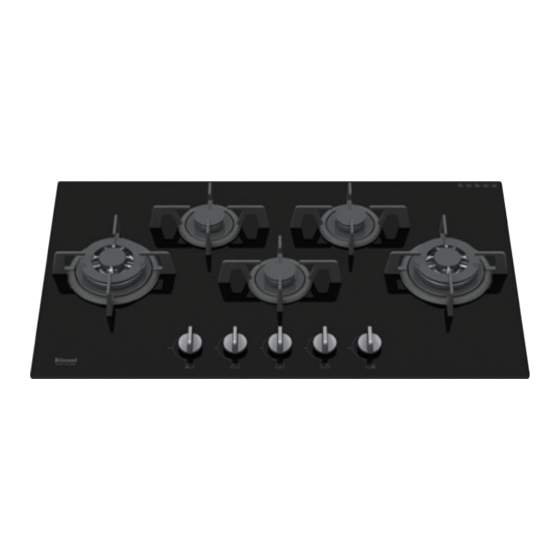
Gas Built in Hob
RB-3311S-GBS
RB-3312S-GBS
RB-3311D-GBS
RB-3311M-GBS
RB-3311N-GBS
RB-6313S-GBST
RB-6323S-GBST
RB-6314S-GBS
RB-6313D-GBST
RB-6313M-GBST
and connection
RB-7312S-GBS
RB-7313S-GBST
RB-7323S-GBST
RB-7314S-GBS
RB-7315S-GBS
RB-7313D-GBST
RB-7312M-GBS
RB-7313M-GBST
RB-7312N-GBS
RB-9312S-GBS
RB-9313S-GBST
RB-9314S-GBS
RB-9315S-GBS
RB-9312D-GBS
RB-9213D-GBST
RB-9314D-GBS
RB-9315D-GBS
RB-9312M-GBS
RB-9313M-GBST
RB-9312N-GBS
RB-9313N-GBSU
1
Advertisement
Table of Contents

Related Manuals for Rinnai RB-3311S-GBS


Summary of Contents for Rinnai RB-3311S-GBS
- Page 1 Instructions for use, installation, and connection Gas Built in Hob RB-3311S-GBS RB-7312S-GBS RB-9312S-GBS RB-3312S-GBS RB-7313S-GBST RB-9313S-GBST RB-3311D-GBS RB-7323S-GBST RB-9314S-GBS RB-3311M-GBS RB-7314S-GBS RB-9315S-GBS RB-3311N-GBS RB-7315S-GBS RB-9312D-GBS RB-7313D-GBST RB-9213D-GBST RB-7312M-GBS RB-9314D-GBS RB-6313S-GBST RB-7313M-GBST RB-9315D-GBS RB-6323S-GBST RB-7312N-GBS RB-9312M-GBS RB-6314S-GBS RB-9313M-GBST RB-6313D-GBST RB-9312N-GBS RB-6313M-GBST...
-
Page 2: Table Of Contents
Every time you use Rinnai appliances, Rinnai believes you can feel comfort by its safety and quality. In order to maximize the performance and to maintain your Rinnai built- in hob in the best condition, please follow the instruction carefully. -
Page 3: Important Warnings
1. Important Warnings 1.2 Children and vulnerable people Before installing and using of Rinnai appliances, carefully read and follow the WARNING! supplied instructions. The manufacturer Risk of suffocation, injury or is not responsible for any damages permanent disability. caused by incorrect installation and use. -
Page 4: Safety Instructions
2. Safety Instructions 2.1 Installation • C AUTION : This appliances is for cooking purposes only. It must not be WARNING! used for other purposes, for example room heating. Only a qualified person must install • T his appliance is intended for use in this appliance. household. -
Page 5: Care And Cleaning
2.4 Caution for the tempered glass • M ake sure cookware is centrally positioned on the pan supports and do • N ever use oversized not stick out over edges of the cooking cooking utensils or surface. overload the cooking • O nly apply the accessories supplied by appliances. manufacturer. • N ever install a flame diffuser on the • D o not remove the pan burner. -
Page 6: Line Up
3. Line up 30cm Models Top Plate Dimension ; 310 mm × 520 mm Cut-Out Hole Dimension ; 268 mm × 490 mm × R0 mm ~ R50 mm RB-3311N-GBS RB-3311M-GBS RB-3311D-GBS RB-3311S-GBS RB-3312S-GBS Inner Flame Mega Double Simmer Simmer Simmer 60cm Models Top Plate Dimension ;... -
Page 7: Components And Parts Name
4. Components and Parts name Rinnai Original Burner Series Inner Flame Series Mega Series Double Simmer Series Simmer Series Parts Names Inner Flame Series Mega Series Pan Support S Pan Support Pan Support H Burner Cover S Burner Head S... -
Page 8: Installation
5. Installation Kitchen worktop cut-out dimensions Model Cut out hole dimension (mm) RB-3311S-GBS RB-3312S-GBS 268 x 490 30 cm RB-3311D-GBS R0~R50 R0~R50 RB-3311M-GBS RB-3311N-GBS RB-6313S-GBST RB-6323S-GBST R0~R50 560 x 480 60 cm RB-6314S-GBS R0~R50 RB-6313D-GBST RB-6313M-GBST RB-7312S-GBS RB-7313S-GBST RB-7323S-GBST R0~R50... - Page 9 WARNING! * Install the built-in hob in a well ventilated room and keep it away from any combustible or flammable objects such as paper or oil. * Place the built-in hob on a stable and level surface. * If the built-in hob is to be installed close to combustible objects (such as wooden walls, wooden shelves), it should be installed at least 15 cm from the side walls.
- Page 10 ● Set the battery properly as instructed. Ignition Model Battery holder location Battery Size Front RB-3311S-GBS C (1.5V × 1) RB-3312S-GBS C (1.5V × 1) 30 cm RB-3311D-GBS C (1.5V × 1) RB-3311M-GBS C (1.5V × 1) RB-3311N-GBS C (1.5V × 1) C (1.5V ×...
- Page 11 ● Set the pan support properly as instructed. * Set pan support to top plate. Inner Flame Series H, S Mega Series H Burner S Burner Double Simmer Series H, S H Burner S Burner Simmer Series H, S H Burner S Burner Installation of Gas Hose ●...
-
Page 12: Operating Instructions
6. Operating Instructions Ignition ” ( MAX) 1 . P ress the control knob for about 3 mm and turn to the left (counter clock-wise) to the “ ● ● ● position. 2 In the event of the burner flames being accidentally extinguished, turn off the burner control and do not attempt to re-ignite the burner for at least 1 min. If the burner has not lit up after 15 seconds, stop operating the built-in hob and open the compartment door and/or wait for at least 1 minute before attempting to ignite the burner again. -
Page 13: Maintenance
7. Maintenance How to Change Battery 1. If the battery ran out, open the cabinet door and change it correctly. The location of the battery is described in Page 10. • Battery box is located at bottom of built-in hob. Open the cabinet door and change the battery. * Set battery correctly with care. + - How to set Drip Pan Inner Flame Series * Set Burner Cover properly as instructed. - Page 14 * Set Burner Head H on Top Burner Body HS properly. The Pin of Burner Head H shall be located onto the Slot on Top Burner Body HS. Set Burner Head S on the Top Burner Body HS properly. Burner Head H Burner Head S Top Burner Body HS Slot...
- Page 15 * Install Burner Body S to Burner Base S properly. The Slot on Burner Base S shall be properly located onto the Guide Pin of Burner Body S. * Set Burner Head S on Burner Body S. Burner Body S Burner Head S Guide Pin Slot...
- Page 16 Simmer Series H, S * Set burner Body H on burner base H. Be careful to align guide pin of burner body with slot of burner base. * Install Burner Cap H and Simmer Burner Cap properly onto Burner Body H. Simmer Burner Cap Guide Pin Burner Cap H...
-
Page 17: Trouble Shootings
8. Trouble Shootings FAULT CAUSE REMEDY Spark electrode is wet, especially in Dry the electrode with clean tissue 1. No Ignition high humidity season. or dry cloth. Push and turn the gas control knob 2. Flame cannot Incorrect turning of gas control anti-clockwise until a ‘click’... -
Page 18: Technical Specifications
Connecting Type of Weight Dimension Battery Size High Medium small (mm) Tube RB-3311S-GBS 310 x 520 x 130 — — — RB-3312S-GBS 310 x 520 x 130 268 x 490 30 cm RB-3311D-GBS 310 x 520 x 136 C (1.5V ×... - Page 20 http://www.rinnai.com...
Need help?
Do you have a question about the RB-3311S-GBS and is the answer not in the manual?
Questions and answers