Table of Contents
Advertisement
Advertisement
Table of Contents

Related Manuals for Kyocera Rally


Summary of Contents for Kyocera Rally
- Page 1 Rally User Manual...
-
Page 2: Table Of Contents
Table of Contents Customize Contacts ....... 31 1 Get Started ......4 Contact Groups ......32 SIM Card ......... 4 Speed Dial List ....... 32 Phone Battery ........5 Dial Services ........32 Phone Overview ......6 ICE Contacts ........33 Main Menu ........ - Page 3 10 History ........59 Work with History ......59 11 Web ........60 Surf the Web ......... 60 Search the Web ......60 12 Get Help ......... 61 Customer Support ......61 Qualified Service ......61 13 Notes ........61 Important Safety Information ...
-
Page 4: Get Started
Get Started 4. Insert the battery, contacts end first, and SIM Card gently press into place. (see page 5 for battery instructions). Insert the SIM Card 5. Replace the cover, applying equal 1. Insert your thumbnail or fingernail into pressure from the top down on both the slit at the bottom of the back cover sides. -
Page 5: Phone Battery
Phone Battery Charge the Battery Install the Battery ● To install the battery: You must have at least a partial 1. Hold the phone charge in the face down. battery to make 2. Find the notch or receive calls. directly below To charge the the back cover. -
Page 6: Phone Overview
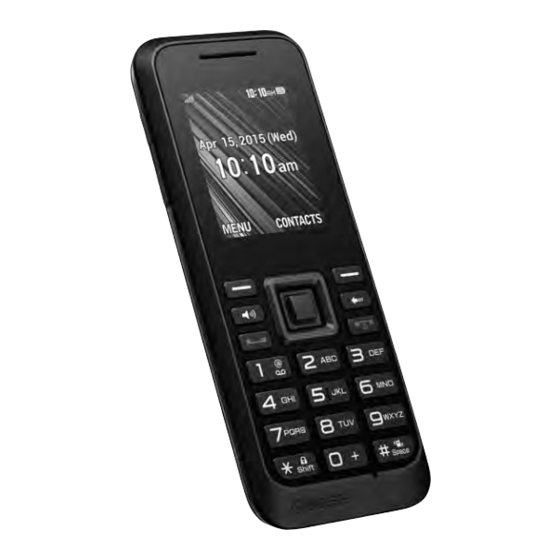
Phone Overview Get to Know Your Phone ① Earpiece. ② Display screen. ③ Volume key raises or lowers ringtone or call volume. ④ Left softkey selects items that appear on the lower left of the display. At the home screen, you can select MENU. -
Page 7: Screen Icons
Screen Icons These icons may appear on your phone’s screen. Your phone’s current signal strength. Your phone is connected to a (More bars = stronger signal.) Bluetooth device. Your phone cannot find a usable signal. Your phone is visible to other Bluetooth devices. - Page 8 Picture mode is set to Beach/Snow. Picture mode is set to Scenery. Picture mode is set to Mirror Image. Picture mode is set to Night/Dark. Self-timer is set to 5 seconds. Self-timer is set to 10 seconds. Multiple shots function is enabled. Camera is set to 0.3-megapixel resolution (640x480).
-
Page 9: Main Menu
Main Menu At the home screen, press (OK key) to access the main menu. Home Level 1 > Level 2 Screen > OK key Browse the web. Contacts Access your Contacts list. Access these options: On/Off, Visibility, Add New, Bluetooth Trusted Devices, and My Bluetooth Info. -
Page 10: Guide Conventions
Guide Conventions Back Up Within a Menu In this guide, the following conventions are ● Press to go to the previous menu. used when describing phone features. ● Press to return to the home screen. Navigate Through the Menus ● Select means to press the Left softkey, Right softkey or OK key to select an item seen on the display. -
Page 11: Call Features
Call Features This section describes the basic features Call Using a Contact related to calls. 1. From the home screen, select CONTACTS. Power Phone Up 2. Highlight a contact and press ● To turn your phone on, press and hold Call Using Voice Recognition and wait until the phone display lights up. -
Page 12: End Phone Calls
Use the Speakerphone End Phone Calls Your phone has a built-in speakerphone. ● Press ● To turn on the speakerphone, press . The speakerphone icon In-call Options appears on the home screen when the speakerphone is on. Selecting OPTIONS during a call displays ●... -
Page 13: Use Plus (+) Code Dialing
Conference Calling Use Plus (+) Code With Conference Calling, you can talk to Dialing eight people at the same time. When placing international calls, use Plus 1. Enter a number and press Code Dialing to automatically enter the 2. Once you have established the international access code for your location connection, press . -
Page 14: Text Entry
Text Entry Enter Numbers with Number Text Entry Modes Keypad You can enter letters, numbers, and From the text entry field, select OPTIONS symbols whenever you are prompted to > Text Mode > 123 to enter a number enter text. when you press a key once. - Page 15 Rapid Entry (T9) with Number Keypad From the text entry field, select OPTIONS > Text Mode > T9Word to check words you are trying to spell against a dictionary of common words. You can enter text in the following ways: ●...
-
Page 16: Text Entry Quick Reference
Text Entry Quick Reference This table gives instructions for entering text. To.. Do this.. Enter a letter Use Abc or T9Word mode and press a key until you see the letter you want. Enter a number Use 123 mode and press a key. Enter a symbol Use Symbols mode and highlight a symbol you want and press... -
Page 17: Settings
Settings Settings Menu Select Settings from the main menu to access the following functions: Level 1 > Level 2 > Level 3 Settings Access these options: Graphic, Brightness, Backlight, Notification, Display Picture ID, Power Save Mode, Keypad Light, and Clock/Calendar. Access these options: Incoming Ringtone, Playback Volume, Volume Power Up, Key Beeps, and Escalate Setting. -
Page 18: Display
2. Select a preset length of time to elapse Display before the screen and keypad Adjusting your phone’s display settings not backlights turn off. only helps you see what you want, they Set the Notification Pop-up can also help increase battery life. This option allows you to enable or disable Set Graphics notification pop-up when you receive a... -
Page 19: Volume
Warning: Turning off escalating ringer Set the Clock/Calendar will make your phone ring loudly. ● From Clock/Calendar, select a Unexpected loud sounds could clock/calendar display option. damage your hearing. Volume Ringtones Adjust your phone’s volume settings to suit You can assign a ringtone or vibration your needs and your environment. -
Page 20: Keyguard
● Word Choice List to select whether to Keyguard display the word choice list. ● Input Language to select the language Use Keyguard to lock the keypad to enter (English or Spanish). immediately or to automatically lock the keypad after a period of inactivity to ●... -
Page 21: Lock Phone
Lock Phone Reset/Delete The Lock Phone settings menus let you Delete Phone Content set phone security, lock code, and more. You can quickly and easily delete all the Set Lock Phone content that you have created or stored in your phone. When your phone is locked, you can only make calls to 911 or ICE Contact. -
Page 22: Others Settings
Reset Your Phone and Phone Voice Services Content Voice Guide This option lets you clear different types of Voice Guide allows you to hear voice personal information stored on your prompts and spoken numbers or key phone, reset your phone to factory names as you press a key, and also to hear settings, or both. - Page 23 - Always Confirm to always ask for Connect to TTY Device confirmation. You can connect the phone to a teletype - Never Confirm to never ask for (TTY) device for the hearing impaired. confirmation. (TTY device sold separately.) To adapt the system to your voice: Note: Enable TTY only when using the 1.
-
Page 24: Airplane Mode
Connect to Hearing Aid Device - On to activate Airplane Mode. Airplane Mode will be deactivated when you With a hearing aid device (sold separately) turn the phone off. connected, you can enable the hearing aid - Off to deactivate Airplane Mode. feature. -
Page 25: Call Setup Options
Persistent Alerts Call Answer Mode You can set the type of Alert you would You can select how to answer incoming like to receive. calls on your phone. 1. From Alerts, select Persistent Alerts. 1. From Call Setup, select Call Answer. 2. -
Page 26: Headset Mode
Call Barring Note: To set Fixed Dialing Numbers On or Off, you need to input PIN2 With this function, you can restrict code. predetermined types of calls to save - Change PIN2 Code to change PIN2 communication fees. Code set for the SIM card. 1. -
Page 27: Display Language
3. Enter your password at the prompt and Display Language follow the voice prompts. You can choose to display your phone’s onscreen menus in English or in Spanish. When you return to the service area, To assign a language for the phone’s voicemail notification will resume as display: normal. - Page 28 Location Navigation Key Shortcut Before using any of the location-based You can use the navigation keys as services, you must turn on your phone’s shortcuts to access specific menu items location feature. directly from the home screen. You can reassign the default shortcuts to the menu To enable your phone’s location feature: items you choose.
-
Page 29: Contacts
Contacts Use Contacts to store information about a person or company. Access Contacts Add Contacts Access Contacts List Add Contacts from Home Screen 1. From the home screen, select 1. From the home screen, enter a phone CONTACTS. number to save. –... -
Page 30: Use Contacts
Add Contacts from SIM card Use Contacts 1. From the Contacts list, select OPTIONS Call Contacts > Copy from SIM. 1. From the Contacts list, highlight a 2. Select Multiple Contacts or contact. All Contacts. to dial the entry’s default 2. -
Page 31: Customize Contacts
Assign Pictures to Contacts Customize Contacts 1. From the Contacts list, select a contact. Edit Contact Details 2. At the contact details screen, scroll up to select 1. From the Contacts list, highlight a contact. 3. Select Choose Photo. 2. Select OPTIONS > Edit Contact. 4. -
Page 32: Contact Groups
Delete a Group Delete Contacts 1. From the Contacts list, highlight a 1. From the Contacts list, select a contact. group. 2. Select OPTIONS > Delete Contact > 2. Select OPTIONS > Delete Group > DELETE. DELETE. Note: You cannot recover deleted information. -
Page 33: Ice Contacts
ICE Contacts Emergency Message To send an emergency message: To make it easier for emergency 1. From the Contacts list, select OPTIONS personnel to identify important contacts, > Settings > ICE. you can list your local emergency contacts under “ICE” in your phone's Contacts list. 2. -
Page 34: Messaging
Messaging Use Messaging to send, receive, and erase messages from your phone. Messaging Menu Select Messaging from the main menu to access the following functions: Level 1 > Level 2 > Level 3 Messaging Voicemail Access these options: Call Voicemail and Voicemail Details. -
Page 35: Send Messages
2. Compose a reply. - MULTIPLE to select multiple 3. When done, select SEND. recipients. Select CONTINUE when Note: The Kyocera Rally is not capable you have finished selecting and of receiving video messages. entering recipients. Messaging... -
Page 36: Threaded Messaging
Threaded Messaging Options Threaded Messaging When you are viewing a messaging thread list, select OPTIONS. You can choose Threaded messaging lets you follow a from the following options. (Options will chain of messages to and from a particular vary according to screen.) contact. -
Page 37: Message Settings
● Select Send Message to insert a preset Message Settings message to your text message. ● Select Edit to edit the text. Messaging settings allow you to set how the phone handles incoming and outgoing ● Select Delete to delete the preset messages. -
Page 38: Wireless Emergency Alerts
Long SMS to MMS Wireless Emergency Alerts Converts SMS message into MMS when Your phone is compatible with federally the input message exceeds the character supervised cell phone alert services which limit. send out broadcast SMS messages for public warning. 1. -
Page 39: Simple Data Exchange
Simple Data Exchange This feature makes it easy to select certain information in a message and automatically save it or use it in a related application. Simple Data Exchange works with these types of information: ● Email addresses ● Phone numbers ●... -
Page 40: Camera
Camera You can use the camera to take and share pictures. Your phone comes with a 0.3 megapixel camera. - Send to send your picture in a Take Pictures message. See ”Send Pictures” on page 44. The following topics teach you how to take pictures with your phone’s camera. -
Page 41: Camera Mode Options
- User Settings to provide convenient Camera Mode Options access to your favorite settings. Various options are available from camera Zoom mode. ● Press OPTIONS (right softkey) in This feature allows you to zoom in on an camera mode to display additional object when you take a picture. -
Page 42: Assign Pictures
- Shutter Sound to select a shutter Multiple Shots sound from Default, “Say This feature allows you to take three, six, Cheese,” or “Ready.” or nine shots in a continuous sequence. When you take multiple shots, the icon will - Status Bar to display or hide status be displayed at the upper left corner of the indicators and softkeys. -
Page 43: Store Pictures
To review your stored pictures on the Store Pictures memory card: Your phone’s picture storage area is called ● Press > Photos > My Photos > My Photo. There are two types of folders On Memory Card. in My Photos: In Phone and Memory Card Folder - In Phone –... -
Page 44: Send Pictures
- Copy/Move to copy or move pictures 4. Press SEND (left softkey) and select the from a memory card folder to another recipient from the list or from the memory card folder. following options: - Details/Edit to edit or display details - Go to Contacts to select a recipient relating to your pictures. -
Page 45: Other Settings
Other Settings - Auto Save to to select the storage area for the pictures. See “Set Storage Options” on page 43. - Status Bar to display or hide status indicators and softkeys. These can be revealed or hidden by pressing the navigation key up or down. -
Page 46: Tools
Tools Tools Menu Select Tools from the main menu to access the following functions: Level 1 > Level 2 > Level 3 Tools Voice Memo Access Voice Memo. Alarm Set an alarm. Calendar Access your calendar. Countdown Set a countdown timer. Access these options: Connect to PC, File Manager, Memory Format Memory Card, Memory Info, Create Folders and... -
Page 47: Alarm
● Speaker On/Off to switch voice input - Recording Guard to switch on and off and output between Earpiece mode and the function to prevent interruptions Speaker mode. while recording an Audio Memo. ● Edit Title to edit the file name of - Recording Mode to select the recorded data. -
Page 48: Calendar
6. Select a ringtone option by selecting the 8. Select an alarm time by selecting the Ringtone field. Alarm Time field. 7. Select a volume level by selecting the 9. Select a repeat status by selecting the Volume field. Repeat field. 8. -
Page 49: Memory Storage
● Select Snooze to stop the alarm and Delete Old Events or All Events start snooze mode. 1. From Calendar, select OPTIONS > ● Select View to display the event detail Delete Memory. screen. 2. Select Delete Old or Delete All. ●... -
Page 50: Insert The Microsd Card
Insert the microSD Card Remove the microSD Card 1. With the power off, remove the battery 1. With the power off, remove the battery cover and the battery. (The battery must cover and the battery. be removed in order to insert the 2. -
Page 51: Back Up Your Contacts Data To The Microsd Card
● Press > Tools > Memory Storage > Back Up Your Contacts Data to Create Folders. (The phone will create the microSD Card the microSD’s default folders: DCIM, You can easily back up your phone’s VIDEO, MUSIC, VOICE, SD_PIM, Contacts data to the microSD card. BLUETOOTH, and OTHER.) 1. - Page 52 ● Copy to Card/Copy to Phone to copy a Access File Manager file from one storage area to another. 1. Press > Tools > Memory Storage ● Delete to delete a file or folder from File > File Manager. Manager. 2.
-
Page 53: Calculators
battery while files are being accessed or Connect Your Phone to Your transferred. Computer ● DO NOT use your computer to change Before using your phone’s mass storage or edit folder or file names on the capabilities, you need to prepare your microSD card, and do not attempt to phone’s data services to synchronize with transfer large amounts of data from the... -
Page 54: Countdown
● START begins counting. Tip Calculator ● SPRIT or LAP records the time. You can use Tip Calculator to calculate the amount to pay including the tip. ● STOP pauses counting. Note: USD is used for calculation. ● RESET clears the stopwatch. Unit Converter You can use Unit Converter to convert the You can configure SIM card settings when... -
Page 55: Voice Services
View a Note Start Voice Recognition From Notepad, select a note to open note. Do one of the following to start Voice Recognition: Edit a Note 1. From Notepad, highlight a note you ● Press and hold want to edit and select EDIT. ●... - Page 56 Send Text Message By Voice Check Item By Voice Recognition Recognition 1. Start Voice Recognition. 2. When prompted to speak, say Check 1. Start Voice Recognition. <Item>. For example, to check the 2. When prompted to speak, say Send signal strength status, say “Check Message <Name or #>.
-
Page 57: Bluetooth
Bluetooth Bluetooth® is a short-range communications technology that allows you to connect wirelessly to a number of Bluetooth devices, such as headsets and hands-free car kits, and Bluetooth-enabled handhelds, computers, and wireless phones. The Bluetooth communication range is usually approximately 30 feet. Bluetooth Menu Turn Bluetooth On and The Bluetooth menu allows you to set up... -
Page 58: Pair Bluetooth Devices
View the Trusted Pair Bluetooth Devices Devices List The Bluetooth pairing process allows you to establish trusted connections between This list displays a list of devices which are your phone and another Bluetooth device. paired with your phone and set as trusted When devices are paired, a passkey (PIN) devices. -
Page 59: 10 History
10 History History List Options Work with History When you are viewing a history list, select View History List OPTIONS. You have the following options: ● New Group to create a new group ● From the home screen, press – or – entry. -
Page 60: 11 Web
11 Web Add a Bookmark Surf the Web 1. Surf to the Web page you want to You can use your phone to browse the bookmark and select Options > Add Internet if you have obtained phone this page to Bookmarks. Internet services from your service 2. -
Page 61: 12 Get Help
12 Get Help 13 Notes ● Instructions to perform tasks in this Customer Support guide may change depending on the Contact the Kyocera Communications Inc. version of software or application on Customer Care Center in any of the your phone. following ways: ●... -
Page 62: Important Safety Information
This section contains important Note: For the best care of your phone, operational and safety information that will only Kyocera-authorized personnel help you safely use your phone. Failure to should service your phone and read and follow the information provided in accessories. -
Page 63: Following Safety Guidelines
signals. However, RF signals from Following Safety Guidelines wireless phones may affect inadequately To operate your phone safely and shielded electronic equipment. efficiently, always follow any special RF signals may affect improperly installed regulations in a given area. Turn your or inadequately shielded electronic phone off in areas where use is forbidden operating systems or entertainment... -
Page 64: Using Your Phone With A Hearing Aid Device
Your Rally has an M3 and a T3 rating. accessories. These ratings are not guarantees. Results Restricting Children’s Access to will vary depending on the user’s hearing... -
Page 65: Caring For The Battery
with your hearing device is the best way to noise from wireless phones and should evaluate it for your personal needs. have ratings similar to phones. Ask your hearing healthcare professional for the M-Ratings: Phones rated M3 or M4 meet rating of your hearing aid. - Page 66 ● Recently there have been some public ● Do not short-circuit a battery or allow reports of wireless phone batteries metallic conductive objects to contact overheating, catching fire, or exploding. battery terminals. It appears that many, if not all, of these ●...
-
Page 67: Radio Frequency (Rf) Energy
● Less than one month: -4° F to 140° F (- the disposal of batteries in household or 20° C to 60° C) business trash may be prohibited. ● More than one month: -4° F to 113° F (- Radio Frequency (RF) 20°... - Page 68 The highest reported SAR values of the requirements may not comply with FCC Rally are: RF exposure requirements and should be avoided. Head: 0.93 W/kg For more information about RF exposure, Body-worn: 0.66 W/kg...
-
Page 69: Owner's Record
This will be helpful if you need to contact us installed and used in accordance with the about your phone in the future. instructions, may cause harmful interference to radio communications. Model: Rally Serial No.: Important Safety Information... -
Page 70: Manufacturer's Warranty
Product. KYOCERA shall, at its sole and fire, water (except for product certified for absolute discretion, either repair or replace protection against water; see the Kyocera... - Page 71 KYOCERA and which the Product is not CONSEQUENTIAL DAMAGES, EVEN IF specified to tolerate, including damage ADVISED OF THE POSSIBILITY caused by mishandling and blown fuses; THEREOF, WHETHER FORESEEABLE (x) consumables (such as memory cards, OR UNFORESEEABLE OF ANY KIND fuses, etc.);...
- Page 72 AGAINST INFRINGEMENT OR ANY IMPLIED WARRANTY OR CONDITION ARISING OUT OF TRADE USAGE OR OUT OF A COURSE OF DEALING OR COURSE OF PERFORMANCE. NO DEALER, DISTRIBUTOR, AGENT OR EMPLOYEE IS AUTHORIZED TO MAKE ANY MODIFICATION OR ADDITION TO THIS WARRANTY. Some jurisdictions do not allow the exclusion or limitation of incidental or consequential damages, or allow...
-
Page 73: End User License Agreement
AGREEMENT, DO NOT USE, DOWNLOAD Software or make it available over a network for OR OTHERWISE ACCESS THE SOFTWARE use on more than the single Kyocera device for OR SERVICES AND (I) PROMPTLY RETURN which it was originally supplied. The Software... - Page 74 SOFTWARE IS PROVIDED “AS IS” regulations. Some of the Software packaged with your WITHOUT WARRANTY OF ANY KIND. Kyocera device may be provided by third KYOCERA FURTHER DISCLAIMS ALL parties (“Third Party Software”). Third Party WARRANTIES, INCLUDING WITHOUT Software may also be available from third party LIMITATION ANY IMPLIED WARRANTIES content distributors such as application stores.
- Page 75 Consent to Use of Data: You agree that automatically terminate without notice from or Kyocera, its affiliates and its designated action by Kyocera if you fail to comply with agents may collect and use technical and any term hereof. related information, gathered in any manner, Governing Law: This Agreement is governed as part of its product support services.
-
Page 76: Index
Index abbreviated dialing, 25 alerts, 48 accessibility, 22 deleting events, 49 accessories calls headset, 26 answering, 11 hearing aid, 24 any key answer, 25 TTY device, 23 auto answer, 25 airplane Mode, 24 call answer mode, 25 alarm, 47 call barring, 26 alerts call forwarding, 25 event, 48... - Page 77 assigning pictures, 31, 42, 52 icons, 7, 20 assigning ringtones, 31 important safety information, 62 calling, 30 in case of emergency (ICE) contacts contacts list, 29 adding, 33 deleting, 32 calling, 33 dialing services, 32 emergency message, 33 editing, 31 information, 33 ICE contacts, 33 Internet, 60...
- Page 78 missed alerts, 13 text entry, 20 missed call notification, 13 volume, 19 my phone number, 20 SIM, 54 navigation shortcuts, 28 change PIN code, 54 notepad, 54 insert, 4 notification pop-up, 18 remove, 4 number prefixes, 31 lock, 54 number types, 31 PIN, 54 phone PUK, 54...
- Page 79 world clock, 54 TTY device, 23 vibrate type, 23 visibility, 57 voice guide, 22 voice memo options, 46 playing, 46 recording, 46 voice recognition adaptation, 56 audio modes, 56 finding contacts, 55 opening menus, 56 sending message, 56 settings, 22, 56 using, 55 voicemail checking, 34...
- Page 80 © 2015 Kyocera Corporation. All rights reserved. KYOCERA is a registered trademark of Kyocera Corporation. All other trademarks are the property of their respective owners. This product contains NetFront Browser of ACCESS CO., LTD. ACCESS and NetFront are trademarks or registered trademarks of ACCESS CO., LTD. in Japan and other countries.
Need help?
Do you have a question about the Rally and is the answer not in the manual?
Questions and answers