
Related Manuals for TGB Xmotion 125


Summary of Contents for TGB Xmotion 125
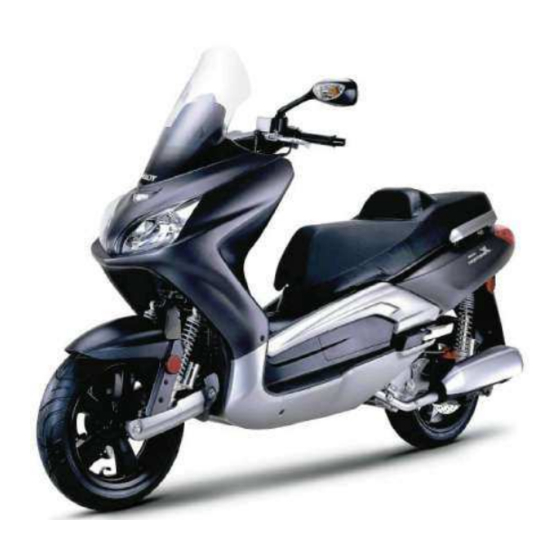
- Page 1 Xmotion 125/250 OWNER-MANUAl MAINTENANCE HANDBOOK TAIWAN GOLDEN BEE CO.,LTD. PDF created with pdfFactory Pro trial version www.pdffactory.com...
-
Page 2: Table Of Contents
TABLE OF CONTENT 1. REGULAR INSPECTION 1-1 Delivery Introduction ----------------------------------------------------- 2 1-2 Inspection Before Running --------------------------------------------- 4 1-3 Regular Maintenance Schedule -------------------------------------- 5 1-4 General Inspection -------------------------------------------------------6 1-5 Notes for Inspection ----------------------------------------------------- 7 2. MAINTENANCE INFORMATION 2-1 Specification Sheet ----------------------------------------------------- 8 2-2 Safety Precautions--------------------------------------------------------10 2-3 Special Tools -------------------------------------------------------------- 11 2-4 List of Grease &... -
Page 3: Delivery Introduction
CHAPTER I REGULAR INSPECTION 1-1 Delivery Introduction 1-4 General Inspection 1-2 Inspection Before Running 1-5 Notes for Inspection 1-3 Regular Maintenance Schedule _______________________ 1-1 Delivery Introduction To inform customers of correct methods to use: To practically and correctly ride a scooter according to the Instruction of Manual and Maintenance Handbook. - Page 4 Recommended oil : TGB Genuine EXTRA 4X OIL. B. Genuine TGB HYPOID GEAR OIL(or SAE85W-140) will be adopted as gear oil to be changed on a periodical basis. Gear oil and engine oil are different in their nature.
- Page 5 1-2 Inspection Before Running Items to be Inspected Before Running by Customers: ITEM CONTENT GUIDELINE Is the oil volume 1 .Check Oil Warning Lamp to see if the oil 1. Starter proper? volume is proper? Is the fuel volume 1 .Check fuel volume to see if it is enough 2 .Fuel sufficient? to the destination.
- Page 6 1-3 Regular Maintenance Schedule The chart below lists the recommended intervals for all the returned periodic service work necessarily to keep the motorcycle operating at peak performance and utmost efficiency. Mileages are expressed in terms of kilometers and months. These intervals judged by odometer reading or month whichever comes first.
- Page 7 *The above maintenance schedule is established by taking the monthy 1000 kilometers as areference which ever comes first. Code : I ~ Inspection, cleaning, and adjustment R ~ Replacement C ~ Cleaning(replaced if necessary) L ~ Lubrication Remark : 1. Clean or replace the air cleanr element more often whe the scooter is operated on dusty roads or in the Heavily - polluted environment.
- Page 8 Be aware of smoke and fire while performing maintenance. New Packing, Gasket, O Ring, locking pin should be used while assembling. Only designated TGB oils should be used on spare parts. Clean the vehicle before maintenance to avoid dirt or mud on disconnected parts.
-
Page 9: Maintenance Information 2-1 Specification Sheet
CHAPTER 2 MAINTENANCE INFORMATION 2-1 Specification Sheet Air Filter Paper Type CU8 (X-Motion 125) Fuel sion Length (mm) 2130 Fuel Capacity 11 L System Dimen W id t h ( mm) Carburetion Type CVK164 Height (mm) 1380 Venturi (mm) Wheelbase (mm) 1500 Front Unload... - Page 10 CUB (X-Motion 250) Air Filter Paper Type Fuel Dimension Length (mm) 2130 Fuel Capacity 11 L System Width (mm) Carburetion Type Height (mm) 1380 Venturi (mm) Wheelbase (mm) 1500 Mass Unload mass Front Rear Ignition Type E.C.U. Electric Total system Front Spark CR8E...
-
Page 11: Safety Precautions
2-2 Safety Precautions Warning: Engine Exhaust Please keep good ventilation during engine operation. Do not operate engine in closed-room. The toxic carbon-oxygen (CO) in exhaust may lead human to loss conscious and even death. Warning: Gasoline The gasoline is very easy to burn or explode. Forbid any fire during inspection of gasoline tank or gasoline leak. -
Page 12: Special Tools
2-3 Special Tools 125 ce: PDF created with pdfFactory Pro trial version www.pdffactory.com... - Page 13 PDF created with pdfFactory Pro trial version www.pdffactory.com...
- Page 14 LUOO' U0JSJ9A U(\\M \BU} P91B9J0 £1...
- Page 15 PDF created with pdfFactory Pro trial version www.pdffactory.com...
- Page 16 PDF created with pdfFactory Pro trial version www.pdffactory.com...
- Page 17 PDF created with pdfFactory Pro trial version www.pdffactory.com...
- Page 18 PDF created with pdfFactory Pro trial version www.pdffactory.com...
- Page 19 PDF created with pdfFactory Pro trial version www.pdffactory.com...
- Page 20 PDF created with pdfFactory Pro trial version www.pdffactory.com...
- Page 21 woo■ \e\j\ ojd UOJSJGA Âjopejpd...
- Page 22 ■ Ajojoewpa Nwm } OJd Âjojoejpd LUOO UOJSJGA...
- Page 23 PDF created with pdfFactory Pro trial version www.pdffactory.com...
- Page 24 PDF created with pdfFactory Pro trial version www.pdffactory.com...
-
Page 25: List Of Grease & Oil Adopted
1104 Sealing Three- TGB Gear Oil 85w-140 Bond Apply on Right Transmission Gear Oil Hand Crank Surface. for Scooters. TGB Genuine EXTRA 4X OIL Three-Bond 1322 Under Engine Oil Apply in oil tank M10 Screw (For medium fixing) for Flywheel Magneto. - Page 26 "0 *~t Wfmmk CRITICAL CHARACTERISTIC ► Ifffitt SIGNIFICANT CHARACTERISTEC —\...
- Page 27 COLOR COLOR COLOR BLACK SÎS CHOCOLATE H/51 WHITE/RED BLACK ift/ BROWN/WHITE GREEN/BLUE BLACK M/Ë BLUE/WHITE PURPLE GREEN/YELLOW BLACK/GREEN »/t ■ GREEN/BLACK BLACK /YELLOW t-> w/É YELLOW/WHITE Ë/i. WHITE/BLUE ï PINK Ë/w WHITE/YELLOW "i M/ff BLUE/RED YELLOW/BLUE SKY BLUE BLUE BROW RED/YELLOW #"...
- Page 28 "0 —ï C0L0R COLQR COLQR COLQR BLACK DEEP GREEN WHITE/GREEN WHITE/BROW É/i BLACK #î§ CHOCOLATE É/a WHITE/RED YELLOW BLACK BROWN/WHITE GREEN/YELLOW YELLOW/BLACK BLUE/WHITE .1(1 ORANGE/BLUE GREEN/BROW GREEN/YELLOVJ BLUE/ORANGE BLA CK/P URP LE GREEN/BLACK RED/ORANGE BLUE YELLOW/WHITE , 1 , 1 BLUE/GREEN ORANGE fôr...
-
Page 29: Troubleshooting
2-6 Troubleshooting Complaint Possible Reason Remedy No action for starter motor 1. Fuse breaks. 2. No power in Replace battery. 3. Defective action of brake Charging switch. 4 Short circuit of starter Replace relay. Replace No sparking or poor sparking 1. - Page 30 * Torque Values of Chassis Components * Tightening Location Specification Torque (kg-cm) Front Wheel Axle Self-lock Nut 500~600 Brake Disk Hex Bolt 180~280 Brake Clipper Tightening Bolt M 8x35 210~250 Speed Meter Cable Nut Front Fork Bearing Tightening Nut M25x1.0 600~650 Rear Wheel Axle Self-lock Nut M16x10...
- Page 31 Gearbox Cover Tightening Bolt M6x28 100~1200 M6x35 Gearbox Oil Fill Cover Screw 90~150 Gearbox Oil Drain Cover Screw M8x12 90~150 Clutch Side Cover Screw M6x40 50~80 M6x65 Starter Arm Tightening Screw M6x22 100~120 PDF created with pdfFactory Pro trial version www.pdffactory.com...
- Page 32 2-8 TROUBLESHOOTING 2-8-1 Troubleshooting for failure in starting the engine Engine does not Analysis of potential causes See page 19 start Check if the crank shaft works Does not work works Check if the starting motor works Poor (too slow) Fair Works Does not work...
- Page 33 Poor skip Fair Poor Fair Adjustment or Refer to 1- replacement of Check engine 8-2 Poor Replace the carburetor buoyant pistons, skip in original needle valve bearings and Spark starting motor others Plugs for or repair it. checking Check spark plug for cleanliness, normal gap, pollution by gasoline.
- Page 34 Check item : O No fuel O Dirty fuel filter O Obstructed ventilation tubing of th efuel tank O Poor carburector buoyant needle valve O Carburetor buoyant with impurities O Poor carburetor buoyant O No skip in spark plugs O Poor skip in spark plugs O Dirty spark plugs O Incorrect spark plugs gap O Dirty and wet spark plugs...
- Page 35 2-8-2 Troubleshooting for poor skip of spark plugs Analysis of potential causes Poor skip of spark plugs Loosen spark plugs Check for spark plug cap, ignition coil Poor spark plugs Poor high-voltage wiring Poor distributor coils Poor Loose Normal PICK Ups Poor main Load in the spark plug Replacement of new spark plug and try skip switches Wiring relay...
- Page 36 2-8-3 Troubleshooting for no-skip of spark plugs Analysis of potential causes No skip of spark plugs ----------------------------------- ► Loose spark plug cap Check for proper loading of the spark plug cap Poor spark plug Loose C.D. adapter Poor Fair Poor C.D.I. Poor PICK UP Load properly the spark Replacement spark plug and test the...
- Page 37 2-8-4 Troubleshooting for slow run (troubled engine) Analysis of potential causes Poor slow run ----------------------------------- ► Dirty spark plugs Check for contamination in spark plugs and excessive gap Incorrect spark plug gaps Fair Incorrect ignition Poor timing Cleaning and Alarming abnormality of ignition timing Obstructed air filter adjustment grill...
- Page 38 2-8-5 Poor acceleration and horse power Breakdown of potential causes Poor acceleration and horse power -------------------------- ► • Braking plate retaining braking Check for drag of braking drum by braking plate drum • Air filter grill obstructed Poor Fair • Dirty spark plugs Adjust or replace braking plate •...
- Page 39 Poor Fair Check for normal Cleaning or fluid level in the replacement buoyant Fair Poor (low level) Check the Check of needle compression valve and buoyant Check for leakage in cylinder washer; check Fair Poor cylinder, piston, piston ring for wear. Correct, Check fuel pipe Adjustment or adjustment or...
-
Page 40: Electric System
CHAPTER 3 DESCRIPTION OF COMPONENTS AND ASSEMBLY 3-1 ENGINE 3-1-1 Fuel system (For 125c.c.) 3-1-2 Fuel injection system (For 250c.c.) 3-1-3 Lubrication System 3-1-4 Cooling System 3-1-5 Spark Plug 3-2 ELECTRIC SYSTEM 3-2-1 Ignition & Charging Device 3.2-2 Lamps 3-3 BODY 3-3-1 Frame &... - Page 41 3-1 ENGINE 3-1-1 Fuel system (For 125c.c.) PDF created with pdfFactory Pro trial version www.pdffactory.com...
- Page 42 PDF created with pdfFactory Pro trial version www.pdffactory.com...
- Page 43 PDF created with pdfFactory Pro trial version www.pdffactory.com...
- Page 44 PDF created with pdfFactory Pro trial version www.pdffactory.com...
- Page 45 PDF created with pdfFactory Pro trial version www.pdffactory.com...
- Page 46 ■ Ajojo&ypa } OJd Âjojoejpd LUOO AMMI UOJSJGA 1717...
- Page 47 PDF created with pdfFactory Pro trial version www.pdffactory.com...
- Page 48 PDF created with pdfFactory Pro trial version www.pdffactory.com...
- Page 49 LUOO' U0JSJ9A U(\\M |BU} P91B9J0...
- Page 50 PDF created with pdfFactory Pro trial version www.pdffactory.com...
- Page 51 PDF created with pdfFactory Pro trial version www.pdffactory.com...
- Page 52 PDF created with pdfFactory Pro trial version www.pdffactory.com...
- Page 53 3-1-2 Fuel injection system (For 250c.c.) PDF created with pdfFactory Pro trial version www.pdffactory.com...
- Page 54 PDF created with pdfFactory Pro trial version www.pdffactory.com...
- Page 55 PDF created with pdfFactory Pro trial version www.pdffactory.com...
- Page 56 PDF created with pdfFactory Pro trial version www.pdffactory.com...
- Page 57 PDF created with pdfFactory Pro trial version www.pdffactory.com...
- Page 58 PDF created with pdfFactory Pro trial version www.pdffactory.com...
- Page 59 PDF created with pdfFactory Pro trial version www.pdffactory.com...
- Page 60 PDF created with pdfFactory Pro trial version www.pdffactory.com...
- Page 61 PDF created with pdfFactory Pro trial version www.pdffactory.com...
- Page 62 PDF created with pdfFactory Pro trial version www.pdffactory.com...
- Page 63 PDF created with pdfFactory Pro trial version www.pdffactory.com...
- Page 64 PDF created with pdfFactory Pro trial version www.pdffactory.com...
- Page 65 PDF created with pdfFactory Pro trial version www.pdffactory.com...
- Page 66 LUOO' U0JSJ9A \BU} P91B9J0...
- Page 67 PDF created with pdfFactory Pro trial version www.pdffactory.com...
- Page 68 PDF created with pdfFactory Pro trial version www.pdffactory.com...
- Page 69 PDF created with pdfFactory Pro trial version www.pdffactory.com...
- Page 70 PDF created with pdfFactory Pro trial version www.pdffactory.com...
- Page 71 PDF created with pdfFactory Pro trial version www.pdffactory.com...
- Page 72 PDF created with pdfFactory Pro trial version www.pdffactory.com...
- Page 73 PDF created with pdfFactory Pro trial version www.pdffactory.com...
- Page 74 PDF created with pdfFactory Pro trial version www.pdffactory.com...
- Page 75 PDF created with pdfFactory Pro trial version www.pdffactory.com...
- Page 76 PDF created with pdfFactory Pro trial version www.pdffactory.com...
- Page 77 PDF created with pdfFactory Pro trial version www.pdffactory.com...
- Page 78 PDF created with pdfFactory Pro trial version www.pdffactory.com...
- Page 79 PDF created with pdfFactory Pro trial version www.pdffactory.com...
- Page 80 PDF created with pdfFactory Pro trial version www.pdffactory.com...
- Page 81 PDF created with pdfFactory Pro trial version www.pdffactory.com...
- Page 82 PDF created with pdfFactory Pro trial version www.pdffactory.com...
- Page 83 PDF created with pdfFactory Pro trial version www.pdffactory.com...
- Page 84 PDF created with pdfFactory Pro trial version www.pdffactory.com...
- Page 85 PDF created with pdfFactory Pro trial version www.pdffactory.com...
- Page 86 PDF created with pdfFactory Pro trial version www.pdffactory.com...
- Page 87 PDF created with pdfFactory Pro trial version www.pdffactory.com...
- Page 88 PDF created with pdfFactory Pro trial version www.pdffactory.com...
- Page 89 PDF created with pdfFactory Pro trial version www.pdffactory.com...
- Page 90 PDF created with pdfFactory Pro trial version www.pdffactory.com...
- Page 91 PDF created with pdfFactory Pro trial version www.pdffactory.com...
- Page 92 PDF created with pdfFactory Pro trial version www.pdffactory.com...
- Page 93 PDF created with pdfFactory Pro trial version www.pdffactory.com...
- Page 94 PDF created with pdfFactory Pro trial version www.pdffactory.com...
- Page 95 PDF created with pdfFactory Pro trial version www.pdffactory.com...
- Page 96 PDF created with pdfFactory Pro trial version www.pdffactory.com...
- Page 97 PDF created with pdfFactory Pro trial version www.pdffactory.com...
- Page 98 PDF created with pdfFactory Pro trial version www.pdffactory.com...
- Page 99 PDF created with pdfFactory Pro trial version www.pdffactory.com...
- Page 100 LUOO' U0JSJ9A \BU} P91B9J0...
- Page 101 PDF created with pdfFactory Pro trial version www.pdffactory.com...
- Page 102 PDF created with pdfFactory Pro trial version www.pdffactory.com...
- Page 103 PDF created with pdfFactory Pro trial version www.pdffactory.com...
- Page 104 PDF created with pdfFactory Pro trial version www.pdffactory.com...
- Page 105 PDF created with pdfFactory Pro trial version www.pdffactory.com...
- Page 106 PDF created with pdfFactory Pro trial version www.pdffactory.com...
- Page 107 PDF created with pdfFactory Pro trial version www.pdffactory.com...
- Page 108 PDF created with pdfFactory Pro trial version www.pdffactory.com...
- Page 109 LUOO' U0JSJ9A \BU} P91B9J0 £-\,-£...
- Page 110 PDF created with pdfFactory Pro trial version www.pdffactory.com...
- Page 111 ■ Ajojo&ypa \eu] LUOO AMMI UOJSJGA...
- Page 112 PDF created with pdfFactory Pro trial version www.pdffactory.com...
- Page 113 PDF created with pdfFactory Pro trial version www.pdffactory.com...
- Page 114 PDF created with pdfFactory Pro trial version www.pdffactory.com...
- Page 115 AMMI\ U0JSJ9A U(\\M LUOO' \BU} P91B9J0 £11...
- Page 116 AMMI\ U0JSJ9A U(\\M LUOO' \BU} P91B9J0 6u||ooo p-i-...
- Page 117 ■ Ajojo&ypa } OJd Âjojoejipd LUOO AMMI UOJSJGA...
- Page 118 LUOO' AMMI\ U0JSJ9A |BU} P91B9J0...
- Page 119 PDF created with pdfFactory Pro trial version www.pdffactory.com...
- Page 120 ■ Ajojo&ypa \eu] LUOO AMMI UOJSJGA...
- Page 121 LUOO' U0JSJ9A U(\\M |BU} P91B9J0...
- Page 122 AMMI\ U0JSJ9A U(\\M LUOO' \BU} P91B9J0...
- Page 123 LUOO' U0JSJ9A \BU} P91B9J0...
- Page 124 \J(\\N\ LUOO' U0JSJ9A P91B9J0 |BU}...
- Page 125 PDF created with pdfFactory Pro trial version www.pdffactory.com...
- Page 126 PDF created with pdfFactory Pro trial version www.pdffactory.com...
- Page 127 PDF created with pdfFactory Pro trial version www.pdffactory.com...
- Page 128 3-1-5 Spark Plug Disassemble: © Spark plug cap. Note: Please blow away deposits around spark plug with blower before removing spark plug. Otherwise, the dust may drop into cylinder and it can damage engine. Inspection: Check if spark plug has carbon deposits, burned, or cracked. Use steel brush to remove carbon deposits and adjust spark plug gap.
- Page 129 B. Battery : 1. Battery Caution: 1. The electrolyte contains sulphuric acid is poisonous. avoid to contact with eye, skin and clothes. Immediately wash with abundant water and call a doctor at once in case of contact with the eyes or skin. Immediately drink beaten eggs or vegetable oil, call a doctor at once in case of drink.
- Page 130 3. THE PROCEDURE OF USING NEW BATTERY (FOR WATER-ADDING BATTERY ) 1. Use the open long plastics tube to instead of the L-Type closed rubber tube; adjacent to the " + " pole of the battery. 2. Cut off the tip of the electrolyte's bottle, and put on the open rubber tube.
- Page 131 to open inner box lid, then disconnect the battery band and take out the battery, finally take off cable. 2. Checking electrolyte, add distilled water to refill and adjust to upper level; in case of adding distilled water frequently, checking the over- charging of the battery: No voltage indicated on the terminal or no action on rectifier, means short on the battery, the voltage will higher than normal, and the life will...
- Page 132 6.Tap or drinking water contain mineral will reduce the battery's life, it must to use distilled water. (For Water- Adding battery) 7.If scooter is stay a long time, it required charged periodically, otherwise it'll fully discharged by itself above three months. 3-2-2 Lamps Head lamp: ©...
- Page 133 3-3 BODY 3-3-1 Frame & Cover 1 . Frame : A. steel pipe and steel sheet are adopted to compose reinforced frame. B. A compartment as Personal space for Helmet is set in the Frame center. 2 . Cover: 1. SEAT SET 2.
- Page 134 PDF created with pdfFactory Pro trial version www.pdffactorv.com...
- Page 135 * Dismount floor panels following the sequence shown in the list: Helmet Case. Mirror, Rear View. Carrier. Cove Handle Bar, Upper. Bottom Plate. Leg Shield Front. Front Fender. Right and Left Side Cover. Cover Set, Leg Shield Fender, Fixed, Front. Cover Handle Bar, Leg Shield Side, Under.
- Page 136 3-3-2 Compartment and Seat 1 . Compartment: A. Located in the center of scooter body, there is a Personal Space for helmet and other, etc. B. The maximum load capacity of compartment is 10kg. C. Please don't store precious or easy-to-break articles in the compartment without any protection.
- Page 137 3-3-3 Front & Rear Suspension System 1. Front- Suspension : A. No suspension on Front Fork.(For B Type) B. Brake Con-rod and Bracket of Brake Lining are equipped between Front Fork and Disc Brake. Resistant Torque occurrs toward the revolving direction when acting brake. The Torque will become the force to push Front- Fork up by using connection Rod.
-
Page 138: Removal And Inspection Of Electric Items
CHAPTER 4 . DISASSEMBLY REPAIRS 4-1 NOTICE FOR DISASSEMBLY REPAIRS 4-2 REMOVAL AND INSTALLATION OF ENGINE 4-3 REMOVAL AND INSPECTION OF ELECTRIC ITEMS 4-3-1 OPERATING CAUTIOS & TROUBLESHOOTING 4-3-2 BATTERY 4-3-3 SHORT CIRCUIT TEST 4-3-4 STARTER MOTOR 4-3-5 RESISTOR 4-3-6 CDI 4-4 REMOVAL AND INSPECTION OF BODY PARTS 4-4-1 Removal and Inspection of Front Fork and Steering 4-4-2... - Page 139 4-1 NOTICE FOR DISASSEMBLY lNSPECTION 1. In order to avoid mixing and loss of disassembled parts before reassembling, the disassembled parts have to be arranged according to their function during the process. 2. The damage to Cover and Frame should be avoided while disassembling and assembling.
- Page 140 4-2 REMOVAL AND INSTALLATION OF ENGINE Removal of Engine: © Remove Seat and Cover. © Remove Exhaust Muffler. © Remove Clamp of Air Filter and Air Filter. PDF created with pdfFactory Pro trial version www.pdffactory.com...
- Page 141 © Remove Mud Guard. © Remove Ignition Coil Lead. Flywheel Magneto Lead. Engine Earth Ground Lead. © Remove the Throttle Cable, on Carburetor Piston. © Remove Oil Hose. © Remove Negative Pressure Hose and Remove rear belt cooling duct. Remove Fuel Hose. ©...
- Page 142 ® Remove the rear-axle shaft bolts and remove rear wheel. ©Installation Install in reverse order of removal procedures. PDF created with pdfFactory Pro trial version www.pdffactory.com...
- Page 143 PDF created with pdfFactory Pro trial version www.pdffactory.com...
- Page 144 PDF created with pdfFactory Pro trial version www.pdffactory.com...
- Page 145 PDF created with pdfFactory Pro trial version www.pdffactory.com...
- Page 146 PDF created with pdfFactory Pro trial version www.pdffactory.com...
- Page 147 PDF created with pdfFactory Pro trial version www.pdffactory.com...
- Page 148 PDF created with pdfFactory Pro trial version www.pdffactory.com...
- Page 149 PDF created with pdfFactory Pro trial version www.pdffactory.com...
- Page 150 PDF created with pdfFactory Pro trial version www.pdffactory.com...
- Page 151 PDF created with pdfFactory Pro trial version www.pdffactory.com...
- Page 152 U0JSJ9A U(\\M LUOO■ |BU}...
- Page 153 PDF created with pdfFactory Pro trial version www.pdffactory.com...
- Page 154 PDF created with pdfFactory Pro trial version www.pdffactory.com...
- Page 155 PDF created with pdfFactory Pro trial version www.pdffactory.com...
- Page 156 PDF created with pdfFactory Pro trial version www.pdffactory...
- Page 157 PDF created with pdfFactory Pro trial version www.pdffactory.com...
- Page 158 PDF created with pdfFactory Pro trial version www.pdffactory.com...
- Page 159 PDF created with pdfFactory Pro trial version www.pdffactory.com...
- Page 160 PDF created with pdfFactory Pro trial version www.pdffactory.com...
- Page 161 LUOO U0JSJ9A U(\\M |BU}...
- Page 162 PDF created with pdfFactory Pro trial version www.pdffactory.com...
- Page 163 PDF created with pdfFactory Pro trial version www.pdffactory.com...
- Page 164 PDF created with pdfFactory Pro trial version www.pdffactory.com...
- Page 165 PDF created with pdfFactory Pro trial version www.pdffactory.com...
- Page 166 PDF created with pdfFactory Pro trial version www.pdffactory.com...
- Page 167 LUOO' U0JSJ9A U(\\M |BU} P91B9J0...
- Page 168 PDF created with pdfFactory Pro trial version www.pdffactory.com...
- Page 169 PDF created with pdfFactory Pro trial version www.pdffactory.com...
- Page 170 ■ Ajojoewpa OJd Âjojoejpd LUOO UOJSJGA IBUI...
- Page 171 PDF created with pdfFactory Pro trial version www.pdffactory.com...
- Page 172 PDF created with pdfFactory Pro trial version www.pdffactory.com...
- Page 173 LUOO' U0JSJ9A U(\\N\ |BU} P91B9J0...
- Page 174 PDF created with pdfFactory Pro trial version www.pdffactory.com...
- Page 175 PDF created with pdfFactory Pro trial version www.pdffactory.com...
- Page 176 PDF created with pdfFactory Pro trial version www.pdffactory.com...
- Page 177 PDF created with pdfFactory Pro trial version www.pdffactory.com...
- Page 178 LUOO' U0JSJ9A \BU} P91B9J0...
- Page 179 PDF created with pdfFactory Pro trial version www.pdffactory.com...
- Page 180 PDF created with pdfFactory Pro trial version www.pdffactory.com...
- Page 181 PDF created with pdfFactory Pro trial version www.pdffactory.com...
- Page 182 PDF created with pdfFactory Pro trial version www.pdffactory.com...
- Page 183 PDF created with pdfFactory Pro trial version www.pdffactory.com...
- Page 184 PDF created with pdfFactory Pro trial version www.pdffactory.com...
- Page 185 LUOO' U0JSJ9A |BU} P91B9J0...
- Page 186 PDF created with pdfFactory Pro trial version www.pdffactory.com...
- Page 187 PDF created with pdfFactory Pro trial version www.pdffactory.com...
- Page 188 PDF created with pdfFactory Pro trial version www.pdffactory.com...
- Page 189 PDF created with pdfFactory Pro trial version www.pdffactory.com...
- Page 190 PDF created with pdfFactory Pro trial version www.pdffactory.com...
- Page 191 PDF created with pdfFactory Pro trial version www.pdffactory.com...
- Page 192 PDF created with pdfFactory Pro trial version www.pdffactory.com...
- Page 193 CRANKSHAFT/CRANKCASE Gênerai information Crankshaft Trouble diaqnosis Assembly of crankcase Disassemblv of crankcase 1.2-1.6 kgf-m 1.0-1.5 kgf-m 1.5-3,0 kgf-m O.B-1,2 kgf-m PDF created with pdfFactory Pro trial version www.pdffactorv.com...
- Page 194 PDF created with pdfFactory Pro trial version www.pdffactory.com...
- Page 195 PDF created with pdfFactory Pro trial version www.pdffactory.com...
- Page 196 PDF created with pdfFactory Pro trial version www.pdffactory.com...
- Page 197 PDF created with pdfFactory Pro trial version www.pdffactory.com...
- Page 198 woo■ AJopB^pa ftmm UOJSJGA...
- Page 199 PDF created with pdfFactory Pro trial version www.pdffactory.com...
- Page 200 \ ojd Âjopejpd ■ NWM UOJSJGA LUOO...
- Page 201 4-3 REMOVAL AND INSPECTION OF ELECTRIC ITEMS 4- 3-1 Operating Cautions & Troubleshooting Operating Cautions: 1. Warning: a. The liquid in the battery is diluted sulfuric acid that is dangerous. If, your skin or eye unfortunately get contact with it, please wash with water abundantly and consult immediately a doctor, lest you should lose vision.
- Page 202 11 .If fresh electrolyte is poured in a new battery, a voltage will be generated after a certain lapse of time. If the voltage is not sufficient, then a recharging is necessary. A recharged new battery has necessarily a longer lifetime. 12.The C.D.I of the ignition system shall not fall swinging and be shocked.
- Page 203 Too low capacity: 1. Insufficient recharging. 2. Pole plates react with sulfuric acid. 3. Insufficient electrolyte. 4. Active matter fallen from pole plates because of excessive recharging. Inefficient recharging system: 1. Bad contact at connectors, short circuitry, or broken circuit. 2.
- Page 204 Defective spark plug. Spark plug covered by carbon. Electric leakage in ceramic part of spark plug. Electric leakage from spark plug rubber screen. 3. Defective ignition timing. a. Defective flywheel magneto. b. Defective C.D.I . Too large gap of spark plug. d.
- Page 205 4-3-2 BATTERY A. Cautions in battery inspection and generator charging. Inspection: Use gravity gauge to measure electrolyte. White is fully charged, yellow means charge is required, and red is broken or almost totally discharged. Note: Electrolyte's specific gravity and charge level comparison table (20°C). 1.280 1.250 1.220...
- Page 206 B. Connect megga meter "-" terminal to circuit negative cable. Note: User megga meter "A" current position. ■ Turn main switch to "OFF" position. Inspection: Check if there is electrical current. If no current, check the main switch and wire harness for short circuit.
- Page 207 4-3-5 RESISTOR Disassembly: Remove front windshield cover. Measure: A. Use megga meter's positive terminal to connect resistor wire. B. Connect the megga meter's negative terminal with frame ground and measure the resistance. Note: Resistor standard: 20 W 5.9 Ohm: 5.0~7.0 Ohm. 5W 5.0 Ohm: 4.0~6.0 Ohm.
- Page 208 4-4 Removal and Installation of body 4- 4-1 Removal and Installation of Seat and Cover Seat: © Remove the nuts and pin. © Seat. © Remove 6 bolts on the helmet case. © Helmet case. Note: There is a coupler under the helmet case. And remove it.
- Page 209 Front fender: © Remove the bolts on the front fender. (each side) Mud guard: © Remove the bolts on the mud guard. (each side) Installation: Install in reverse order of removal procedures. Raer leg shield: © Remove the bolts on the rearleg shield. (each side) PDF created with pdfFactory Pro trial version www.pdffactory.com...
- Page 210 Fronnt leg shield cover: © Remove the nuts and screw on the fronnt leg shield cover. © Fronnt leg shield cover. Fronnt leg shield: © Remove the bolts on the fronnt leg shield. (each side) © Fronnt leg shield. Leg shield cover set: ©...
- Page 211 Wind shield: © Remove the bolts on the wind shield. (each side) © Wind shield. Front speedometer cover: © Remove the screws on the Front speedometer cover. (each side) Speedometer cover: © Remove the screws on the speedometer cover.(each side) Installation: Install in reverse order of removal procedures.
- Page 212 4-4-2 Removal and Inspection of Front Fork & Steering CU8 & CUB 1. FORK COMP, FRONT 2. SHOCK ABSORBER ASSY 3. SUSPENSION ARM, LH. & 4. FIXED PLATE, LH. & RH. CU8-B & CUB-B 1. FORK COMP, FRONT 2. FORK COMP, FRONT LH. & 1.
- Page 213 CU8 & CUB: ® Remove upper and lower bolts on the shock absorber assy. © Shock absorber assy. © Remove the bolts on the suspension ram. © Suspension ram. CU8-B & CUB-B: © Remove the bolts on the fork comp. ©...
- Page 214 Rear wheel: Watch: Please place main stand to park the motorcycle for maintenance. Removal: © Remove 2 bolts on the caliper. © Caliper. © Remove the nut. © Rearwheel. Note: (1) Please use vacuum to clean wheel ri m and lining. Try to reduce the contamination of asbestos fiber, which may affect the human breath system or lead to cancer.
- Page 215 Inspection: Check if the shock absorber is worn, scratched, leaking, or bent. If its condition is poor, please replace with new one. Note: Torque of shock absorber upper and lower attaching bolts: 200 ~ 300 kg-cm Installation: Install in reverse order of removal procedures. PDF created with pdfFactory Pro trial version www.pdffactory.com...
-
Page 216: Brake System
4-5 Brake system: CU8 & CUB 1:MASTER CYLINDER 2:HOSE ASSY 3:CALIPER 4:PAD ASSY 5:DISC,BRAKE 6:REAR FORK ASSY created with pdfFactory Pro trial version www.pdffactory.com... - Page 217 CU8-B & CUB-B 1:MASTER CYLINDER 2:HOSE ASSY 3:CALIPER 4:PAD ASSY 5:DISC,BRAKE 6:REAR FORK ASSY PDF created with pdfFactory Pro trial version www.pdffactory.com...
- Page 218 A. Check of braking fluid level Inspection: The front brake fluid level should above "LOWER". If it is below, refill the brake fluid and check leakage of the brake system. Adding of braking fluid: • Stand the scooter at its main rest on a leveled floor. •...
- Page 219 b. Make sure the brake cam runs smoothly. c. Make sure to apply sufficient grease to the brake cam and lining anchor-pin. E. Inspection of Front Brake: a. Check the gap between the ends of front brake lever. Gap of Front Brake Lever 10 ~20 mm ___________ b.
Need help?
Do you have a question about the Xmotion 125 and is the answer not in the manual?
Questions and answers