Table of Contents
Advertisement
Advertisement
Table of Contents

Related Manuals for Chamberlain Merlin MJ3800


Summary of Contents for Chamberlain Merlin MJ3800
- Page 1 www.chamberlainanz.com MJ3800 Residential & Light Duty Commercial Door Opener Installation and Operating Instructions Owners Copy: Please keep these instructions for future reference This manual contains IMPORTANT SAFETY information DO NOT PROCEED WITH THE INSTALLATION BEFORE READING THOROUGHLY...
-
Page 2: Table Of Contents
START BY READING THESE IMPORTANT SAFETY INSTRUCTIONS WARNING • Failure to comply with the following instructions may result in serious personal injury or property damage. • Read and follow all instructions carefully. • The garage door opener is designed and tested to offer safe service provided it is installed and operated in strict accordance with the instructions in this manual. -
Page 3: Carton Inventory
CARTON INVENTORY Your door opener is packaged in one carton which contains the opener and the parts illustrated below. Note that accessories will depend on the model purchased. If anything is missing, carefully check the packing material. Hardware Inventory INSTALLATION HARDWARE Hex Screw #14-10x1-7/8"... -
Page 4: Specification
1/4", 5/16" & 3/8" Sockets Needle Nose Pliers and Wrench with 200mm Extension Adjustable End Wrench Torque Meter (not shown) Please note hardware accessories are supplied directly from Chamberlain USA, therefore Tools and Drills are often stated in imperial measures. -
Page 5: Door Requirements
DOOR REQUIREMENTS Survey the area to see if any of the conditions • Must have minimum of 203mm (8”) between the below apply to your installation. Additional side wall (or obstruction) and the end of torsion materials may be required. You may find it helpful bar. -
Page 6: Assembly
ASSEMBLY STEP 1 Attach the Collar to the Opener To prevent possible SERIOUS INJURY or DEATH, To avoid installation difficulties, do not run the door the collar MUST be properly tightened. The door opener until instructed to do so. may not reverse correctly or limits may be lost due to collar slip. -
Page 7: Installation
INSTALLATION IMPORTANT INSTALLATION INSTRUCTIONS DEATH: To reduce the risk of SEVERE INJURY or WARNING WARNING 7.NEVER wear watches, rings or loose clothing while 1. READ AND FOLLOW ALL INSTALLATION WARNINGS AND INSTRUCTIONS. nstalling or servicing opener. They could be caught in the door or opener mechanisms. 2. - Page 8 INSTALLATION STEP 2 Attach the Emergency Release Rope and Handle To prevent possible SERIOUS INJURY or DEATH from a falling door: • Thread one end of the rope through the hole in • If possible, use emergency release handle to the top of the red handle so “NOTICE”...
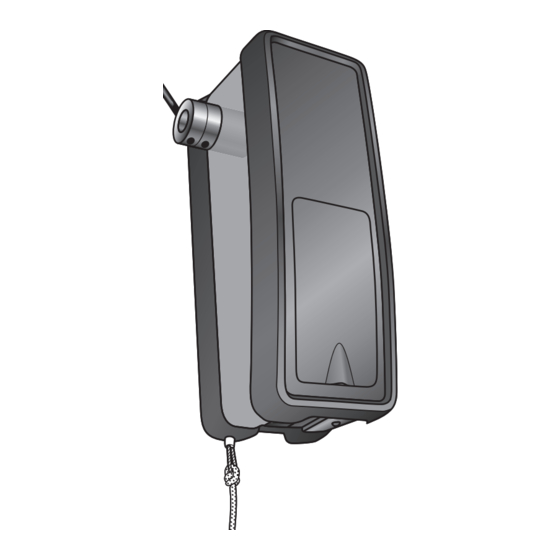
- Page 9 INSTALLATION STEP 4 Figure 1 Attach the Cable Tension Monitor (Required) Your MJ3800 is supplied with a cable tension monitor. This safety device is supplied to monitor the cable for Opener ANY slack that may occur and will reverse the door Torsion Bar when excessive slack is detected, eliminating service calls.
-
Page 10: Connect Electric Power
CONNECT ELECTRIC POWER To prevent possible SERIOUS INJURY or DEATH from TO AVOID INSTALLATION DIFFICULTIES, DO NOT RUN electrocution or fire: THE GARAGE DOOR OPENER UNTIL INSTRUCTED TO DO SO. • Be sure power is not connected to the opener, and disconnect power to circuit BEFORE removing cover. -
Page 11: System
INSTALLATION STEP 8 Install The Protector System Be sure power is not connected to the door opener BEFORE installing the safety reversing sensor. When installed thesafety reversing sensor must be To prevent SERIOUS INJURY or DEATH from a closing connected and aligned correctly before the door door: opener will move in the down direction. - Page 12 TROUBLESHOOTING THE SAFETY MOUNTING AND WIRING THE SAFETY REVERSING SENSORS REVERSING SENSORS 1. If the sending eye indicator LEDs are both flashing • Run the wires from both safety reversing sensors to the after installation, check for: opener. Use insulated staples to secure wire to wall and ceiling.
-
Page 13: Multi-Function Door Control
USING THE MULTI-FUNCTION DOOR AUTOMATIC CLOSE TIMER FUNCTION CONTROL Note: Requires the Chamberlain Protector System THE MULTI-FUNCTION DOOR CONTROL (IR- sensors) to be installed. If Protector System (IR- Actuator Press the push bar to sensors) is installed only to enable the timer to close... - Page 14 ADJUSTMENT STEP 1 Program the Travel Limits Without a properly installed safety reversal Travel limits regulate the points at which the door will system, persons (particularly children) could be stop when moving up or down. Follow the steps below SERIOUSLY INJURED or KILLED by a closing to set the limits.
- Page 15 ADJUSTMENT STEP 2 Figure 1 Figure 2 Setting the Force Indicator The force setting button is located on the front panel. Black Light The force setting measures the amount of force Button BLACK required to open and close the door. Push Orange button twice to enter 1.
-
Page 16: Adjustment
ADJUSTMENT STEP 5 Test the Safety Reversal System Without a properly installed safety reversal TEST system, persons (particularly children) could be SERIOUSLY INJURED or KILLED by a closing the • With the door fully open, place a 40mm (1 1/2”) door. - Page 17 OPERATION IMPORTANT SAFETY INSTRUCTIONS To reduce the risk of SEVERE INJURY or DEATH: WARNING WARNING 1. READ AND FOLLOW ALL WARNINGS AND reversal system MUST be tested. INSTRUCTIONS. 9. Safety reversal system MUST be tested every 2. ALWAYS keep transmitters out of reach of children. month.
-
Page 18: Wireless Programming
WIRELESS PROGRAMMING Your door opener has already been programmed at the factory to operate with your hand-held transmitter. The door will open and close when you press the large centre button. Below are instructions for programming your opener to operate with additional Security transmitters. - Page 19 TO ADD, REPROGRAM OR CHANGE A KEYLESS ENTRY PIN USING THE “LEARN” BUTTON 1. Press and release the orange “learn” button on opener. The learn indicator LED will glow steadily for 30 seconds. 2. Within 30 seconds, enter a four digit personal identification number (PIN) of your choice on the keypad.
-
Page 20: Repair Parts
REPAIR PARTS Installation Parts PART DESCRIPTION 041A4582 Emergency release rope & handle ™ assembly 041A6102-1 Electric powered door lock 041B4494-1 2-Conductor bell wire - white & CM128 Wireless wall button white/red Protector system (IR Beams) 041A6104-1 Cable tension monitor 041A6388 Collar with set screws 041C0902 Mounting bracket... -
Page 21: Diagnostic Chart
Unplug to reset. • If it is still flashing 5 times and opener moves 150-200mm (6-8"), the unit’s APE (Absolute Positioning Encoder) may need to be replaced, for details contact your Chamberlain reseller. 9 FLASHES Symptom: Door reverses while closing. -
Page 22: Troubleshooting
15. Power lock makes noise when operating. repair the door. • Call your local Merlin ® dealer or Chamberlain customer 7. The door opens but won't close: service for replacement power lock. • Check cable tension monitor (see installation step 4). -
Page 23: Care Of Your Opener
OPERATION OF YOUR OPENER Using your C945 3ch Mini-Transmitter Your merlin Security opener and hand-held ® transmitter have been factory-set to a matching code which changes with each use, randomly accessing over 100 billion new codes. Your opener will operate with up to 64 merlin Security ®... -
Page 24: Warranty
Zealand Limited (Seller) warrants to the original purchaser of arising from breach of law or contract or for negligence, the Merlin MJ3800 Garage Door Opener (Unit) that it is free exceed the cost of repairing or replacing the Unit or from defects in material and/or workmanship for a period of 2 refunding the purchase price of the Unit.
Need help?
Do you have a question about the Merlin MJ3800 and is the answer not in the manual?
Questions and answers