Advertisement
The safety of this product
and the materials
used for its production is guaranteed and certified in test labora-
tories according to EN standards.
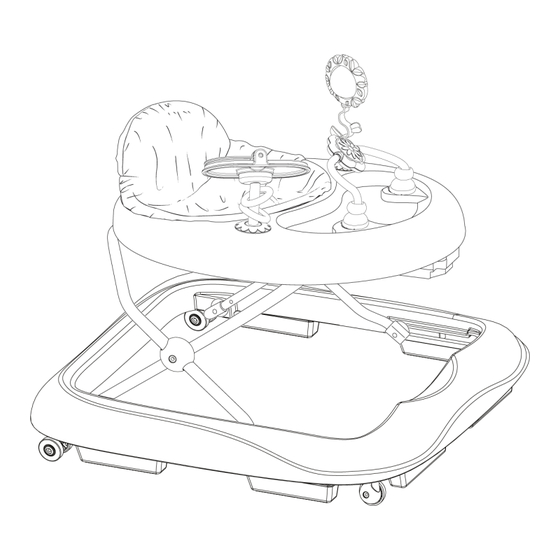
INSTRUCTION MANUAL FOR USE
OF BABY WALKER "FLOWER"
PLEASE, READ CAREFULLY THESE INSTRUCTIONS AND KEEP
THEM IN A SAFE PLACE FOR FUTURE REFERENCE! THIS
MANUAL CONTAINS IMPORTANT INFORMATION FOR THE SAFE
USE OF THIS WALKER!
Advertisement
Table of Contents

Related Manuals for Chipolino FLOWER


Summary of Contents for Chipolino FLOWER
- Page 1 EN standards. INSTRUCTION MANUAL FOR USE OF BABY WALKER “FLOWER” PLEASE, READ CAREFULLY THESE INSTRUCTIONS AND KEEP THEM IN A SAFE PLACE FOR FUTURE REFERENCE! THIS...
- Page 2 This baby walker aids children, who can not walk alone by themselves, to make their first steps! This baby walker is suitable for children, who can sit unaided, aged approximately 6 months and up, weighing not more than 12 kg. It is equipped with a toy mounted on the walker tray that amuses the child.
- Page 3 9. Do not place items with strings around your child's neck such as hood strings or pacifier cords, in order to prevent strangulation! 10. Use the baby walker only at home on flat surfaces without slope or objects that can tip it over.
- Page 4 ASSEMBLY INSTRUCTIONS, FOLD ING AND UNFOLDING THE WALKER This baby walker is supplied partially assembled. To complete the assembly you do not need any tools. Follow exactly the instructions and follow the figures. Usually, each assembly operation is supported by a clicking sound. IMPORTANT! After each operation, make sure that you have performed it correctly and the fixing is stable.
- Page 5 ASSEMBLY INSTRUCTIONS. FUNCTIONS Universal Wheel Directional Wheel fig. 2 fig. 3 fig. 4 1. Reverse the bottom base and insert the lever from the bottom side hole. Then move upper tray backward to embed the other lever from and “8” shaped hole in the rear bottom base and press down - fig.
- Page 6 fig. 7 fig. 8 6. Locate the bead chaser. Lower each end of the toy into the sockets at the front of the tray, aligning the base with the notch in the side of socket. Push down until the toy clicks into place (fig.
-
Page 7: Care And Maintenance
CARE AND MAINTENANCE 1. This product requires regular maintenance. If you take care of your product you will prolong its life. 2. Regularly check your locking mechanisms, the safety belt, joints, fixing mechanisms, in order to be sure that they are in good working order. 3. - Page 8 1 Golyamo konarsko shosse Str., Plovdiv, BULGARIA ww.chipolino.com...
Need help?
Do you have a question about the FLOWER and is the answer not in the manual?
Questions and answers