STIEBEL ELTRON DHB-E 11 SLi electronic Operating And Installation
Electronically controlled instantaneous water heater
Hide thumbs
Also See for DHB-E 11 SLi electronic:
- Operating and installation (148 pages) ,
- Operating and installation manual (104 pages) ,
- Operation and installation (18 pages)
Table of Contents
Advertisement
Advertisement
Table of Contents
Troubleshooting

Related Manuals for STIEBEL ELTRON DHB-E 11 SLi electronic


Summary of Contents for STIEBEL ELTRON DHB-E 11 SLi electronic
- Page 1 Operating and installatiOn electronically controlled instantaneous water heater » dHB-e 11 sli electronic » dHB-e 13 sli electronic » dHB-e 18 sli 25 a electronic » dHB-e 18/21/24 sli electronic » dHB-e 27 sli electronic » dHB-e 13 a electronic...
-
Page 2: Table Of Contents
COntents | OperatiOn general information OperatiOn OperatiOn General information �����������������������������������������2 Safety instructions ����������������������������������������������� 2 Other symbols in this documentation ����������������������� 3 Units of measurement ������������������������������������������ 3 1. General information Safety � ���������������������������������������������������������3 The chapter “Operation” is intended for appliance users and Correct use �������������������������������������������������������� 3 heating contractors. -
Page 3: Operation
OperatiOn safety 2. Safety 1.2 Other symbols in this documentation Note 2.1 correct use General information is identified by the symbol shown The appliance is a pressure appliance for heating domestic hot on the left. water. f Read these texts carefully. Any other use beyond that described shall be deemed inappropriate. Observation of these instructions is also part of the correct use of symbol Meaning... -
Page 4: Appliance Description
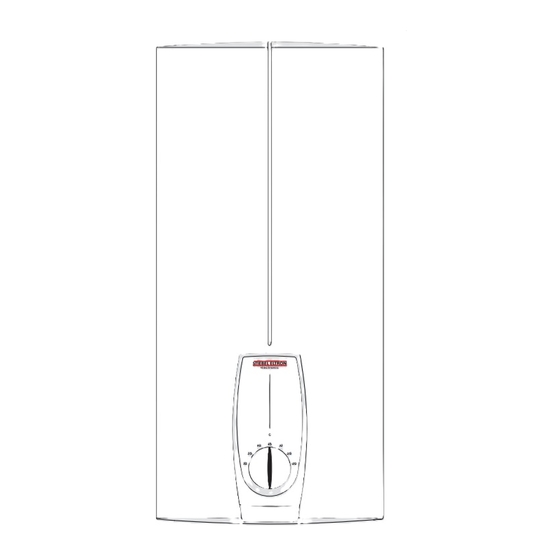
OperatiOn appliance description 3. appliance description 5. cleaning, care and maintenance f Never use abrasive or corrosive cleaning agents. A damp This electronically controlled instantaneous water heater with cloth is sufficient for cleaning the appliance. automatic output matching keeps the outlet temperature constant. This occurs regardless of the inlet temperature up to the output Maintenance work, such as checking the electrical safety, must limit. -
Page 5: Safety
installatiOn safety installatiOn 7.3 Water installation 7.3.1 cold water line Permissible materials: Galvanised steel pipe, stainless steel pipe, 7. Safety copper pipe or plastic pipe. 7.3.2 dHW line 7.1 General safety instructions Permissible materials: Stainless steel pipe, copper pipe or plastic All required steps to complete commissioning must be carried pipe. -
Page 6: Appliance Description
installatiOn appliance description 8. appliance description CAUTION Burns If operating with preheated water, the set temperature The bare wire heating system is suitable for hard and soft water limit and anti-scalding protection may be ineffective. areas. The heater has low susceptibility to scale build-up. f In this case, restrict the temperature at the The appliance is suitable for heating cold water or for reheating upstream central thermostatic valve;... -
Page 7: Installation
installatiOn installation pipe set, offset installation 9.1.3 appliance with changeover connected load This pipe set with pipe bends is required if you want to have the The appliance DHB-E 18/21/24 SLi is set to 21 kW when delivered. appliance vertically offset against the water connection by approx. If the appliance is installed with a different output, take the 90 mm downwards. -
Page 8: Installation
installatiOn installation 10.1.2 Oversink 10.2.4 Fitting the power cable 1 Cold water inlet 2 DHW outlet f Prepare the power cable. 10.2 installation f Use the plastic cap as an installation aid. 10.2.1 Opening the appliance 10.2.5 inserting the twin nipples 10.2.6 preparing the water connection f Secure the tee and cross-piece to the twin nipples with flat packing. - Page 9 installatiOn installation 10.2.7 Fitting the sieve f Fit the sieve provided in the cold water inlet of the appliance. Note The sieve must always be fitted for the function of the appliance to be guaranteed. If an appliance is being replaced during installation, ensure that a sieve is available.
-
Page 10: Installation Versions
installatiOn installation 10.2.12 F itting the lower back panel 10.2.13 c ompleting the installation process f Align the mounted appliance by loosening the fixing 10.3.2 power supply for finished walls toggle, aligning the power supply and back panel, and then retightening the fixing toggle. If the back panel of the The appliance can also be connected if the power supply has been appliance is not flush against the wall, the appliance can be routed over finished walls. - Page 11 Fit the water plugs with gaskets to seal the connection tabs if the tap pipes are slightly offset. The back panel (below the plaster). With Stiebel Eltron pressure taps, plugs guides are not required in this case. and gaskets are part of the standard delivery. For third party pressure taps, plugs and gaskets can be ordered as special f Click the cap guides provided into place in the knock-outs.
- Page 12 installatiOn installation 10.3.10 U ndersink installation with turned appliance cap The appliance cap can be positioned on the back panel turned through 180°. This particularly advantageous for undersink installation. For this take the following steps: f Remove the user interface from the appliance cap by pressing the locking hooks.
-
Page 13: Commissioning
installatiOn Commissioning f Calibrate the temperature by turning the temperature 10.3.11 i nstallation for offset tiles selector as far as possible clockwise and then anti-clockwise. This appliance can be installed where tiles are offset. See f Check the appliance function. diagram for maximum tile offset and minimum contact area of f Remove the protective foil from the user interface. -
Page 14: Troubleshooting
installatiOn troubleshooting 13. troubleshooting WARNING Risk of electrocution To test the appliance, it must be supplied with power. 13.1 display options Led diagnostic "traffic lights" display options illuminates in case of faults yellow illuminates when the appliance is heating water green flashing: The appliance is supplied with power 13.2 Fault table Fault / led diagnostic "traffic light"... -
Page 15: Specification
installatiOn specification 14. Specification 14.3 mixed water volume / outlet volume available temperature approx. 38 °c in the shower, for hand 14.1 dimensioned drawing washing, filling the bath etc. ≤ 20 Mixed water volume Appliance Cold water inlet 6 °C l/min 10.7 12.1 temperature 10 °C l/min 10.7 12.3 13.8 14 °C l/min 10.7 12.5 14.5 16.1 Outlet temperature approx. 60 °c for the kitchen sink and when using thermostatic valves. Outlet volume Appliance Cold water inlet... -
Page 16: Specification
installatiOn specification 14.7.1 notice for australia / new Zealand: The installation shall comply with AS/NZS 3500.4. 14.8 Specification dHB-e 11 sli dHB-e 13 sli dHB-e 13 a dHB-e 18 sli 25a dHB-e 18/21/24 sli dHB-e 27 sli 232013 232014 232360 232015 232016 232017 Electrical details Rated voltage 1 Rated output 1 10.1... -
Page 17: Environment And Recycling
WarrantY | envirOnMent and reCYCling Warranty The warranty conditions of our German companies do not apply to appliances acquired outside of Germany. In countries where our subsidiaries sell our products, it is increasingly the case that warranties can only be issued by those subsidiaries. Such warranties are only granted if the subsidiary has issued its own terms of warranty. - Page 18 nOtes | dHB-e sli | a electronic www.stiebel-eltron.com...
- Page 19 nOtes WWW.stiebel-eltron.com dHB-e sli | a electronic |...
- Page 20 Deutschland Verkauf Tel. 05531 702-110 | Fax 05531 702-95108 | info-center@stiebel-eltron.de STIEBEL ELTRON GmbH & Co. KG Kundendienst Tel. 05531 702-90015 | Fax 05531 702-95890 | kundendienst@stiebel-eltron.de Dr.-Stiebel-Straße | 37603 Holzminden Ersatzteilverkauf Tel. 05531 702-90050 | Fax 05531 702-95335 | ersatzteile@stiebel-eltron.de Tel.
Need help?
Do you have a question about the DHB-E 11 SLi electronic and is the answer not in the manual?
Questions and answers