
Related Manuals for Shoprider UL8-W12 COMO


Summary of Contents for Shoprider UL8-W12 COMO
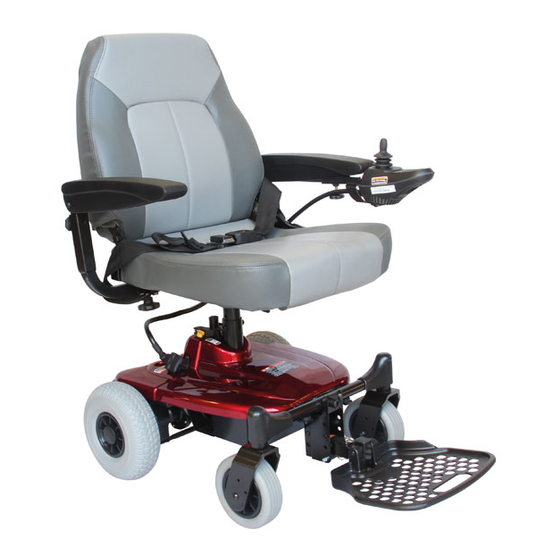
- Page 1 MEDICAL POWER WHEELCHAIR Owner’s Manual ATTENTION Please read your owner’s manual before driving your power wheelchair. UL8-W12 COMO...
-
Page 2: Table Of Contents
CONTENTS INTRODUCTION page 3 FEATURE GUIDE page 3 EMI WARNING page 4 – 5 SAFETY INSTRUCTIONS page 6 – 7 PREPARATION FOR USE page 8 PROGRAMMABLE CONTROLLER page 8 ADJUSTMENT PROCEDUERS page 9 – 10 OPERATION INSTRUCTIONS page 11 – 12 DISASSEMBLY &... -
Page 3: Introduction
INTRODUCTION Congratulations on receiving the Shoprider Powerchair. This Powerchair is the ultimate combination of style and comfort. The short wheelbase allows easy maneuverability within the smallest spaces both indoors and outdoors. The rear drive wheels and electromagnetic brakes provide a safe and comfortable ride. -
Page 4: Emi Warning
EMI WARNING ELECTROMAGNETIC INTERFERENCE (EMI) FROM RADIO WAVE SOURCES Medical Power Wheelchairs (Hereinafter referred to as “Powerchair”) may be susceptible to electromagnetic interference (EMI), which is a kind of interfering electromagnetic energy (EM) emitted from sources such as radio stations, TV stations, amateur radio (HAM) transmitters, two-way radio, and cellular phones. - Page 5 EMI WARNING POWERCHAIR ELECTROMAGNETIC INTERFERENCE (EMI) Because EM energy rapidly becomes more intense as one moves closer to the transmitting antenna (source), the EM fields from hand-held radio sources (transceivers) are of special concern. It is possible to unintentionally bring high levels of EM energy very close to the Powerchair’s control system while using these devices.
-
Page 6: Safety Instructions
SAFETY INSTRUCTIONS Please use your Powerchair often and let it expand your horizons. The more mobility your Powerchair brings, the happier you will be! But, with all things, observing a few rules will ensure safe maneuvering. So please… (1) Do not drive the Powerchair without reading this instruction manual. (2) Do not use the joystick in an erratic manner when going up or down an incline. - Page 7 (31) Always use low speed on downhill. (32) Do not operate over railway tracks. (33) Ensure the powerchair is serviced by an authorised Shoprider dealer every 12 months to ensure it remains in safe working order failure to do so may cause catastrophic failure with possible injury and damage to surrounding property Remember! Give consideration to pedestrians whenever using the Powerchair.
-
Page 8: Programmable Controller
NOTE! Before using the Powerchair for the first time, be sure the batteries have been connected. Charge the Powerchair for at least 6-8 hours prior to first time use. PROGRAMMABLE CONTROLLER Shoprider Powerchair has a programmable controller. For more information regarding the programming parameters for the programmable Powerchair controller please contact your provider. -
Page 9: Adjustment Proceduers
ADJUSTMENT PROCEDURES ARM ADJUSTMENTS (Fig.2) ANGLE Pull up on the end of the armrests and they will flip back up allowing easy transfer in and out of the seat. Under the armrest, there is a bolt and lock nut (1) that can be adjusted up or down to change the angle of the armrest. - Page 10 ADJUSTMENT PROCEDURES JOYSTICK CONVERSION (right to left or left to right) Loosen the hand knob [Fig.2 (3)] and remove the entire armrest assembly with the joystick attached. Place the armrest assembly on the desired side. Reset in position by re-tightening the hand knobs to complete joystick conversion. SEAT HEIGHT ADJUSTMENTS (Fig.4) Disconnect the power cord coming from the joystick/controller at the back of the Powerchair by pressing on the latch with your left hand and firmly pulling the cable...
-
Page 11: Operation Instructions
OPERATION INSTRUCTIONS JOYSTICK CONTROLLER (nVSI) OVERVIEW (Fig. 5) Fig. 5 On / Off Button (1) This button turns the joystick controller (hereinafter referred to as nVSI) on and off. Do not use this button to stop the Powerchair, except in an emergency. Battery Gauge (2) The battery gauge shows you that the Powerchair is switched on. - Page 12 OPERATION INSTRUCTIONS GETTING READY TO DRIVE STEP 1 Press the On / Off Button, then the joystick will turn on after the Battery Gauge blinks for about a second. STEP 2 Press the Speed Increase / Decrease Button to set up a suitable level that you can maneuver the Powerchair easily.
-
Page 13: Disassembly & Assembly Instruction
DISASSEMBLY & ASSEMBLY INSTRUCTIONS DISASSEMBLY PROCEDURES (Fig. 7) WARNING! We advise caution when disassembling and lifting items. You must ensure that the person undertaking these actions is able to handle the weight. STEP 1 Ensure that the area in which the Powerchair is to be dismantled is spacious enough to accommodate all the components. -
Page 14: Extra Guidelines In The Control Of Your Powerchair
EXTRA GUIDELINES IN THE CONTROL OF YOUR POWERCHAIR Ramps The stability of your Powerchair is governed by several factors such as the seating position, the angle of the slope and your height and weight. When approaching an incline, do so directly and not at an angle and where ever possible avoid making turns. -
Page 15: Batteries & Battery Charging
BATTERIES & BATTERY CHARGING BATTERY CHARGING (UNITS EQUIPPED WITH OFF-BOARD CHARGER) Familiarise yourself with the safety information below prior to using the battery charger. SAFETY INFORMATION 1. Read the battery charger instructions in this manual and in the manual supplied with the charger prior to charging the batteries. 2. - Page 16 BATTERIES & BATTERY CHARGING CHARGING INSTRUCTIONS 1. Connect the charger to the charging port at the front of the nVSI joystick (item 8 in Fig. 5) "Ensure it is Not turned on" 2. Plug the charger into the wall outlet. Now Turn it On at the wall 3.
-
Page 17: Maintenance
General Maintenance and Lubrication Ensure the powerchair is serviced by an authorised Shoprider dealer every 12 months to ensure it remains in safe working order failure to do so may cause catastrophic failure with possible injury and damage to surrounding property ... -
Page 18: Trouble Shooting
TROUBLE SHOOTING If a system trip occurs, you can find out what has happened by counting the number of flashes of the battery gauge. Below is a list of self-help actions. Try to use this list before you contact your provider. Go to the number in the list which matches the number of flashes of the battery gauge and follow the instructions. - Page 19 TROUBLE SHOOTING LOCKING / UNLOCKING THE POWERCHAIR The nVSI controller can be locked to prevent unauthorised use. The locking method is via a sequence of key presses and joystick movements, as detailed below. To lock the Powerchair: While the controller is switched on, depress and hold the on/off button. ...
-
Page 20: Warranty Terms & Conditions
(3) years from the date of purchase by the original customer. Shoprider Australia will repair or replace, at our option free of charge any part found on examination by Shoprider Australia to be defective in material and or workmanship within the warranty period. - Page 21 NOTE: In the event of a warranty issue, Always contact your selling Shoprider® dealer who will arrange any work and return any faulty parts. Parts will be assessed and replaced within 3-5 working days.
-
Page 22: Specification
Charger Type Off Board 24V, 2A ® All specifications are subject to change without prior notice. SHOPRIDER reserves the rights of any changes on the unit. 1. Includes the anti-tip wheel. 2. Driver weight may exceed weight of the unit, so speed must be reduced when turning. -
Page 23: Disclaimer
ATTENTION: This owner's manual is printed based on the latest specifications and product information available at the time of publication. SHOPRIDER® reserves the right to make changes as they become necessary. Any changes to the SHOPRIDER® range may cause slight variations between the illustrations and explanations in this manual and the scooter model that was purchased. - Page 24 ~24~...
Need help?
Do you have a question about the UL8-W12 COMO and is the answer not in the manual?
Questions and answers