Table of Contents
Advertisement
Quick Links
Advertisement
Table of Contents

Subscribe to Our Youtube Channel
Related Manuals for BenQ T80


Summary of Contents for BenQ T80
- Page 1 Smartphone User Manual...
-
Page 3: Table Of Contents
Table of contents Safety precautions ......7 dictionary ........22 T9 settings ........22 Phone Overview ......10 Entering symbols and special Front view .........10 characters ........23 Description of indicator ....12 My Text ..........23 Rear view ..........12 Inserting My Text ......23 Startup .......... - Page 4 Table of contents Slider setting ........29 Messages .......... 37 Windows update ......29 Messaging ........37 Text Messages ......... 37 Calling ..........29 MMS ..........38 Making a call ........29 E-mail ..........39 Dialling with number keys ..... 29 Setting up an e-mail account ..39 Dialling previous numbers ....
-
Page 5: Table Of Contents
Table of contents STK ............50 Calculator ........57 2D barcode ........58 Organizer ........50 Adding contacts using 2D barcode 58 Alarm Clock ........50 Java™ ..........58 Calendar ...........50 Audio Notes ........50 Connectivity ........60 Tasks ..........51 Beam ..........60 Bluetooth®... - Page 6 Table of contents License Agreement ......76...
-
Page 7: Safety Precautions
Safety precautions Safety precautions Information for parents Please read the operating instructions and safety precautions carefully before use. Explain the content to your children and the hazards associated with using the phone. Remember to comply with legal Permanent hearing loss may requirements and local occur if you use ear- or restrictions when using the... - Page 8 Safety precautions You may only open the phone to Use only original accessories. replace the battery and SIM card. This will avoid potential risks to You must not open the battery health or property and ensure under any circumstances. All compliance with all relevant other changes to this device are regulations.
- Page 9 Safety precautions Bluetooth® technology default name is "BenQ T80". The first time Bluetooth function is activated, or later in the Bluetooth menu, you can change this name. See Page 62. • If Bluetooth function is not needed, this function should be deactivated.
-
Page 10: Phone Overview
Phone Overview Phone Overview Send key (Call key) • Press to pick up incoming calls. • Press to bring up the Dial screen and Front view the call records. • Press to make a call after dialling. • Press to hold/unhold the call. Power on/off/End key •... - Page 11 Phone Overview Voicemail In Home screen, press and hold to access voicemail. Number keys Asterisk key • Press to enter an asterisk (“*”). • Press and hold this key and then press (Yes) to activate the keypad lock. • Press to change input methods for text input.
-
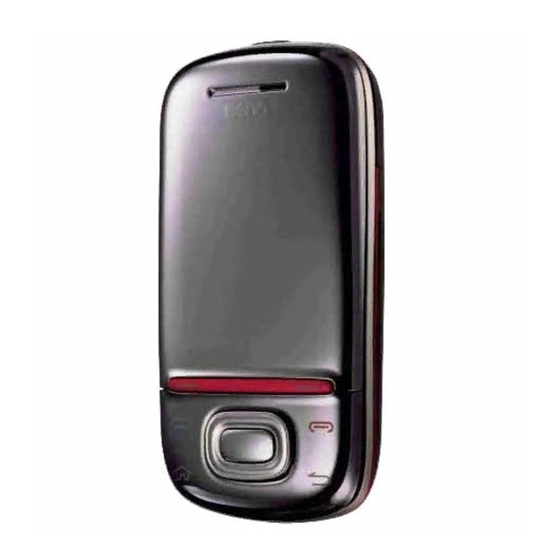
Page 12: Description Of Indicator
Phone Overview Description of indicator Rear view Power indicator Flash Indicates that there are new missed call(s), or the battery power is low (also indicated by the appearance of certain icons on the title bar). Charging in progress. Camera lens Green Charging is complete. -
Page 13: Startup
Startup Startup cut corner at the down right as illustrated. Removing the back cover Use a thin object, such as your fingernail, to press in at the groove beside the microSD card holder and then lift the cover off the phone. Inserting the battery 1. -
Page 14: Removing The Battery
Startup Removing the battery Charging the battery The battery is not fully charged when Switch off your phone before removing first unpacked and should be used up the battery. completely before charging the battery 1. Press upward against the battery on for the first time. -
Page 15: Microsd Card
Startup Charging is in progress. • Your phone can support a microSD card with capacity up to 2GB. • Your phone supports a microSD card Charging is complete. using FAT32 file system only. • You are strongly recommended to transfer and store the newly added Invalid battery. -
Page 16: Switching The Phone On/Off
You need this 2. Wait for the phone to boot up with password in order to use the SIM card. the BenQ screen. This may take a moment. When the PIN code entered has been accepted, the phone will automatically 3. -
Page 17: Signal Strength
Startup Or you can set the time information Quick list later while synchronising your phone Quick List provides quick access to with a PC. manage the phone status and switch 5. Press (Next) to enter a between different profiles. password if you want to protect When the slider is open, press and hold access to your data and available Quick... -
Page 18: Master Reset
• In this user manual, the steps needed to • Press and hold to switch the reach a function refer to the Main menu phone off. BenQ list style and are shown in Start condensed form, for example: > • Press and hold... -
Page 19: Home Screen
You will enter Home screen after you screen. have completed the first-time startup Default BenQ Home screen: procedure. You can use Home screen to view the following information: • Date and time • Name of network operator •... -
Page 20: Home Screen Icons
Flash display Alarm set Flash animations as your screen Silent profile active display available only when you select BenQ HomeScreen to be your Home Vibrate profile active Screen layout. See "Presentation Style" technology active on page 24 for details. Wi-Fi active... -
Page 21: Input Methods
Input methods Changing input methods Available icons may vary depending on the style of the home screen you are using, the program you are running and the • Press repeatedly to select an service available in your area. For input method available in the same example, a "G"... -
Page 22: Text Input With T9
Input methods Text input with T9 yet included in the T9 dictionary. You can add the word to the dictionary. predicts the most probable word Add Word 1. Select at the end of the list from a sequence of keys you press. of word suggestions. -
Page 23: Entering Symbols And Special Characters
Phone settings My Text T9® Text Input is licensed under one or more of the following: U.S. Pat. Nos. My Text refers to short excerpts of texts 5,187,480, 5,818,437, 5,945,928, to be inserted in your SMS or MMS 5,953,541, 6,011,554, 6,286,064, messages. -
Page 24: Phone
Phone settings Phone phone's operations to best suit the environment you are in. You can change settings like auto answer, auto power on/off, auto SMS You can press and hold reply, call barring, call forwarding, activate/deactivate Vibrate profile in related call options, call waiting, caller Home screen quickly. -
Page 25: Clock & Alarm
Keep these confidential numbers in a Color Scheme/Background image • safe place where you can access them not available when you select BenQ again if required. HomeScreen as your Home screen layout. Device Protect your phone from Launch bar •... -
Page 26: Device Lock
Phone settings Disable/Enable SIM PIN. 1. Select (Personal Unblocking Key) Used to unlock SIM cards 2. Enter PIN and confirm with after the wrong PIN has (Done). been entered three Change SIM PIN consecutive times. You can change the PIN to any 4- to 8- Device Lock digit number you find easier to This option lets you enable a password... -
Page 27: Private Contact
Phone settings Private Contact 2. Follow the on-screen instructions to complete uninstallation. Entry of the private password (default: • You can only remove programs you 0123) is required to access Private have installed on the storage memory. Contact. • Programs that came pre-installed on Check to activate Private Mode, protect your phone cannot be removed. -
Page 28: Regional Settings
Phone settings Regional Settings Customer Feedback This option lets you choose a language Enable this option to join the Microsoft for the operating system, and customise Customer Experience Improvement how data appears on your smartphone, Program by sending your feedback to such as currency, time, dates and Microsoft. -
Page 29: Slider Setting
Calling device to pay ticket fare or to add value 3. Press to it. Entering international dialling codes: Press and hold until “+” is Slider setting displayed. Enter country and area codes This option provides further settings then. about the use of the slider. You can also Slider Key Lock Making a call from Contacts set the... -
Page 30: Dialling Using Speech Commander
Calling 5. Press (Done) to save and exit. depending on how you saved these numbers. The numbers you can use for speed dial Digit Dial/Redial/Callback: say the • assignment are 2 to 99. The first speed number to dial. dial entry assigned for voicemail. -
Page 31: Rejecting A Call
Calling Rejecting a call 5. If you want to speak to more people, repeat steps 3 and 4. Press (Ignore) to reject an incoming call. Making an emergency call (SOS) Muting a call You can make an emergency call even if Press to mute an your phone is locked or cannot access... -
Page 32: Talking With The Handsfree Headset
Using the programs Talking with the handsfree Using the programs headset Many of the programs require network connectivity. Make sure that the phone You can put the phone aside during a connectivity is configured properly call and hear the caller via the headset. before you activate these programs. - Page 33 Using the programs Icon Description Where Icon Description Where to find to find Messages Solitaire Page A pre-installed game. Messaging Page Send and receive e-mail, Internet Radio Page SMS, MMS messages. Access to internet radio stations. Page An instant messaging Internet application that combines Internet Explorer...
-
Page 34: Phone
Phone Icon Description Where Icon Description Where to find to find System Master Reset Page Delete all data on the phone Settings Page and restore it to the factory Set up custom settings for settings. your phone. Extras Task Manager Page Calculator Page... -
Page 35: Adding New Contacts
Phone Send Send an MMS to the • shows beside the contacts stored contact person. in your phone memory; • shows beside the contacts stored Delete Delete the contact. on your SIM card. Contact • shows beside your Windows Messenger contacts synchronised to the Block Block the contact. -
Page 36: Call History
Phone Speed Dial Privatize Contact is available only when Private Mode is activated. See "Private Start Phone Speed Dial > > Contact" on page 27 for details. You can assign one important number/function to a single or double- Call History digit number from 2 to 99. -
Page 37: Voice Mail
Messages Voice Mail 2. Press to switch to different Start Phone Voice Mail > > fields and then enter text/add items Select to access your voicemail. You can (see SMS options). Add Recipient Menu 3. Press to select also enter it by speed-dialling . -
Page 38: Mms
Messages Add/ Select a contact person Contacts Remove from list. The Multimedia Message Service Recipient (MMS) enables you to send texts, pictures/videos and sounds in a Check To display the recipient’s combined message to another mobile Names name if the entered phone or to an e-mail address. -
Page 39: E-Mail
Messages E-mail You can also set up e-mail accounts easily Email Auto Setting. See Page 42. You can receive, view, compose and send e-mail in HTML format. Writing/sending an e-mail To create new e-mails, you have to 1. Press (Menu) and select configure at least one e-mail account. -
Page 40: Receiving And Viewing New Messages
Messages My Text Insert a text template. Start a new message. Save to Reply/Reply Save the message in the Reply/reply all/forward the Drafts All/Forward Drafts folder. current message. Cancel Mark as Discard the message. Mark the current message Message Unread/ as unread/read. -
Page 41: Message Folders
Messages Message folders By default, there are 5 different message folders for SMS, MMS, and e-mail respectively. Inbox Incoming messages/e- mails are saved here. Deleted Messages/e-mails to be Items deleted are saved here. Drafts You can save a message/e- mail as a draft while creating it. -
Page 42: Email Auto Setting
Entertainment 1. When you launch this service for the Email Auto Setting first time on your smartphone, follow Start Messages Email Auto Setting > > the on-screen instructions to complete Windows Live™ Setup. This option lets you set up e-mail accounts easily. -
Page 43: Taking Pictures
Entertainment To switch between camera and 1. To enter the camera mode, go to Start Entertainment > camera, and > camcorder, press to go to select Menu Resolution 2. Select > to select an image size. Taking pictures Shooting Mode 3. -
Page 44: Recording Videos
Entertainment Recording videos 2. Decide the time limit, the file format and where to save the video file in Menu Settings > Camcorder. > 3. Customise other options such as zoom ratio, white balance or effects. 4. The lens is located on the back of the phone. -
Page 45: Fm Radio
Entertainment 4. Press (Menu) to open the Exit Exit the current mode. options menu. For picture only Shooting Record Select a preferred shooting Record current channel. Mode mode. Add to Add current channel to favorites For video only your favorite list. Microphone Turn the microphone Favorites... -
Page 46: Browsing And Opening Image, Video Or Music Files
Entertainment Browsing and opening image, Properties Check the properties of video or music files the image, including name, file type, By default, all pictures and videos you dimension, file size, My Pictures have shot are stored in the created date, and whether My Videos folders respectively in the image is protected. -
Page 47: Ringtone Editor
Entertainment Viewing videos or playing music Ringtone Editor 1. Select a video or music file to open Start Entertainment Ringtone Editor > > Windows Media File from within You can record, edit and save part of a Explorer. music file to be your ringtone. 2. -
Page 48: Internet
Internet 1. Locate a station from the defaults. Or Manage Playlist • To perform function More Stations select and pick one requires access to Internet Explorer. station from your favored music • This program supports playing files in genre. *.mp3 and *.wma formats. 2. -
Page 49: Rss
Internet Windows Live options Reading the feeds Home Set if you want to show the 1. When you launch RSS reader for the screen Windows Live™ access in first time, you can download the Home screen. default channels and add them into options the subscription list. -
Page 50: Downloading The Feeds Manually
Organizer Calendar The phone connects to the Internet to get the feeds automatically at the scheduled Start Organizer Calendar > > time. The cost for the downloads varies Calendar to schedule appointments, depending on the network service including meetings and other events. available at the time. -
Page 51: Tasks
System Tasks CommManager Start Organizer Tasks Start System CommManager > > > > Tasks to keep track of things you This program determines the need to do. You can use categories to connectivity of your phone. You can help you organise your tasks and set alternatively access it by: reminders for them. -
Page 52: Synchronisation
Synchronisation Synchronisation System requirements: • Windows® XP Service Pack 2 for Using Microsoft ActiveSync® ActiveSync®. (Windows® XP) or Windows Mobile • Windows Vista® for Windows Mobile Device Center (Windows Vista®), you Device Center. can synchronise the information on For Windows Vista® users, please visit your desktop computer with the Microsoft Windows Mobile website information on your device. -
Page 53: Synchronising Information
Synchronisation Synchronising information Windows Mobile Device Center (WMDC) 1. Decide if you want to synchronise your information with a Microsoft Installing WMDC Exchanger Server, and then click Next. Insert the Companion CD containing 2. Select an information type (such as Windows Mobile Device Center into the Contacts and Calendar) to optical drive of your computer. -
Page 54: Adding Programs
Synchronisation 3. Read any installation instructions, • If the connection between your phone Read Me files, or documentation that Start and the PC is not stable, go to > comes with the program. Many System Settings Connections > > > USB to PC Enable programs provide special installation... -
Page 55: Removing Programs
Synchronisation Removing programs 6. Choose the data types you want to synchronise. Start System Settings 1. Select > > > Remove Programs. 7. Synchronisation now starts. Wait for a while to receive mails. 2. Select the program you wish to Menu Schedule remove. -
Page 56: Simmanager
Synchronisation 5. Record the number of the COM port 2. Check the data you wish to copy and Menu Copy to SIM/Copy that was added. It is recommended then Select > contacts. that the COM port number is less than 10. Speech Commander 6. -
Page 57: Internet Sharing
Extras 4. Press (Connect). If the status is Digit Set the length of phone displayed as Connected, the Settings number. connection is made successfully. You Advanced Set the sensitivity to are able to browse the web pages in Settings Normal, Accurate your computer. -
Page 58: 2D Barcode
Extras 3. Press to delete numbers and symbols entered. Press (Clear) to delete all numbers and symbols entered. 2D barcode Start Extras 2D barcode > > 2D barcode is a 2-D barcode system designed for mobile electronic devices with camera module (such as camera phones, PDA, smart phones, Webcams, Adding contacts using 2D scanners and decoders). - Page 59 JSR 135 Mobile Media API for your phone and cannot be transferred (MMAPI) from this even to create a backup. BenQ offers no warranty or guarantee nor does JSR 184 Mobile 3D Graphics API it accept any liability for the customer's for J2ME™...
-
Page 60: Connectivity
Settings Connections > > > use of such marks by BenQ Corp. is under license. Other trademarks and trade With access to the Internet, you can use names are those of their respective e-mail and browse the web pages. Select owners. -
Page 61: Creating A Bluetooth Connection
Connectivity Creating a Bluetooth connection Using a Bluetooth stereo headset 1. Turn on function and set Your phone supports Advanced Audio the phone to be visible as instructed Distribution Profile (A2DP) which in "Turning Bluetooth® function on" sends a stereo audio stream (such as on page 60. -
Page 62: Printing Via Bluetooth Technology
Connectivity Beam... Print via Bluetooth 2. Select from the menu options 4. Select from the of the file. menu options of the file you intend to If you are sending an image file in print. either *.jpeg, *.gif, *.png, or *.bmp Changing the name of your format, and the remote device supports BIP (Basic Image Profile) -
Page 63: Dial-Up
Connectivity 6. You are now accessing the default GPRS root directory on the selected A General Packet Radio Service (GPRS) device for remote file offers high-speed data transfer. When exchange service. Select (Up) to using a GPRS access, you are charged go to the upper directory. -
Page 64: Turning Wi-Fi On
Connectivity Turning Wi-Fi on Adding a new wireless network Start System Settings • Select > > > You can add a new wireless network to Connections Wi-Fi Menu Turn > > > the listbox. Wi-Fi. 1. Turn your Wi-Fi on as instructed in in CommManager. -
Page 65: Questions & Answers
Questions & Answers Questions & Answers • If you encounter problems while using the phone, or if it performs erratically, you can consult the information in the chart below. If your particular problem cannot be resolved using the information in the chart, contact the dealer where you purchased the phone. •... -
Page 66: System Problems
Questions & Answers Problem Possible causes Possible solution You cannot answer The SIM card is not installed. Install a valid SIM card. incoming calls. Poor signal. Move to an open space, or if you are inside a building, move closer to a window. CommManager Your phone mode is switched Activate the phone mode in... -
Page 67: Message Problems
Questions & Answers Problem Possible causes Possible solution Shortened standby The standby time is related to If you are located in an area where signalling is time. your service provider system weak, temporarily switch off the phone. configuration. The same phone used with different service providers’... -
Page 68: Internet Problems
Questions & Answers Problem Possible causes Possible solution Internet problems Unable to connect to SIM card invalid. Contact your service provider, or see the network. "Connectivity" on page 60. You are not within the Check the service area with your service provider. network’s service area. -
Page 69: Care And Maintenance
Care and maintenance Care and maintenance • The phone has better protection against splashes, dust and knocks if the supplied seals are used. Your phone has been designed and manufactured to the highest of standards The suggestions given above apply equally and should be treated with great care. -
Page 70: Product Data
Product data Product data Declaration of conformity Hereby, BenQ Corporation, declares that this T80 is in compliance with the essential requirements and other relevant provisions of Directive 1999/5/EC. The relevant Declaration of Conformance (DoC) has been signed. Please call the company hotline or visit the BenQ regional website if you require a copy of the original. -
Page 71: Sar
The World Health Organization has stated that present scientific information does not indicate the need for any special European Union (R&TTE) and precautions for the use of mobile devices. international (ICNIRP) They note that if you nevertheless want to reduce your exposure then you can do so by INFORMATION ON RF EXPOSURE / limiting the length of calls or using a SPECIFIC ABSORPTION RATE (SAR) -
Page 72: Microsoft Software License Terms
ADDITIONAL LICENSING • support services REQUIREMENTS AND/OR USE RIGHTS. for this software, unless other terms a. Specific Use. BenQ designed this device for a accompany those items. If so, those terms specific use. You may only use the software for apply. - Page 73 SCOPE OF LICENSE. The software is http://go.microsoft.com/fwlink/?LinkId=8193 licensed, not sold. This agreement only gives you some rights to use the software. BenQ and By using these features, you consent to the Microsoft reserve all other rights. Unless transmission of this information. Microsoft...
- Page 74 WITHOUT CHARGE FROM A CONSUMER label must be affixed to the device, or included NOT THEREBY ENGAGED IN A BUSINESS on or in BenQ software packaging. If you ENTERPRISE, AND (ii) FOR PERSONAL USE receive the label separately, it is not valid. You ONLY;...
- Page 75 The above limitation may not apply to you because your country may not allow the 14. NOT FAULT TOLERANT. The software is not fault tolerant. BenQ installed the exclusion or limitation of incidental, software on the device and is responsible for consequential or other damages.
- Page 76 Licensed Software or use the bound by all of the terms and conditions stated Licensed Software installed on the phone. The below. You further agree that if BenQ or any Licensed Software is licensed with the phone licensor of BenQ ("Licensor") is required to...
- Page 77 You install, copy or Agreement creates no obligations on the part otherwise use the Licensed Software. You may of BenQ other than as specifically set forth terminate this license at any time by deleting herein.
- Page 78 10. TECHNICAL SUPPORT. BenQ and its Notwithstanding the foregoing, some Licensors have no obligation to furnish You products of BenQ may require You to agree to with technical support unless separately additional terms through an on-line "click- agreed in writing between You and BenQ or wrap"...
Need help?
Do you have a question about the T80 and is the answer not in the manual?
Questions and answers